Video of BuildJournal x RaceWerkz M3 in "The Drive"
I've always enjoyed driving around dusk when the sun is setting and the sky is lit up like its on fire. Can I say that without sounding a bit too romantic? It's the perfect time to put on Flume on Spotify (as long as my cell phone service provider permits arghhh) and just cruise. I wanted to capture this on video so I dusted off some old camera equipment at home and went out with a couple friends to shoot some footage.
We shot everything in one day and edited for another full day. Come with me and take a drive in this short video I made with the BuildJournal x BMW E46 M3. Stay tuned for the mini photoshoot we did at the base of the mountain.

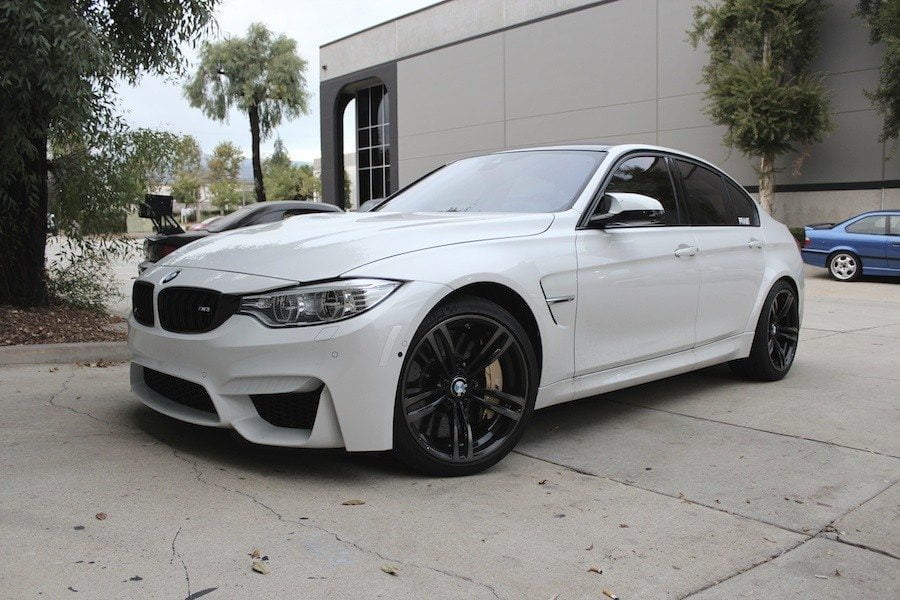
Photoshoot: Oscar's TiAG and Alpine White E46 M3
We're back at the Irvine Metrolink Station and this time we have Oscar's clean TiAG E46 M3 sitting on silver Enkei NT03 wheels. The lighting setup here is pretty good and the location is pretty convenient for us here in the heart of Orange County so it's always nice destination for an impromptu shoot.
Oscar's M3 is fitted with a Brembo big brake kit, Enkei NT03 18x10 wheels, CSL diffuser with a custom diffuser, CSL race lip, CSL trunk, headers, exhaust and a whole lot of interior upgrades.


Beisan VANOS Rebuild on S54 Engine, Lang Racing Development
There are three common issues with the S54 VANOS system that can lead to engine failure: a solenoid coil pack failure, exhaust hub tabs breaking and loosening intake sprocket sleeve bolts. You can pay for a new VANOS unit from BMW, however buying anything from the dealership can get a bit pricy. Fortunately there is an alternative solution from Beisan Systems to refresh your VANOS system and reduce the risk of engine failure.
There are lots of information regarding these failures on the web so we won't go into too much detail on the issues. If you are interested, check out Raj's write-up on M3Forums.
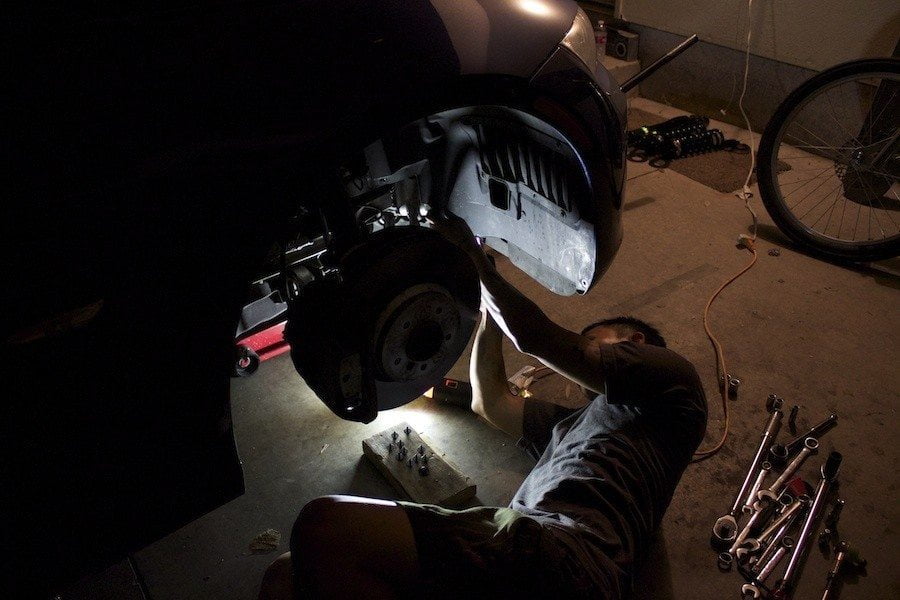
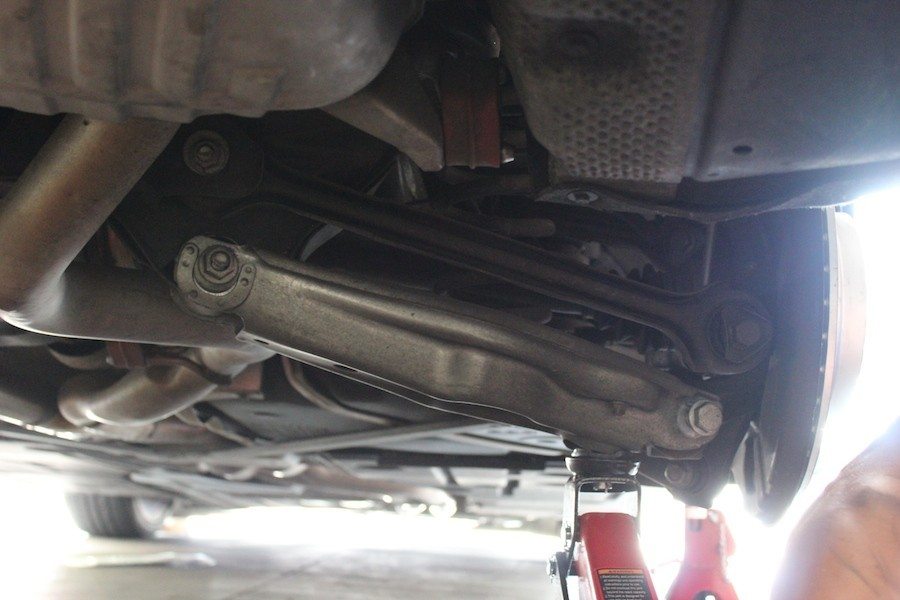
My car has around 145,000 miles now so as a preventative maintenance service I decided to get the Beisan VANOS kit. There are a few shops around the area in Southern California to get this done like RaceWerk Engineering in San Dimas and Lang Racing Development in Irvine. I decided to take it to Andrew at Lang Racing Development since they were closer. Lang Racing specializes in building, driving and tuning race cars. They have a pretty cool BMW E46 M3 and I finally got to to see it today as it just came back from a 25 hour endurance race.


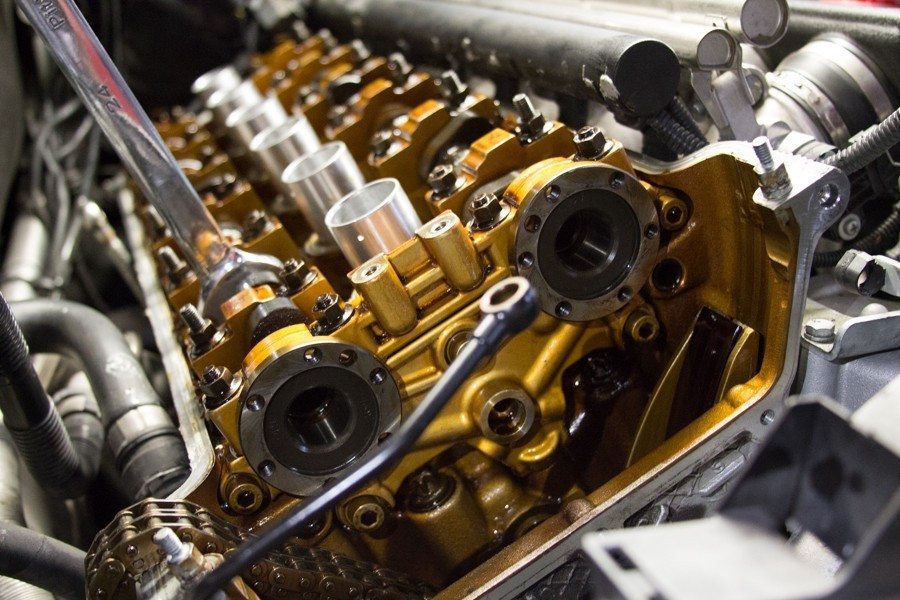
Valve cover open and VANOS unit removed.
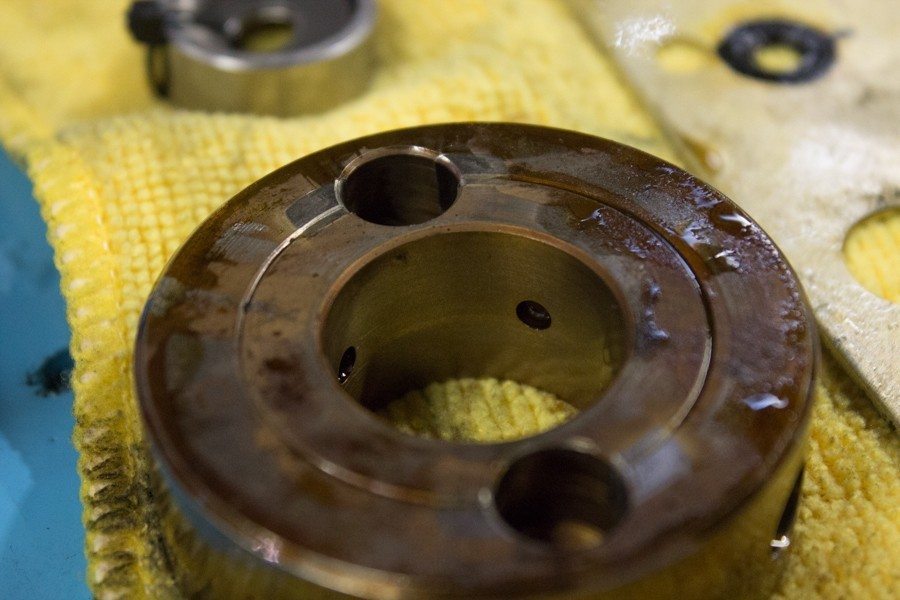
Old oil pump disc from my VANOS unit. You can see the shiny area around the holes which is where the tabs come in contact. Not in bad condition actually.

New oil pump disc from Beisan. Re-drilled holes with smaller diameter. Smaller holes limit play of the exhaust hub tabs, which are prone to break.

Both tabs are intact on the exhaust hub!

Old intake sprocket sleeve bolts. None of them were broken.

New intake sprocket sleeve bolts from Lang Racing Development.
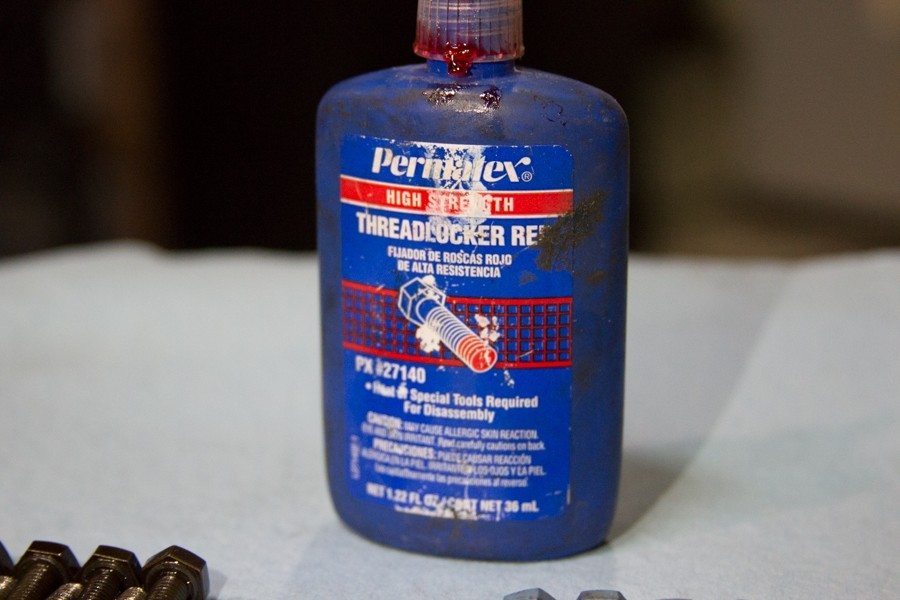
Threadlocker for the intake sprocket sleeve bolts.

Old VANOS solenoid pack. White residue around the blue inserts indicate possible leak. Car has been idling poor and sometimes shutting down into limp mode. Car also shows CEL codes for VANOS related issues. This was probably the issue.
New Beisan Systems VANOS solenoid rebuilt.


Installing the anti-rattle kit.

Old chain guide on the left, new on the right. You can see there's a chunk of plastic missing on my old piece. This is a common problem as well. Must inspect and replace.

The new VANOS unit being put back together and going in the car.

Last, but not least, doing a valve adjustment since valve cover is already open.

BMW M3 and M4 at The SEMA Show 2014
It's our first time out here at The SEMA Show 2014 and we were given a heads up on the enormous amount of floor space you have to cover to see all the cars. It was basically impossible to cover everything during our short stay here so we pulled our map out and headed straight for all the BMW booth spots. We're saving you a few thousand footsteps and 4 trips to the bathroom to bring you some of the best BMW's of SEMA 2014.


Photos: Waking Up for Cars and Coffee Irvine
Orange County is home to some of the wealthiest in the country and during the weekdays it's really not that uncommon to encounter a supercar sighting around the bustling streets of Irvine, CA. While the weekday streets are filled with fancy cars driven by business executives trying to get lunch at their favorite steak house, the weekends are less of a car show spectacle.
That is unless you are on the corner of Irvine Center Drive and Gateway, where Cars and Coffee takes place every Saturday morning for about 2 hours.
For what is a very frequent meet, I'm surprised by the turn out as it consistently brings a good amount of quality cars from both regulars and new-comers. We woke up at 5:30 am and caravanned out to C&C. See the photos below to see what you might find at a C&C event.


RaceWerkz F80 M3 & F82 M4 Downpipe Catless Exhaust, Now Available!
RaceWerkz Engineering based in San Dimas, CA launches the F80 M3 and F82 M4 Downpipe Catless exhaust. There are currently 20 sets available and RaceWerkz is offering a huge special on the first batch.

Features:
- 100% Made in the USA
- Constructed of 304 Stainless Steel & utilizing custom machined
- Factory matching flanges for all three mounting points
- Hand Tig welded to perfection
- Increased throttle and turbo response
- Roughly 12 hp & 18 lb/ft of torque
- Track Tested
- For off-road use only, not 50 state legal


Pricing: MSRP starts at $1,199, however for the first 10, the price will be $899 installed or shipped to anywhere in the continental US and Canada. The remaining sets will be $999 installed or shipped anywhere in the continental US and Canada. Also, if you don't have your M3/M4 yet, order them now and RWE hold a set for you until you have received your car. All products built by RWE carry a limited Lifetime Warranty from any and all production defects unless expressed otherwise.
Ordering: To place your order, please call (818) 802-7327 with the following information.
- First and Last Name
- Phone Number
- Shipping/Billing Information
- Form of Payment (Cash, American Express, Discover, Mastercard, Visa, PayPal)

Photos from #FFdrivein by Optimist Run & autoMobile Uploads
There's something about organized cruises and rally events that brings a smile to our faces. Maybe it's because of the fact that it brings an opportunity for like-minded auto enthusiasts to gather around or maybe it's because we enjoy looking at our rear view mirror and seeing a long line of modified cars as we drive spiritedly through the canyons. Well whatever it is, we like it and lucky for us the good people over at Optimist Run and autoMobile Uploads do exactly that, organize rallies.
A couple weeks ago they organized a unique cruise and movie event, the Fast and the Furious Drive In. The plan was to meet at Neptune's Net for lunch, drive Mullholland Drive and watch the Fast and the Furious at a drive-in movie theater.
Here are a few photos of the Montego Blue E92 335i and our Alpine White E46 M3. Check out #FFdrivein on Instagram for more photos. Make sure to follow @autoMobileUploads and @OptimistRun to see the latest runs. They got their next one planned already! Don't forget to check out the SoCal Photoshoot Map if you want to find directions to some of these photoshoot locations.
 Driving up the 405 freeway to meet up with the rest of the crew at Neptune's Net in Malibu, CA.

Finally made it through the PCH traffic in Malibu and got to some clear roads.

Look familiar? The legendary Neptune's Net where part of the Fast and the Furious was filmed. "I want in."


The trip was already worth it. We got to try these delicious meals. Fish and chips with fried calamari and fries. Also, a chili cheeseburger because cheeseburger.

After our meal, we topped off our tanks and headed out to Mullholland Drive for a spirited cruise.

On our way through Mullholland Drive, we found this turnout spot right around dusk. The Hollywood sign appeared in the background so we stopped to take some photos.


After the Mullholland Drive we caravanned out to a drive-in movie theater to watch Fast and the Furious. It was a long day, but a fun one. Once again thanks to Optimist Run and autoMobile Uploads for throwing this event together!

Photoshoot: E46 M3 at Irvine Metrolink Station
Irvine Metrolink Station photo shoot content ahead. So you've just spent a few hours washing your car and now that it's sitting so clean you just want to take it somewhere to snap a few photos. Sure you can bust out your cell phone camera and take some shots while your car sits on the pavement right in front of a damp garage driveway where you just washed your car, but sometimes you just want to do more like take it to a nice photogenic backdrop. Hard part is, where?
En route to my office in Irvine, there is a small Metrolink station with a pretty large parking structure. I never really thought about going there to shoot photos there because I've done plenty at various parking structures and they're just all the same. This one however was quite different. At the very top of the structure there's a unique carport cover that looks like some kind of Transformers sleeping shelter. Thought it'd make for a good shoot location so I went. Check it out for yourself.


RaceWerkz BMW F80 M3 Catless Downpipe Video
BMW F80 M3 catless downpipe content ahead. One of the best things about owning a turbocharged car is the fact that you can gain a lot power by just freeing up the exhaust flow. The best way to do this? Get a downpipe, intake and exhaust system! The new M3 and M4 turbo inline-six (S55) engine produces 425 hp with 406 ft-lbs of torque, but an aftermarket downpipe can yield up to 6% horsepower and torque increase.
RaceWerkz Engineering took early delivery of their F82 M4 and F80 M3 (yes both of them) and got a head start on their F8x R&D program. Today I got a chance to see, hear and feel their new prototype catless downpipe for the F80 M3.

And a bonus picture of their E92 M3 track car!


BMW E92 335i Coilover Install DIY with Pictures
Today we have Sam's 2008 BMW E92 335i and a brand new set of BC Racing BR Type Extreme Drop coilovers ready to be installed on the car. We recommend getting coilovers installed at a shop, but the installation can be a fairly easy task if you have the right tools and some decent mechanical knowledge. I mean, this is a DIY site right? Although we say it's an easy installation, please do not try to attempt to install if you are not confident. See below for the 335i coilover install.
[tg_divider style="normal"]
Disclaimer: This DIY does require you to lift your car so please use proper tools and follow all safety procedures if you choose to attempt. This guide is for your reference only. We are not liable for any damages or injuries that result from this guide.
[tg_divider style="normal"]
The BR Series model is the perfect choice for street driving and the occasional road course or auto-cross duty. With easily accessible adjustment knobs for fine-tuning compression and rebound, ride height adjustment independent of shock stroke and spring preload, having a performance coilover system has never been easier. BC Racing coilovers come with camber plates so you can adjust your camber to get that perfect fitment and track setup. You can find the cheapest set on Amazon.com. Below is the link to purchase the system for 2008-2011 BMW E92 non-M.
1. FRONT COILOVER INSTALLATION
Step 1.1, lift car on approved set of jack stands. Please observe all normal safety procedures and do this on a flat surface. Never solely rely on your jack to keep the car lifted.
Step 1.2, remove wheels. We removed two wheels at a time starting with the fronts first.
Step 1.3 (optional), put on some music.

Step 1.4, remove wheel speed sensor and brake line from support bracket. On the driver side only, unclip leveling sensor from lower control arm. (picture not shown for leveling sensor)

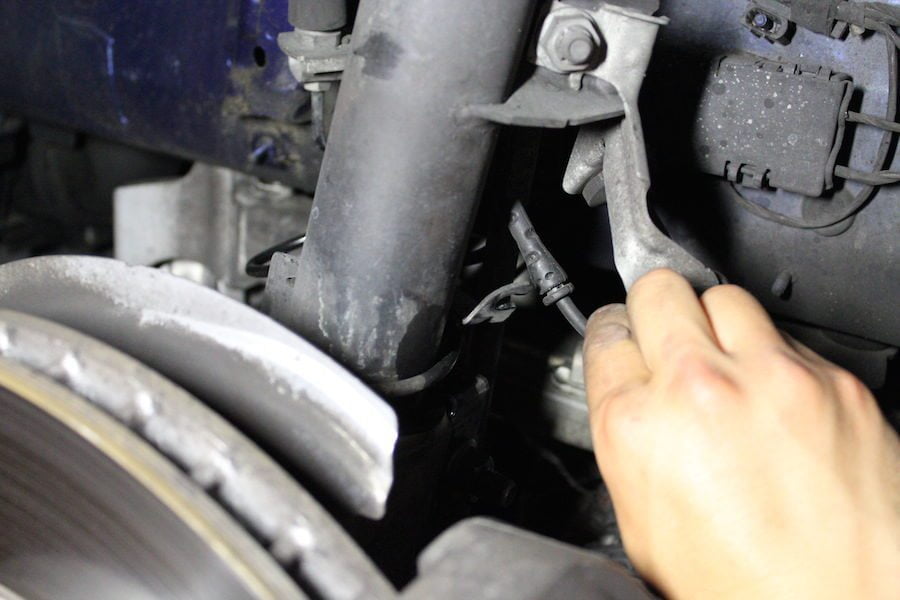
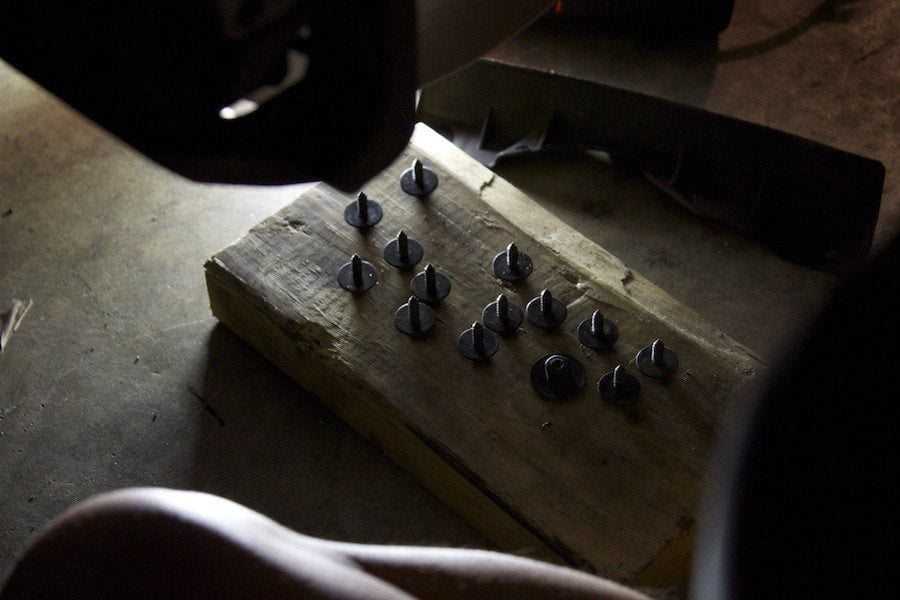
Step 1.5, remove front fender liner. There should be about 12-14 pop its on each one.

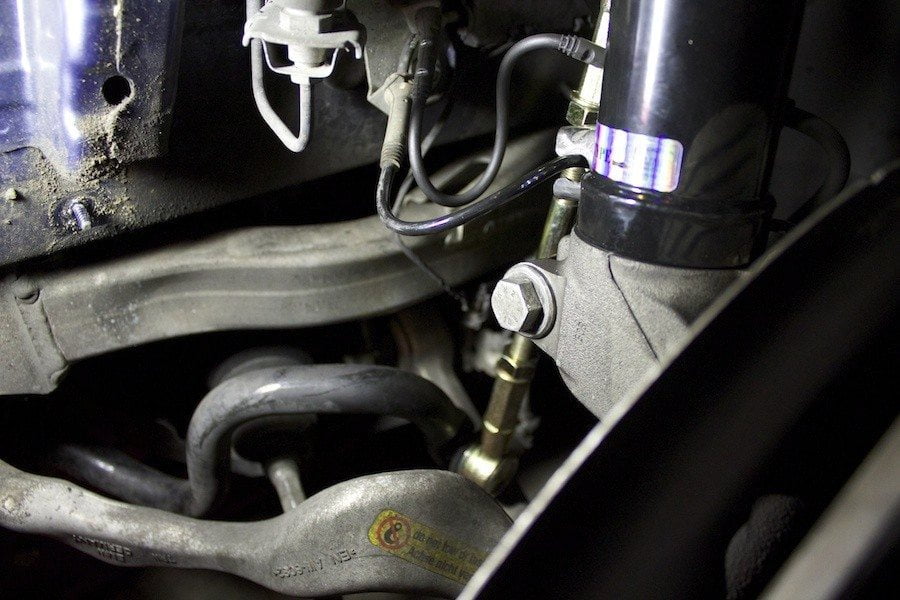
Step 1.6, remove top end link nut, slide out bracket and push top end link out. Make sure all lines are separated from the bracket.

Step 1.7, loosen two bolts on the lower control arm. A 360-degree turn on each bolt should suffice.


Step 1.8, remove nut and bolt on steering knuckle that holds the coilover strut.
Step 1.9, open hood and remove 3 nuts on upper strut mount. As you undo the last nut, the strut will drop so be ready to catch when the entire steering assembly drop. Tip: place a small jack underneath the lower control arm to catch and drop slowly.

Step 1.10, angle out the strut from the wheel well. We haven't removed the strut from the strut tube yet so it won't pop out until we loosen which we will cover in the next step. Tip: angle the steering assembly to allow for max clearance when it comes out of the wheel well. The top bolts on the coilover will barely slide out underneath the fenders. Mask painters tape on fender if you are concerned with paint scratch.
Step 1.11, remove strut from strut tube. There is a small gap in the knuckle and you need some kind of spreader tool to open up the strut tube to loosen tension on the tube. We recommend using the Schwaben Spinde Housing Spreader Tool, but since we didn't have one we found much luck with a 1/4 allen wrench. Stick in the allen wrench in the gap and turn until you feel the tube opening up. Now we can pull the strut out. There is a metal bracket that will drop out as well. Warning: We do not recommend using a pry bar or flat head because loosening too much can result in damaging the OEM tension in the casting.
Step 1.12, insert new coilover into the strut tube while allen key is spreading the casting. Once strut is flush, remove allen key.
Step 1.13, insert bolt back into steering knuckle from Step 1.8. Make sure to include metal bracket if it fell out. Torque to 34 ft-lbs. Tip: make sure the brake line and wheel speed sensor line is wrapping around the strut how it was originally.
Step 1.14, put coilover assembly back in wheel well and secure upper strut mount with 3 nuts. Torque nuts to 25 ft-lbs.
Step 1.15, install end link and bracket.
Step 1.16, is very important. Load coilover spring and torque the two lower control arm bolts to 50 ft-lbs + another 90 degree rotation. Load coilover means you need to have all the car's weight sitting on the spring. This will ensure correct torque setting on the lower control arm bolts so you don't prematurely damage suspension bushings and other components. You're torquing the control arm bolts in the car's natural sitting position. To load spring, we jacked up the lower control arm until the car lifted up from the front jacking point. Please use all caution when doing this procedure.

2. REAR COILOVER INSTALLATION
Step 2.1, lift the rear end using the central jack point and use proper jacks to keep the car suspended.
Step 2.2, open trunk and remove rivets that hold the trunk liner. You will need a T40 torx bolt for one of these removals.


Step 2.3, remove black plastic circle cap underneath trunk liner to access the top rear strut mount.
Step 2.4, remove nut on top of the rear shock by using a 16mm wrench and a 6mm socket to hold counter so the shock doesn't spin while you remove the nut.

Step 2.5, remove nut on bottom shock using a 17mm deep socket. Use a 15mm hex wrench on the shock to keep the shock from spinning while you release the nut.

Step 2.6, compress OEM shock to remove from assembly.

Step 2.7, with a jack supporting the lower control arm, remove the lower control arm outer bolt. Tip: slightly lift lower control arm with jack to relieve pressure on bolt so it can slide out easier.

Step 2.8, with the jack still supporting lower control arm, loosen the lower control arm inner bolt. (pictured on left) About a full turn will suffice. Your control arm weight is now being supported by the jack.
Step 2.9, slowly lower jack to lower the control arm and remove OEM spring.
Step 2.10, prepare your new spring height adjustment for install.
Step 2.11, seat the new spring on lower control arm with the bottom sitting flush in the holder. Make sure the upper spring perch is settled in the chassis hole.
Step 2.12, place the lower control arm outer bolt back in using a jack to lift the lower control arm. Do not tighten just yet. Bolt pictured in Step 2.7.
Step 2.13, as in Step 1.16 you must torque the lower control bolts after the spring has been loaded. Jack up lower control arm until the car's weight is being supported by the rear suspension. While the car suspension is loaded, torque both inner and outer lower control bolts to 121.6 ft-lbs.
Step 2.14, install new rear shocks. You may need to recycle some of the OEM parts from your shock. For the BC Racing application we reused a bushing. Compress the shock slowly and insert the bottom part first.

Step 2.15, install 17mm locking nut on the bottom shock and lower control arm. Torque to 28 ft-lbs while holding shock to prevent rotation. (pictured in Step 2.5)
Step 2.16, mount shock to through the top mount. You will need to adjust your rear shock height (not spring height) now.
Step 2.17, install lock nut on top strut mount through the trunk and torque to 20 ft-lbs. For the BC Racing application, we reused the stock OEM yellow bushing, but we had to modify it. We read this article on how to modify.

After the installation it is mandatory to get a 4-wheel alignment since the suspension geometry has been changed. Not doing so will result in excessive and abnormal tire wear. I'm sure you will be adjusting the height a few more times so make sure you set it to your desired settings and then go get an alignment. Happy installing!

BMW F87 M2 Production to Start 2015
Bimmerpost News just reported the BMW F87 M2 will be coming late 2015 or early 2016! Production for the M2 will begin late Fall 2015 and engine specs have been reported to be the N55 turbo inline 6 (N55B30T0) making somewhere between 365 hp to 375 hp. There have been additional reports that it will come in either a manual or automatic transmission configuration.

The BMW naming convention just got a bit more baffling and the current M235i owners may be feeling a little remorse for jumping the gun, but this is great news for the E46 lovers. People said the M235i is the E46 M3 replacement, but this M2 definitely fits that better.
Rendering photo credits to 2013 DSM CarDesign.
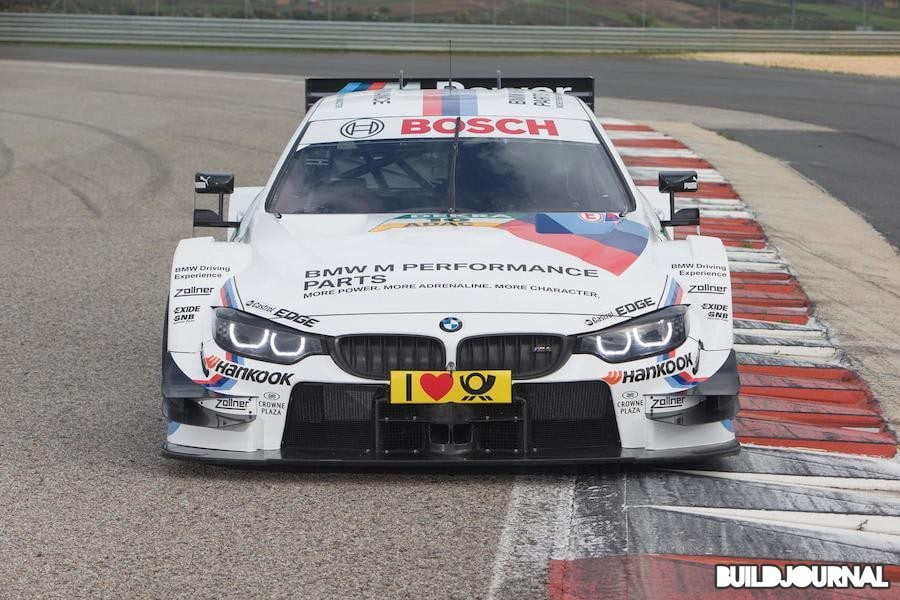
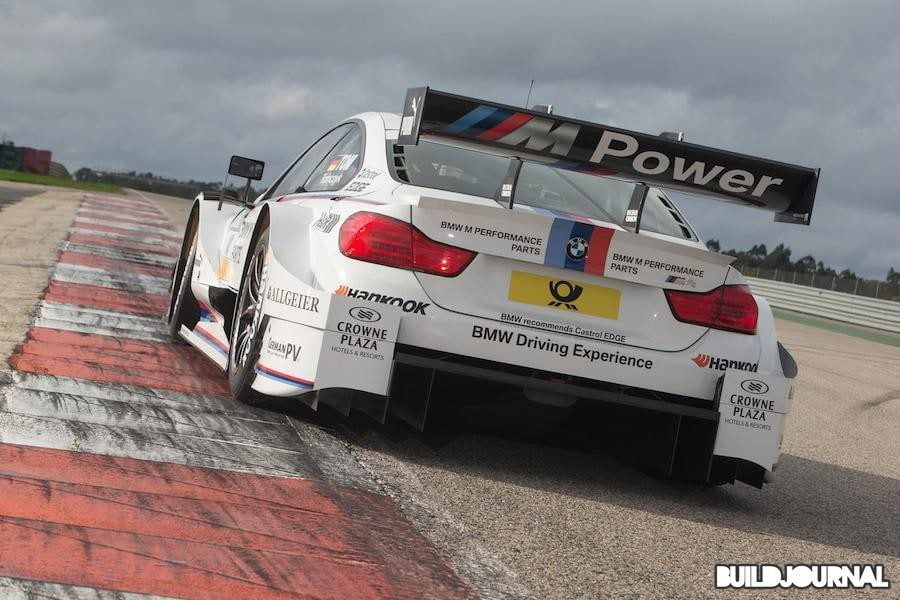
DTM M4 From BMW, Pictures Released
The DTM M4 from BMW has been released and as we expected, it looks very aggressive. The car is pushing 480 bhp with a naturally-aspirated V8 engine and the car weighs in at 2,447 lbs with the driver. The design, aerodynamics, engine, steering wheel, and lights have been engineered by BMW Motorsports, which have been in development for a year.
It's been a few weeks since the BMW M4 Coupé officially debuted and so far we're liking all the progress on racing development. Although people seemed to be baffled by the new series-naming conventions for all the cars, but it's great to see BMW putting so much attention to the M brand, including the newly developed M235i. Looks like there are great things to come from BMW.