This Is What An E46 M3 Straight Pipe Exhaust Dump Sounds Like
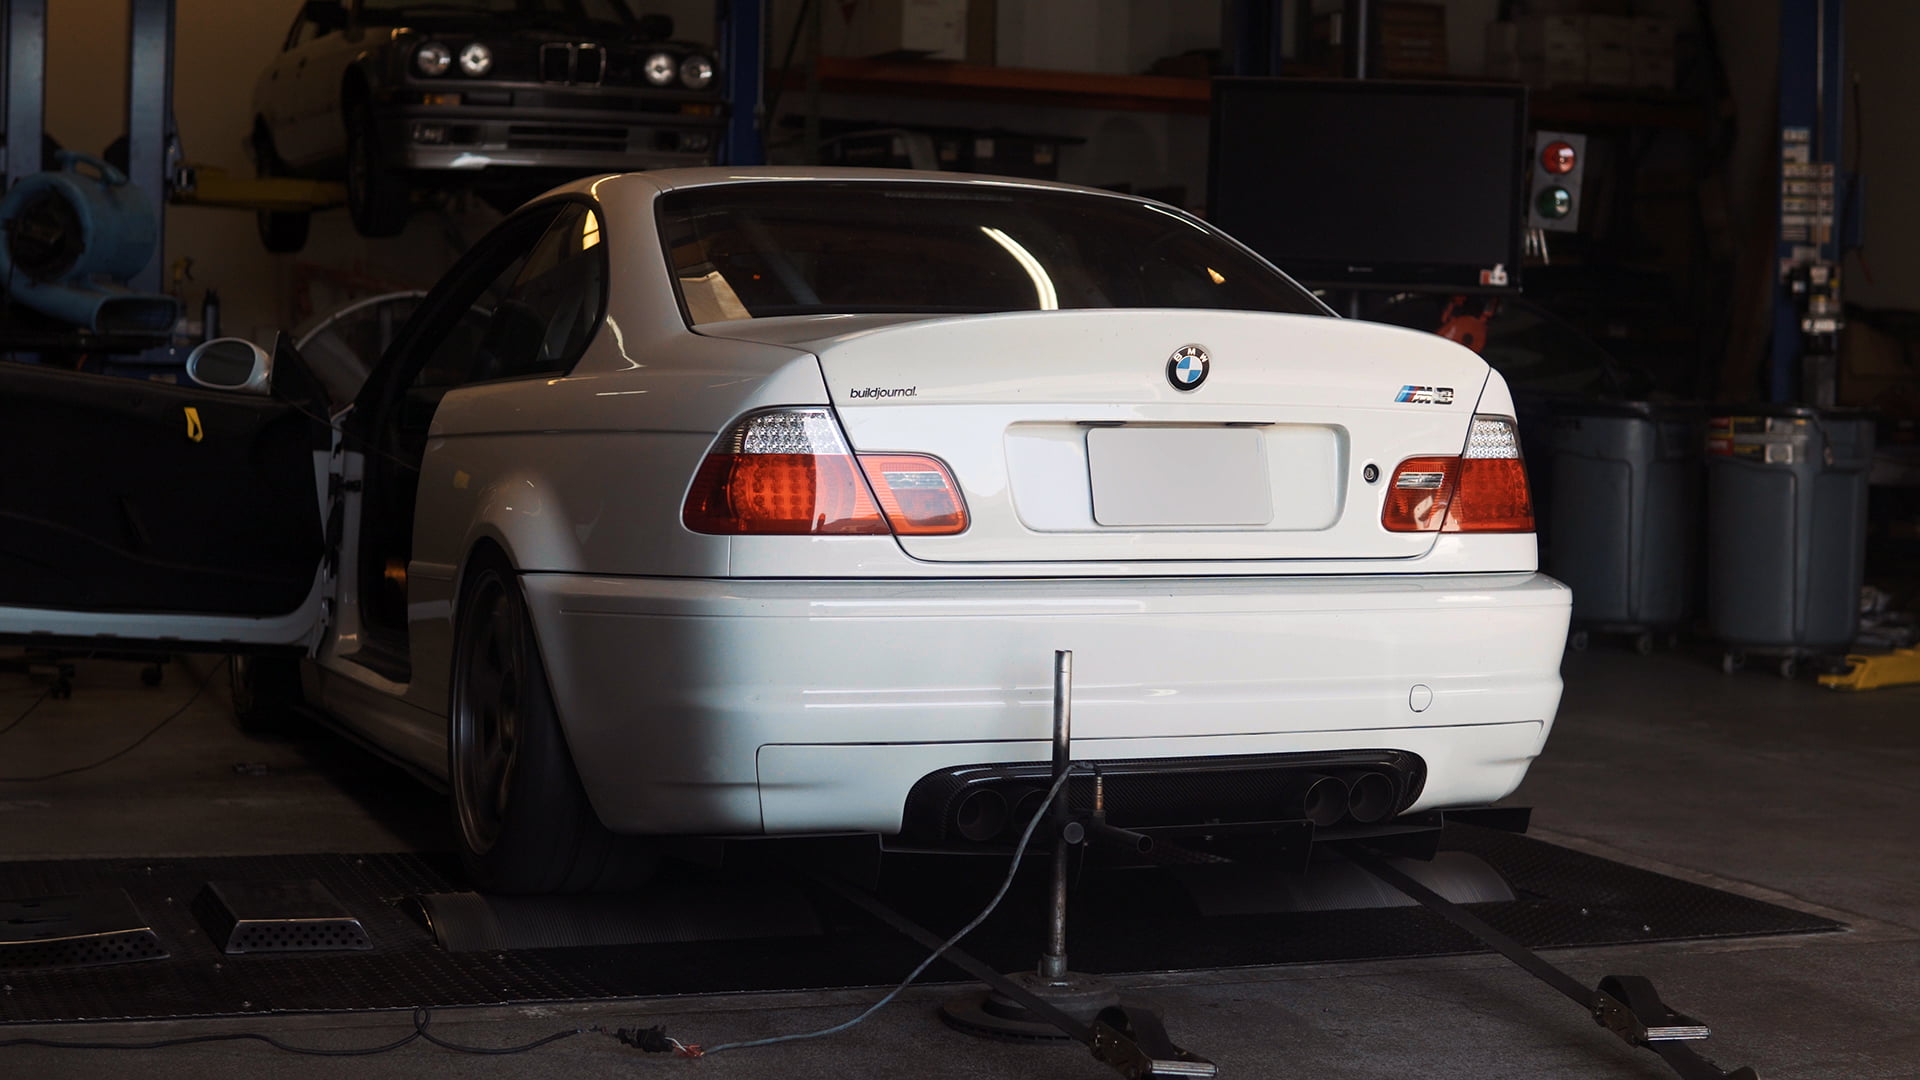
A lot of people have been asking me about my exhaust setup at the track because it’s so damn loud. To be honest I never liked my exhaust really loud, but I liked the idea of having the option to get loud with a flick of a switch so I went with an electronic valve cutout system to do a full straight pipe dump with a QTP 3″ valve. Let me know what you think of both setups.
- Evosport stepped headers
- Stock section 1 with 2 Vibrant resonators
- Status Gruppe non-resonated section 2
- QTP 3″ cutout with turndown
- Supersprint Race muffler

Your Radium Fuel Pump Kit May Fail And Leave You Stranded
I bought the Radium Walbro Fuel Pump Kit earlier this year and did a DIY for the install on our E46 M3. The product quality is great and I personally have not experienced any issues however there have been 6 reported cases (since July 7, 2018) from purchasers that their fuel pump is dying on them leaving them stranded.
The “Melting” Issue
Several E46 M3 owners have been reporting that their car is dying on them leaving them stranded on the road. The common denominator with all these cases is that they are all running the Radium Engineering Walbro 255 LPH kit (20-0082) kit. Investigation has determined the wire terminals on the basket side of the fuel pump is jumping causing intermittent connections when loose resulting in a melted wire. The melted wire results in a loss of power to the pump. These findings were consistent in all cases.


Is It Just Me, Or Everyone Else?
When my friend told me about his Radium fuel pump kit dying on him I thought it was a one-off. Then I saw another report from a different user on the E46 M3 Facebook groups with the identical issue. From that thread, 2 other people have reported the same exact issue. The obvious issue is that the fuel pumps are dying on them, but what’s happening is that the wire terminal on the basket side of the fuel pump is jumping causing intermittent connections when loose resulting in a melted wire. The original directions from Radium did not specify how to secure the connection, but simply stated to peel back the locking terminals and slide the connection in – then finally sealing it with the heat shrink wrap. What they failed to observe is that their spade connector is not a snug enough fit. Scroll with arrow keys or swipe through the gallery below to see images from customers with failed pumps.
I Have A Radium Kit, So Now What?
For all customers after 7/28/18 you should be fine since you have the new directions and possibly new spade connectors as well, but for the others your fuel pump may leave you stranded in the middle of the road if you don’t re-secure the spade connectors. If you have a Radium fuel pump kit I would advise you to re-secure your connectors.
If you have a Radium kit I’d advise you to send them an email to confirm you have received the right connectors. For all that have had melting issues, please email them to notify them of your issue. Click here to send them an email. Below is a list of Radium customers who have had pump failure caused by melted wires. If you have experienced this, please email me photos at info@thebuildjournal.com so I can document.
- Bryan M.
- Justin O.
- Stanley G.
- Chris A.
- Dane K.
- Mario M.

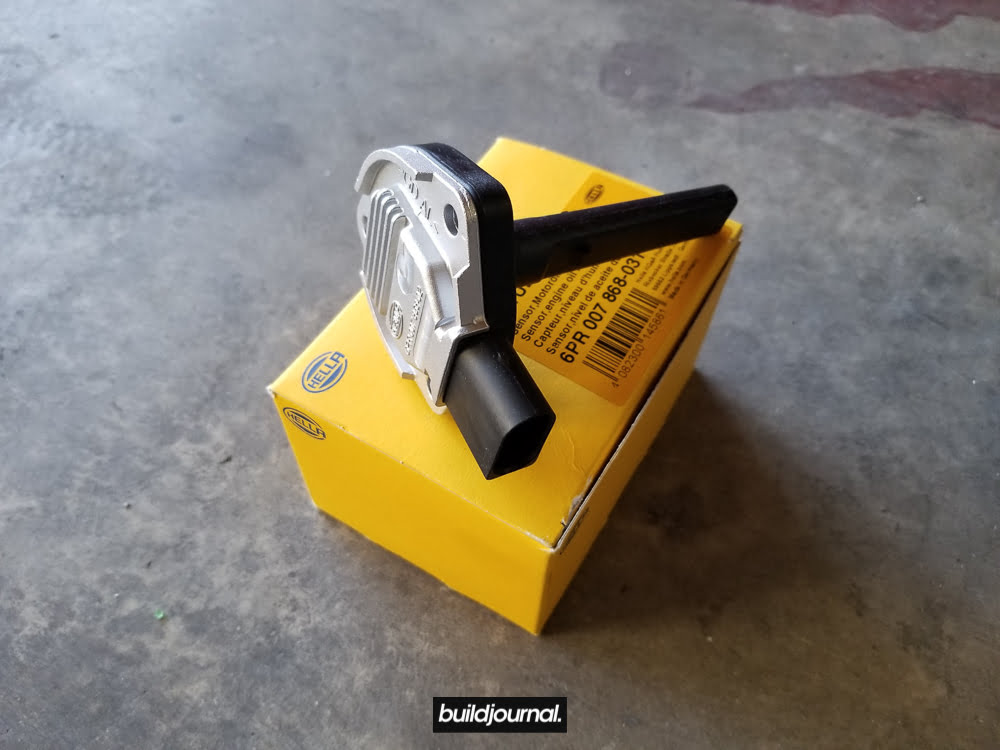
E46 M3 Oil Level Sensor DIY
The E46 M3 oil level sensor is super easy to fix so don't get lazy and avoid it if you're having issues. The symptoms of a bad oil level sensor is quite obvious, but two of the most common are:
- Oil light comes on at start, then turns off momentarily. In conjunction, the oil temperature gauge stays at 0.
- Oil light is on, but oil level is okay.
Parts and Tools Needed
- Oil level sensor (12617508003)
- Oil Level Sensor O-Ring (12611744292)
- 8mm socket
- 10mm socket
- 16mm socket
- 17mm socket
- Jack + stands
- Torque wrench (micro)
- Oil change kit
Directions
Disclaimer: This DIY does require you to lift your car so please use proper tools and follow all safety procedures if you choose to attempt. This guide is for your reference only. We are not liable for any damages or injuries that result from this guide.
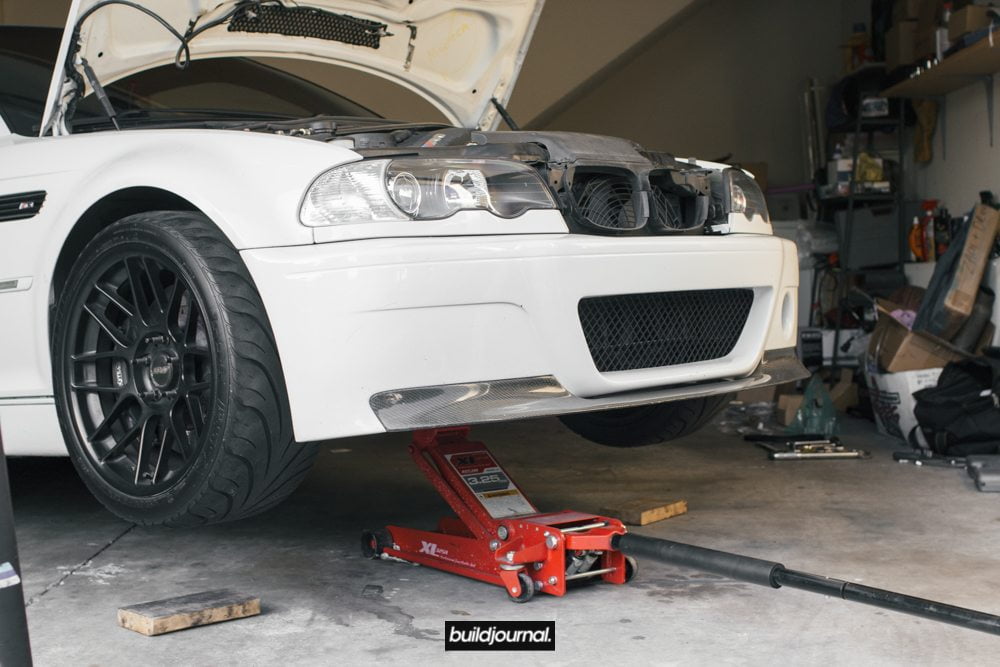
1. Jack up the car.
1.1, straighten your wheel and use the center jack point to lift the front.
1.2, place 2 jack stands to keep the front of the car lifted.
1.3, use jack or tire as an emergency backup support.
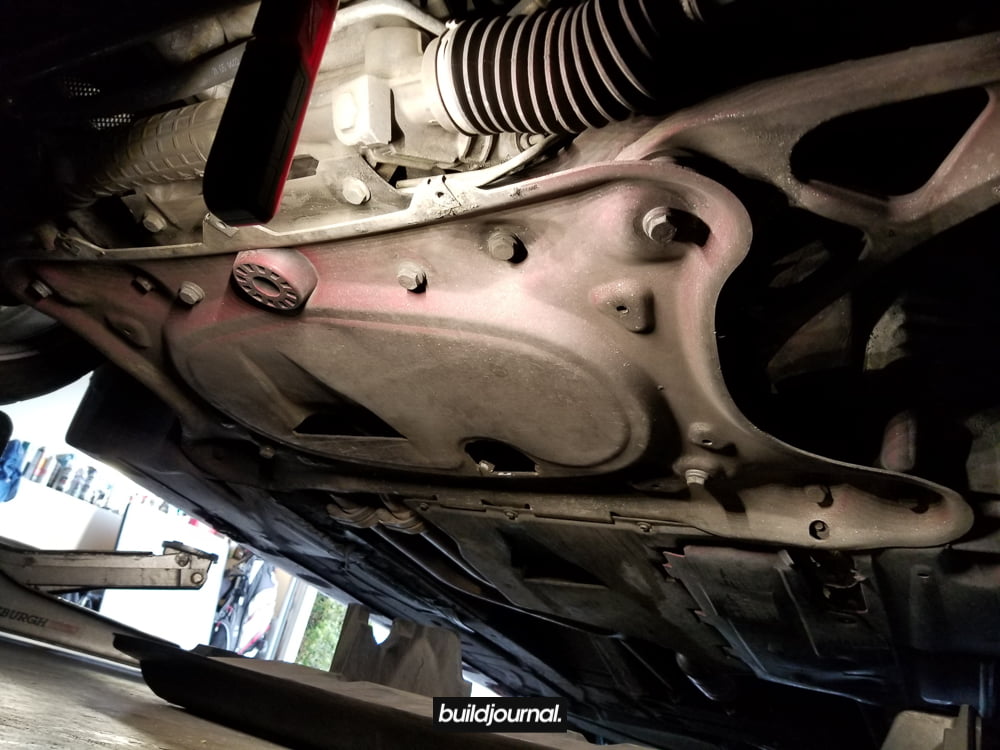
2. Remove plastic under tray and under panel reinforcement plate.
2.1, located underneath the car, there are seven 8mm hex screws total to remove the plastic splash guard/under tray.
2.2, remove the under panel reinforcement panel which has eight (8) 16mm bolts.
3. Drain oil.
3.1, remove the drain plug using a 16mm hex bolt.
3.2, drain all the oil and tighten drain plug back to 18 ft-lbs.
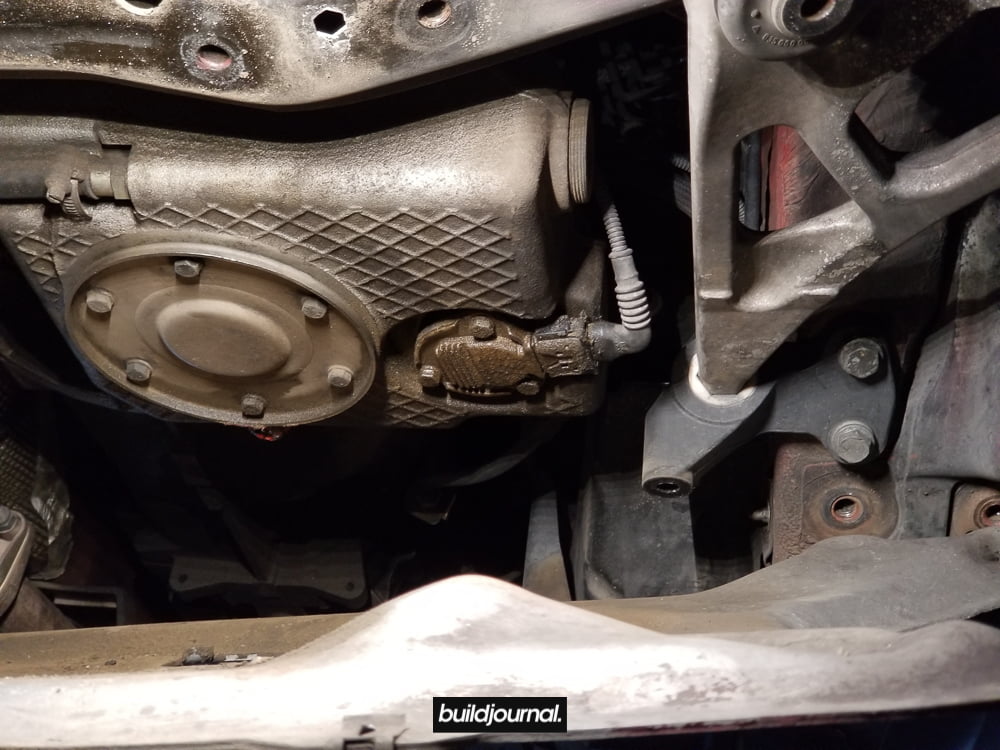
4. Remove oil level sensor.
4.1, remove the three (3) 10mm nuts on the sensor.
4.2, replace with new gasket ring and sensor.
4.3, torque the three (3) 10mm nuts to 88 in-lbs or 10Nm or 7.3 ft-lbs.

5. Fill engine oil.
5.1, follow normal procedure to do oil change including oil filter.
6. Reinstall under tray and plate.
6.1, torque reinforcement plate to 43.5 ft-lbs + turn an additional 90º (with a tolerance of +/- 30º).
6.2, tighten the under tray screws.
7. Check for leaks!
Give it a few minutes for the gauges to work. Sometimes it takes a few minutes of driving or when your engine oil is up to temp for the new sensor to work.
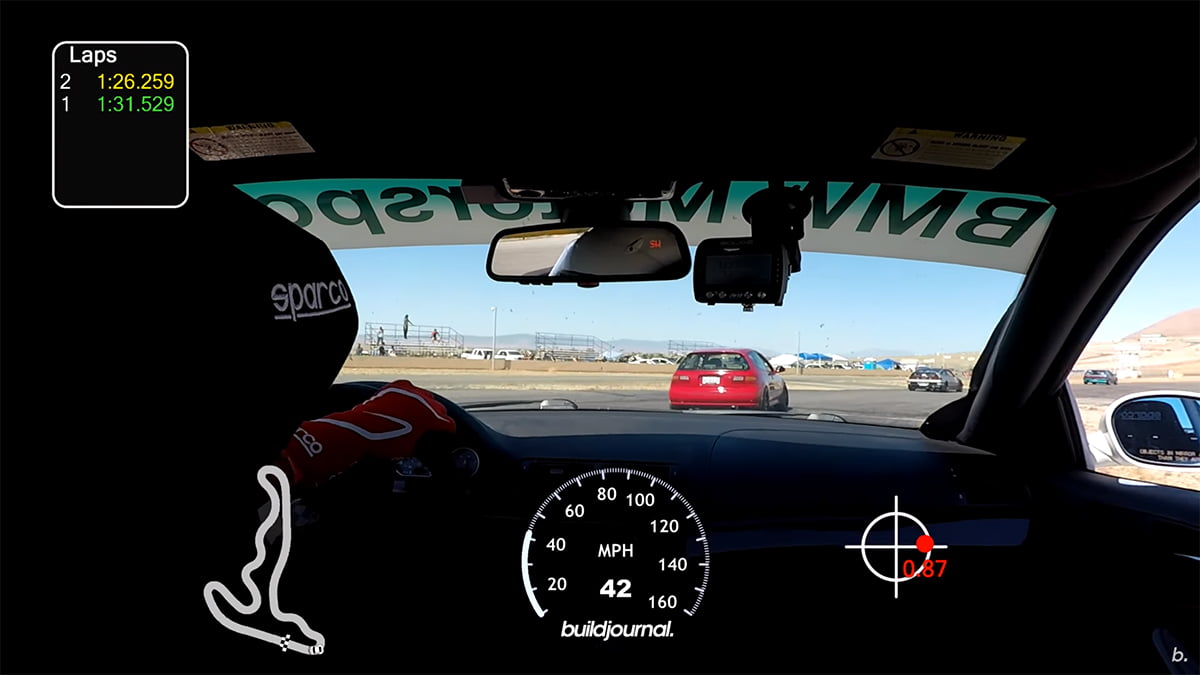
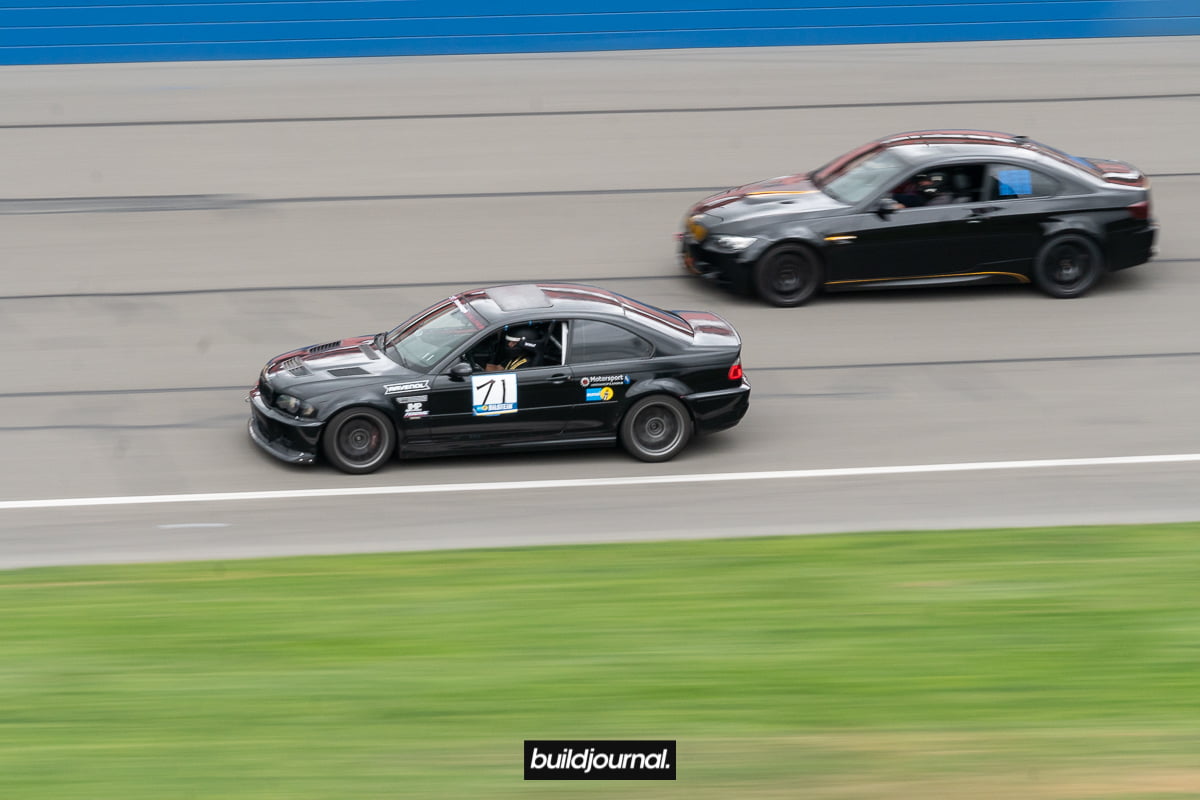
E46 M3 Streets of Willow @ Willow Springs - 1:27.451
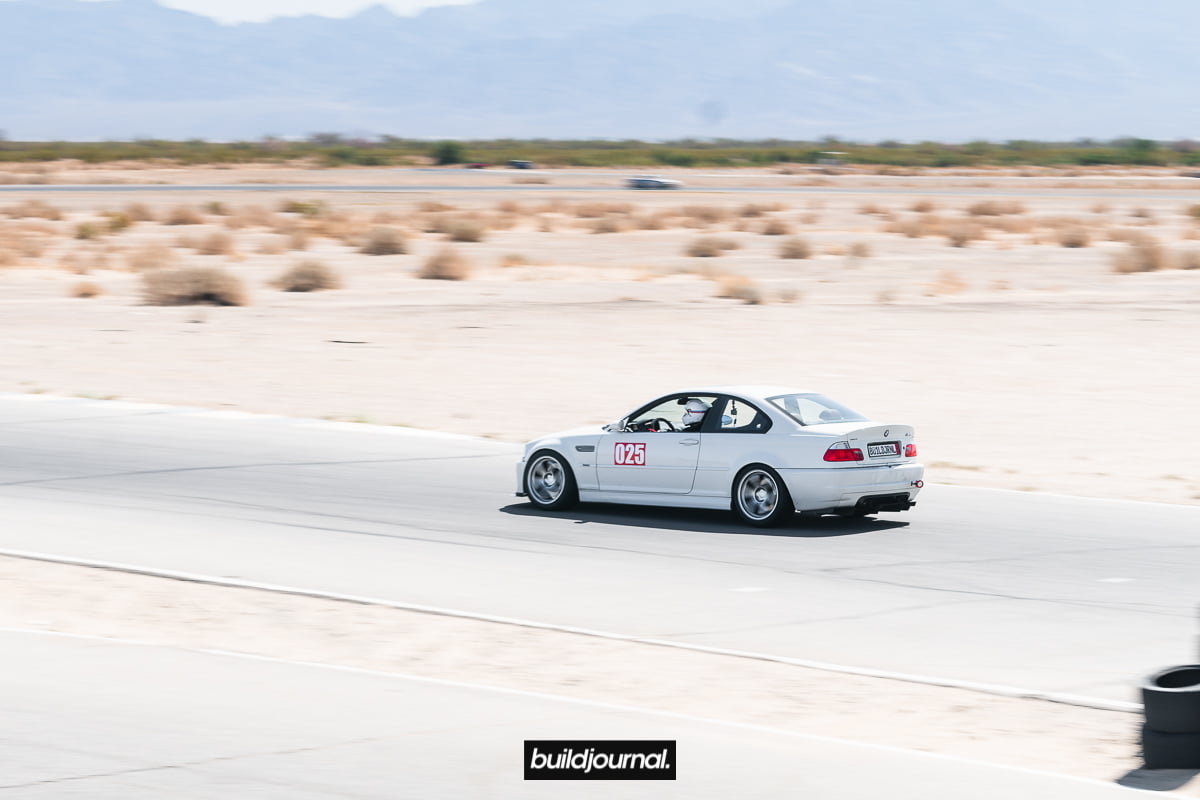
Day 2 of 2 at Willow Springs International Raceway with Team Topak was Streets of Willow day. It was my first time running this track and it was the clockwise configuration. Temperatures were even hotter than day 1 with on-track temps reaching about 110° around noon. After my 2nd session my lap times were getting slower and slower, but I still had lots of fun out there. I managed to get a 1:27.451.

Group Buy: Volk Racing TE37 OG 18x10 ET25
[6/18/2018] Group buy is now closed.
We are organizing a special group buy for the discontinued Volk Racing TE37 OG wheels. This is a rare opportunity and will most likely not have an opportunity to do this again in the near future. So please, if you are interested sign up via the form below. We only need a minimum of 5 people to make this happen. Yes, 5!
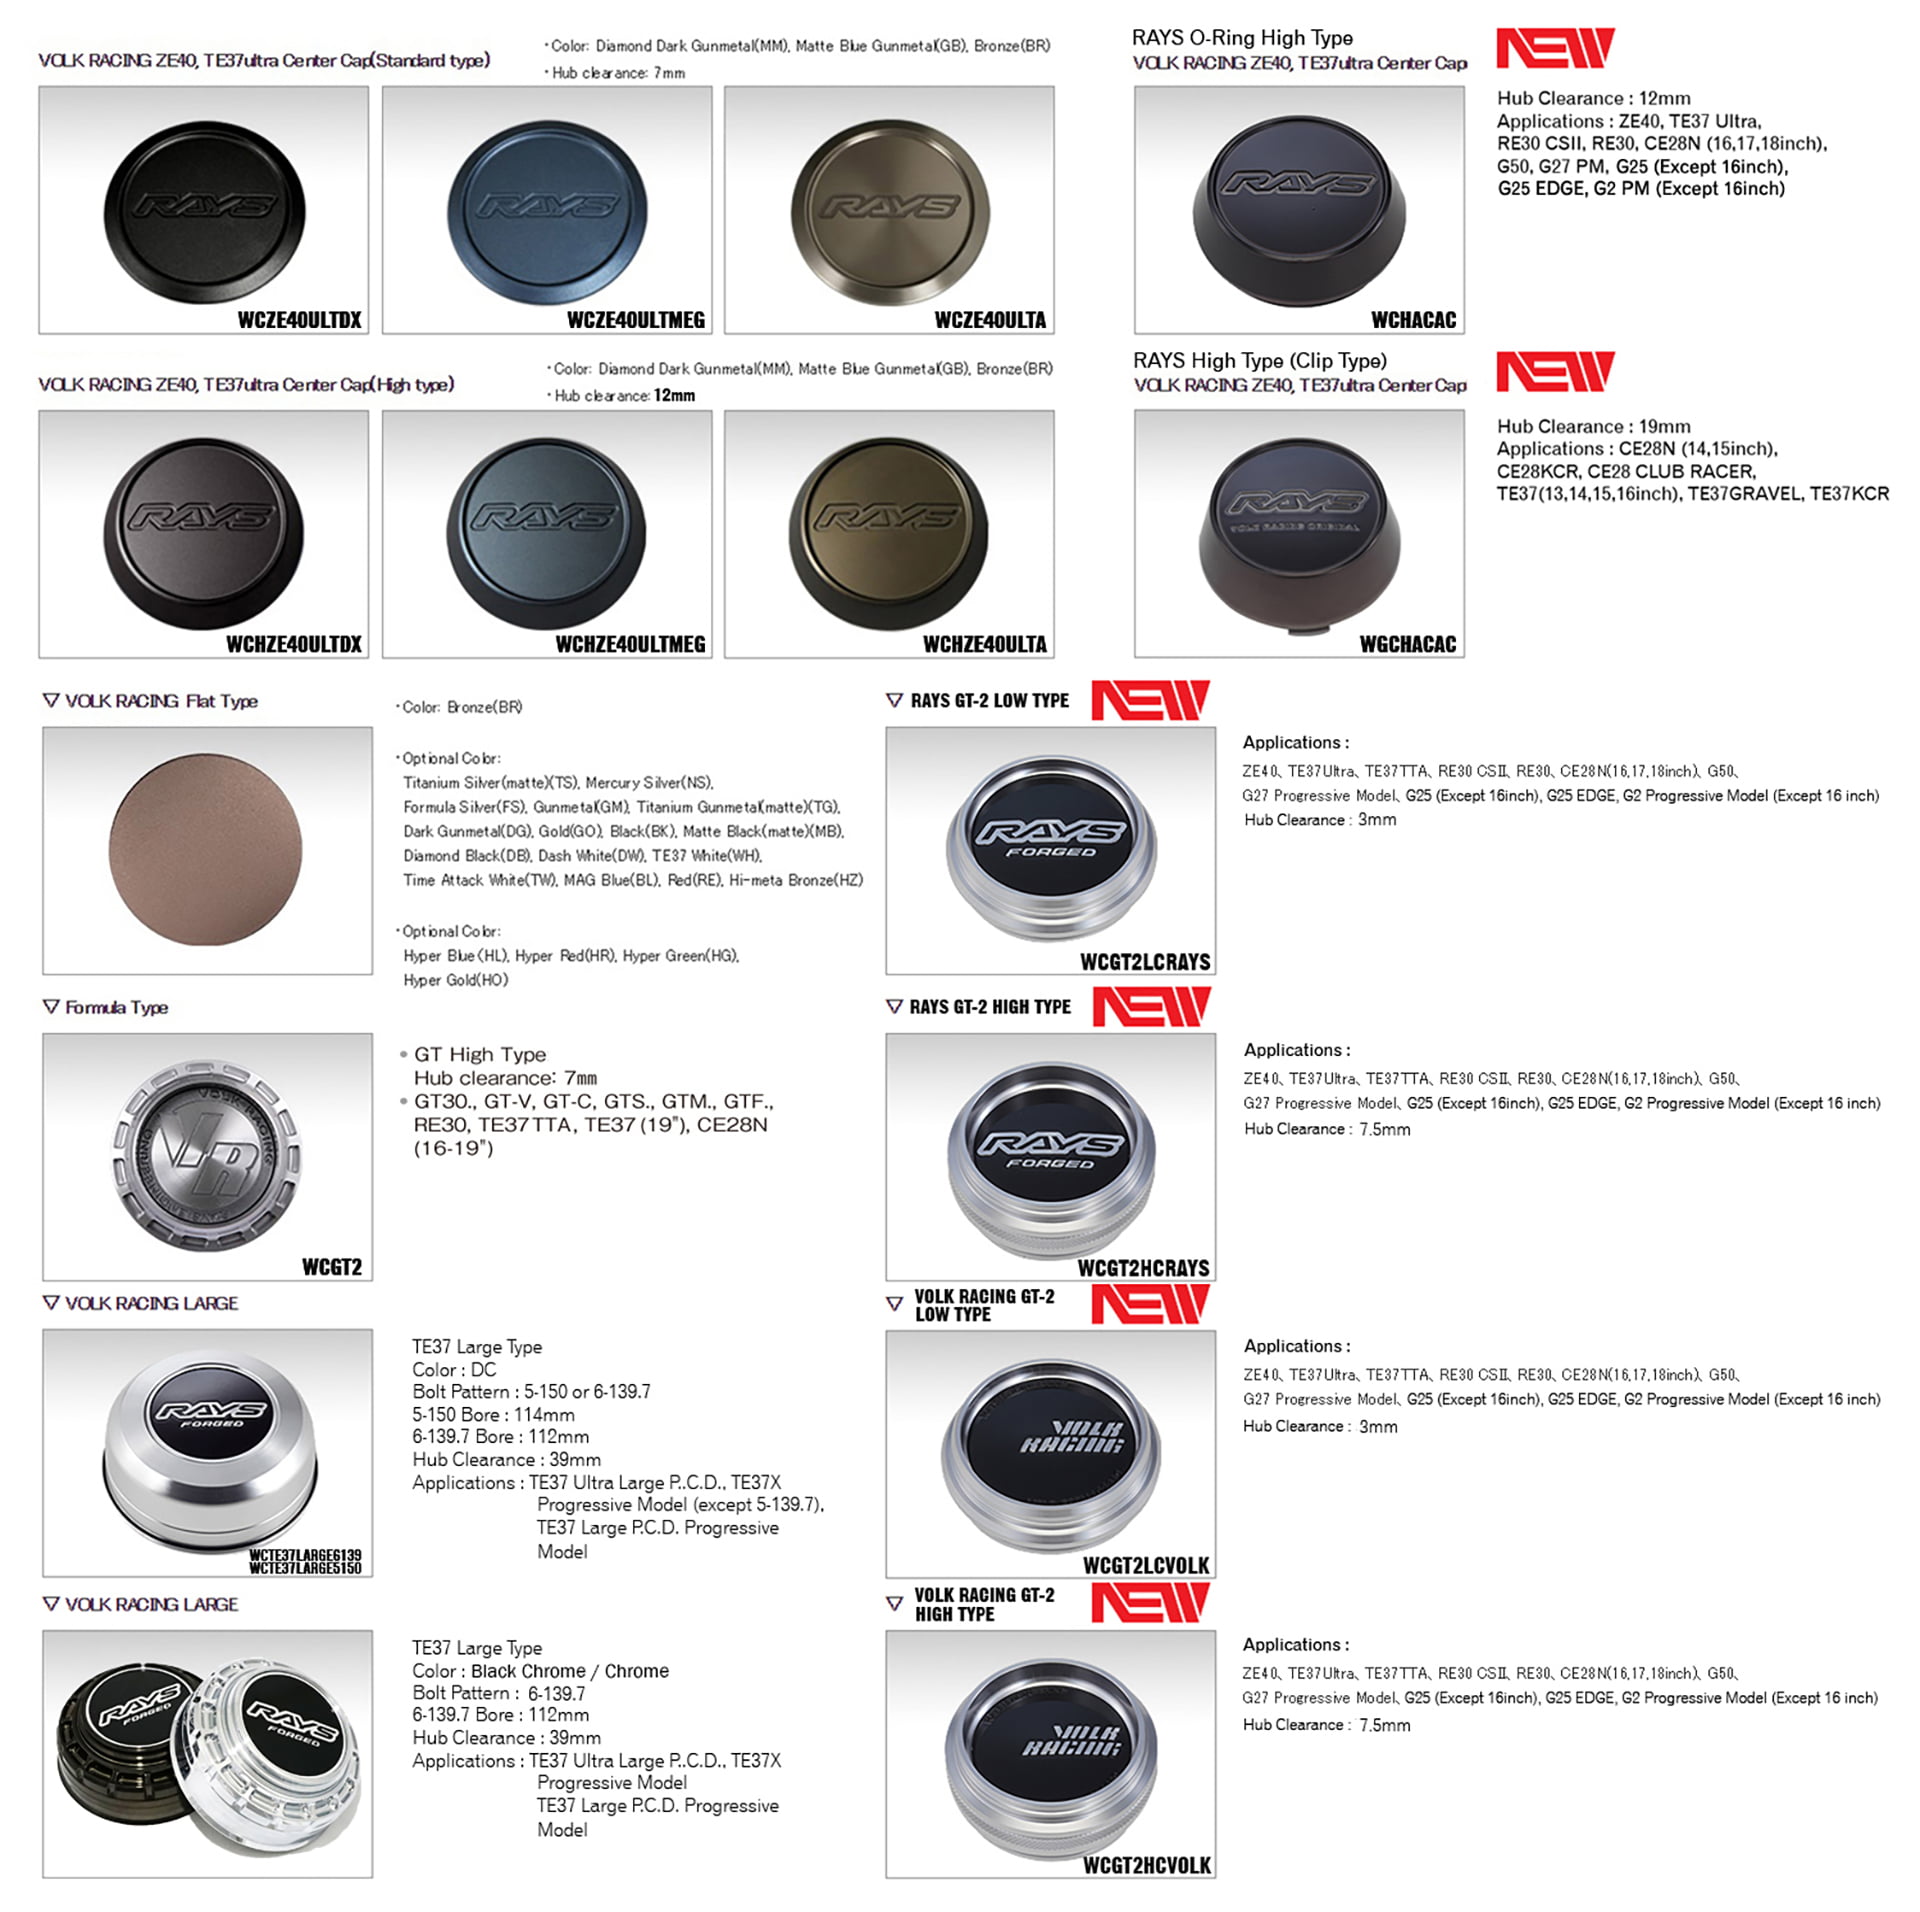
VOLK TE37 OG WHEELS
- Bolt pattern: 5x120
- Wheel size: 18x10 ET25
- Price: $3,200
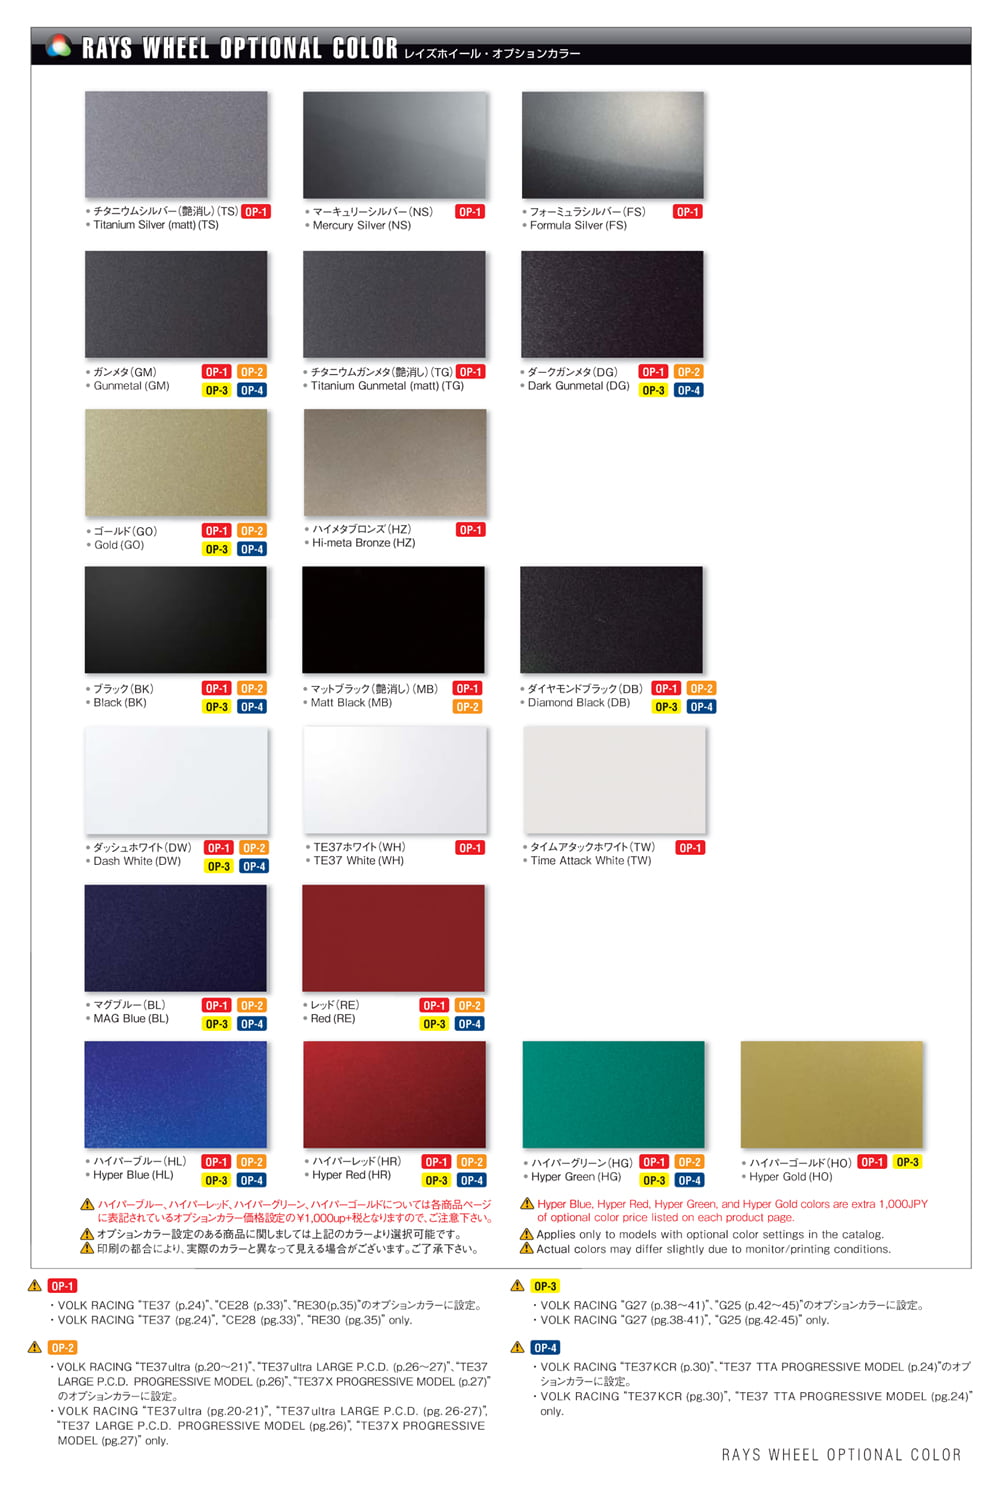
- Select your color (chart below)
OPTIONS
- Nexen N'FERA SUR4 275/35/18 tire package +$700
- Center caps color matched +$200
ORDER PROCESSING
I will run the inquiry form page for this group buy from today 6/13/2018 to 8/31/2018 OR when we reach maximum of 5 buyers that have paid. Once the order is submitted to RAYS, it will take about 4 months to make the wheels and another 1 month to ship. So expect to wait at least 5 months for your wheels to arrive once the order is submitted. Now a little disclaimer to you all, this is a custom one-off order and shipment delay is absolutely possible. By placing an order, you understand the circumstance of this custom order and accept the possibilities of delay.
RAYS has mentioned there is a strict color quantity max depending on order size. Breakdown is below. As stated in the rules, the top 3 color choices submitted will win the vote however the people who registered first will have an opportunity to change colors.
- 5 sets - 3 color choices
- 10 sets - 4 color choices
PAYMENT & DEPOSIT
I will need half of the payment up front before I submit the order. Your spot on the list is first come first serve basis. Order request will be granted to the first 5 people that pay me the deposit of $1,500. Deposits are non-refundable unless we do not hit 5 buyers by 8/31/2018. Once you inquire I will reach out to your email and send you payment information. I accept Paypal - Friends and Family only.
After the wheels arrive, I will charge you for the remainder of the payment before I ship or ask you to come pickup. You must pay the amount in full to receive your wheels.
PICKUP & SHIPPING
The bulk shipment will be delivered to a warehouse for pickup in Orange County, CA. For those that can't pickup, shipping will be an option at buyer's cost. I don't have this all figured out yet, but to be on the safe side expect around an extra $200 for shipping within the US. I will personally be shipping it out so bare with me on the process as I find out more information. Also for those that are requesting shipping, you are expected to pay the shipping costs before the wheels ship out.
GROUP BUY RULES
- First deposit, first serve
- No partial orders - must buy 4 wheels; 1 set
- Top color choices win, however people who submitted inquiry first will have an opportunity to change color if their color didn't win
- Group buy will close 7 days after we hit 5 deposits/buyers
- Pickup in Orange County, CA
- Shipping is extra and buyer will be charged when 2nd half of payment is due
- Color matched center caps will be charged at 2nd half of payment
- No refund unless we don't hit minimum by 8/31/2018
WHEEL COLORS
CENTER CAPS

E46 M3 Big Willow @ Willow Springs - 1:37.234
Continuing on my come back tour, we hit Willow Springs International Raceway for a 2-day event with Team Topak. The weather forecast was a blistering 96° degree on Saturday for Big Willow and 101° for Streets of Willow. Although pretty hot, it was a great opportunity to test my new cooling enhancements as I had overheating issues with water temp at Chuckwalla last month. It was my first time out at both tracks and I was super happy with my results. Skip below to the 10:00 mark to see Lap 8 where I had a PB of 1:37.234.
Track Photos from BIMMERFEST Auto Club Speedway
I didn't have too much time to shoot, but luckily @connie.m3 was able to snap most of the pictures of you guys that ran the ROVAL at Auto Club Speedway. We tried to get all of the E46 owners running out there and a few others as well. Scroll through the massive gallery and see if you're in it! If you want high-res images of your car just give us a DM on Instagram.
[tg_gallery_slider gallery_id="14155"]
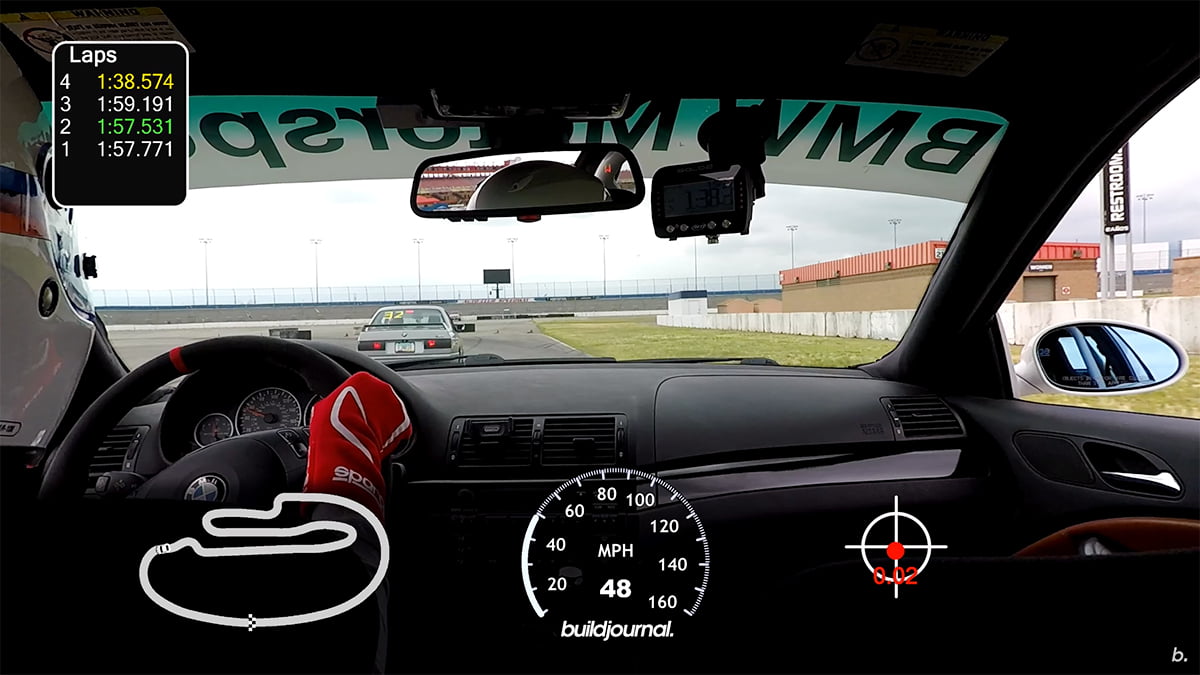
E46 M3 Auto Club Speedway ROVAL @ BIMMERFEST - 1:56.784
I was busy tracking my car at Bimmerfest 2018 so I didn’t get to check out the show at all, but it was a great day to set a personal best. We got a garage with a bunch of other friends, both new and old, and had a blast just driving and hanging out. Below is a video from my 3rd session in the black group.
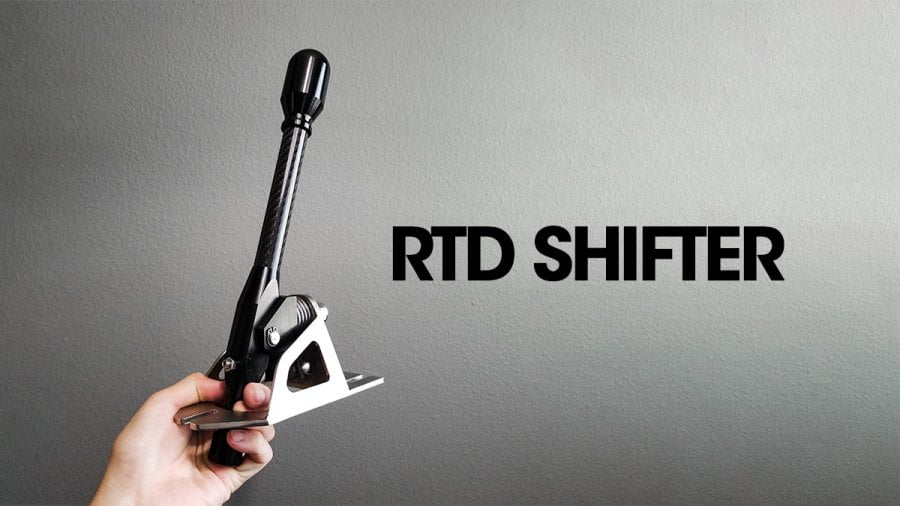
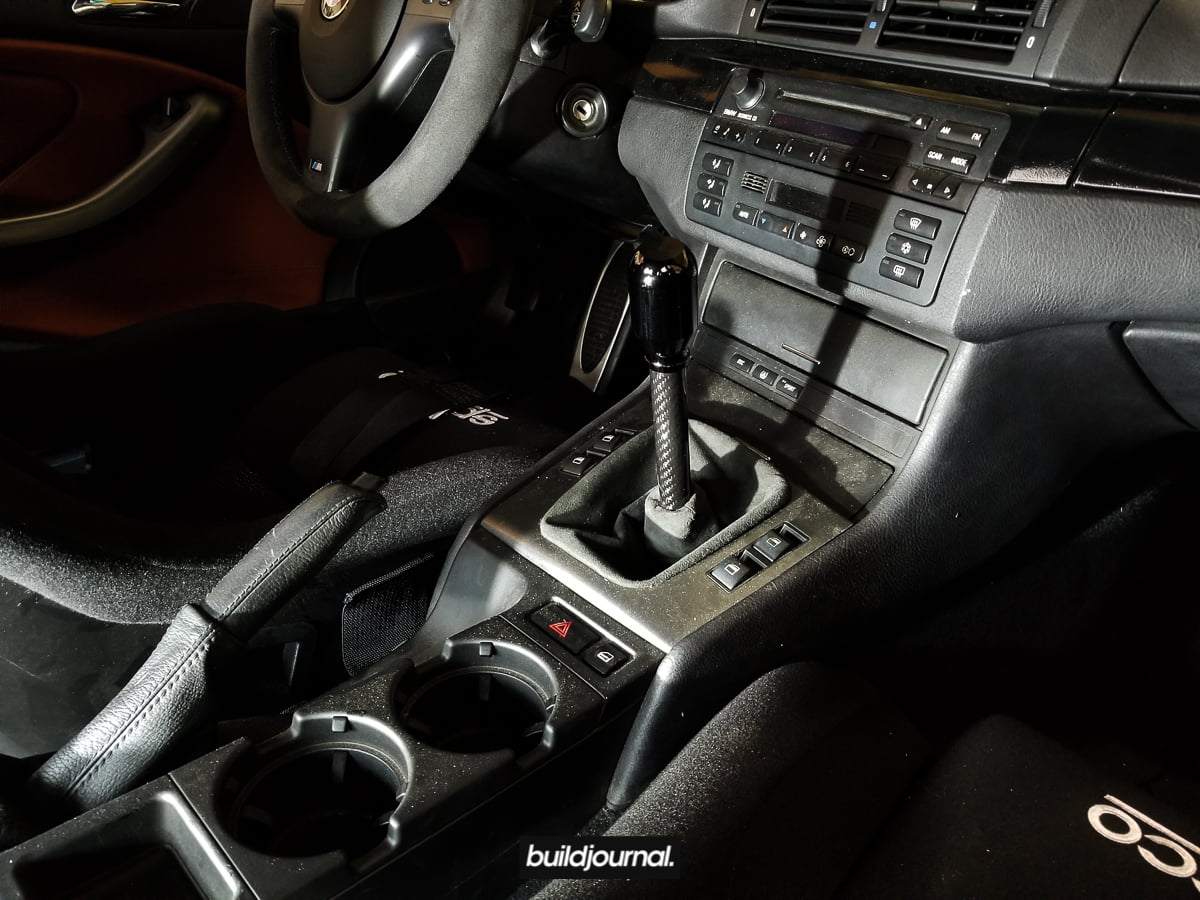
RTD Shifter V4 Carbon Fiber Review
Although race shifters have been around for a while, they're becoming more popular, especially for street driven cars, because of RTD Shifter. What is an RTD Shifter? It's a tunnel mounted race shifter that reduces play and throw significantly while providing a crisp shifting experience. I decided to buy one and try it out on my E46 M3 race car (can I say that now?) especially since the price is very attractive compared to the "ultimate" race shifter, the CAE.
RTD Shifter V4 Carbon Fiber Review
Before I dip in to review the SSK, I just want to say this is not a sponsorship deal or anything of that nature. I paid for the shifter myself. Also I have tried the CAE and the AKG shifter so I will consider my opinions on these 3 shifters as I do this review. Also worth to mention is I'm coming from a B&M SSK.
Below are some product facts from RTD:
- First solid short shifter to fit the E30/E36/E46/E82 console without trimming.
- Mounts to the OEM tunnel holes (no need for drilling)
- Equipped with a Torsion Spring that gives a solid feeling and a better feedback while changing gears
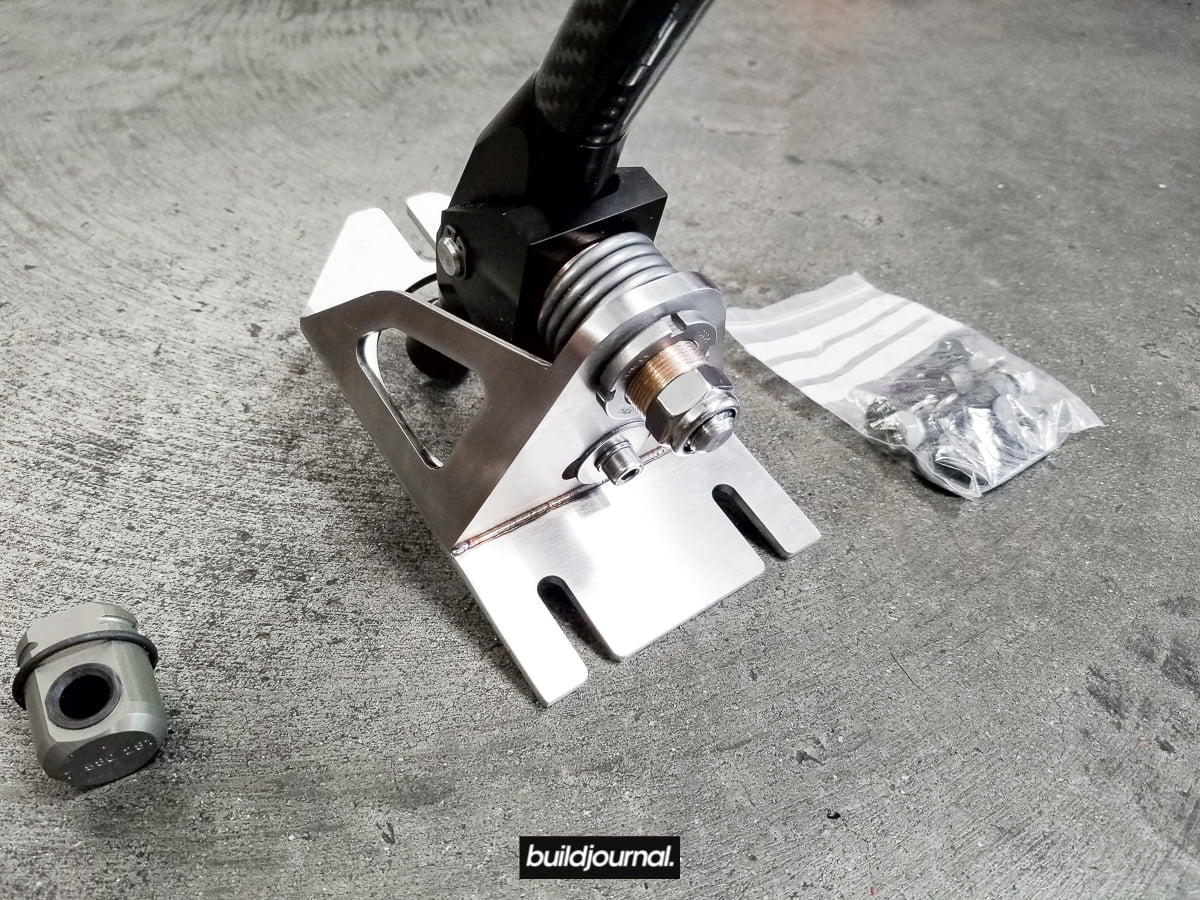
- All turned and milled parts are made of Alumec 89 Alloy which is harder than Aluminum 7075 Alloy used in different shifters; cage is made from stainless steel
- Bronze bushings used instead of Teflon bushings, this gives a longer life for the shifter
- Has a pivoting joint at the area where it connects to the selector rod, which gives flexibility to the short throws
- Shifter have a full 1 year warranty
- We recommend you to buy a DSSR for the best shifting experience
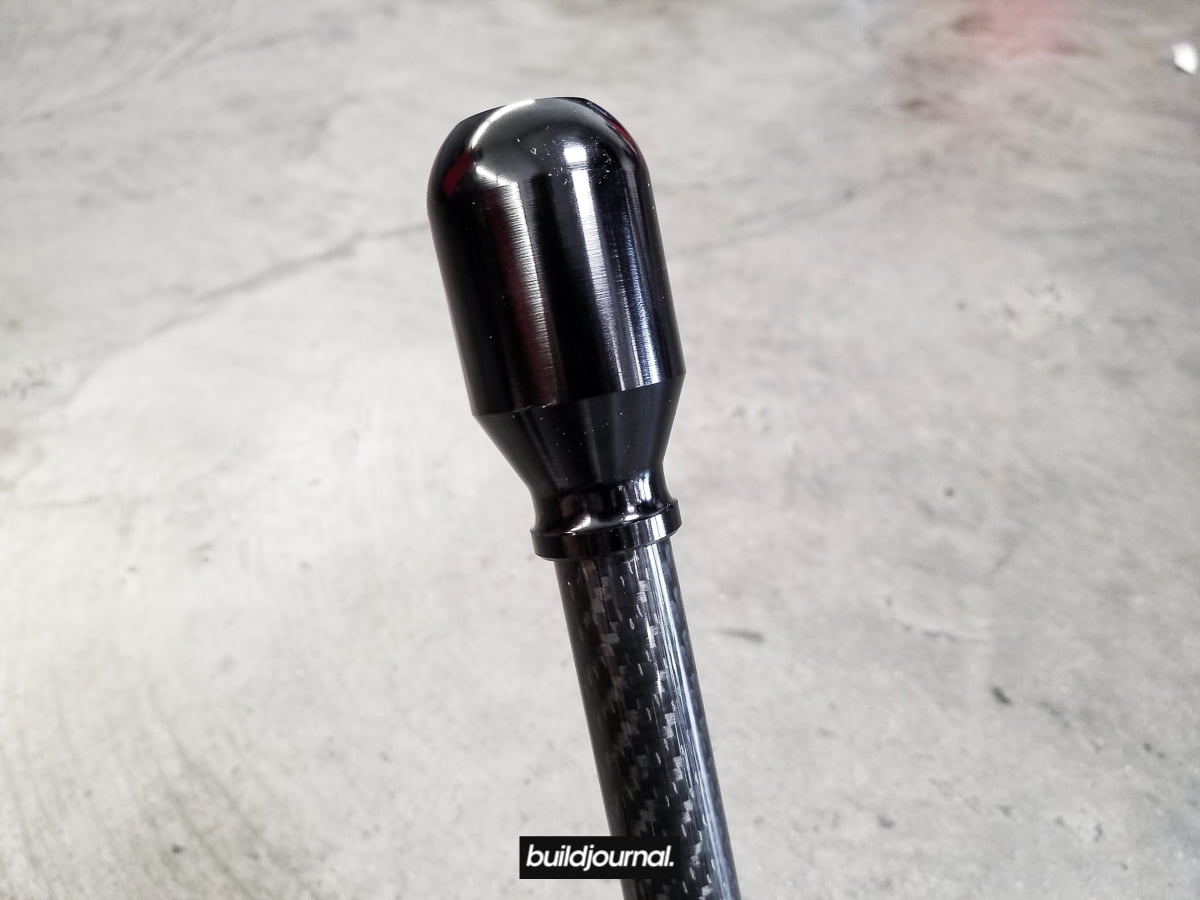
Build Quality: When I opened the box, I noticed it was nicely packaged and strapped down to lessen the chance of damage during shipping - it did come from Lebanon. Picking it up, I felt how durable it felt with the Alumec 89 alloy plate and the shiny carbon fiber rod. The black anodized knob (twist off screw) felt great especially since it's weighted. It's definitely heavier than the ZHP knob. I held it by the knob and shook it around, but there was absolutely no play. The spring tension is tight, which is a good thing to reduce play.


Supporting Parts: I talked to Maher at RTD Shifter and he actually did not tell me to get the DSSR, however I did anyways. He does recommend one, but I asked him for the "homie" opinion. DSSR stands for double sheer selector rod which reduces selector rod play in the shifter's lower pivot. The stock rod is a single rod and does not exert a firm leverage as the DSSR does. His reason for having the DSSR as optional was that the shifter masks the slop because of the torsion spring tension on the shifter. In addition to the DSSR, I bought a new selector joint.
I also bought harder 95A polyurethane transmission bushings as it helps with stabilizing the transmission during cornering. Some people experience sloppy shifting and notchy gear engagements when using softer bushings. It is also recommended to get harder motor mounts, but I'm just running the stock OEM Lemforder mounts.


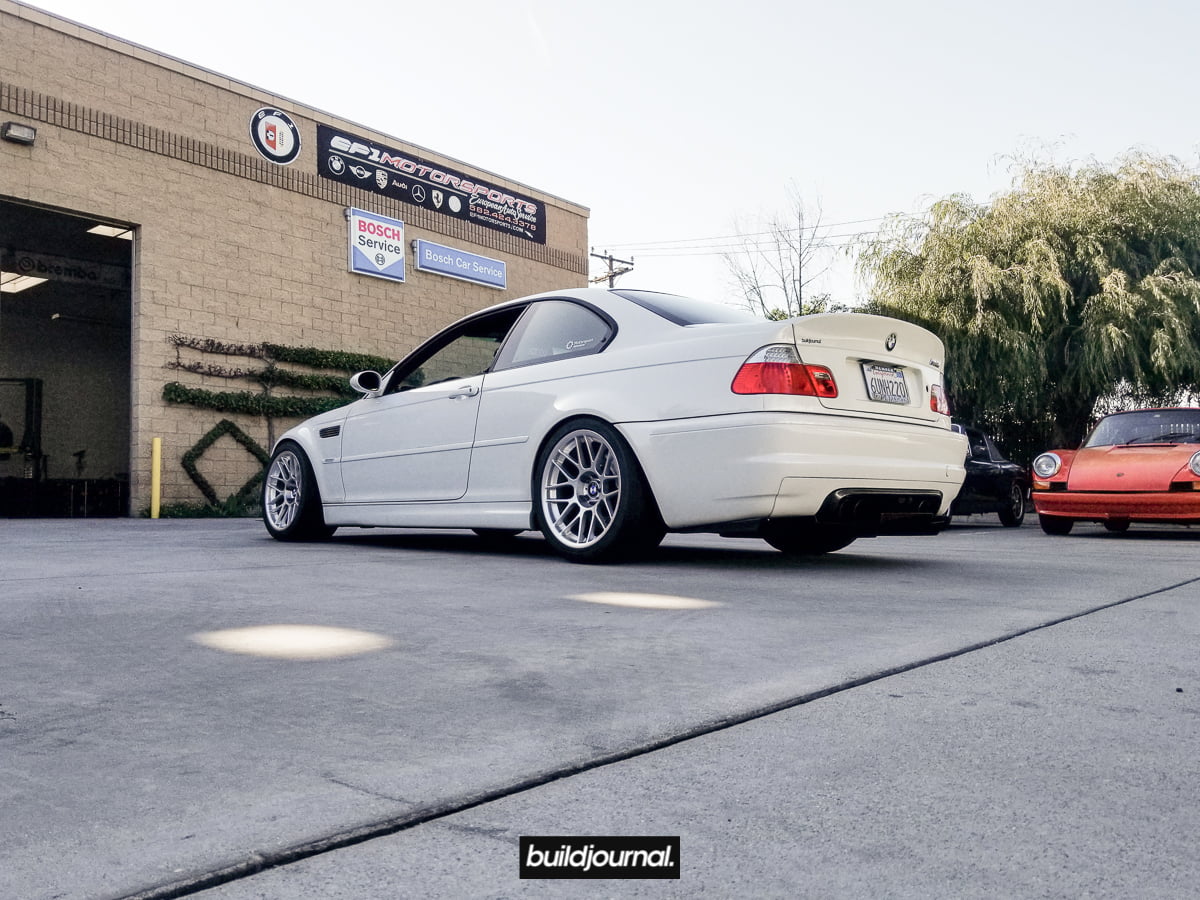
Installation: I took my car to EF1 Motorsports in Long Beach, CA where my good friend Chasen helped me with the install. We put the car up on the lift and started taking down the exhaust and driveshaft to access underneath the transmission tunnel. It was a pretty easy install with a lift. Some people say you have to drop the transmission a little, but we we're able to do without. The DSSR, selector joint and transmission bushings all went in.
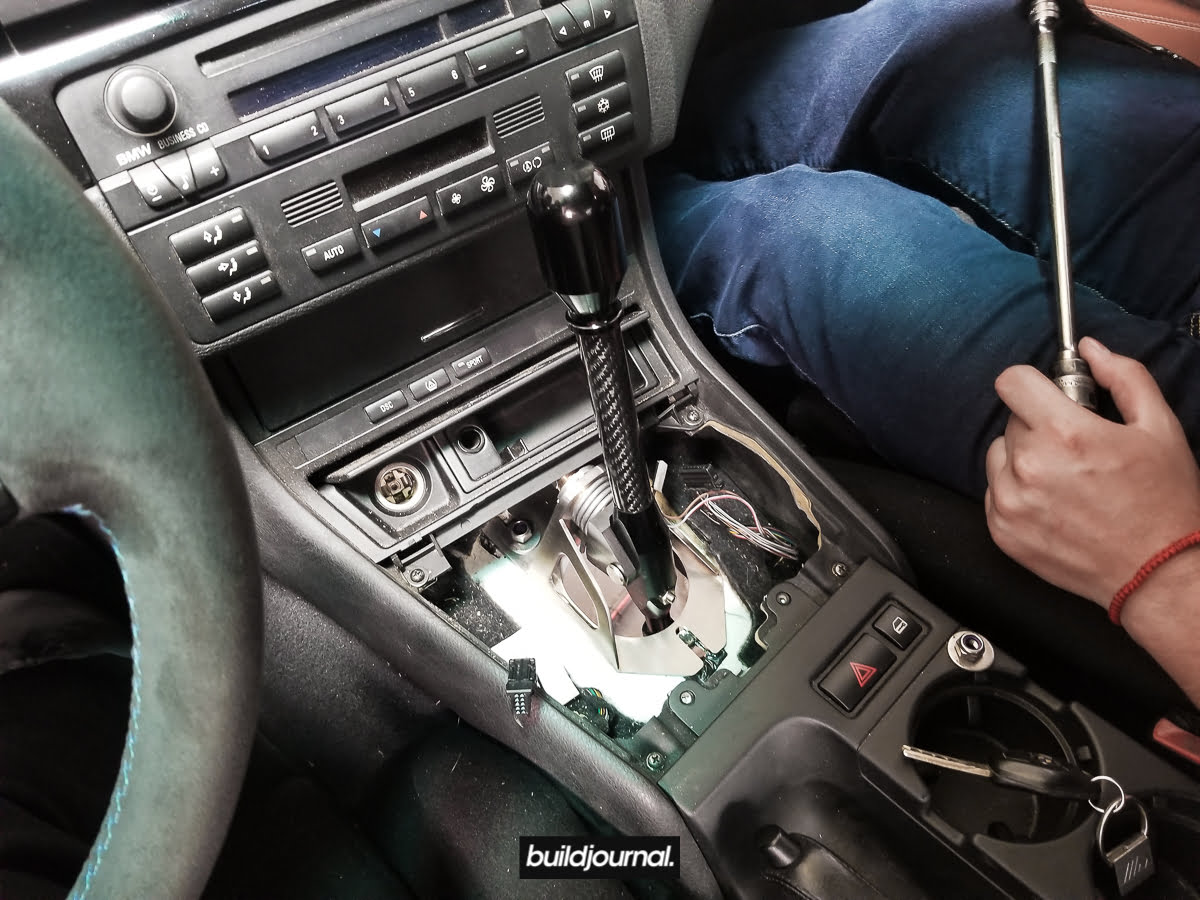
The great thing about the RTD Shifter is that it mounts directly to the stock transmission holes and has a simple bolt to calibrate lever. I've felt a few CAE shifters, but 1 of the 2 I've felt was kind of notchy and just didn't feel as fluid as I would prefer. Call me crazy? The CAE requires custom mounting therefore needs to be calibrated to really get that perfect feel. If the holes are off or the shifter is misaligned, it's not going to feel as smooth. I think that's what happened with the CAE shifters I've felt. I'm sure with a proper install, it'll feel just as good.
Update: I didn't explain the RTD calibration so let me clarify. On the shifter there is a little allen head bolt below the large nut to control the horizontal yaw. (pictured 4 images above) To calibrate, you simply loosen the allen head, throw it into 3rd, and tighten down the allen bolt. That should get the shifter in a good spot. Test all gears, rinse and repeat.
Test Drive: When I first drove it out of the shop I had a hard time getting into reverse. Not because the gearing, but because the spring tension is so much stronger than a normal SSK that it was difficult to sway it all the way left to get into gear. I think my strength is about "average" whatever that means, but getting into reverse was still tolerable. Just needed to get used to it. Keep in mind I'm describing my very first time experiencing this.
First gear was easy, 2nd was easy but I went super slow on the shift, 3rd was super crisp, and 4th did not engage. It took me a while to get into 4th over and over and something seemed a little off, but after I got home I realized I needed to calibrate my shifter. Once calibrated, wow! This thing felt freaking amazing. Every single throw was just crisp! One thing to note though, the slop is not 100% gone, but about 95% of it is gone.
If you want to see videos of me shifting, check out my Instagram Story titled "RTD." on @buildjournal. You have to view from a mobile device.


E46 M3 Owner Orders $300 Sachs Clutch, Gets $7,000 F1 Clutch Instead
Today M3Forum crashed and a Reddit post went trending after M3F user "breadvan" posted about an order he placed on Amazon.com for a stock Sachs clutch unit for the E46 M3. However it turns out he was given an F1 Racing clutch that may be valued up to $7,000 USD according to MotorAuthority.com. User mikeetastic links to a page on ZF and the clutch looks like the F1 clutch as shown. I mean, take a look for yourself. If you want a laugh, take a look at the original F1 Clutch thread on M3F and then the Reddit thread. So many trolls.
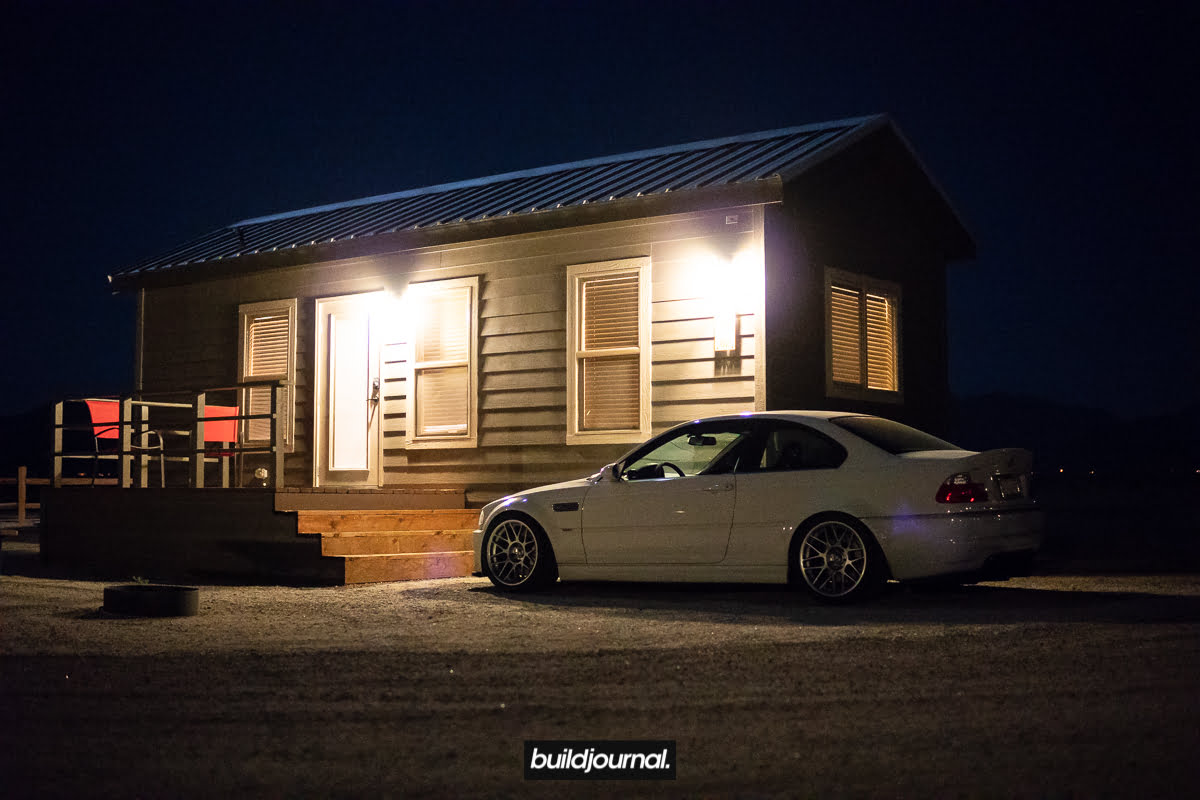
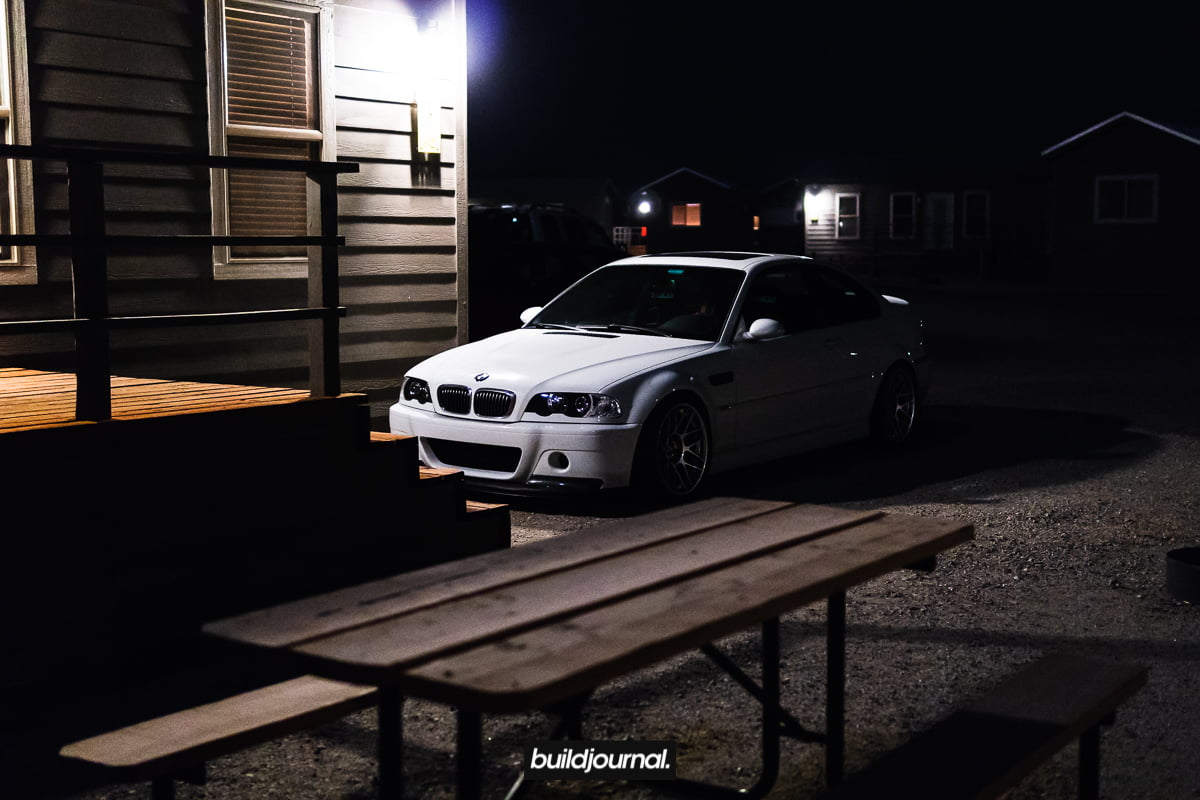
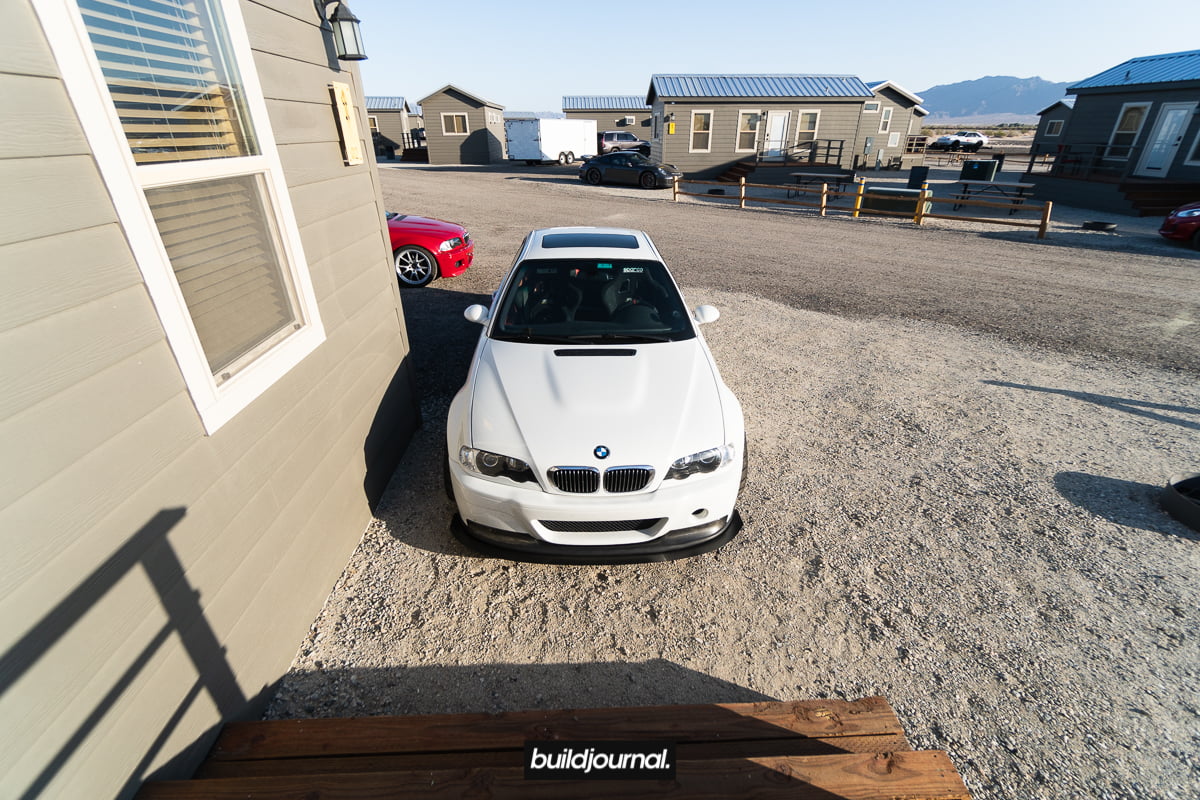
A Track That Lets You Park Your Car Next To Their On-Site Cabins
Love going to the track, but hate driving tired after? Rent a cabin next time you go to Chuckwalla Valley Raceway out in Desert Center, CA! It's literally built on the track facility so you just wake up in the morning and head out. The cabins look fairly new and they come with an electric stove, microwave, shower, bathroom, bed, TV, and a pull-out-bed couch to name a few. The best part? You can see your car from your bedroom window.
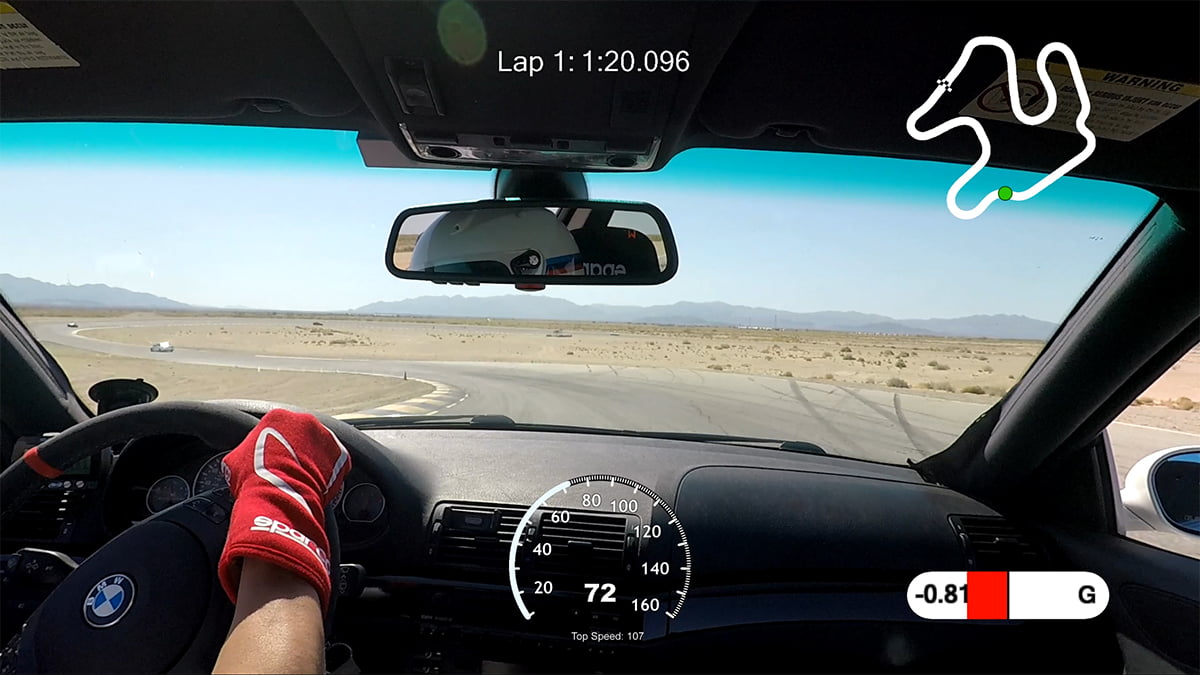
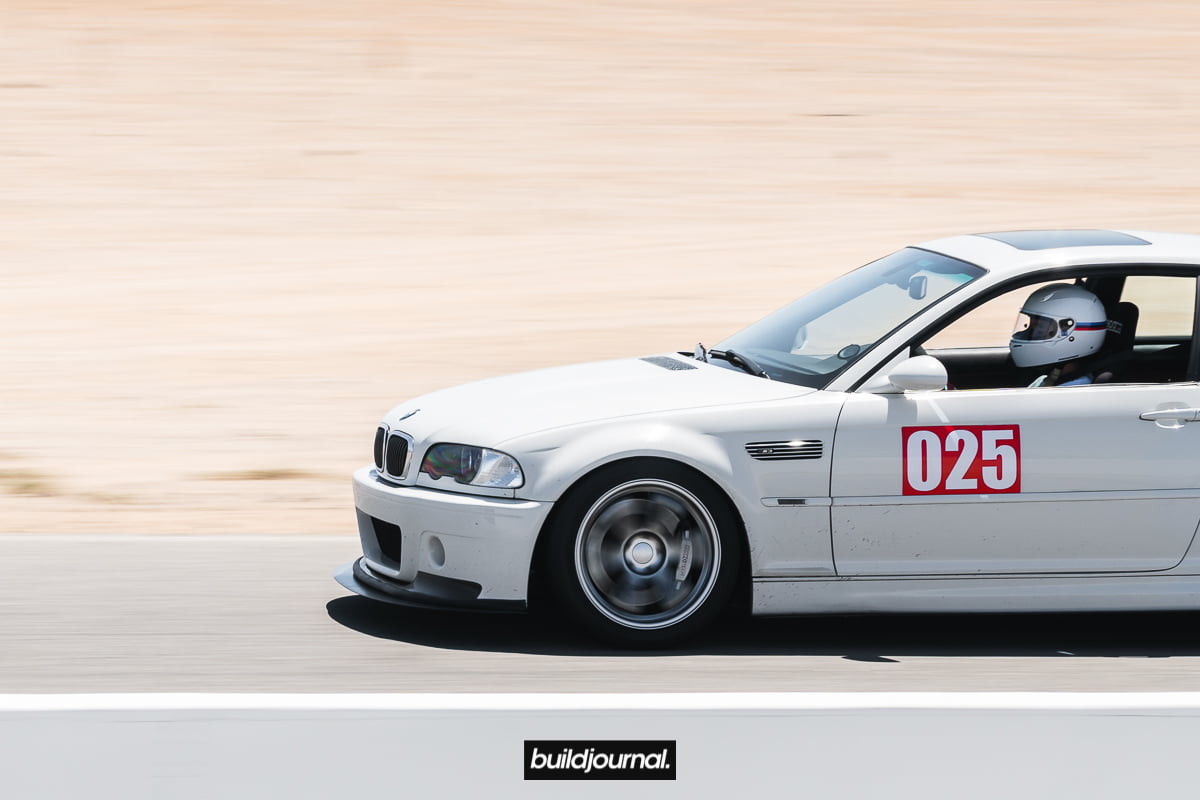
E46 M3 Chuckwalla Valley Raceway CW 2:08.925
Went out to the middle of nowhere 3 hours east of Los Angeles to Desert Center, CA for a track day at Chuckwalla Valley Raceway. We rented out an on-site cabin the night before, provided by CVR, and were greeted with neighbors staying for the track event. The night’s air carried the smell of grilled hot dogs, smokey fire logs, and kumbaya melodies.
First time at any track starts with humble beginnings, but surprisingly I did a 2:10.7 the first session which I was super surprised about. I’m beginning to trust my tires a lot more. It was really difficult to improve that time honestly. On the last session of the day I just decided to sent it and the best I could do was a 2:08.925.
What really helped was a ride-along with one of the instructors. Shout out to my instructor Tim Seargeant for guiding me and giving me pointer. I shaved off about 2 seconds after his advice.