Here is a DIY for the E46 M3 seat leather swap. For those of you who have worn out seats and ripped leather, there is an easy way to replace those pieces without having to get them reupholstered. This DIY will go over how to:
- Replace a broken seat lever
- Replace a worn out bottom foam assembly
- Remove back seat foam assembly from seat frame
Since Andrew (the Buildjournal Alpine White M3) stripped his interior for weight savings, I took the rare opportunity to replace my Napa black interior for his cinnamon interior. Only issue was that his front seats have power bases, and I wanted to keep my manual bases. As a result, I ended up pulling off all four of the leather and foam assemblies and swapping them to different bases.
Tools needed:
- T20 Torx
- T30 Torx
- Flathead
- Clippers
- 10mm socket/wrench
- 16mm socket/wrench
- Black Plastic Rivets
You can also follow along a DIY video by the 50sKid that I found extremely helpful for the bottom portion of the seats. I have linked the steps below with the corresponding timing of the video if you need to watch how he did it. Also below are some Amazon links to the products we recommend. Please buy from these links if you plan to buy because it’ll help us continue to do what we do!
[amazon_link asins=’B00BXQXR3C,B00I9I5FGE,B0002SPCBW,B01K9ELWPI’ template=’CopyOf-ProductCarousel’ store=’builjour-20′ marketplace=’US’ link_id=’4293decf-5ff7-4e46-a83e-1d6bc236da3f’]
1. Remove Front Seats
1.1 – There are two bolts and two nuts on your seat frame holding your seat to the chassis. Remove the caps if you have any. You will need to move your seat forward and backward to access them.
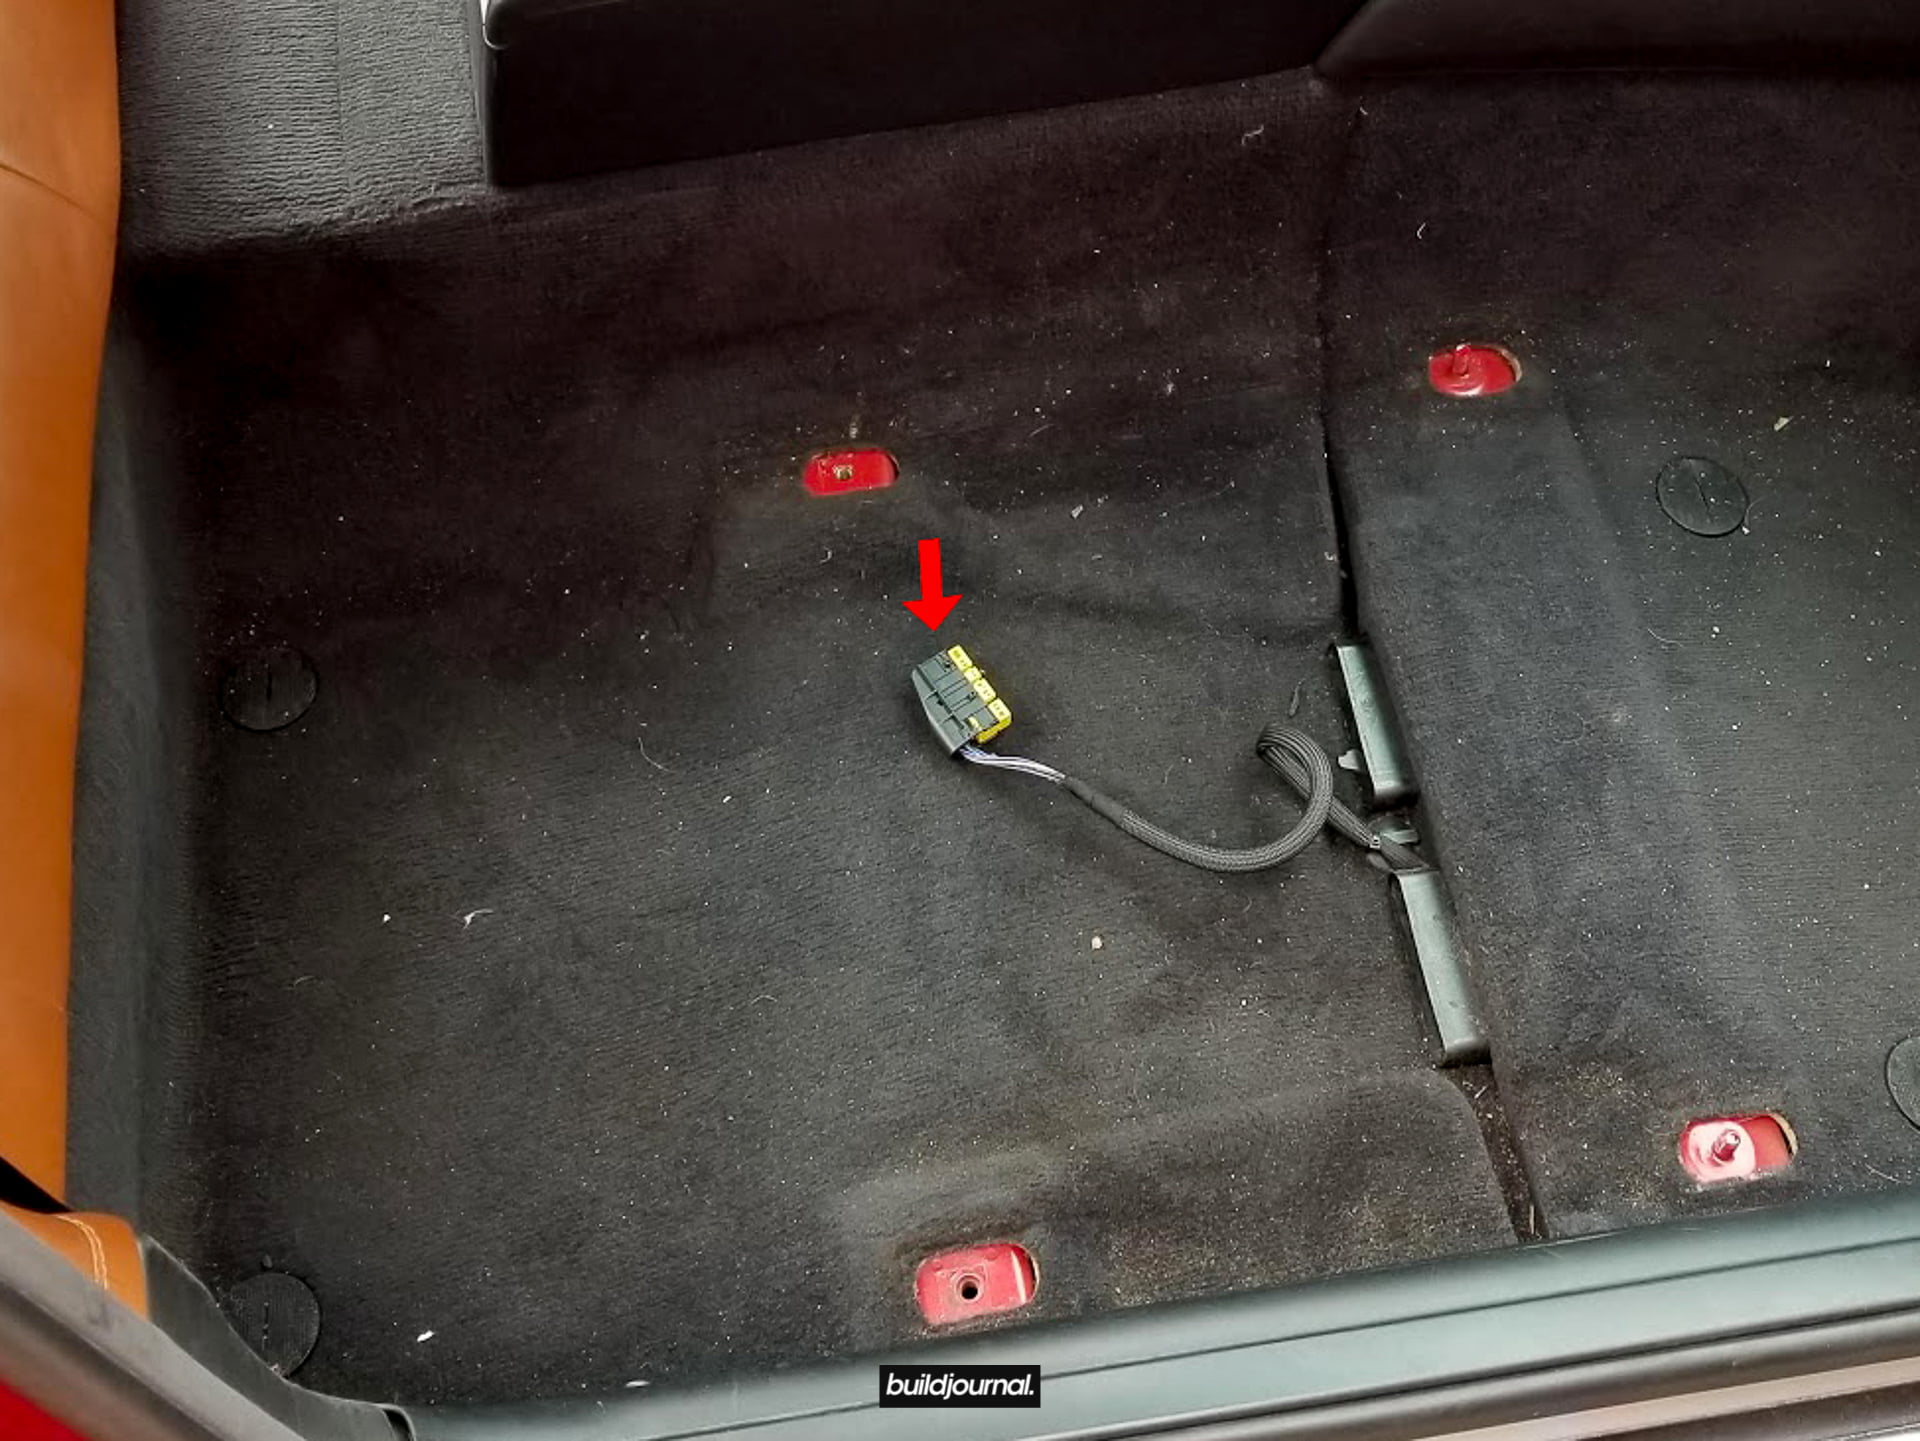
1.2 – Power seats: Before you disconnect the power supply from the seats, move the height of the chair all the way up to give yourself more space to access a bolt in a later step.
1.3 – Disconnect the power supply from your seat. There is a lever-like clip on the side of the connector, flip it up. Then push the side of the plug outwards and it will release the plug and you can pull out.

2. Remove Seat Base Covers
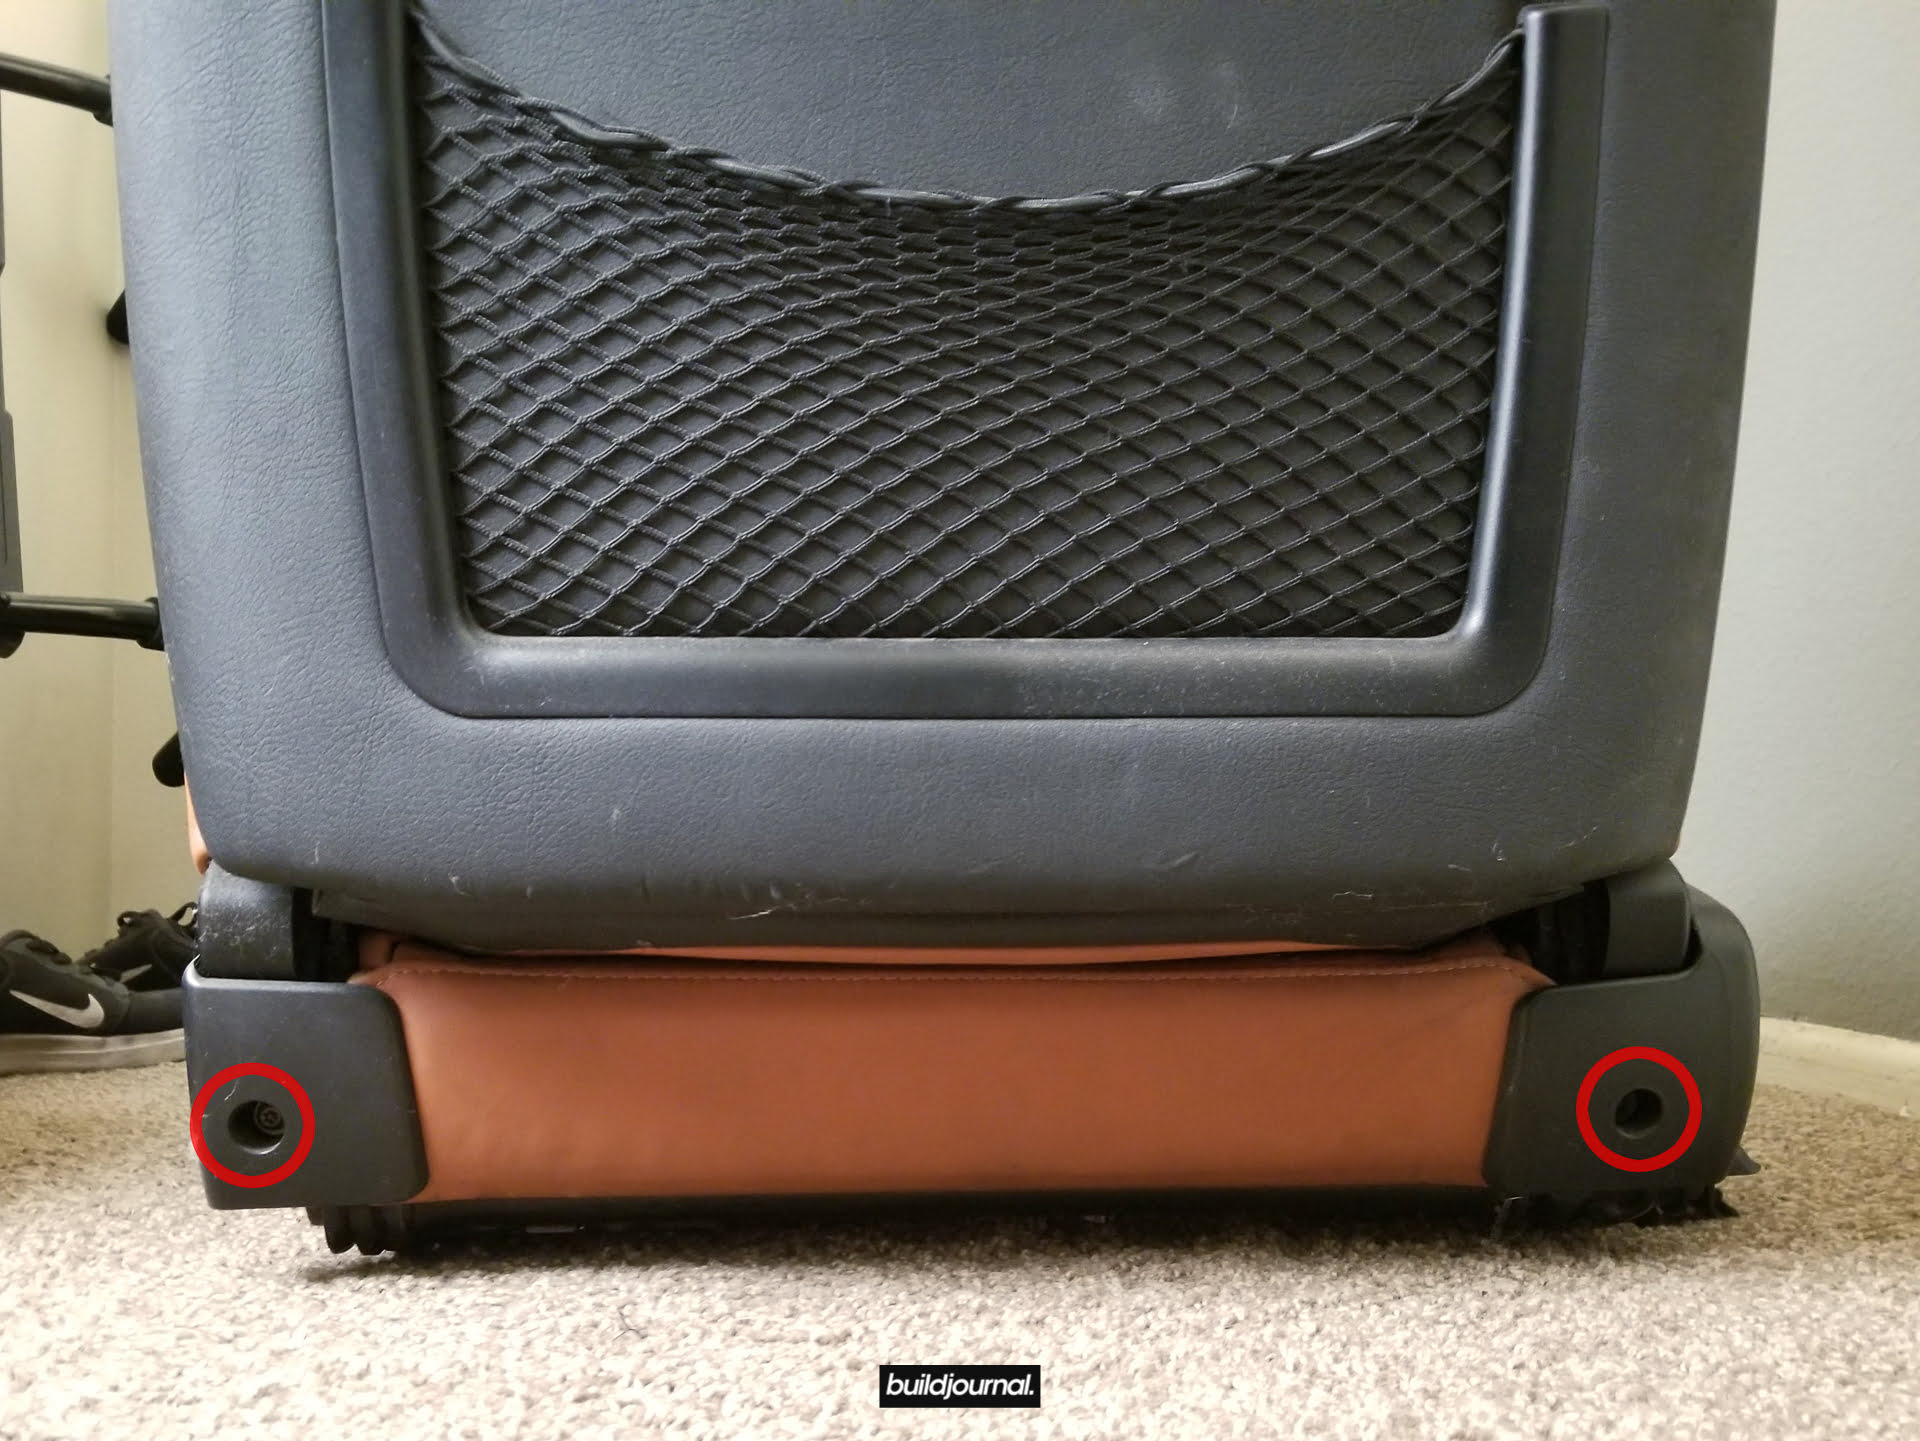
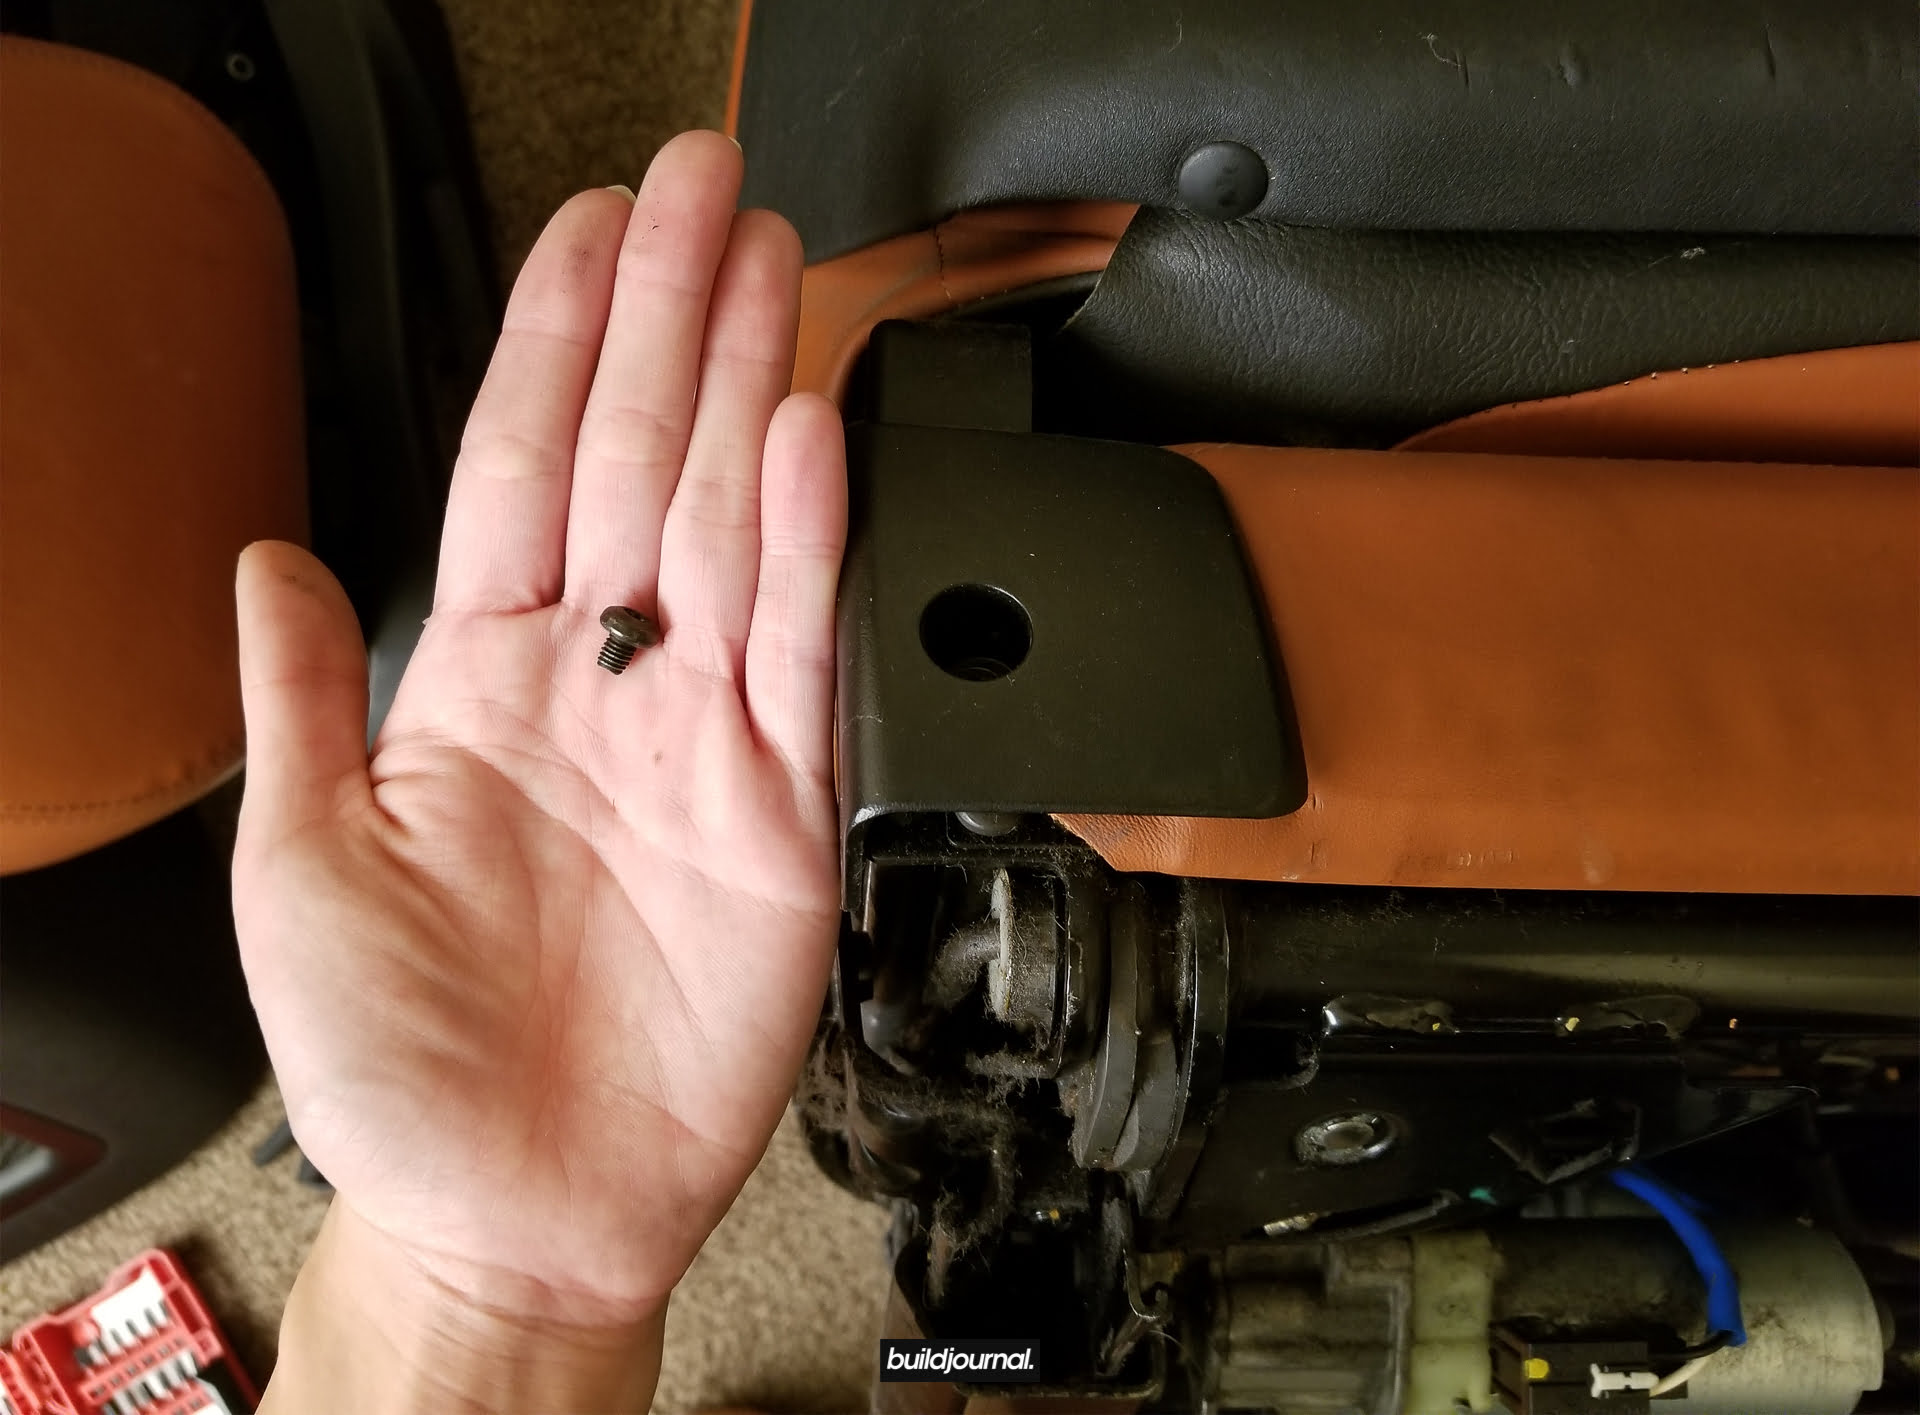
2.1 – Use a T20 torx to remove the two small screws from the plastic covers on the bottom of the seat. (Video) These screws are really small, so make sure you don’t lose them.
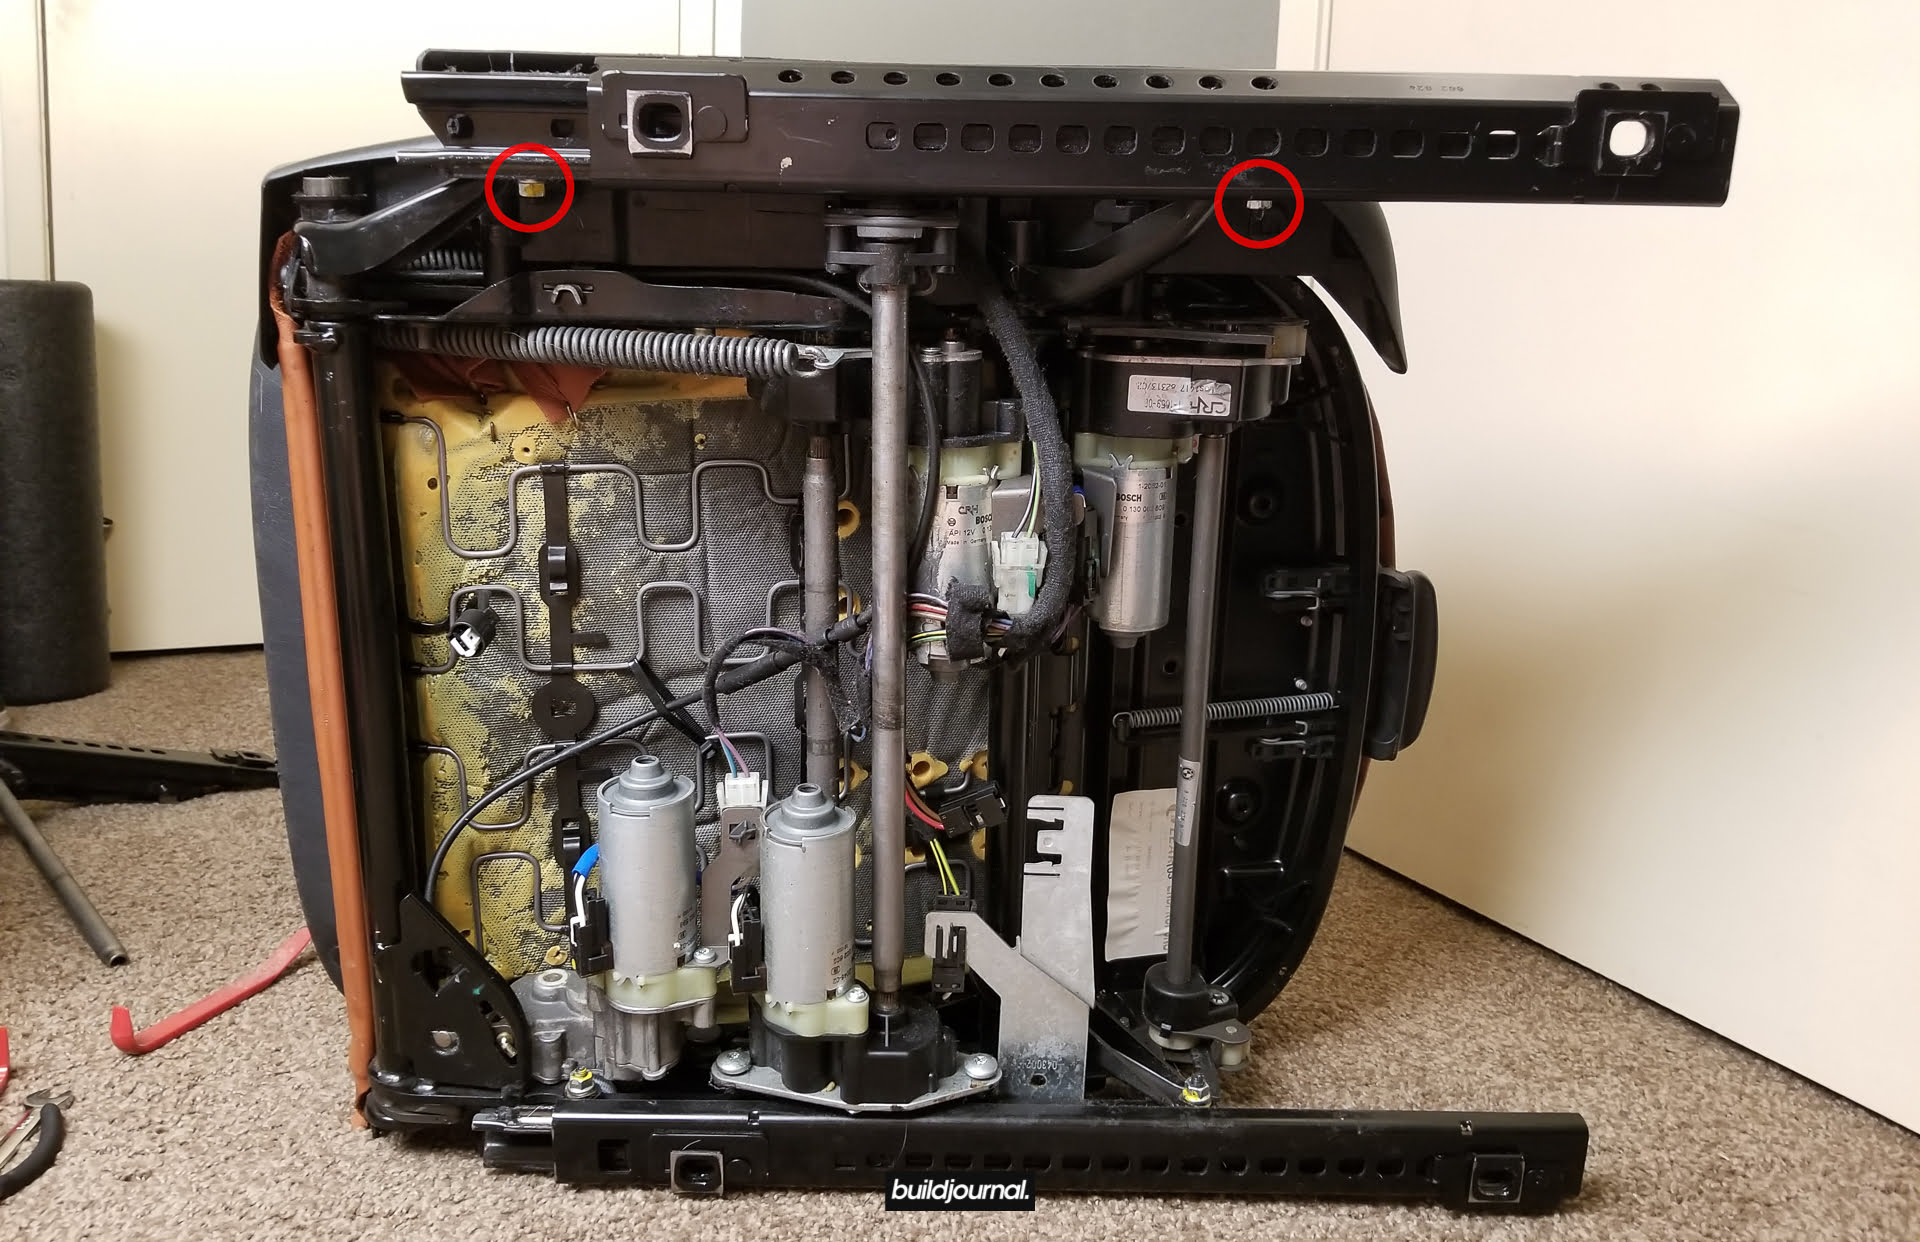
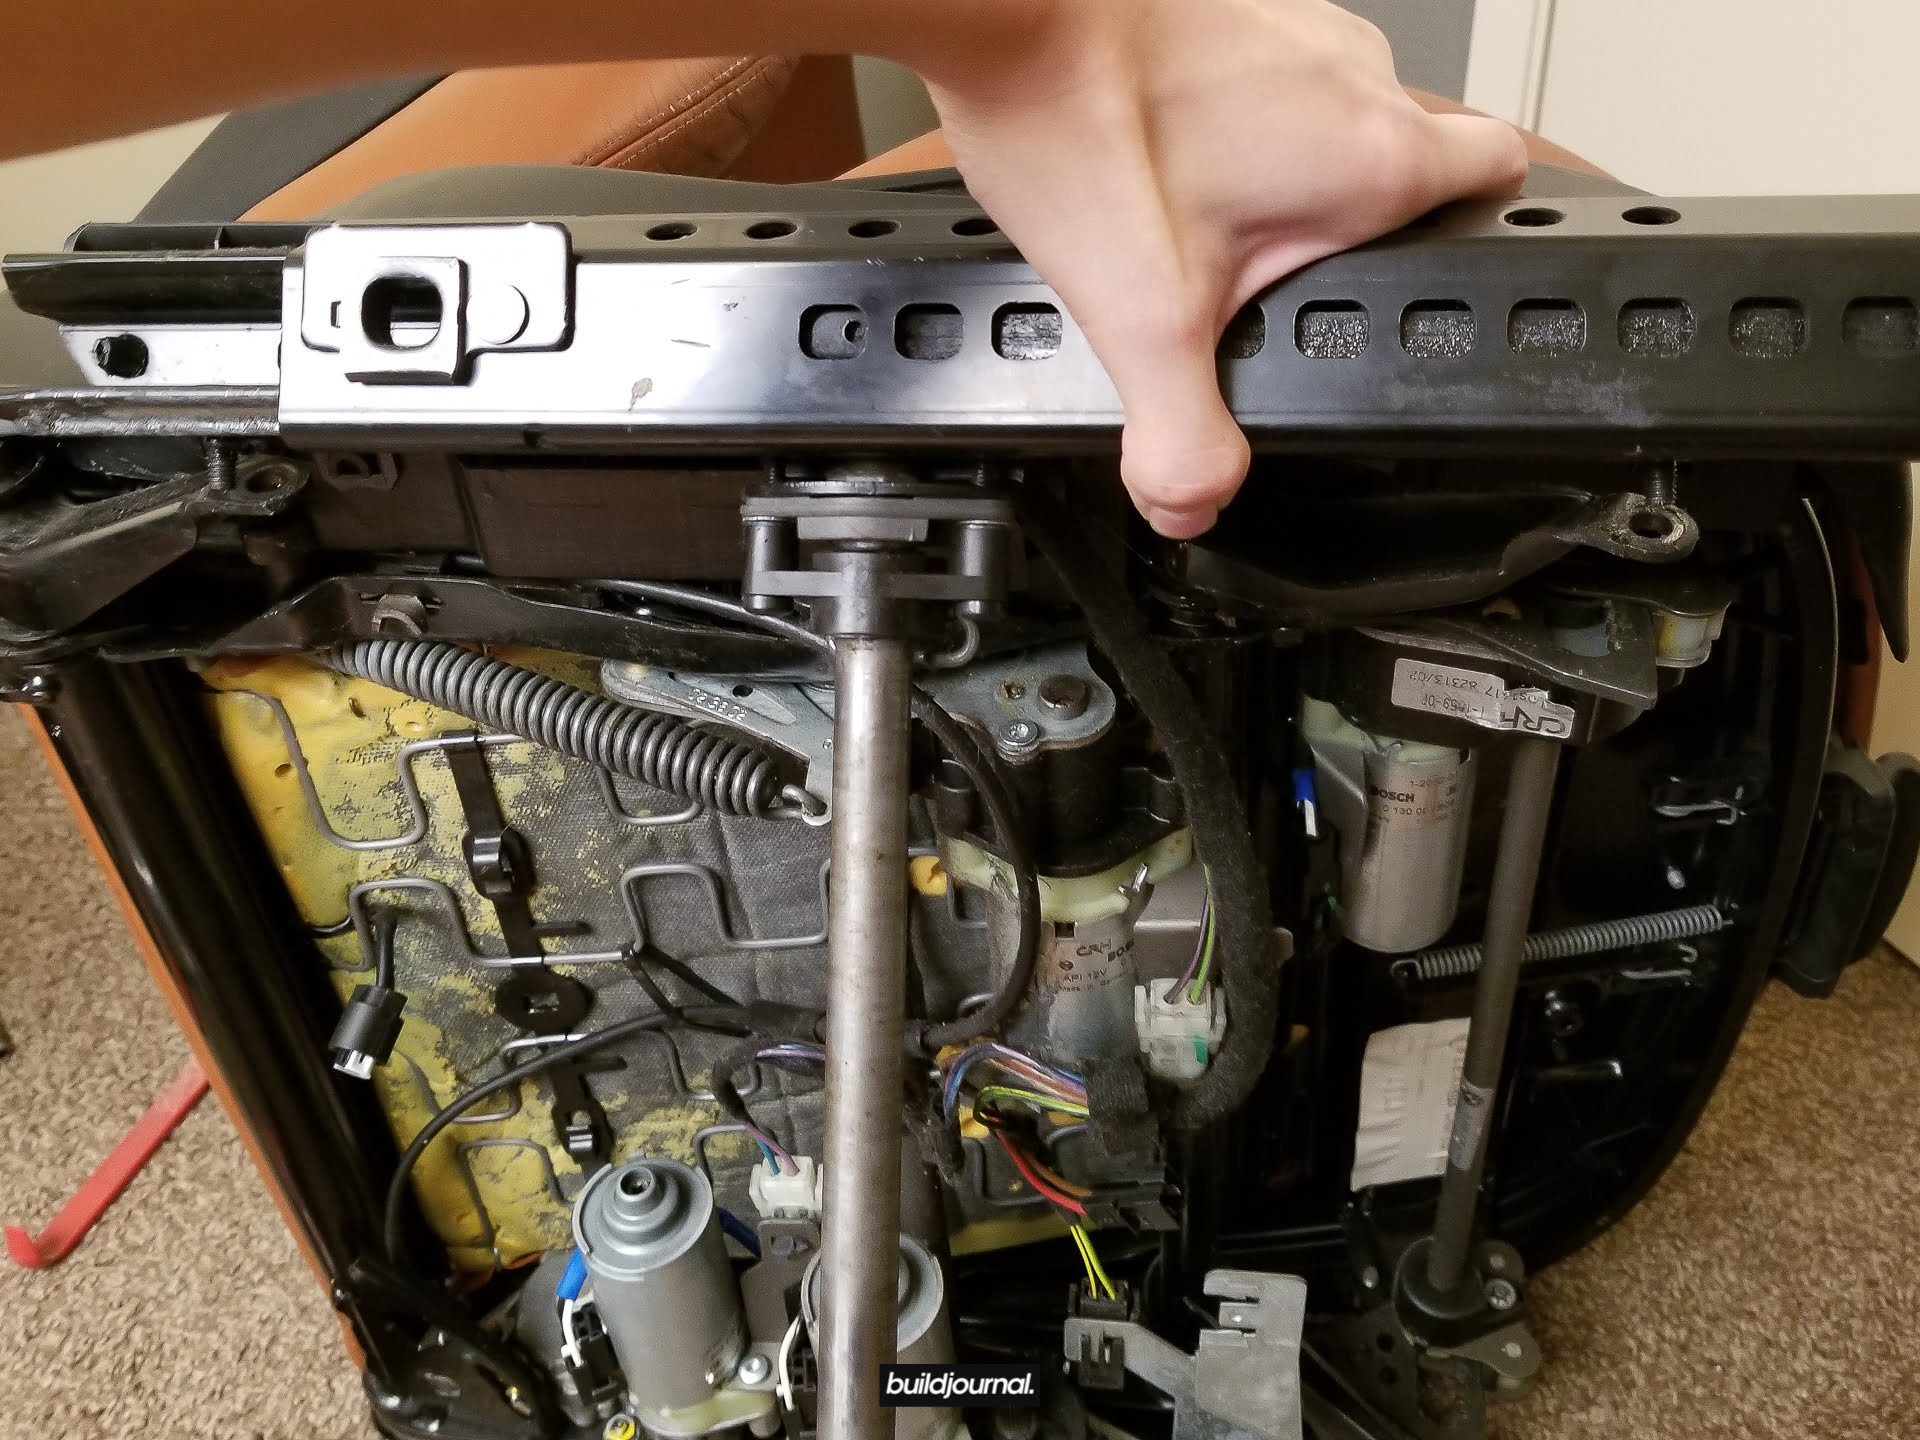
2.2 – Remove the two 10mm nuts on the seat base. Once removed, you will be able to pull off the slider. The center pole will also come out altogether like a T. (This is not a required step and the 50sKid did not do this, but I found that it was much easier to work around the seat and access the tabs/bolts.) Note that this seat is a power seat, manual seats are a little more mechanical and there are more levers, but the process is the same.
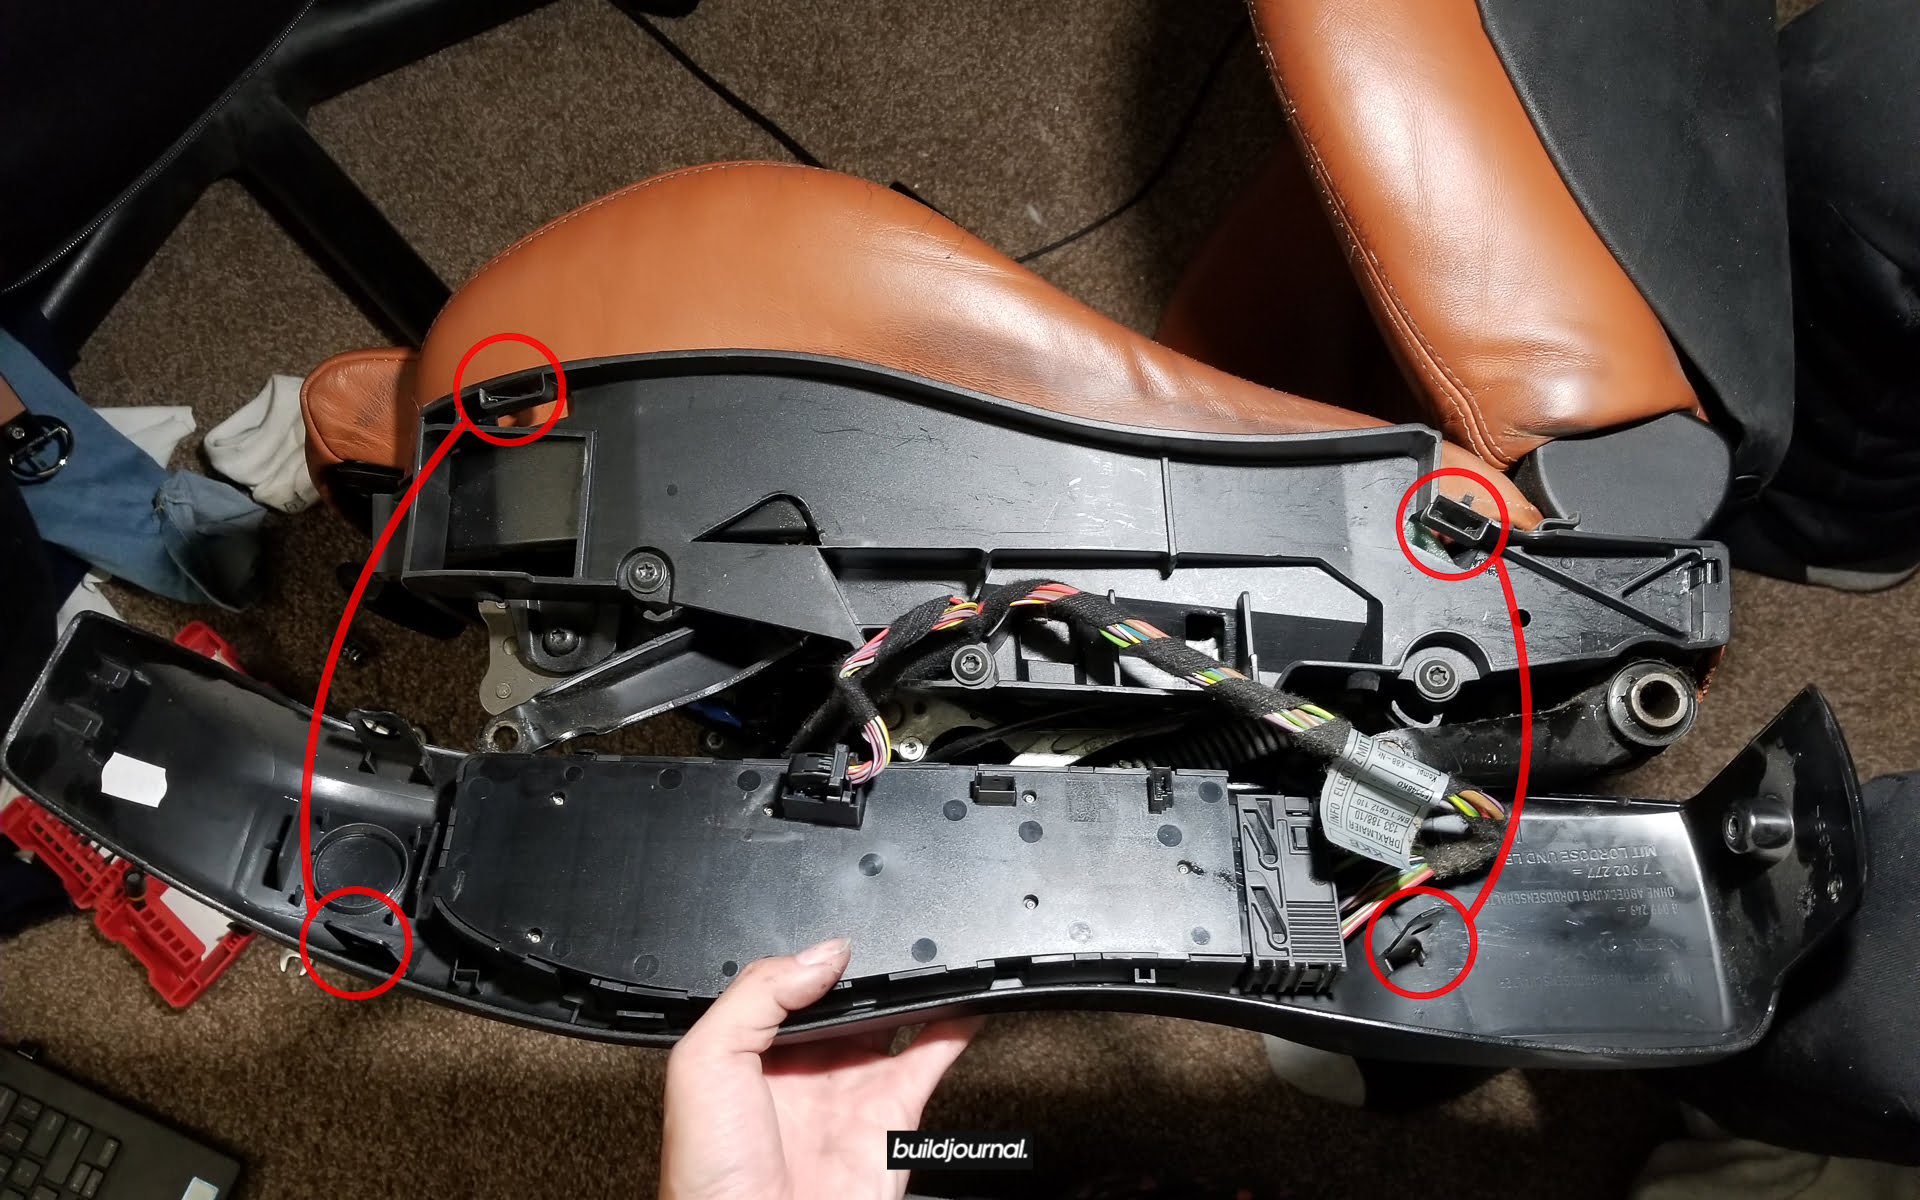
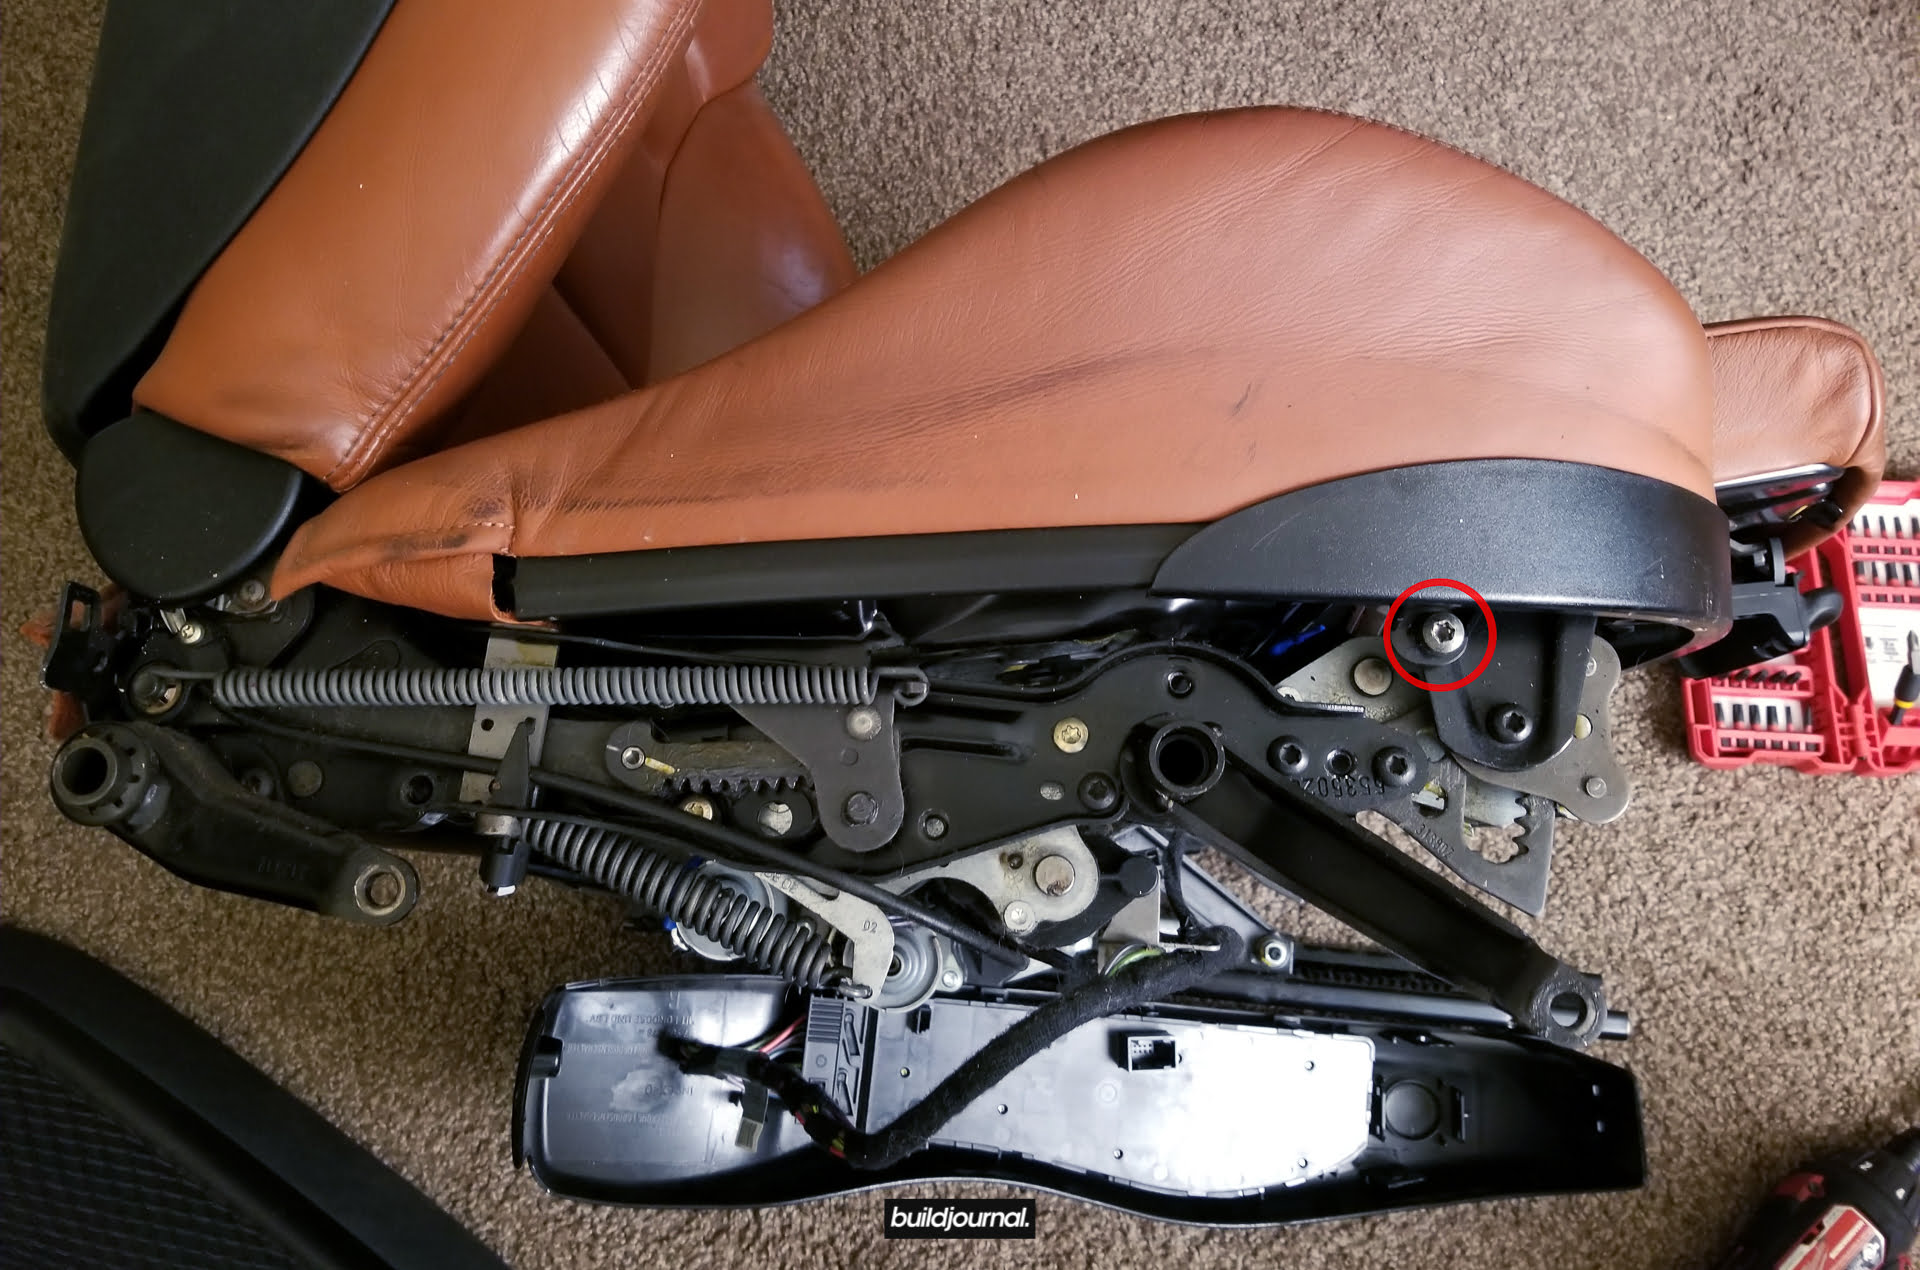
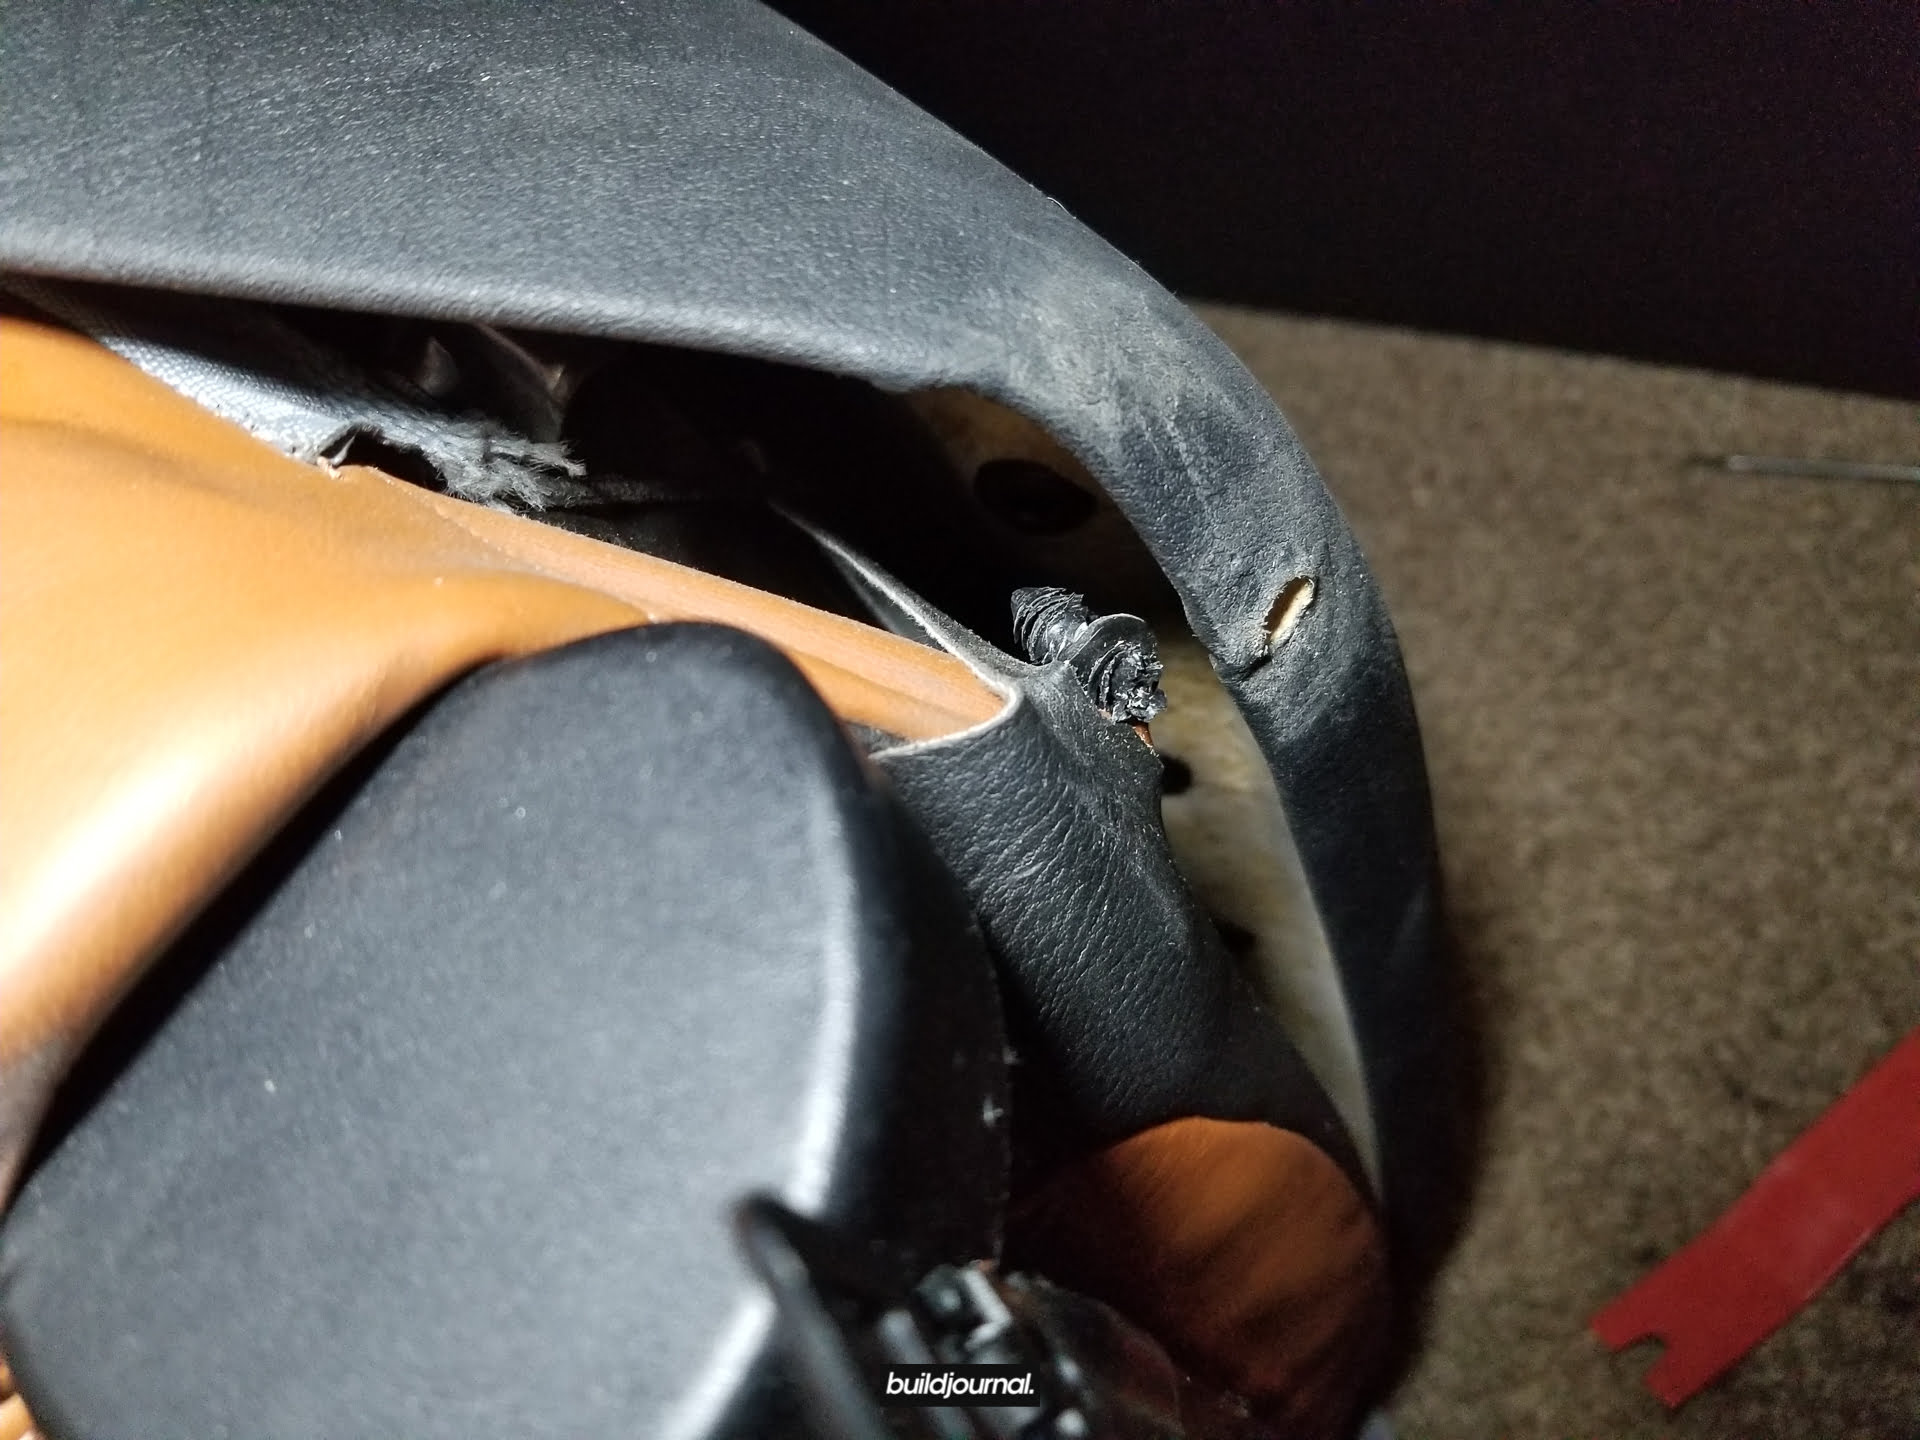
2.3 – Remove the plastic cover over the seat controls. These are held on together by a total of 6 tabs. 4 of them are fairly obvious on the bottom circled here. You can ignore the small tabs in the middle if you want – these are separate to the cover and technically don’t need to be removed.
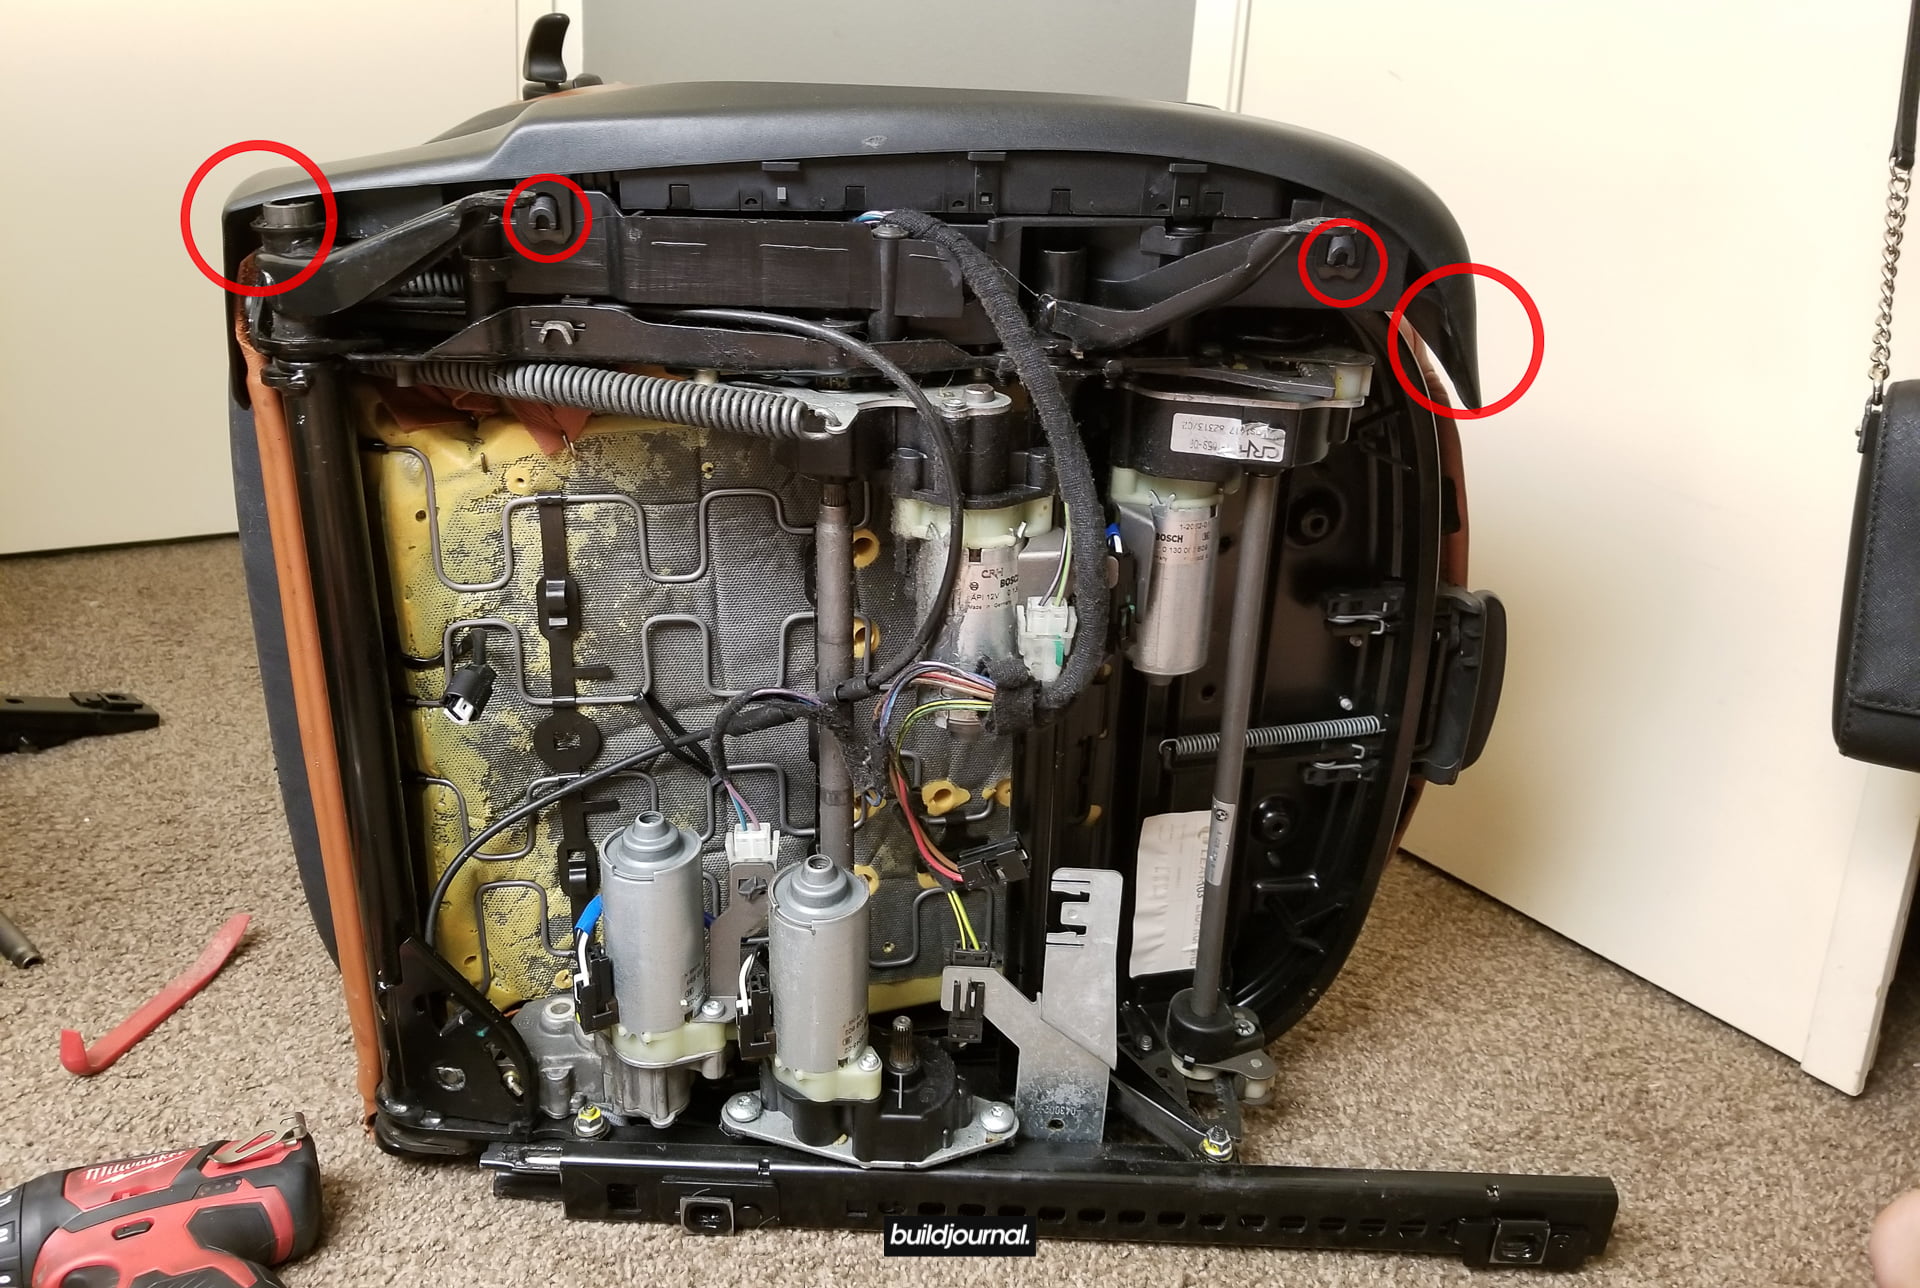
The remaining two tabs are on the top of the cover, which were the most frustrating to find and not break off. Push down on both of the tabs to release them. You may be able to access the rear one from underneath, and then unhitch the front one at the very end. Don’t do what the 50sKid did and break it – watch how he broke it @ 0:39 (Video) and then he realizes it later (Video). The area he broke is circled below.
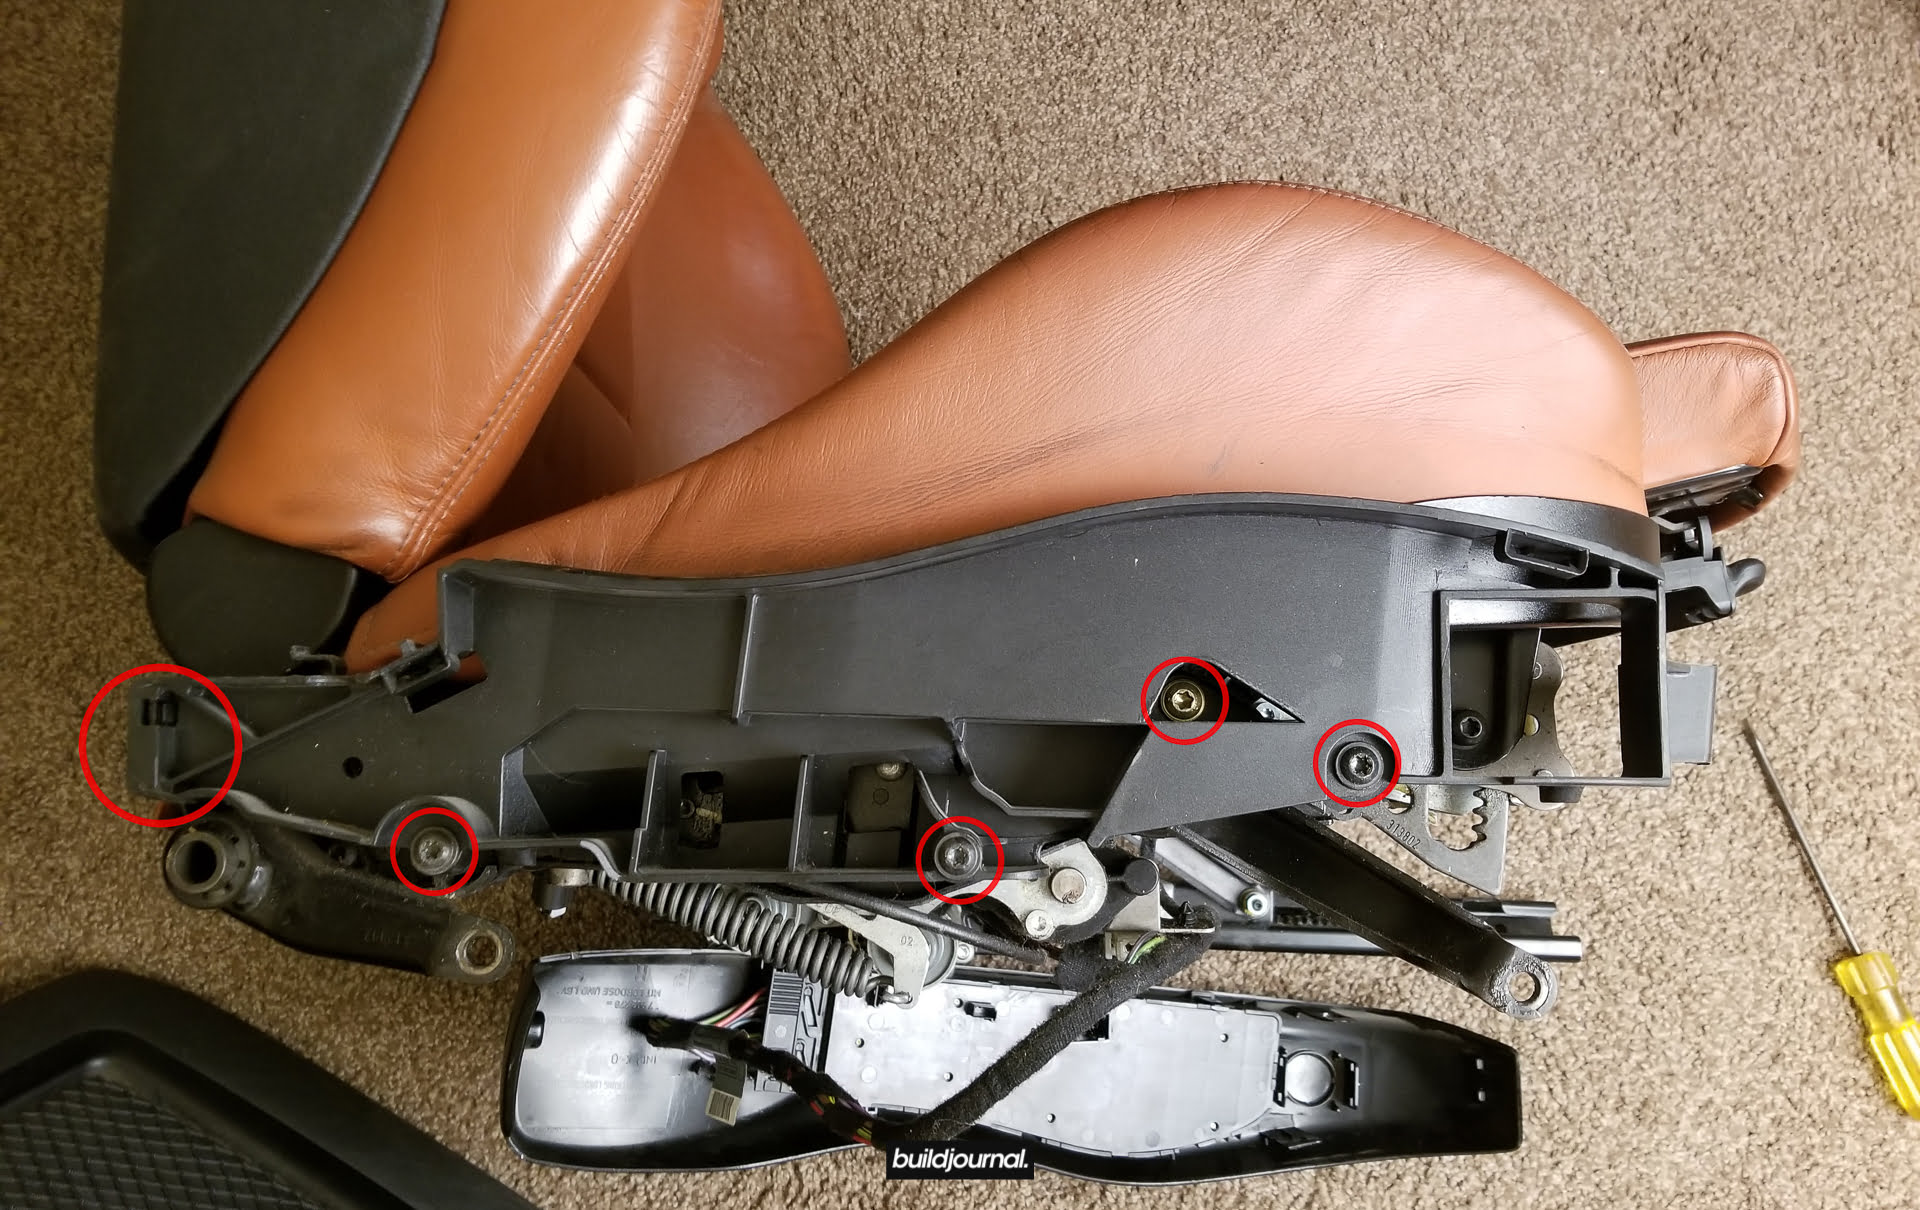
2.4 – Remove the four T20 torx bolts below and pull off this plastic cover. You may need to pull a little harder in the rear clip to make it come off. (Video)
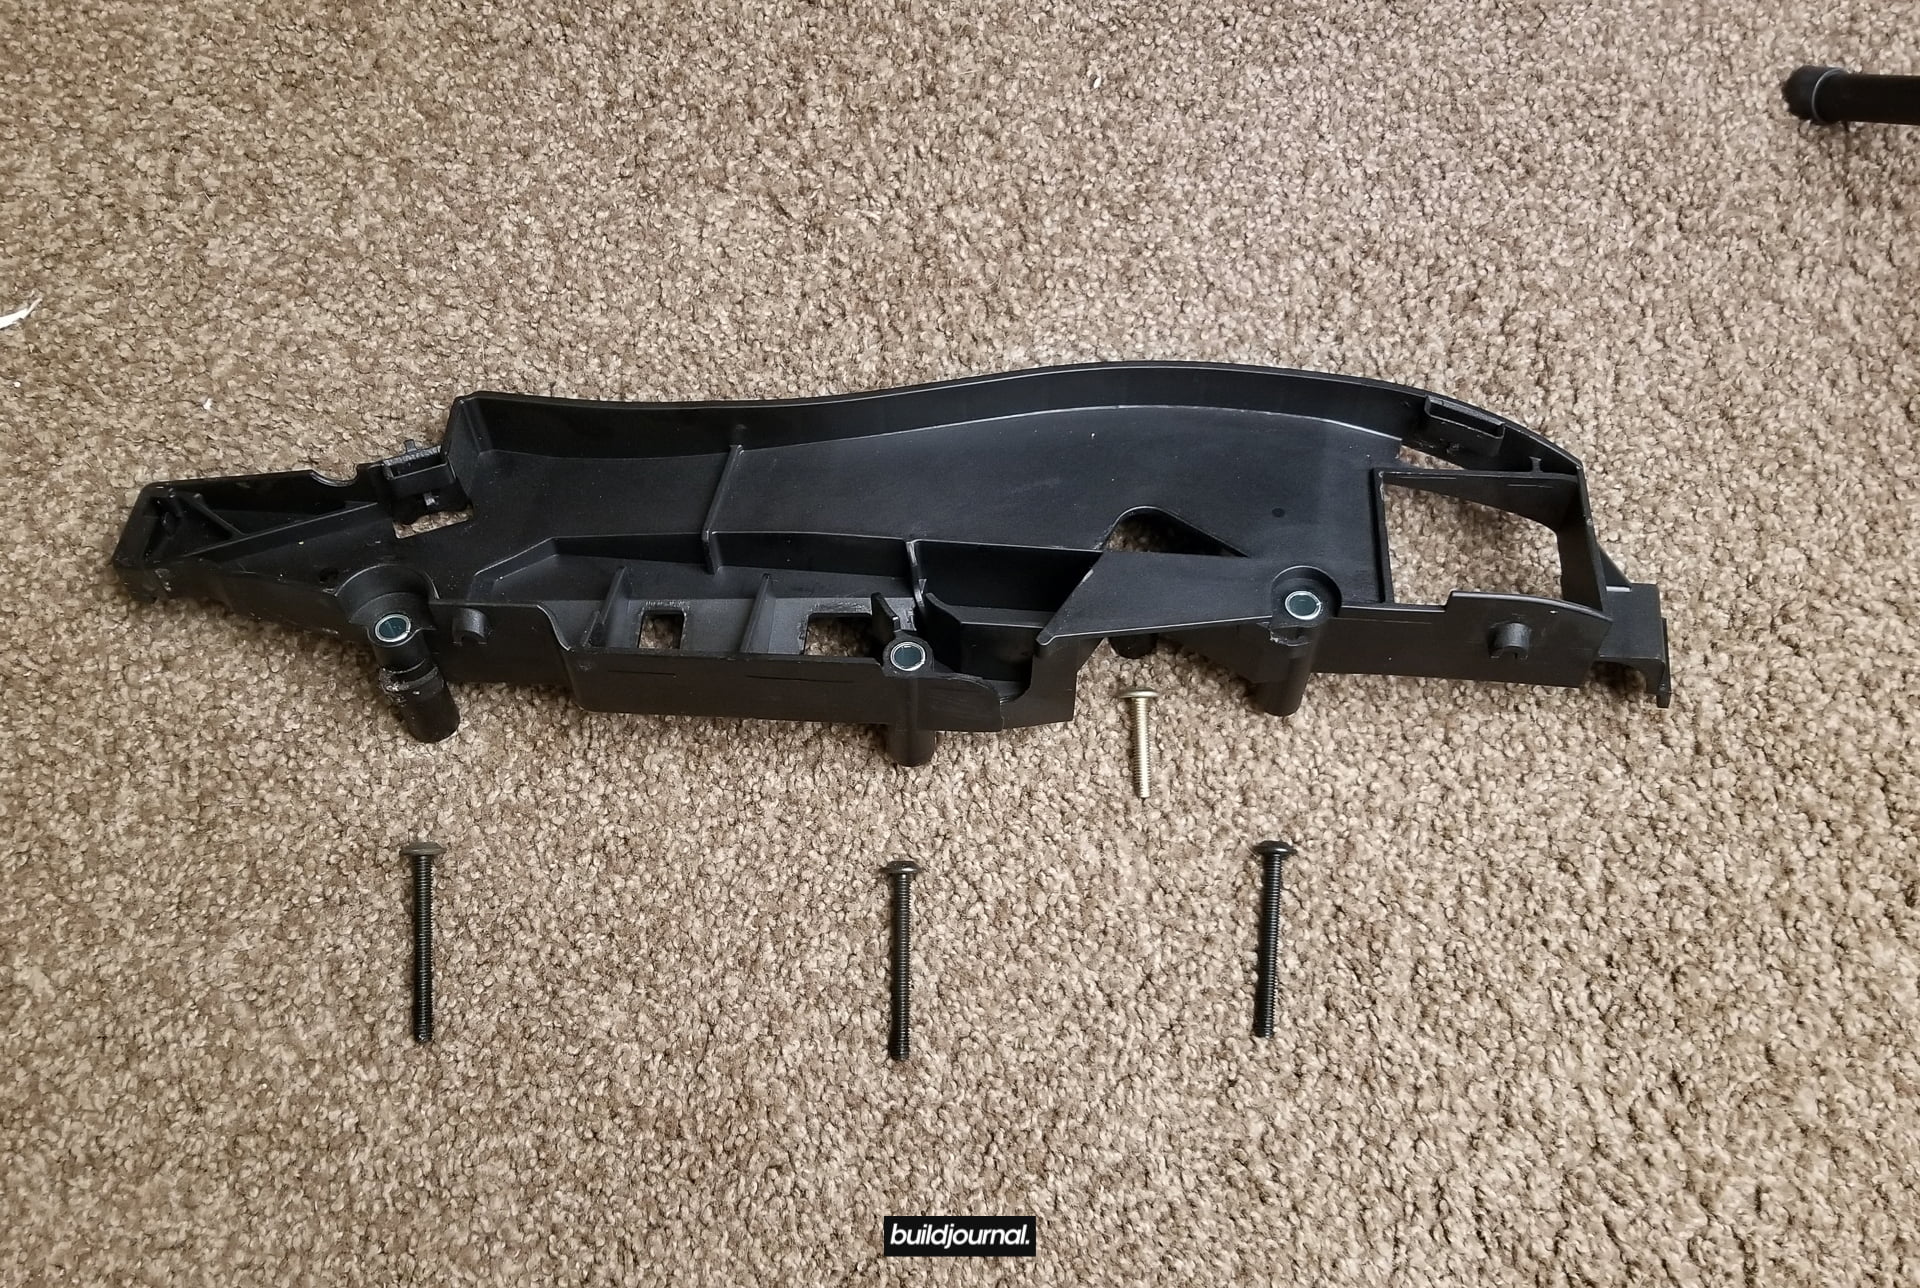
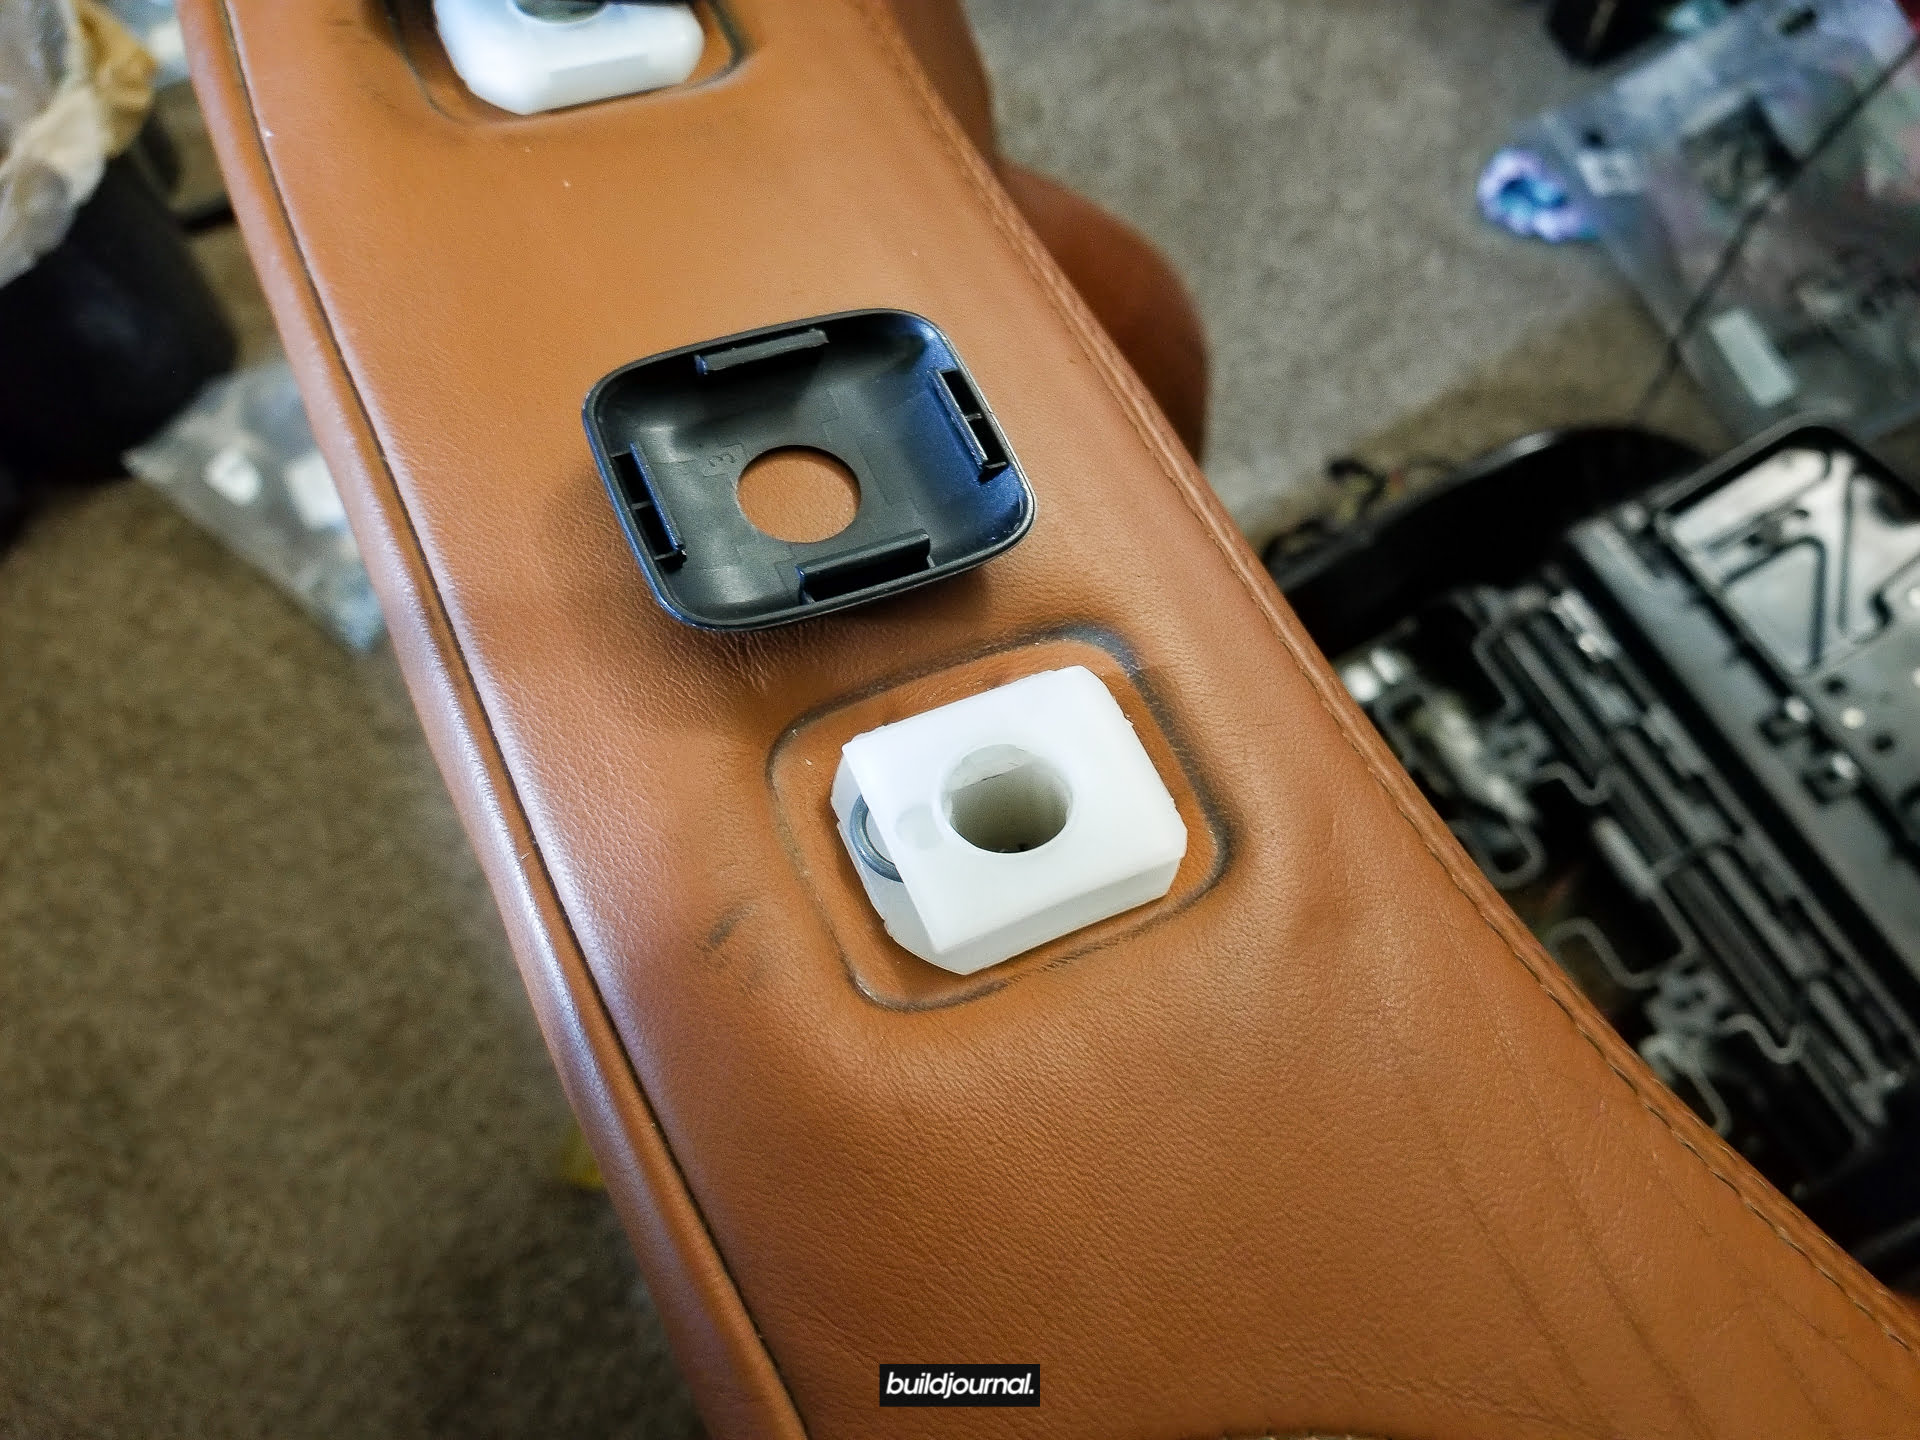
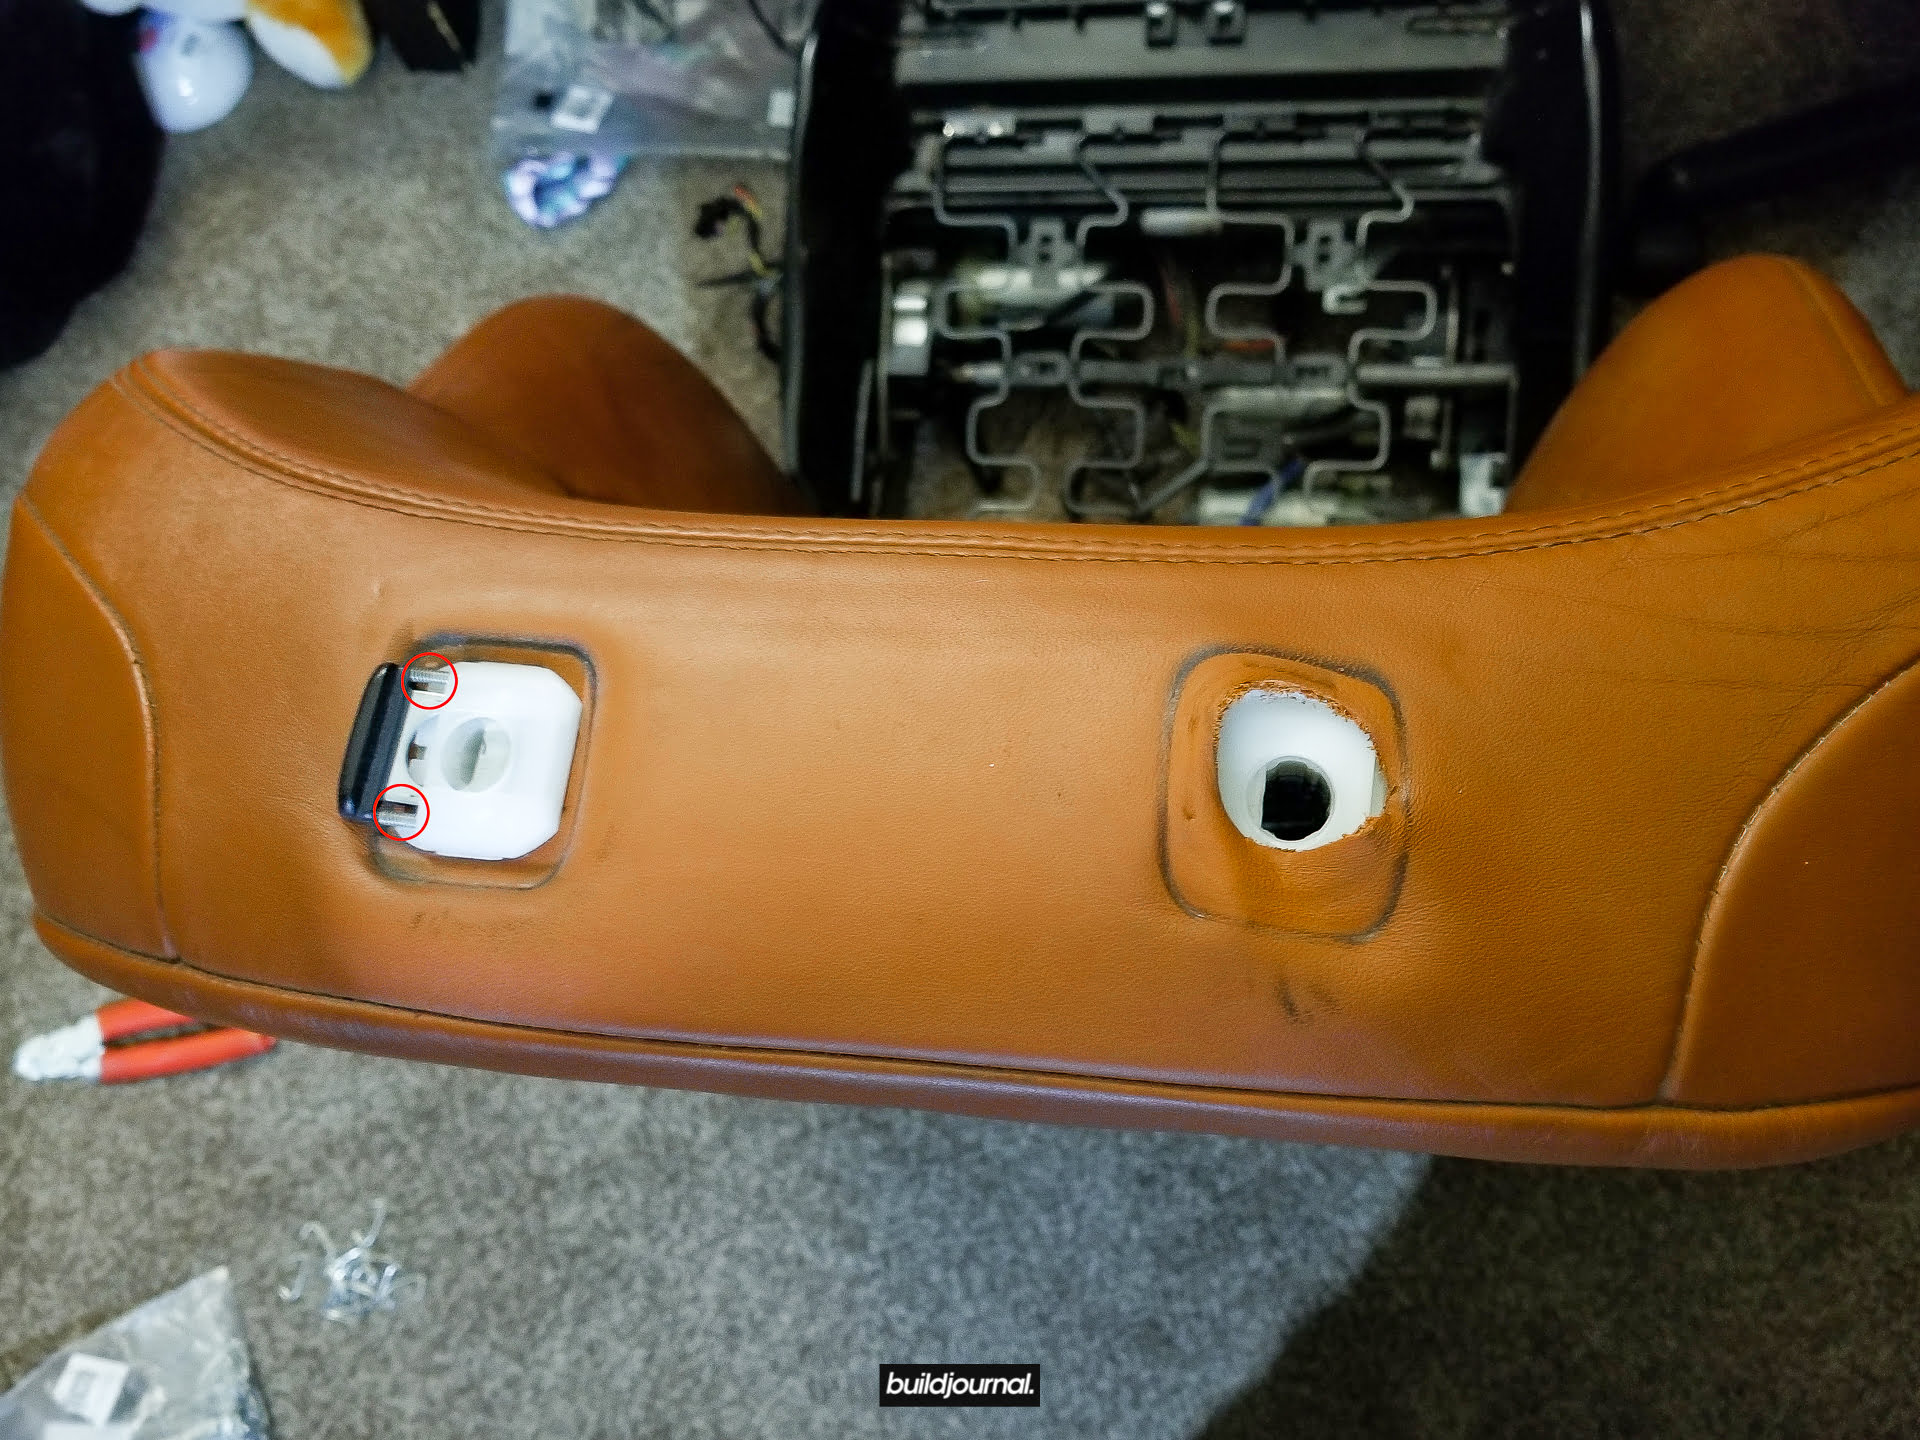
2.6 – Use a T30 torx to remove the seat trim bolt on both sides. Then push down on plastic inserts to make them unlatch. (Video)
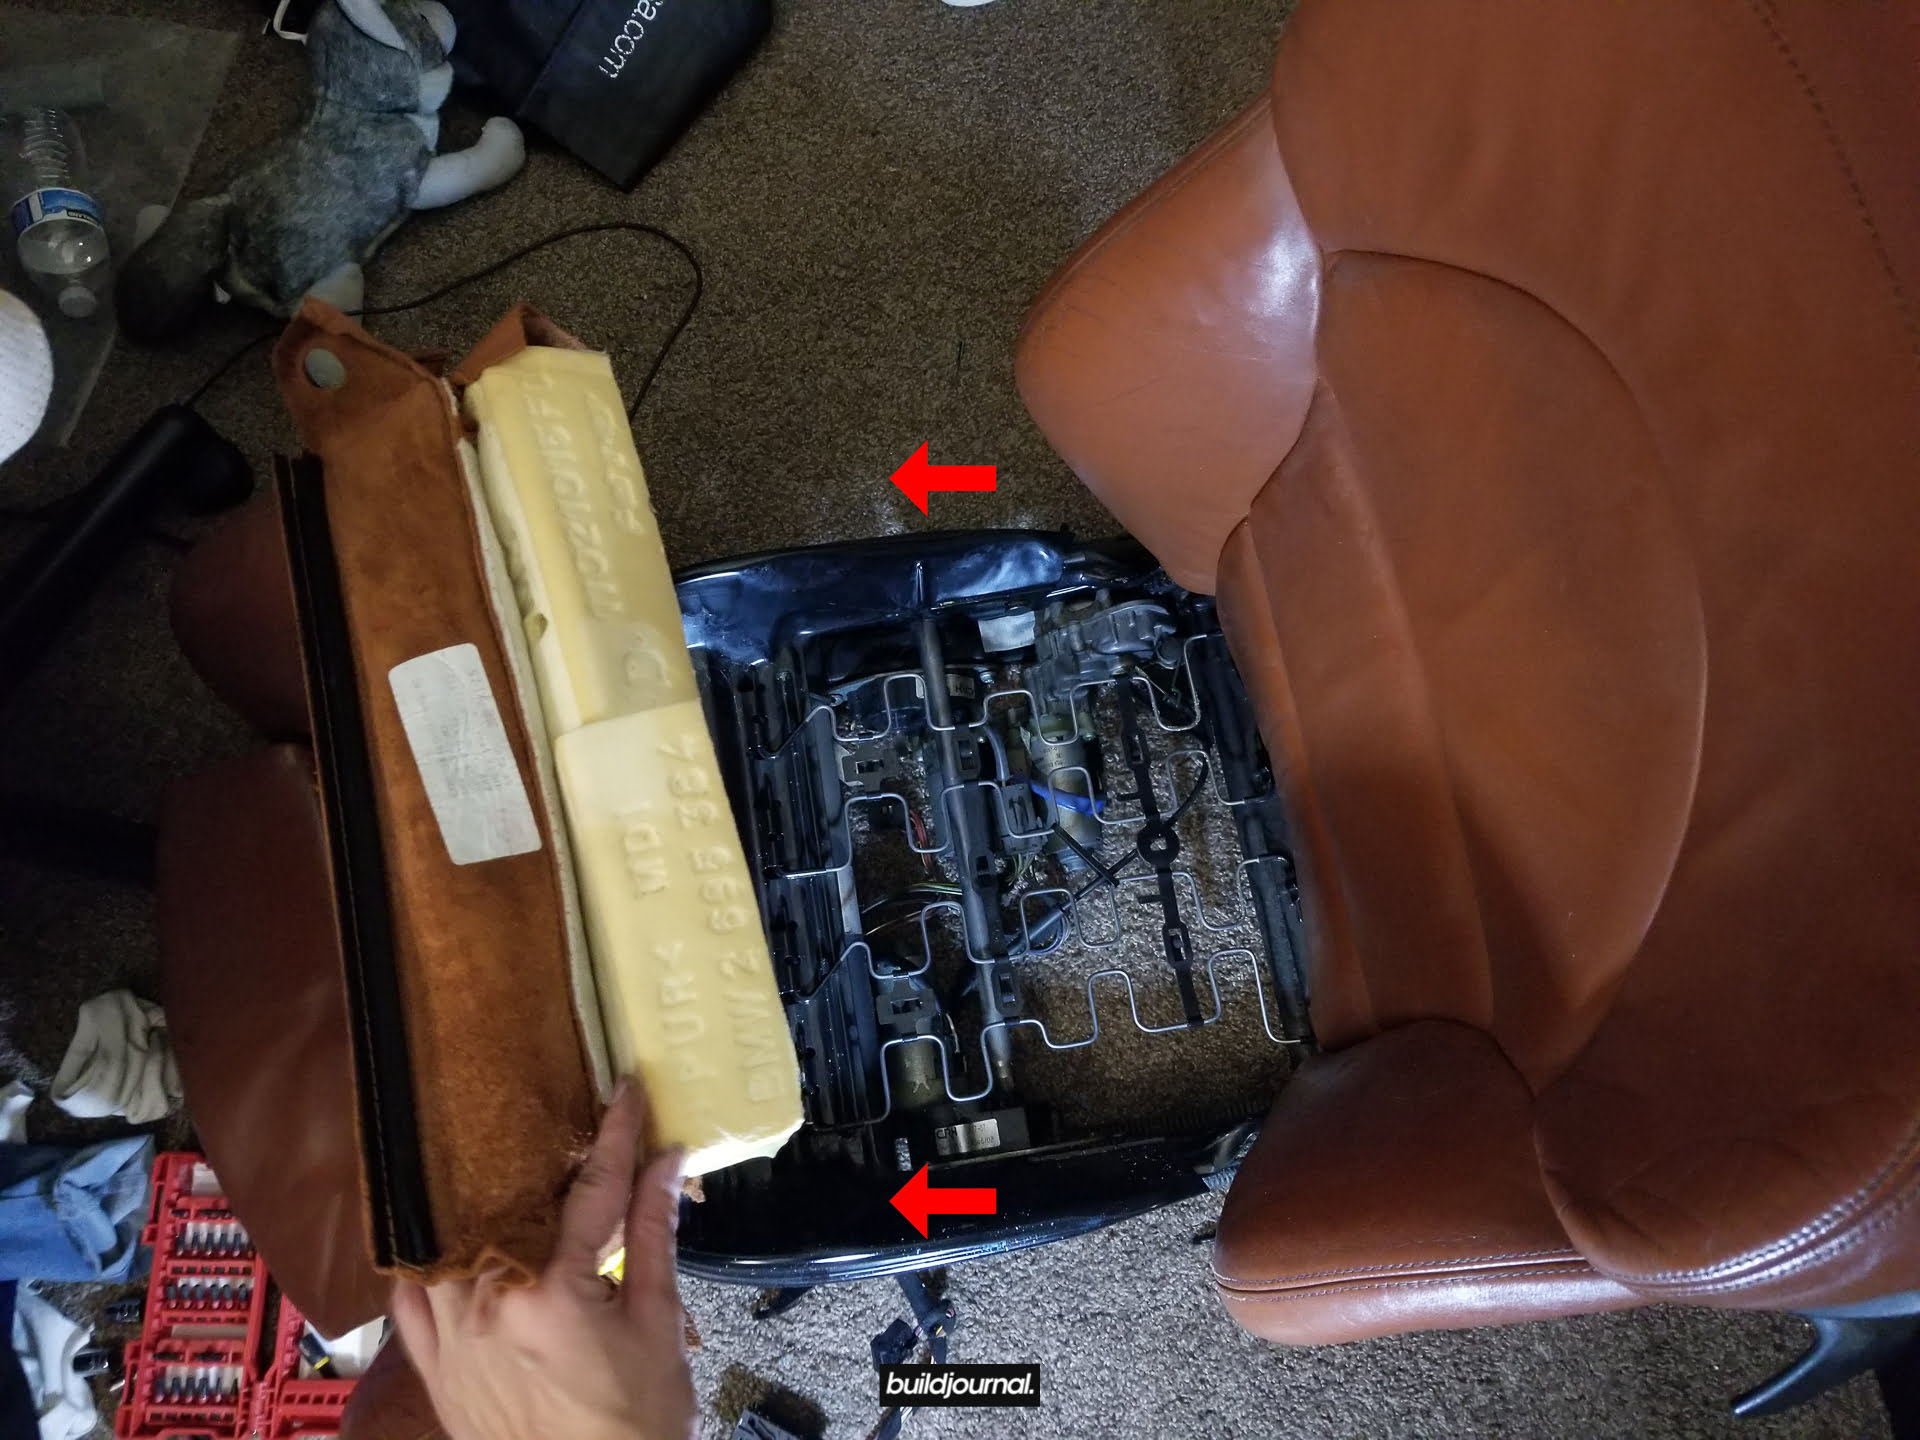
3. Remove the bottom foam assembly
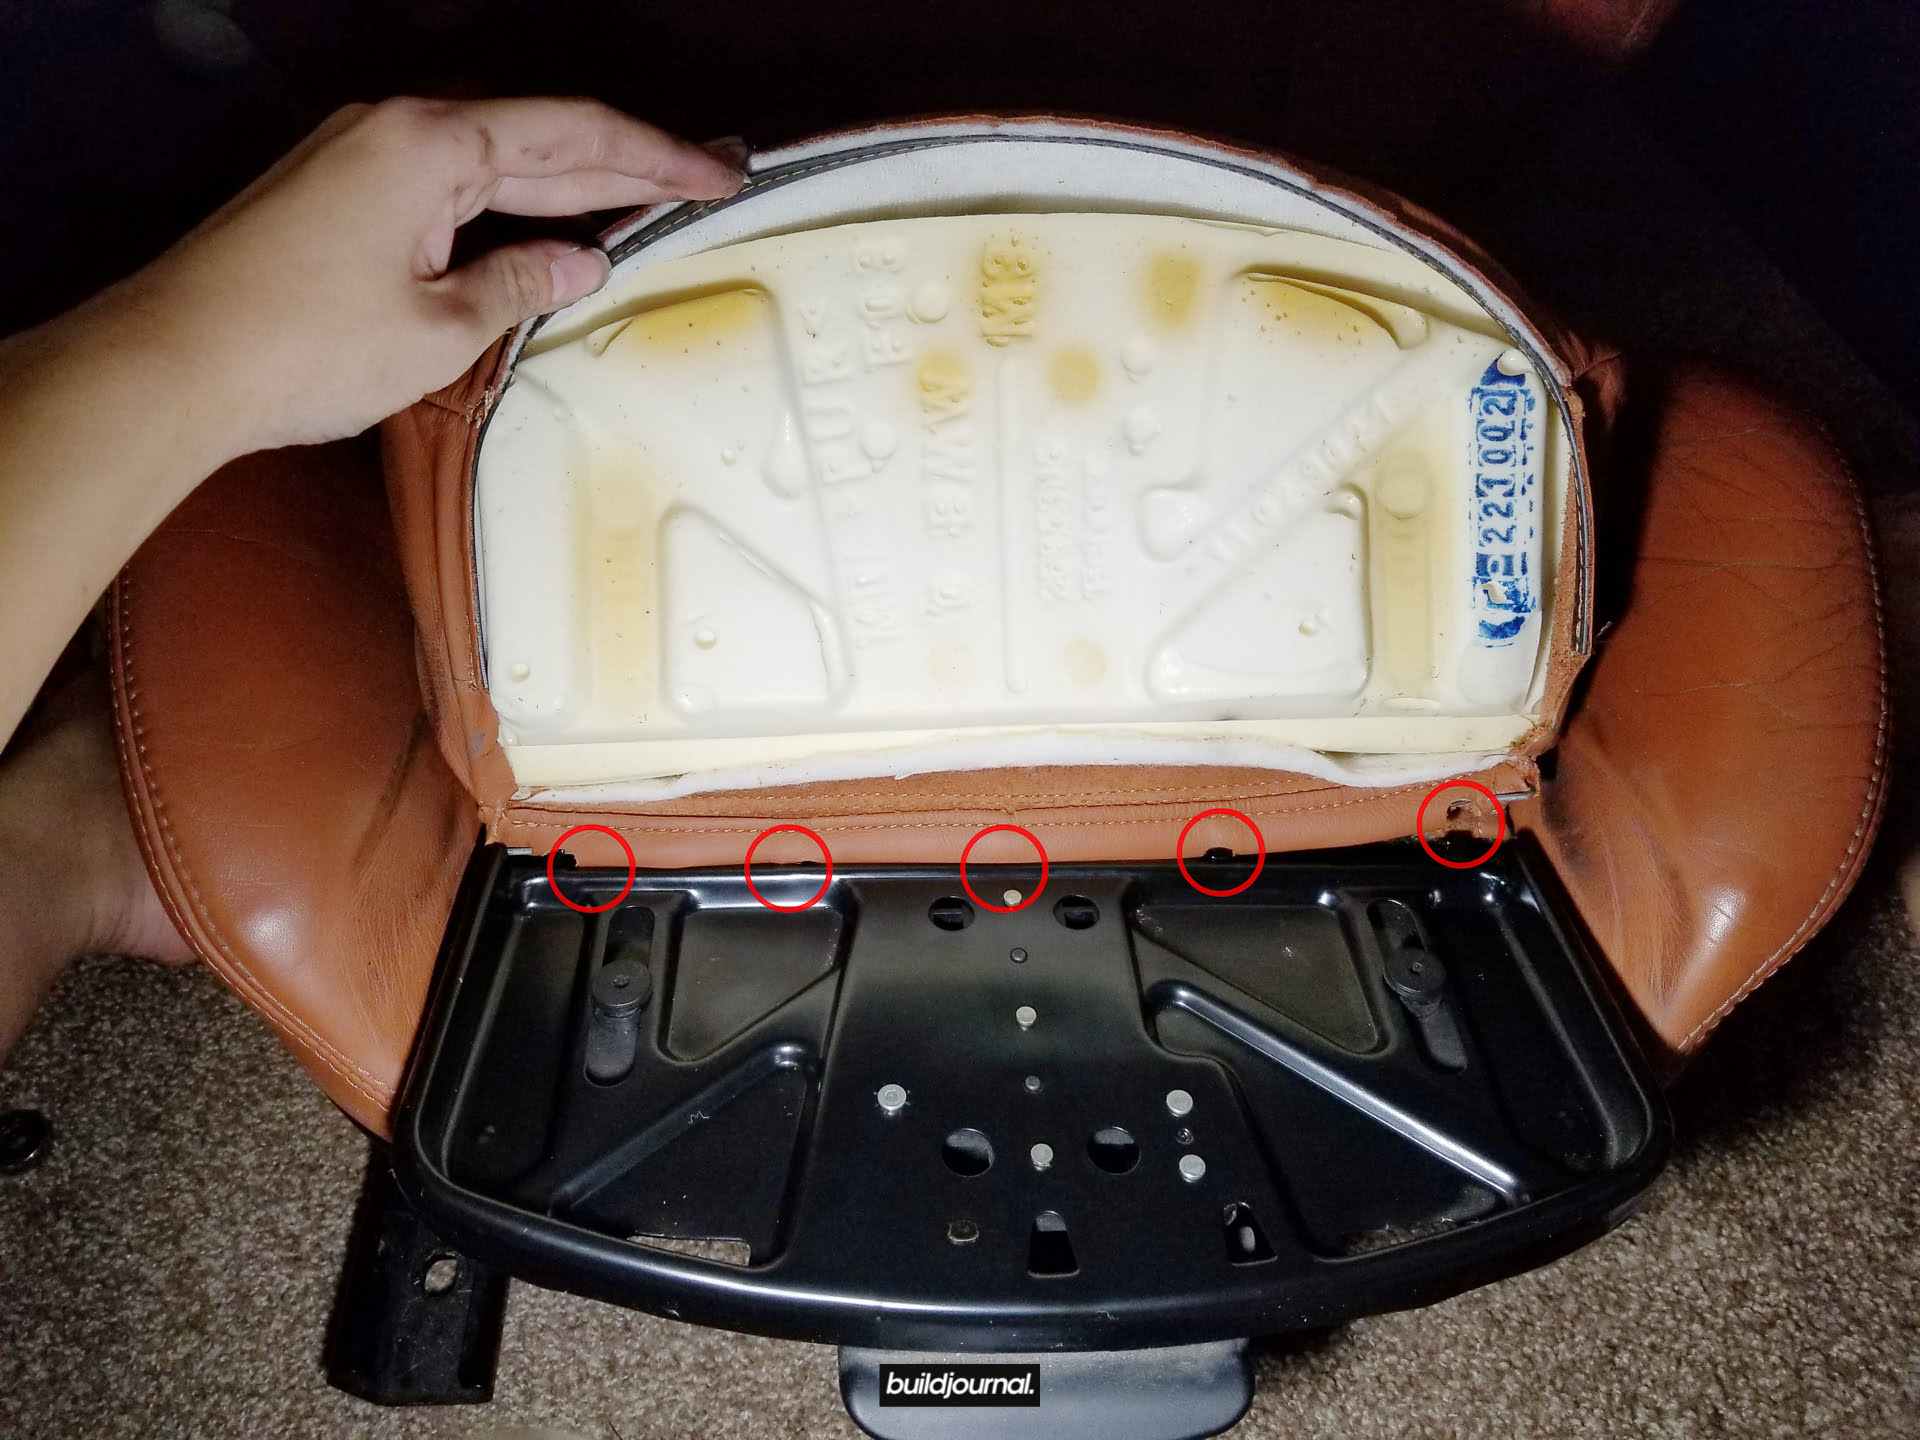
3.1 – Take a flathead and bend these metal tabs down to allow space to pull the leather out. (Video)
3.2 – Use the flathead to pry the plastic lining of the leather out. (Video) Once you get one part of the plastic lining out, you can just use your hands to pull the rest straight out. Don’t worry, that plastic lining is pretty flexible and won’t crack. (Video)
3.3 – Once all the lining is pulled out, the bottom thigh rest foam should be able to flap back. Push down and back on the center wire to release the foam from the hook. (Video)
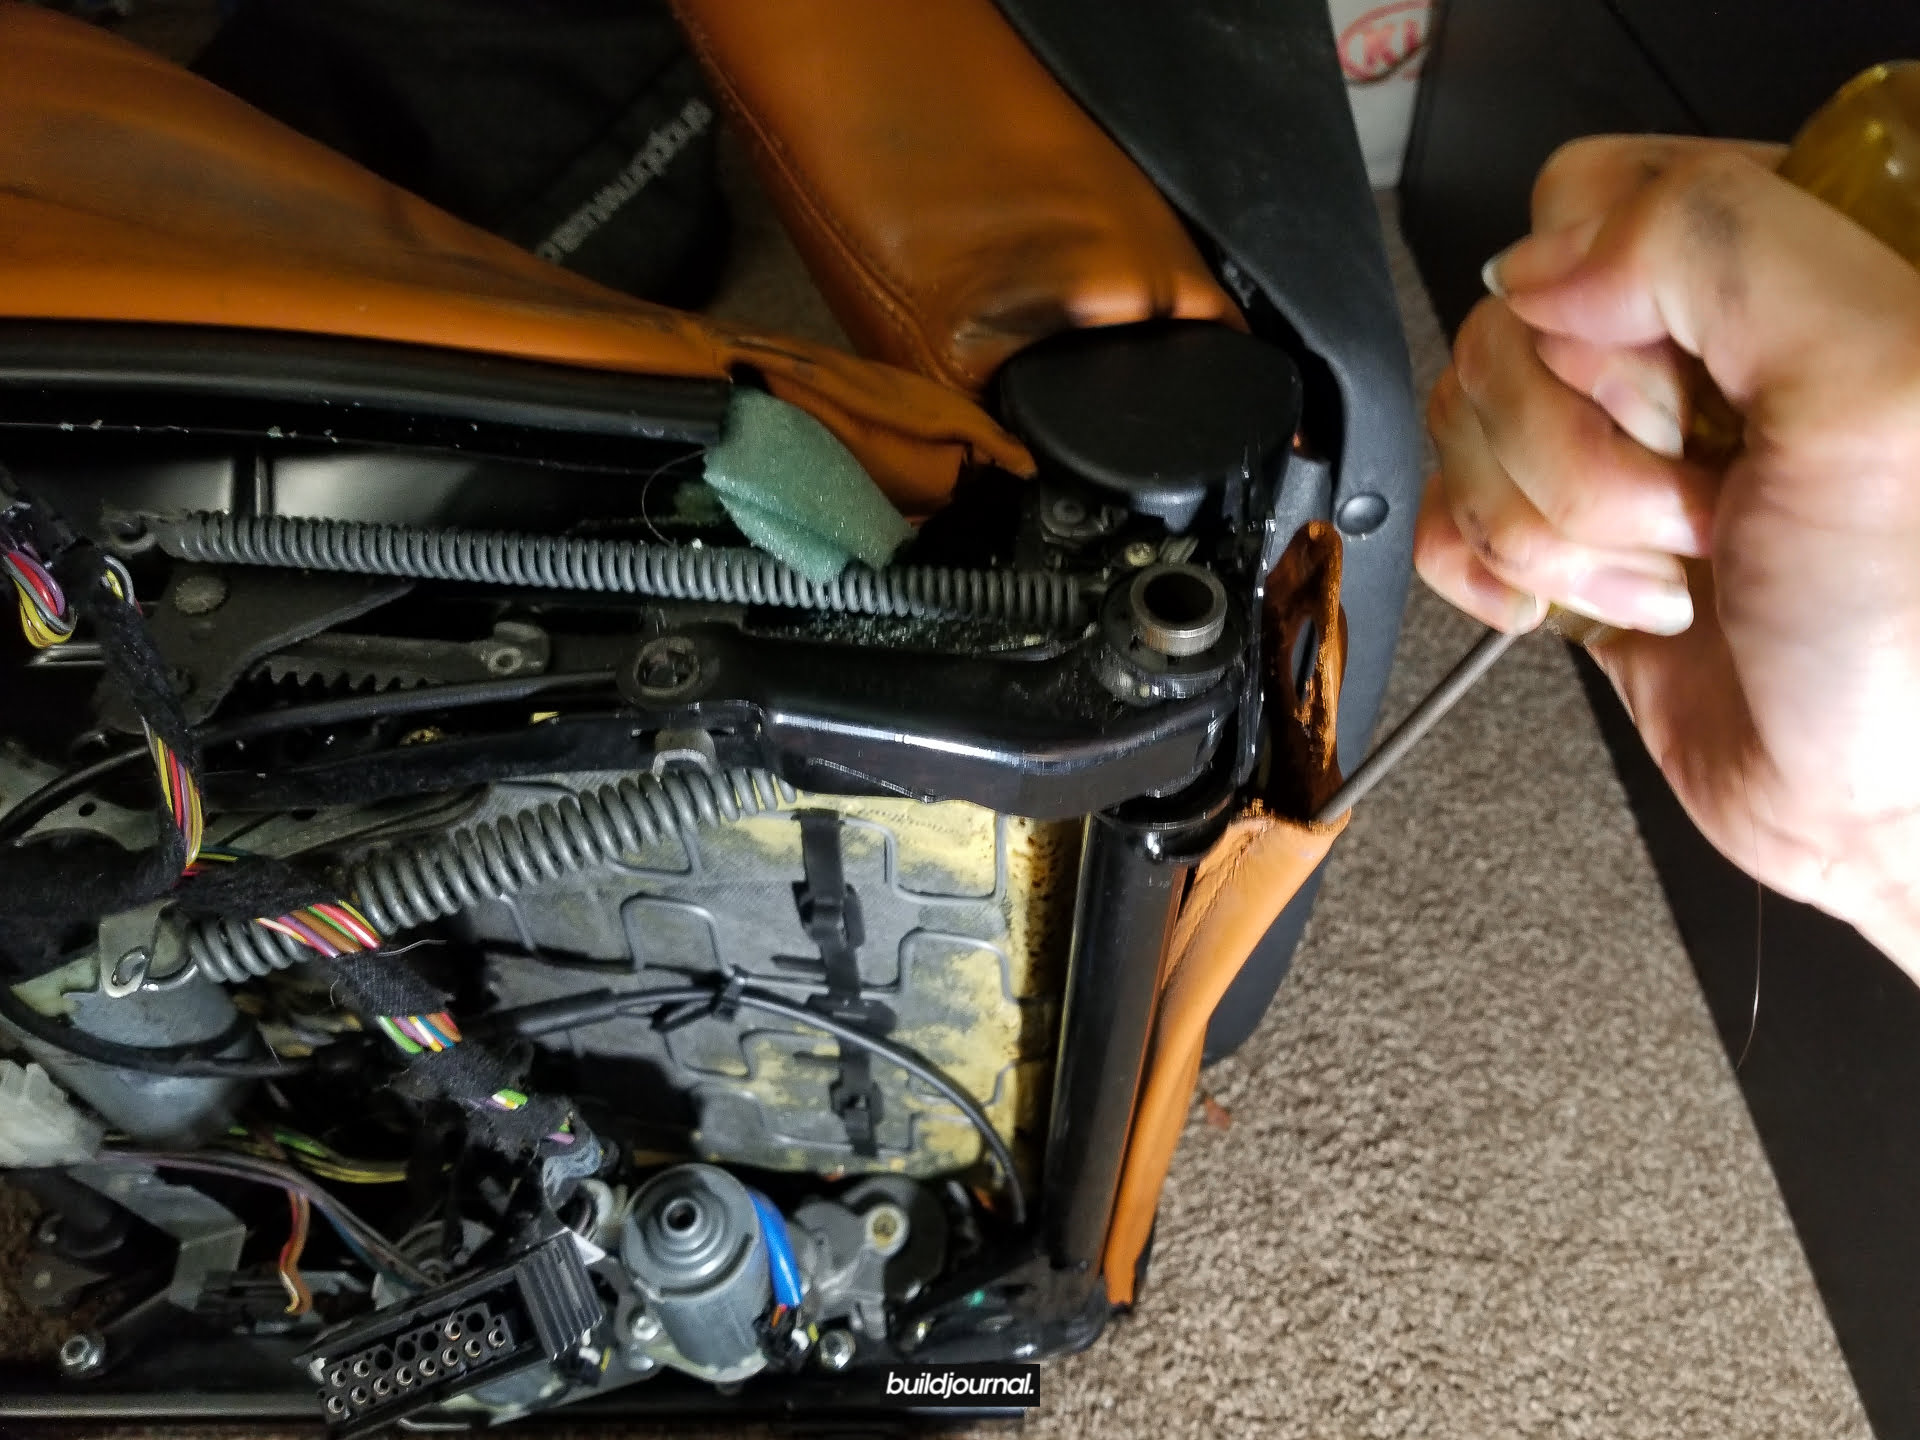
3.4 – To remove the remainder of the bottom foam assembly on the back, put a flathead between the seat frame and trim and pull out towards yourself. Once you get a part of it out, you can use your hands to pull the rest. Note that some of the foam is slightly stuck on to the frame, use your hands to slowly peel it off as it can rip easily. Then your bottom foam assembly is ready to be pulled out. (Video)
3.5 – Tuck in the back pieces through to the front under the bottom part of the backrest. If you have manual seats, you can tilt the seat forward to give yourself some more space to push the leather and foam out. From there, you can pull the whole bottom assembly off. (Video)
3.6 – If you have heated seats, disconnect the wire (don’t cut it like 50sKid did here). My seats were not heated on either set, so unfortunately I don’t have instructions on this part.
3.7 – Note that the bottom foam assembly is the same for both Driver and Passenger side, so you can interchange them if your driver side is getting worn. You can also find a better condition one on Ebay and swap them out.
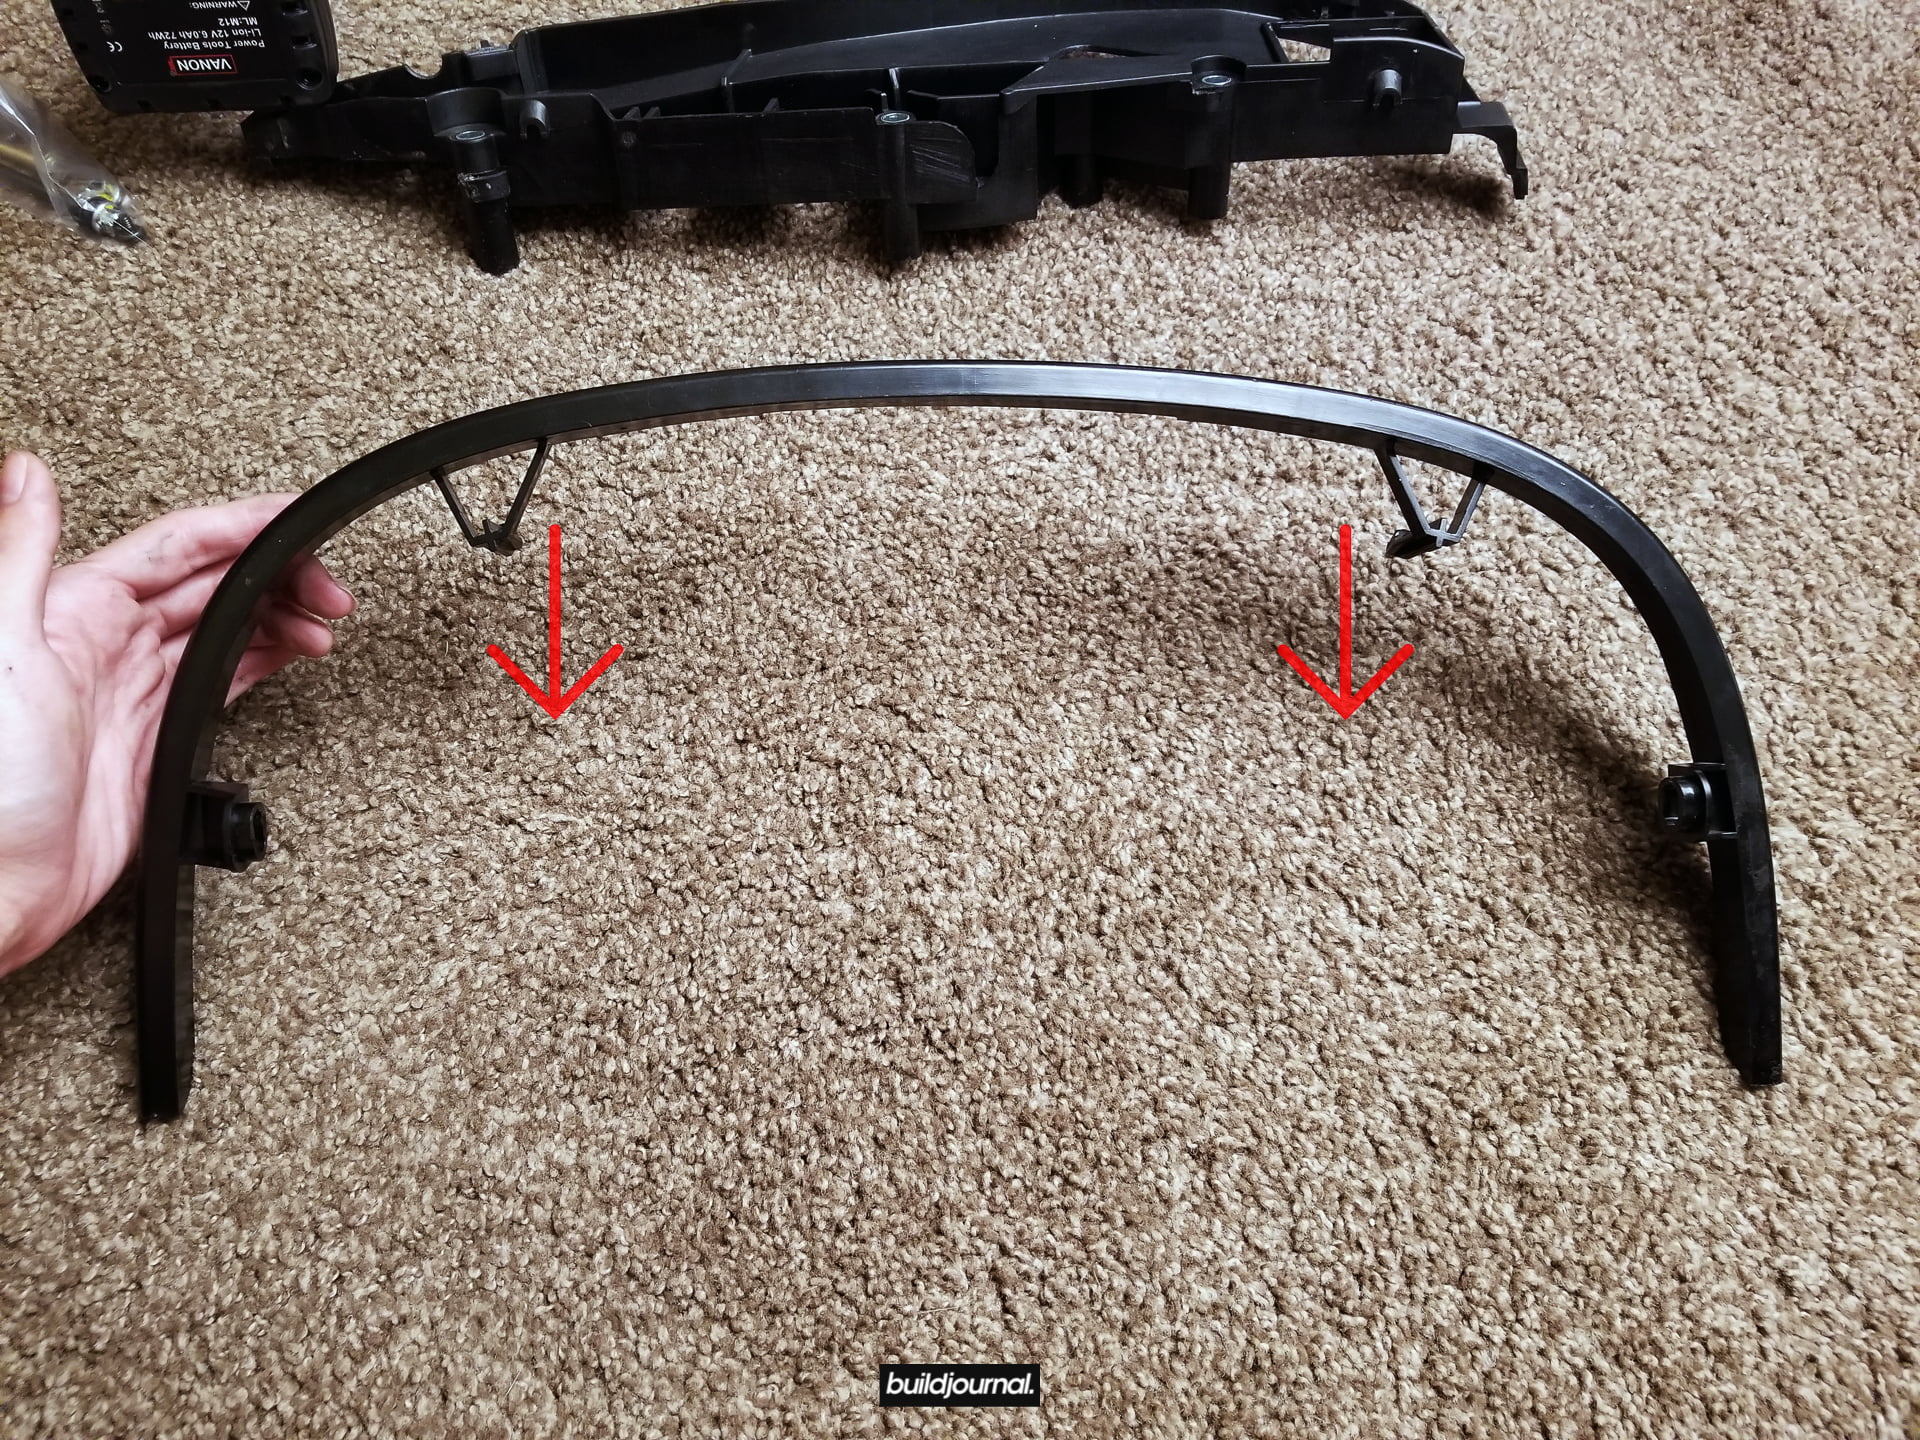
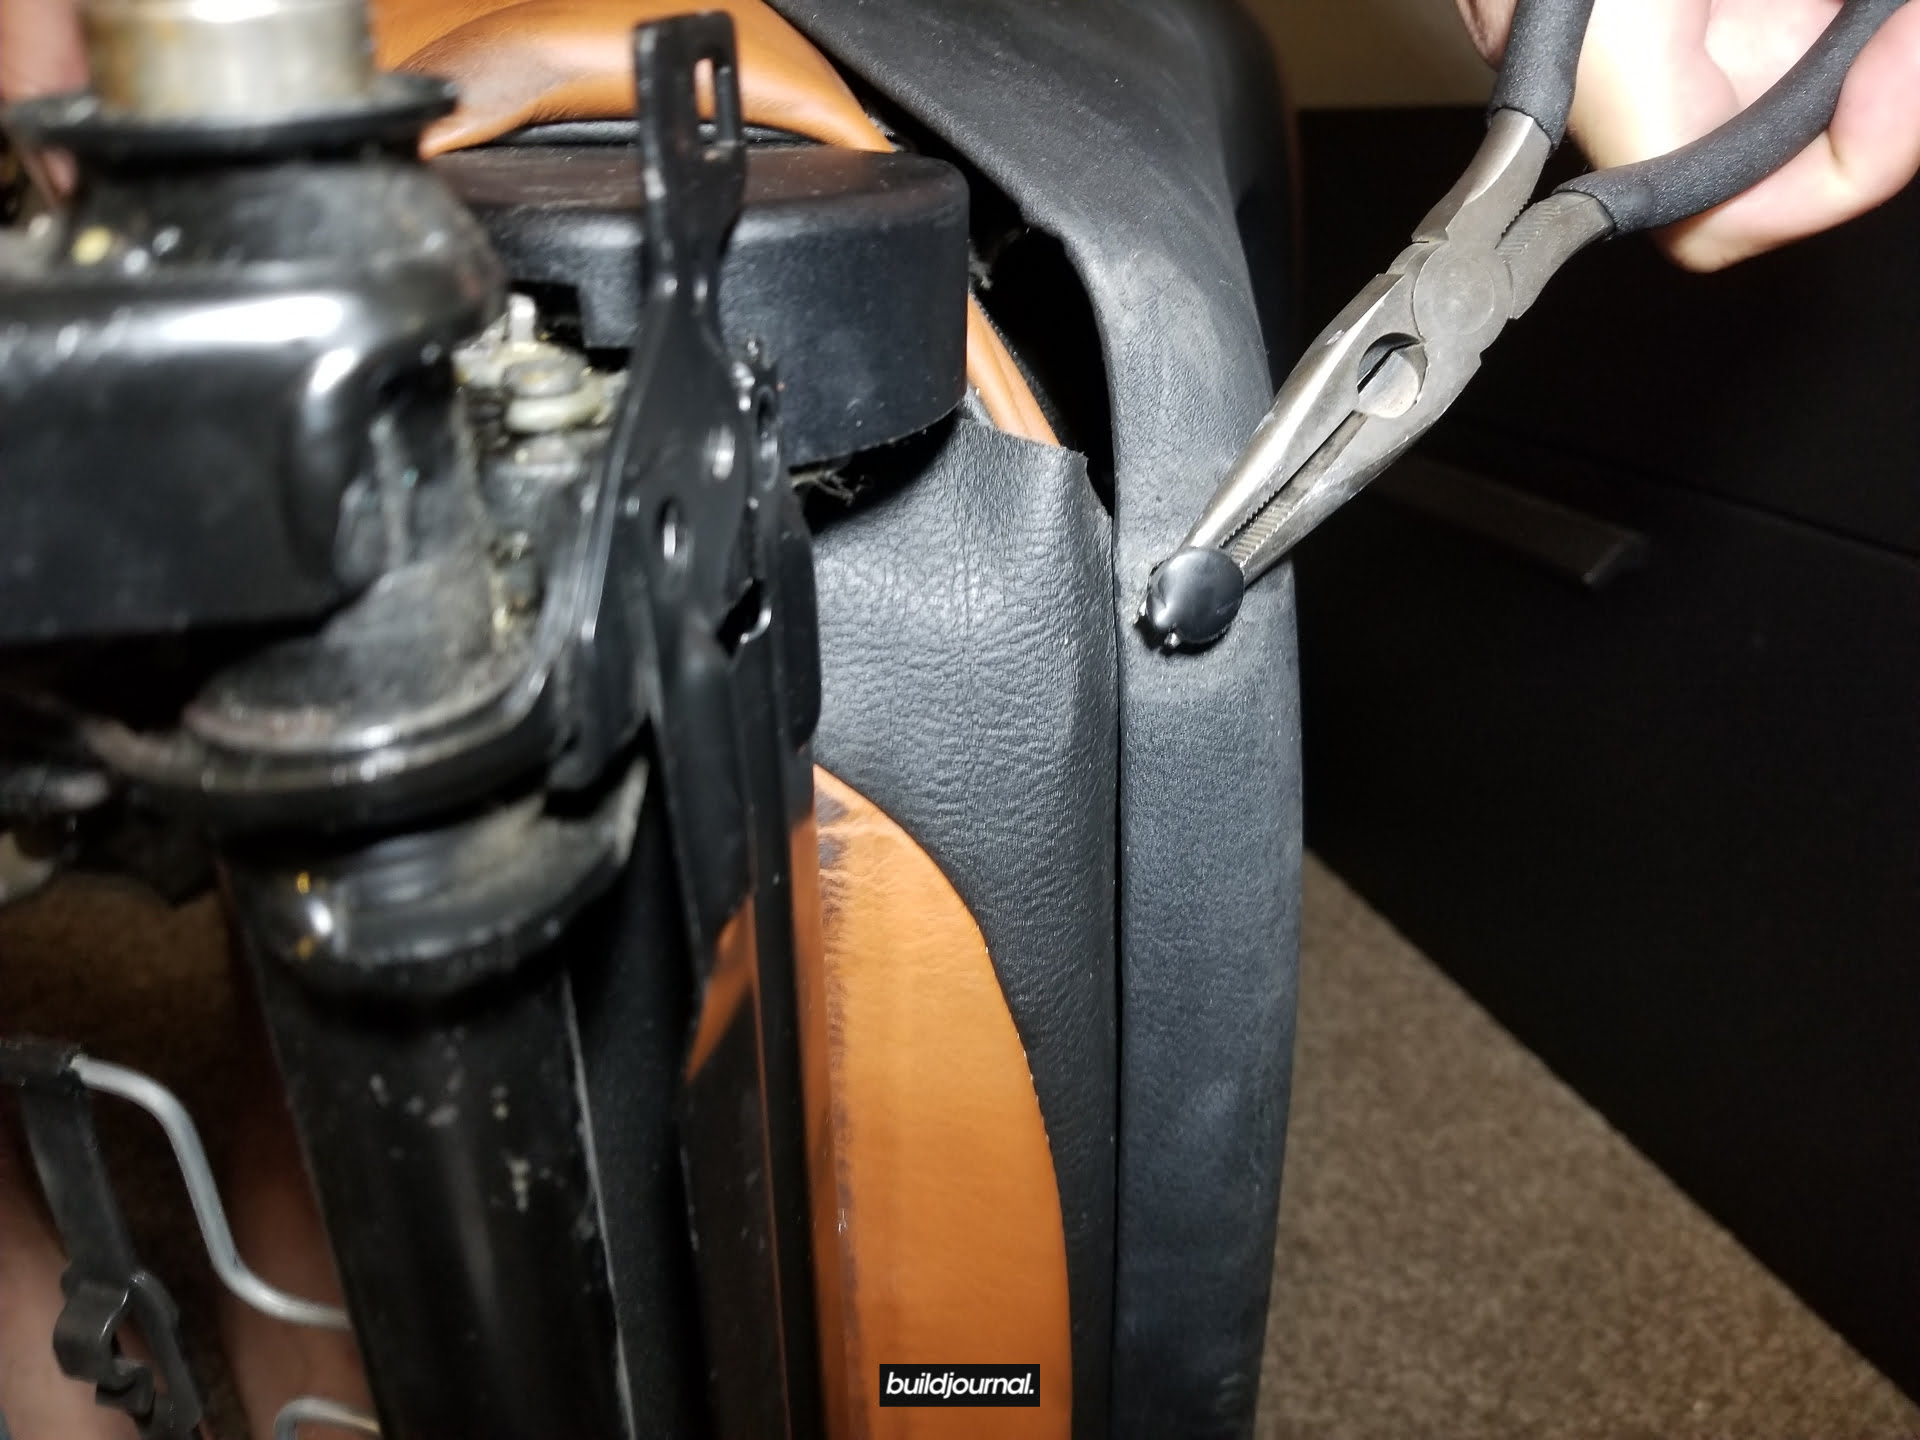
4. Remove the back panel
4.1 – Cut off the push rivets off at the bottom of the back panel. I used a flathead to pry a little bit out, then use pliers/scissors to cut them off. These are one-way push rivets, so you will need to get replacements from your local auto or hardware store.
4.2 – Once removed, slide the back panel down and pull out towards you. It should come off very easily.
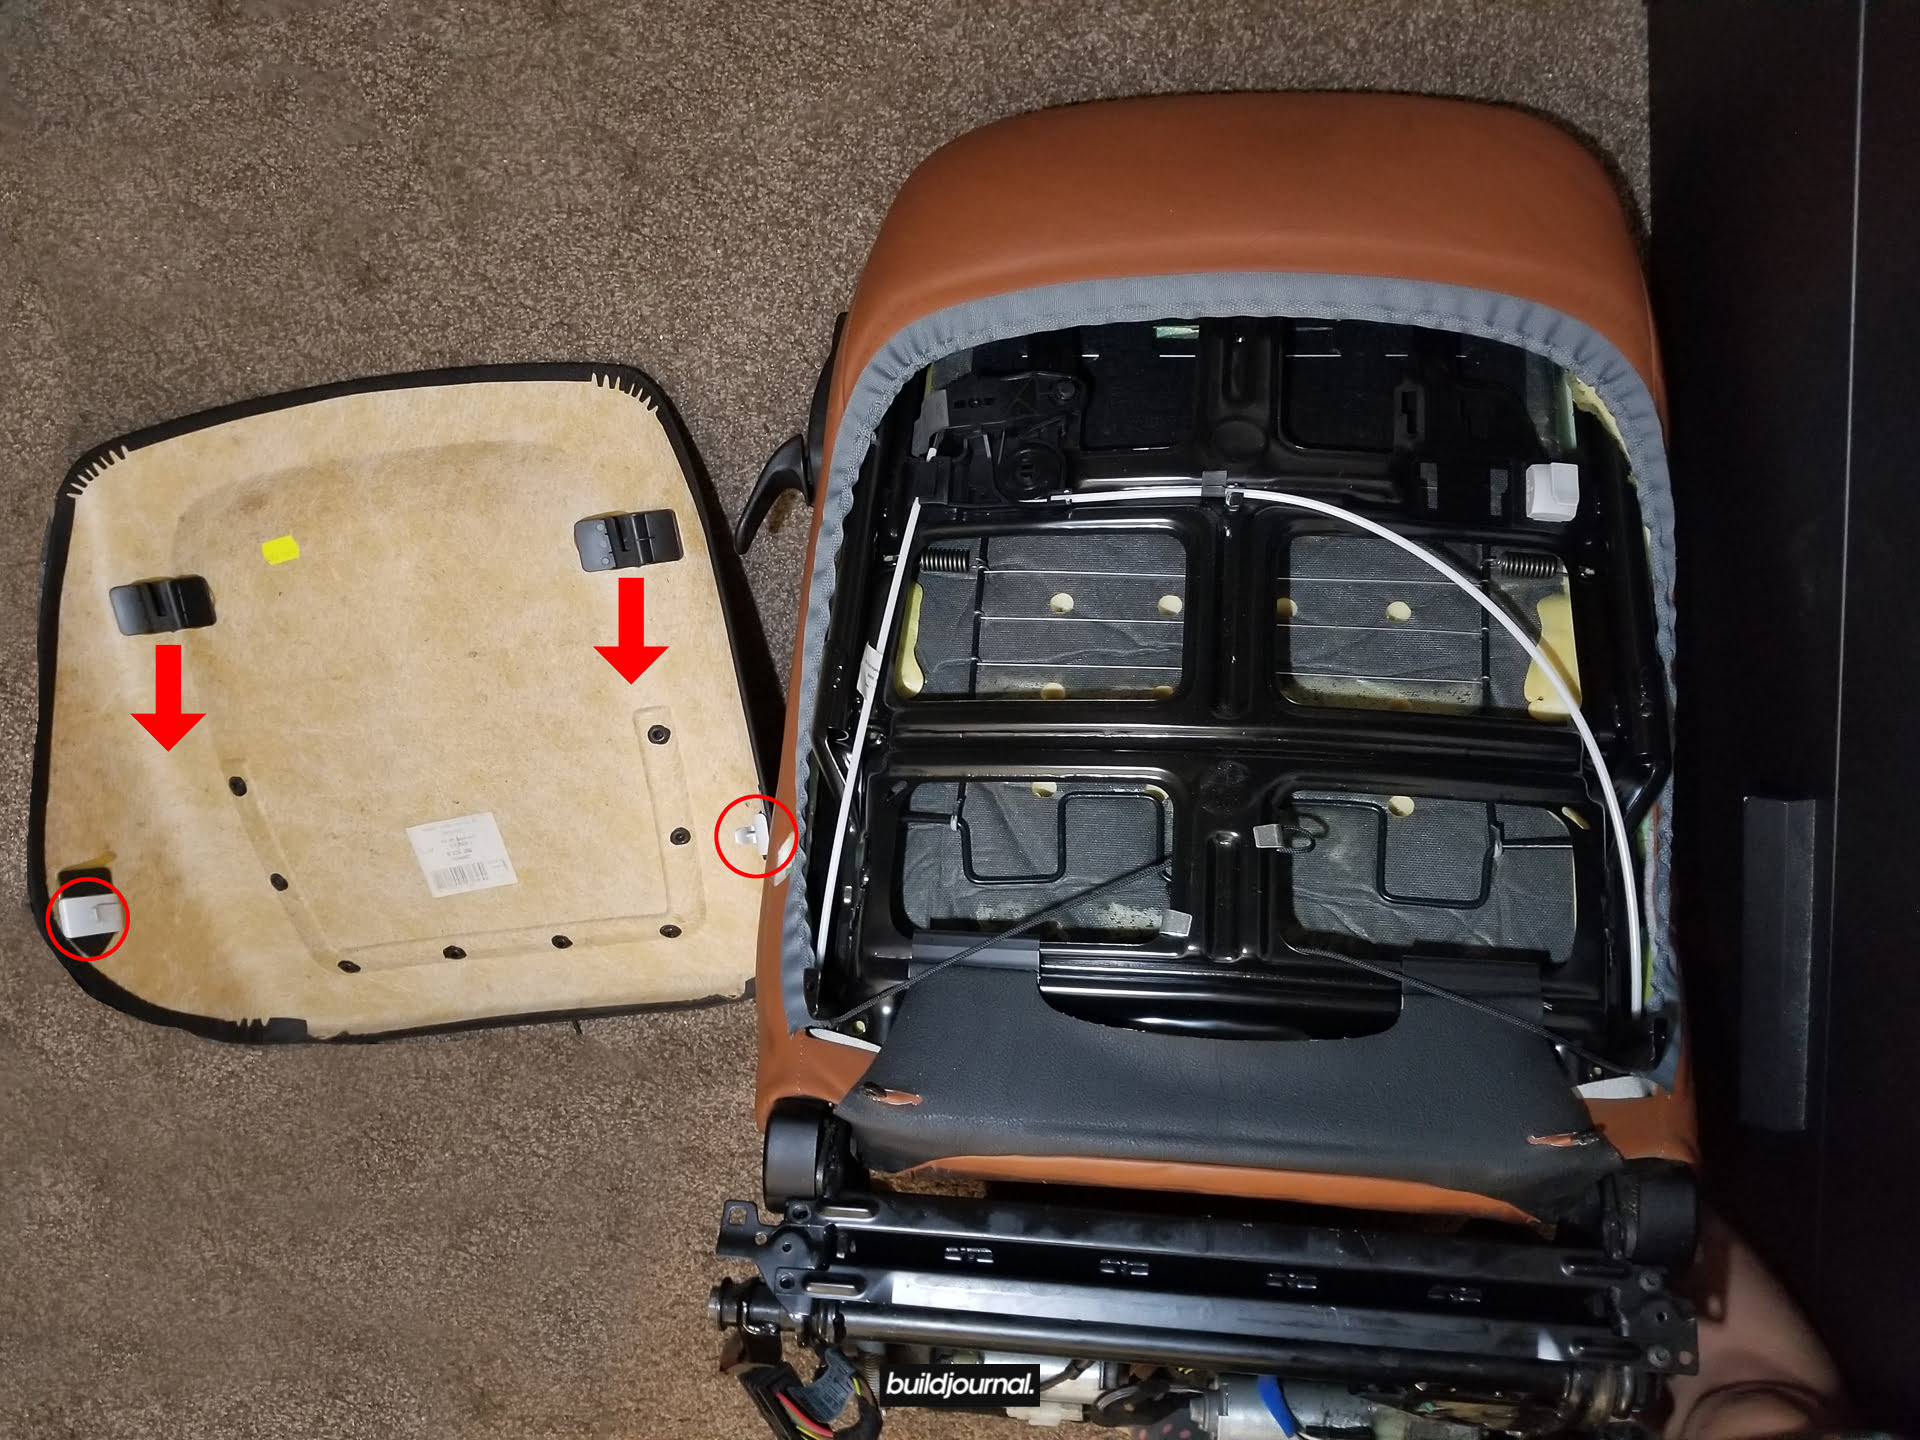
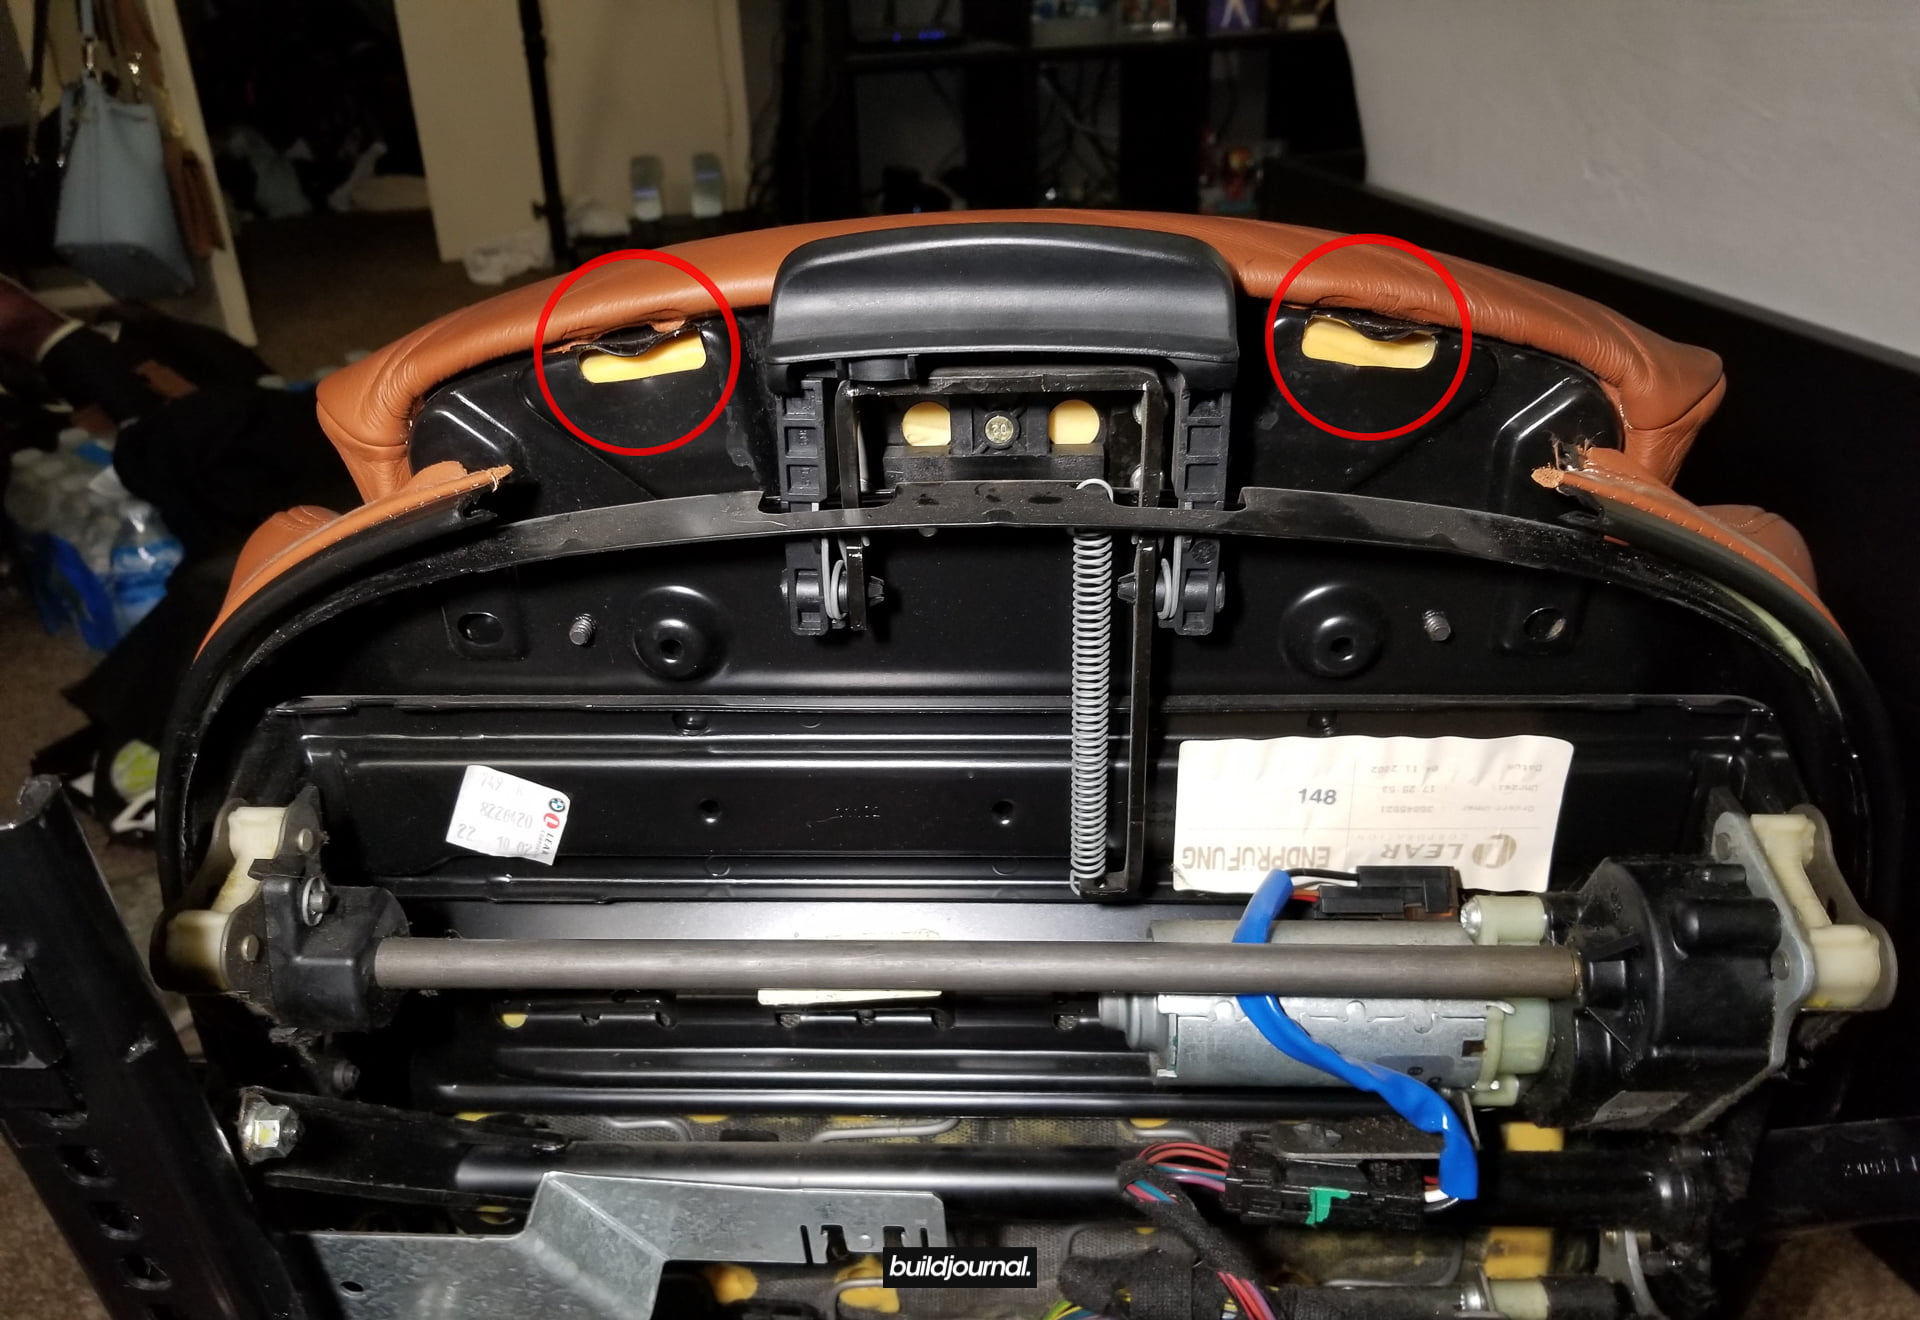
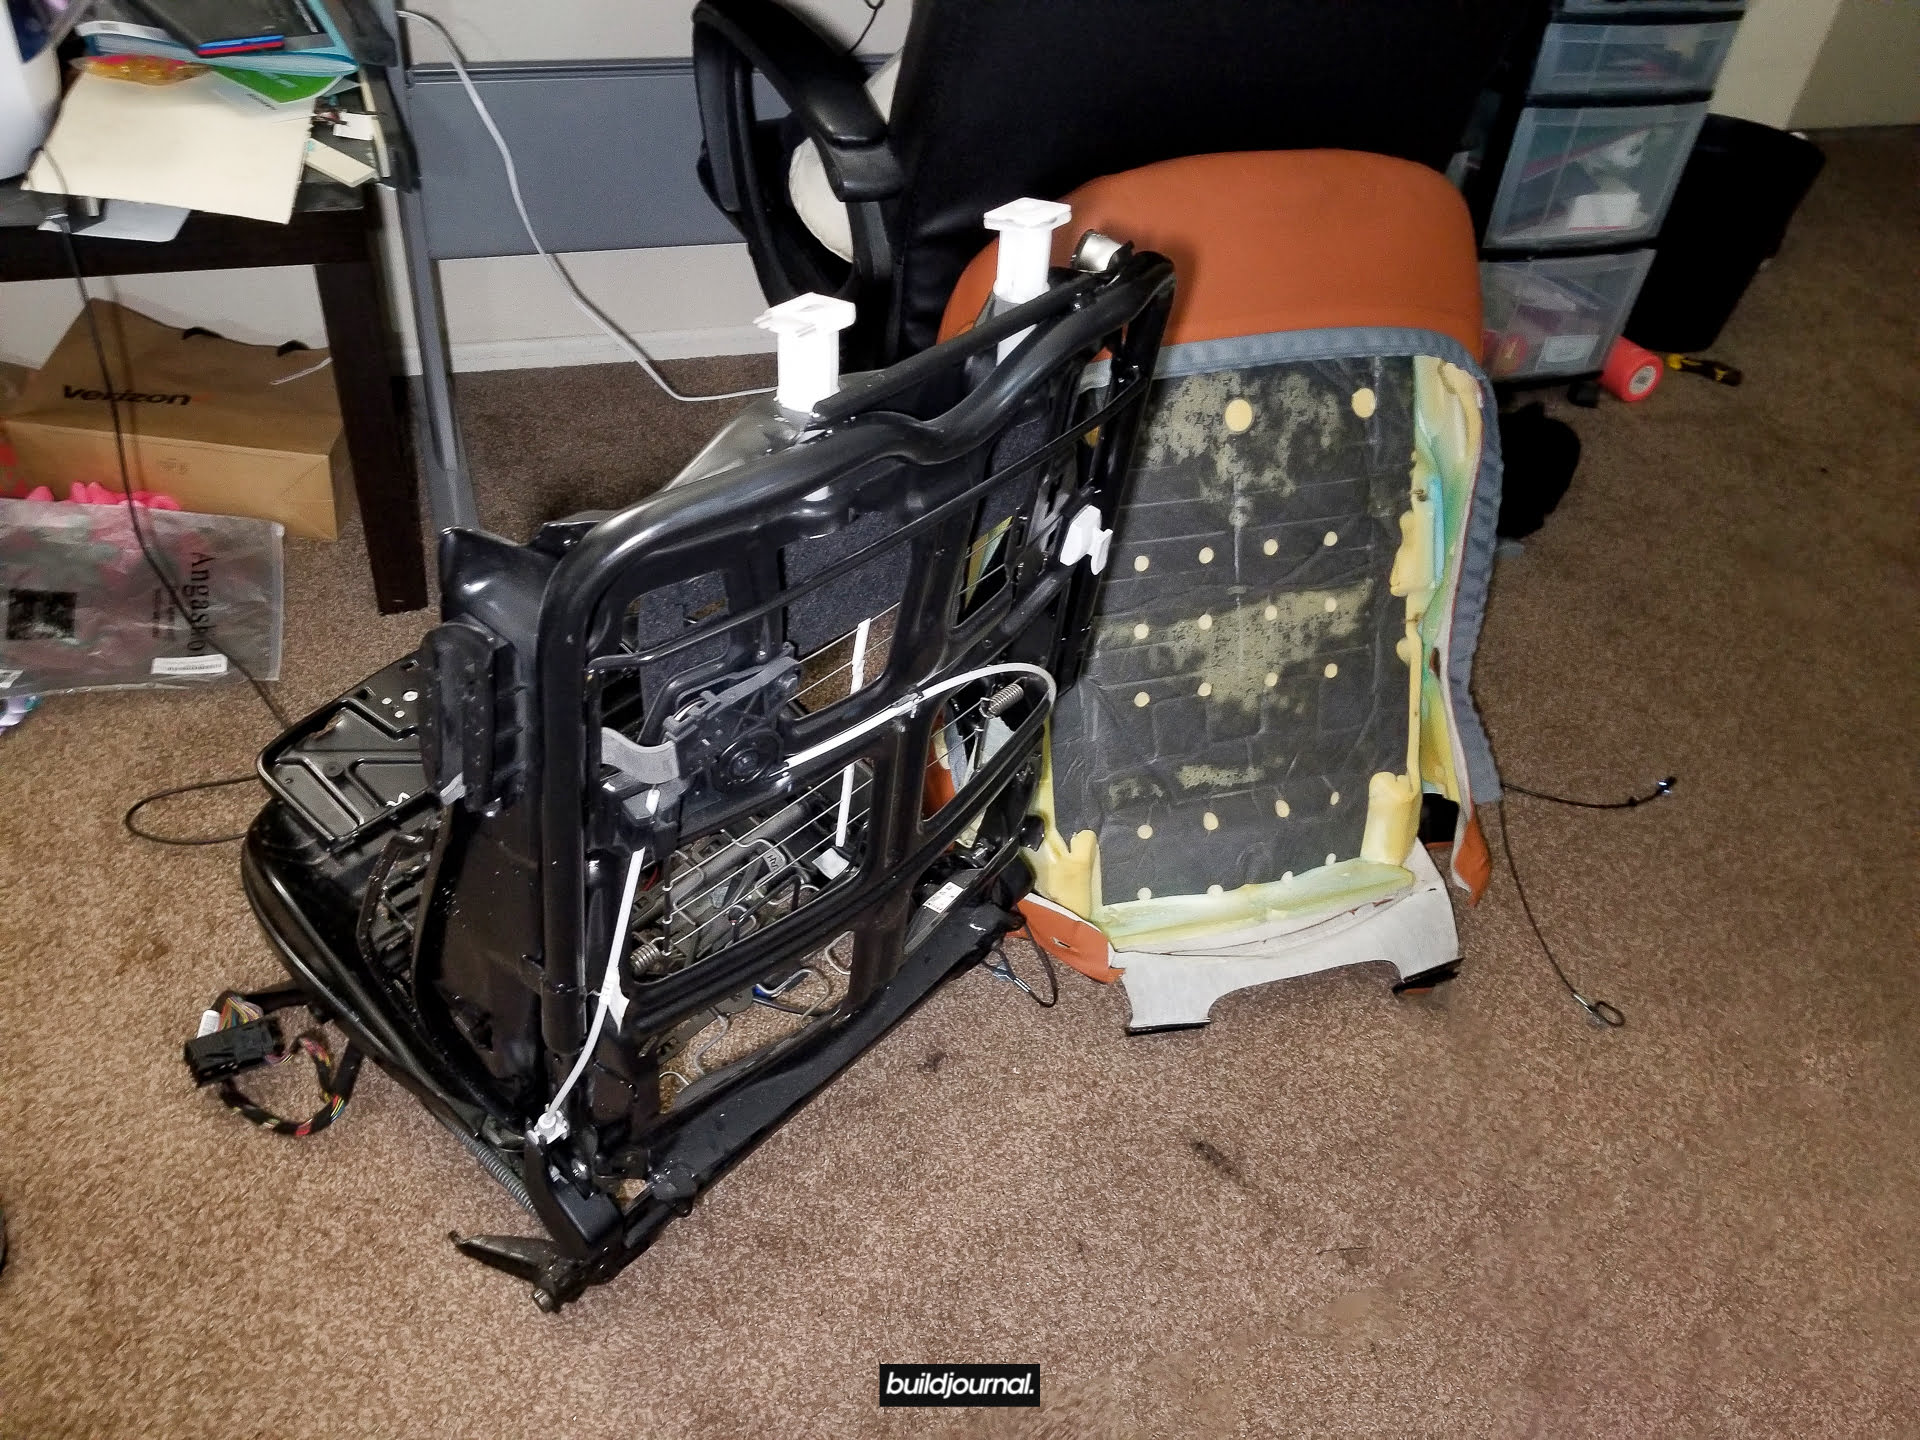
5. Remove the backrest foam assembly
5.1 – Remove the head rest by pushing the left insert and pulling up at the same time.
5.2 – Remove the plastic headrest covers by lifting one side and tilt up. It should come off very easily. Be careful removing the left side with the push insert, there are two springs that come off very easily. Remove them and keep them in a safe place.
5.3 – Pry out the leather surrounding the headrest inserts.
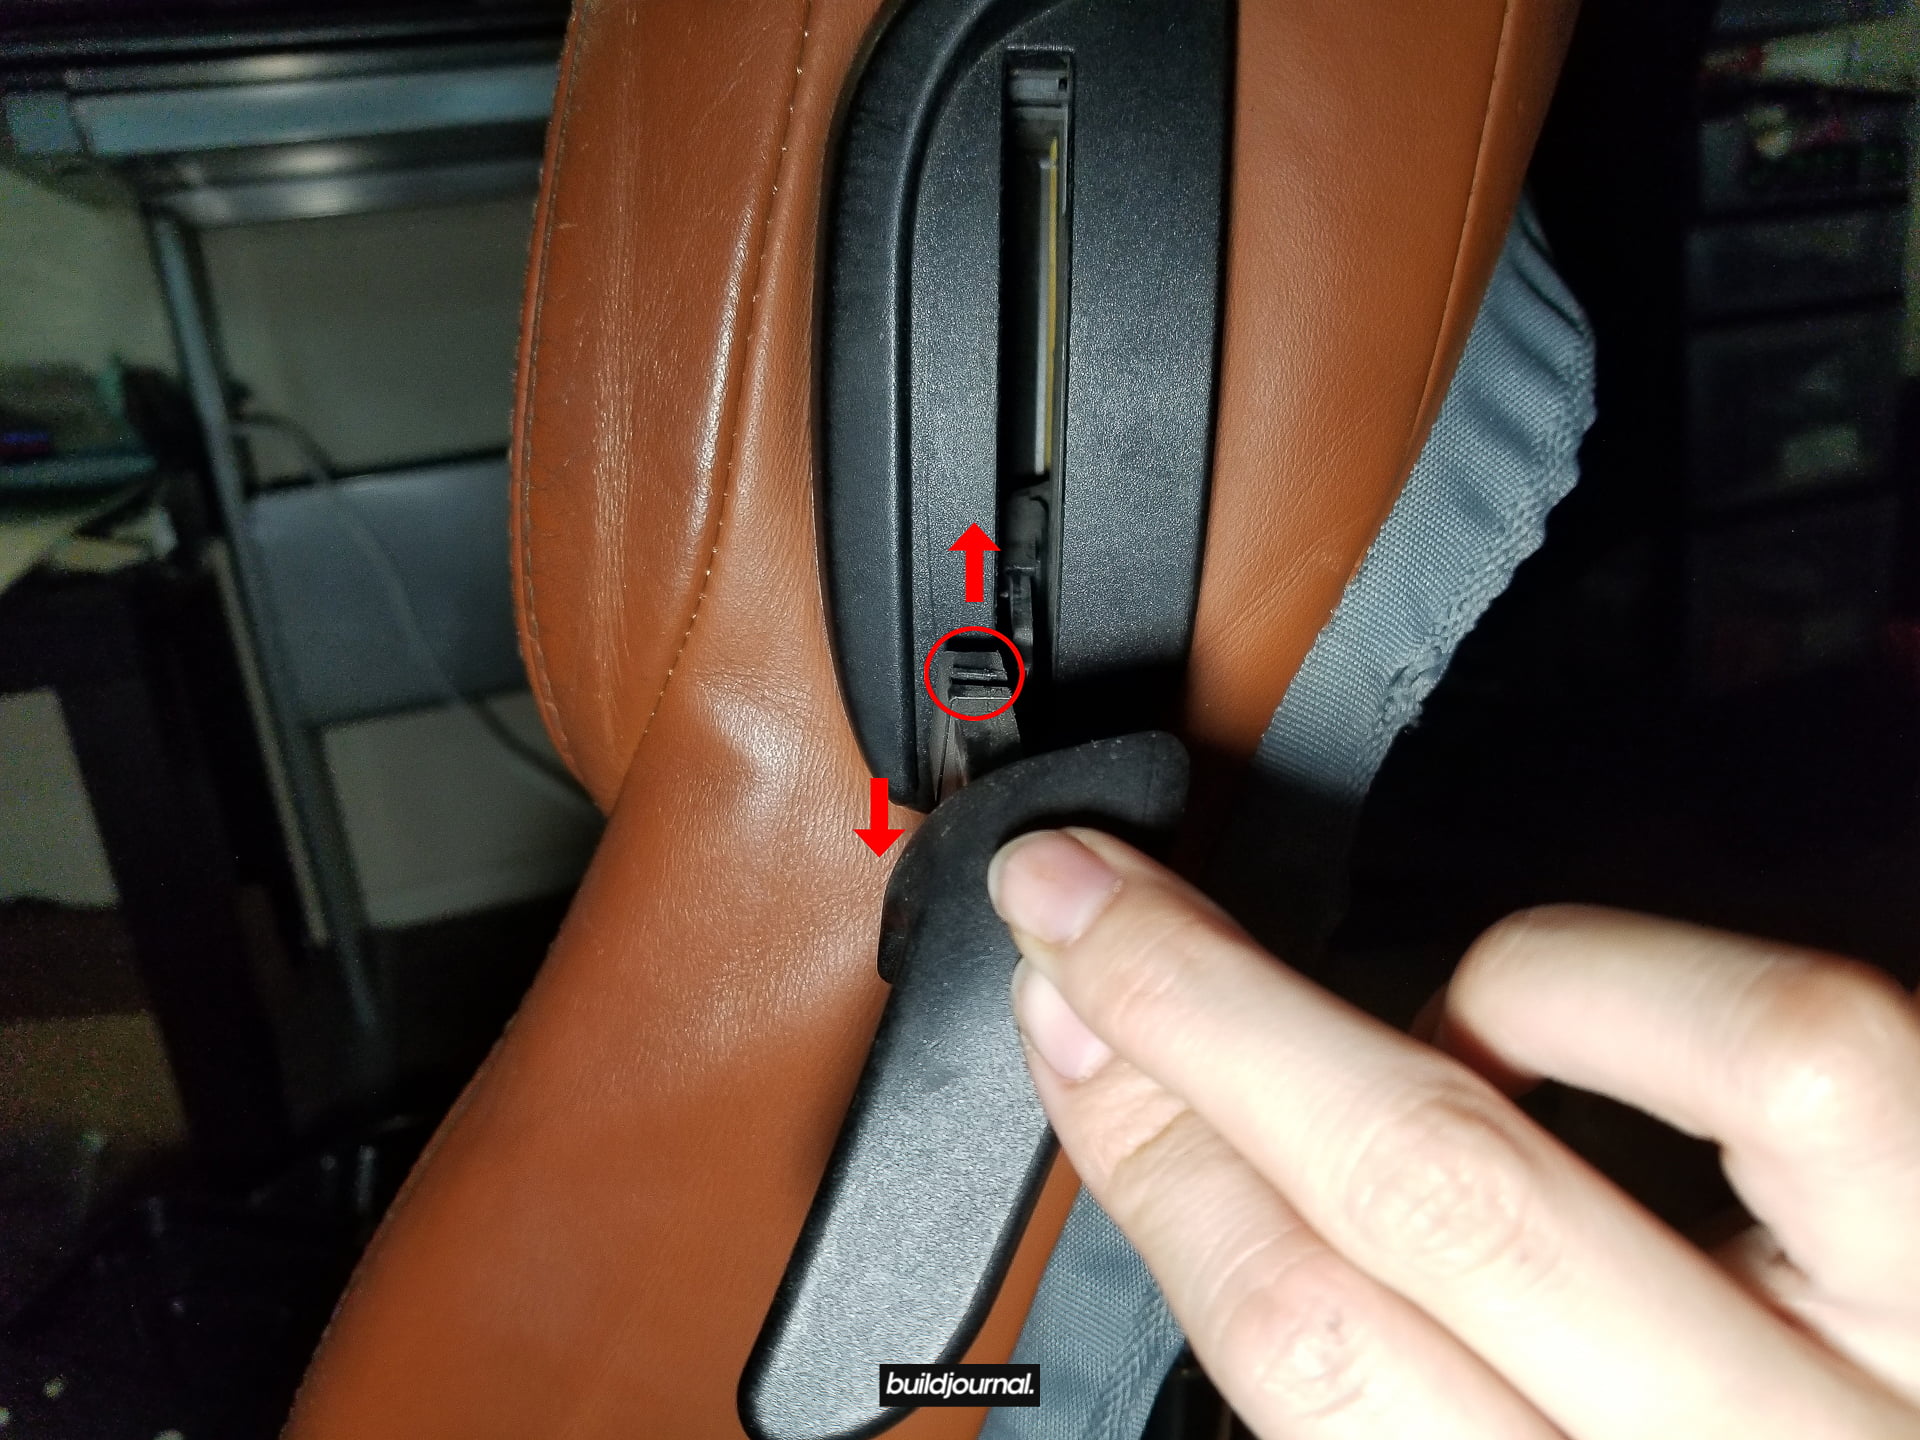
5.4 – Remove the seat levers on the side. There are two little tabs on the lever, one on top and bottom. Lifts both of those and pull the lever, it should slide out easily. You can use tools and do it yourself, or just ask a friend to pull it out while you’re lifting the tabs apart.
5.5 – Remove the plastic cover by pushing the two top and bottom tabs toward the center. I used a flathead, stuck it above the top tab, and pushed down evenly so I wouldn’t break it.
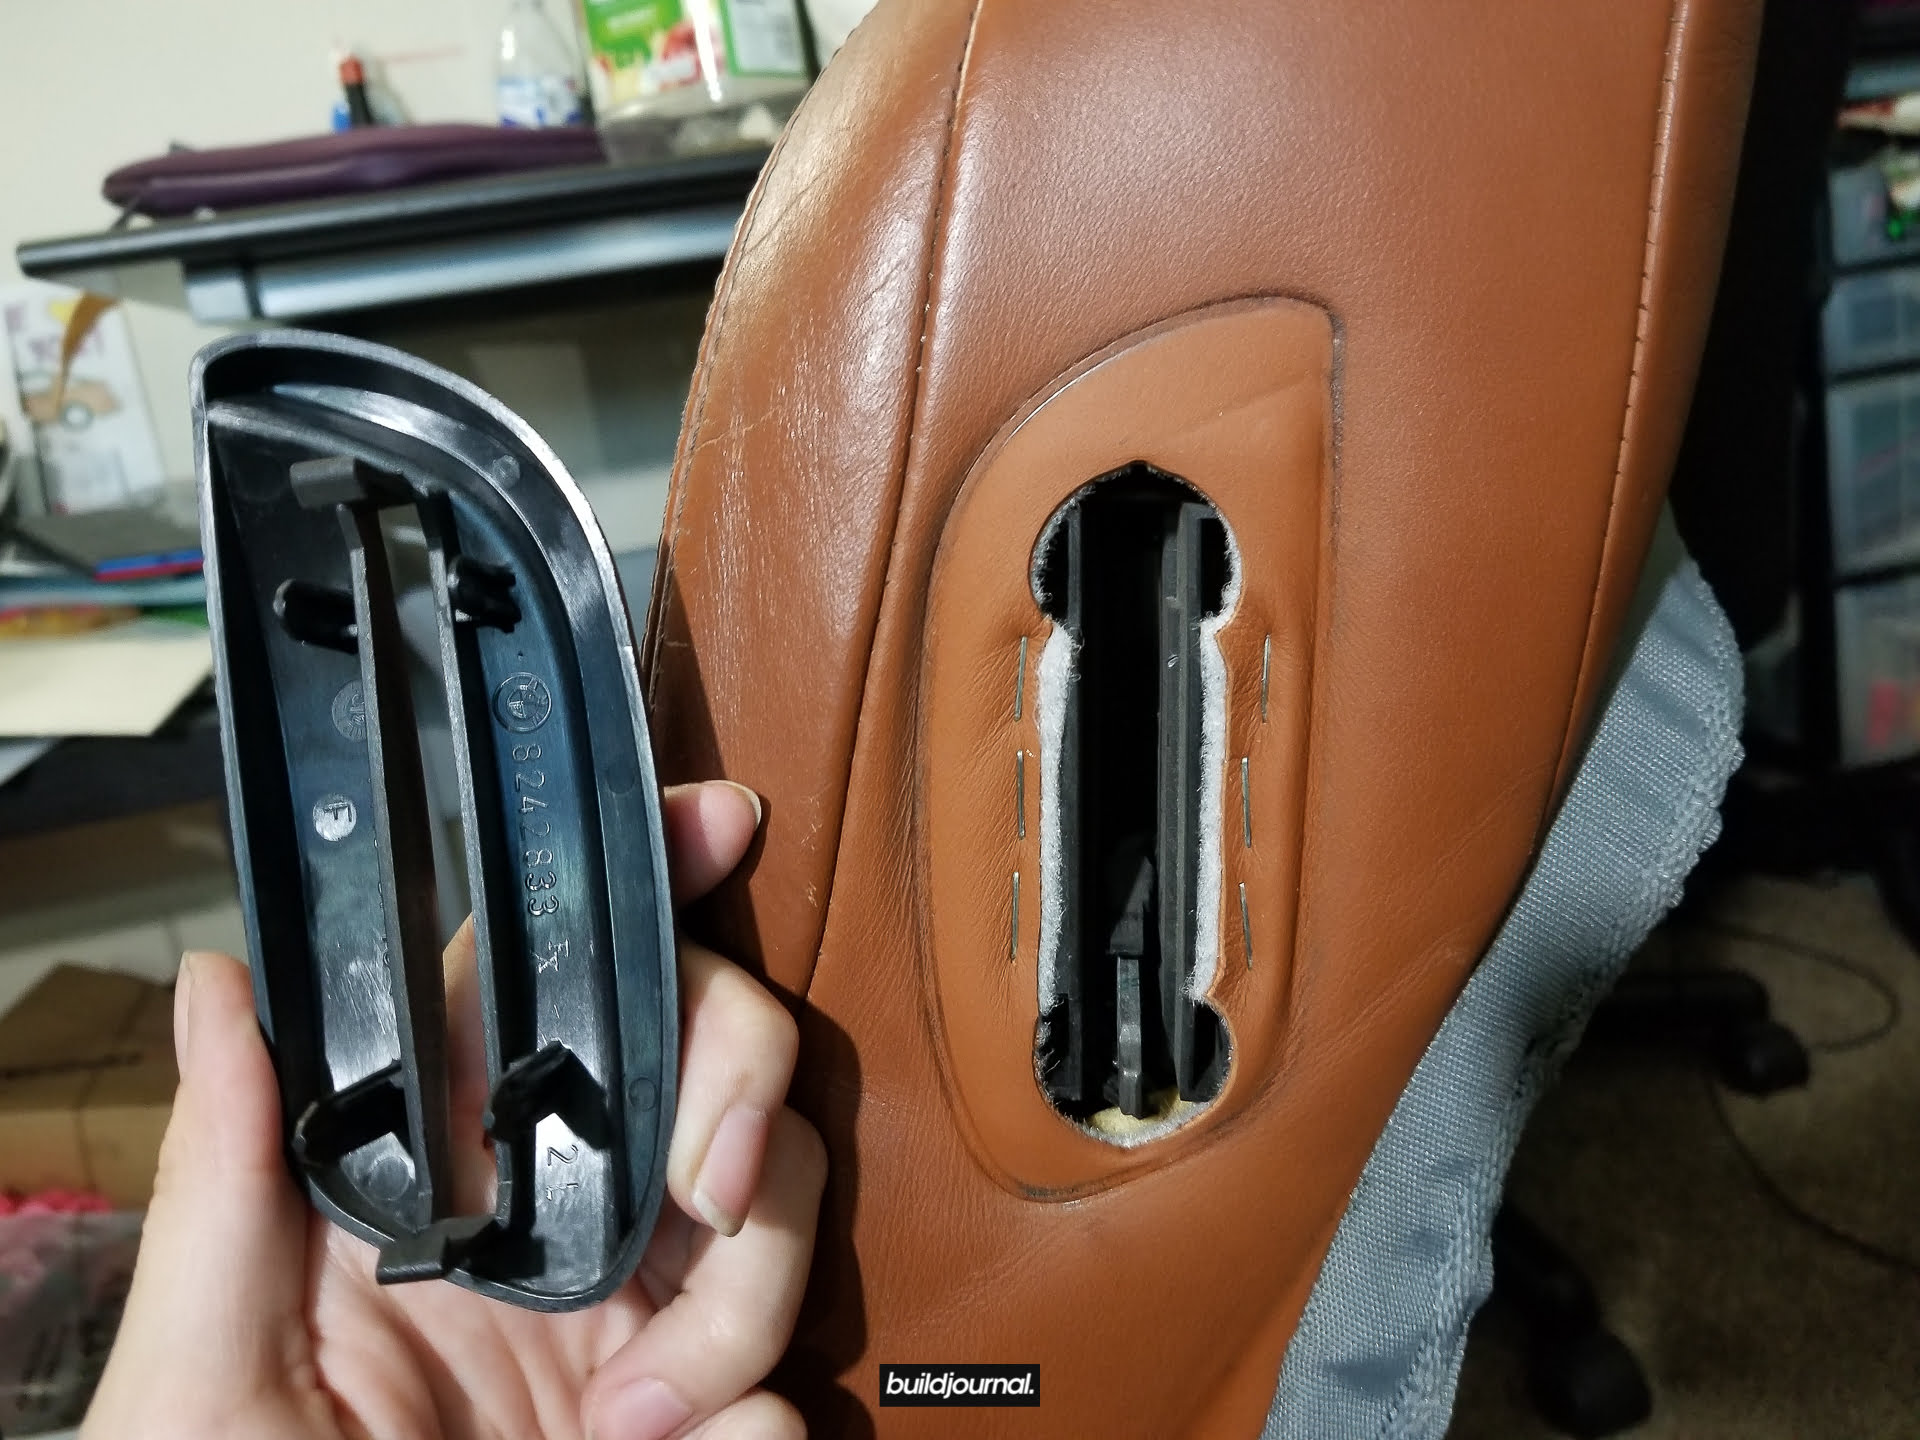
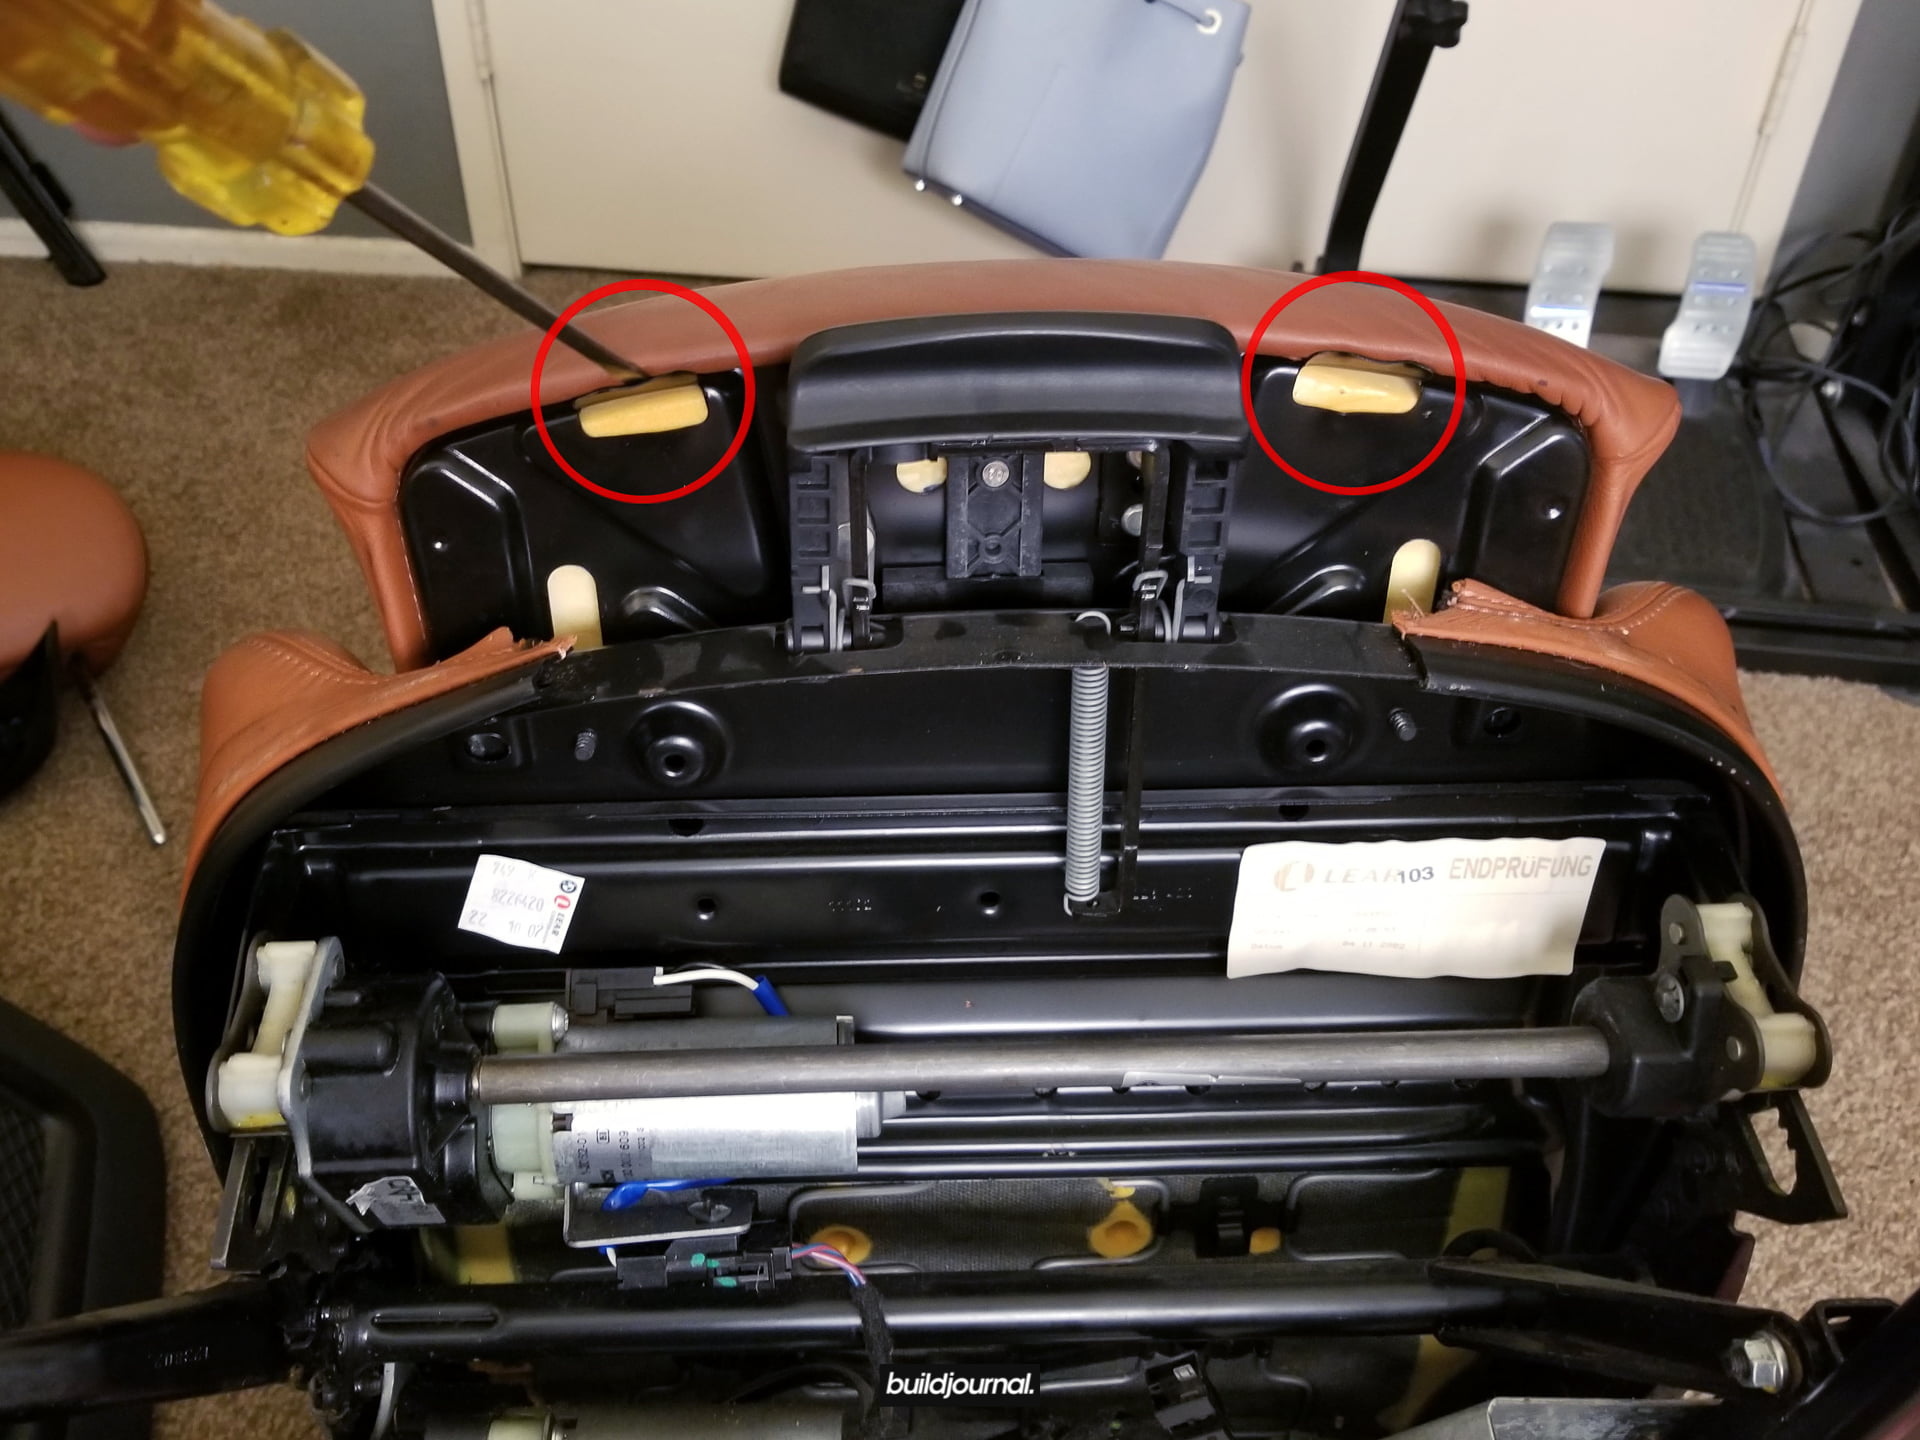
5.6 – Pry out the staples using a flathead or pliers. They’re pretty weak and easy to pull off.
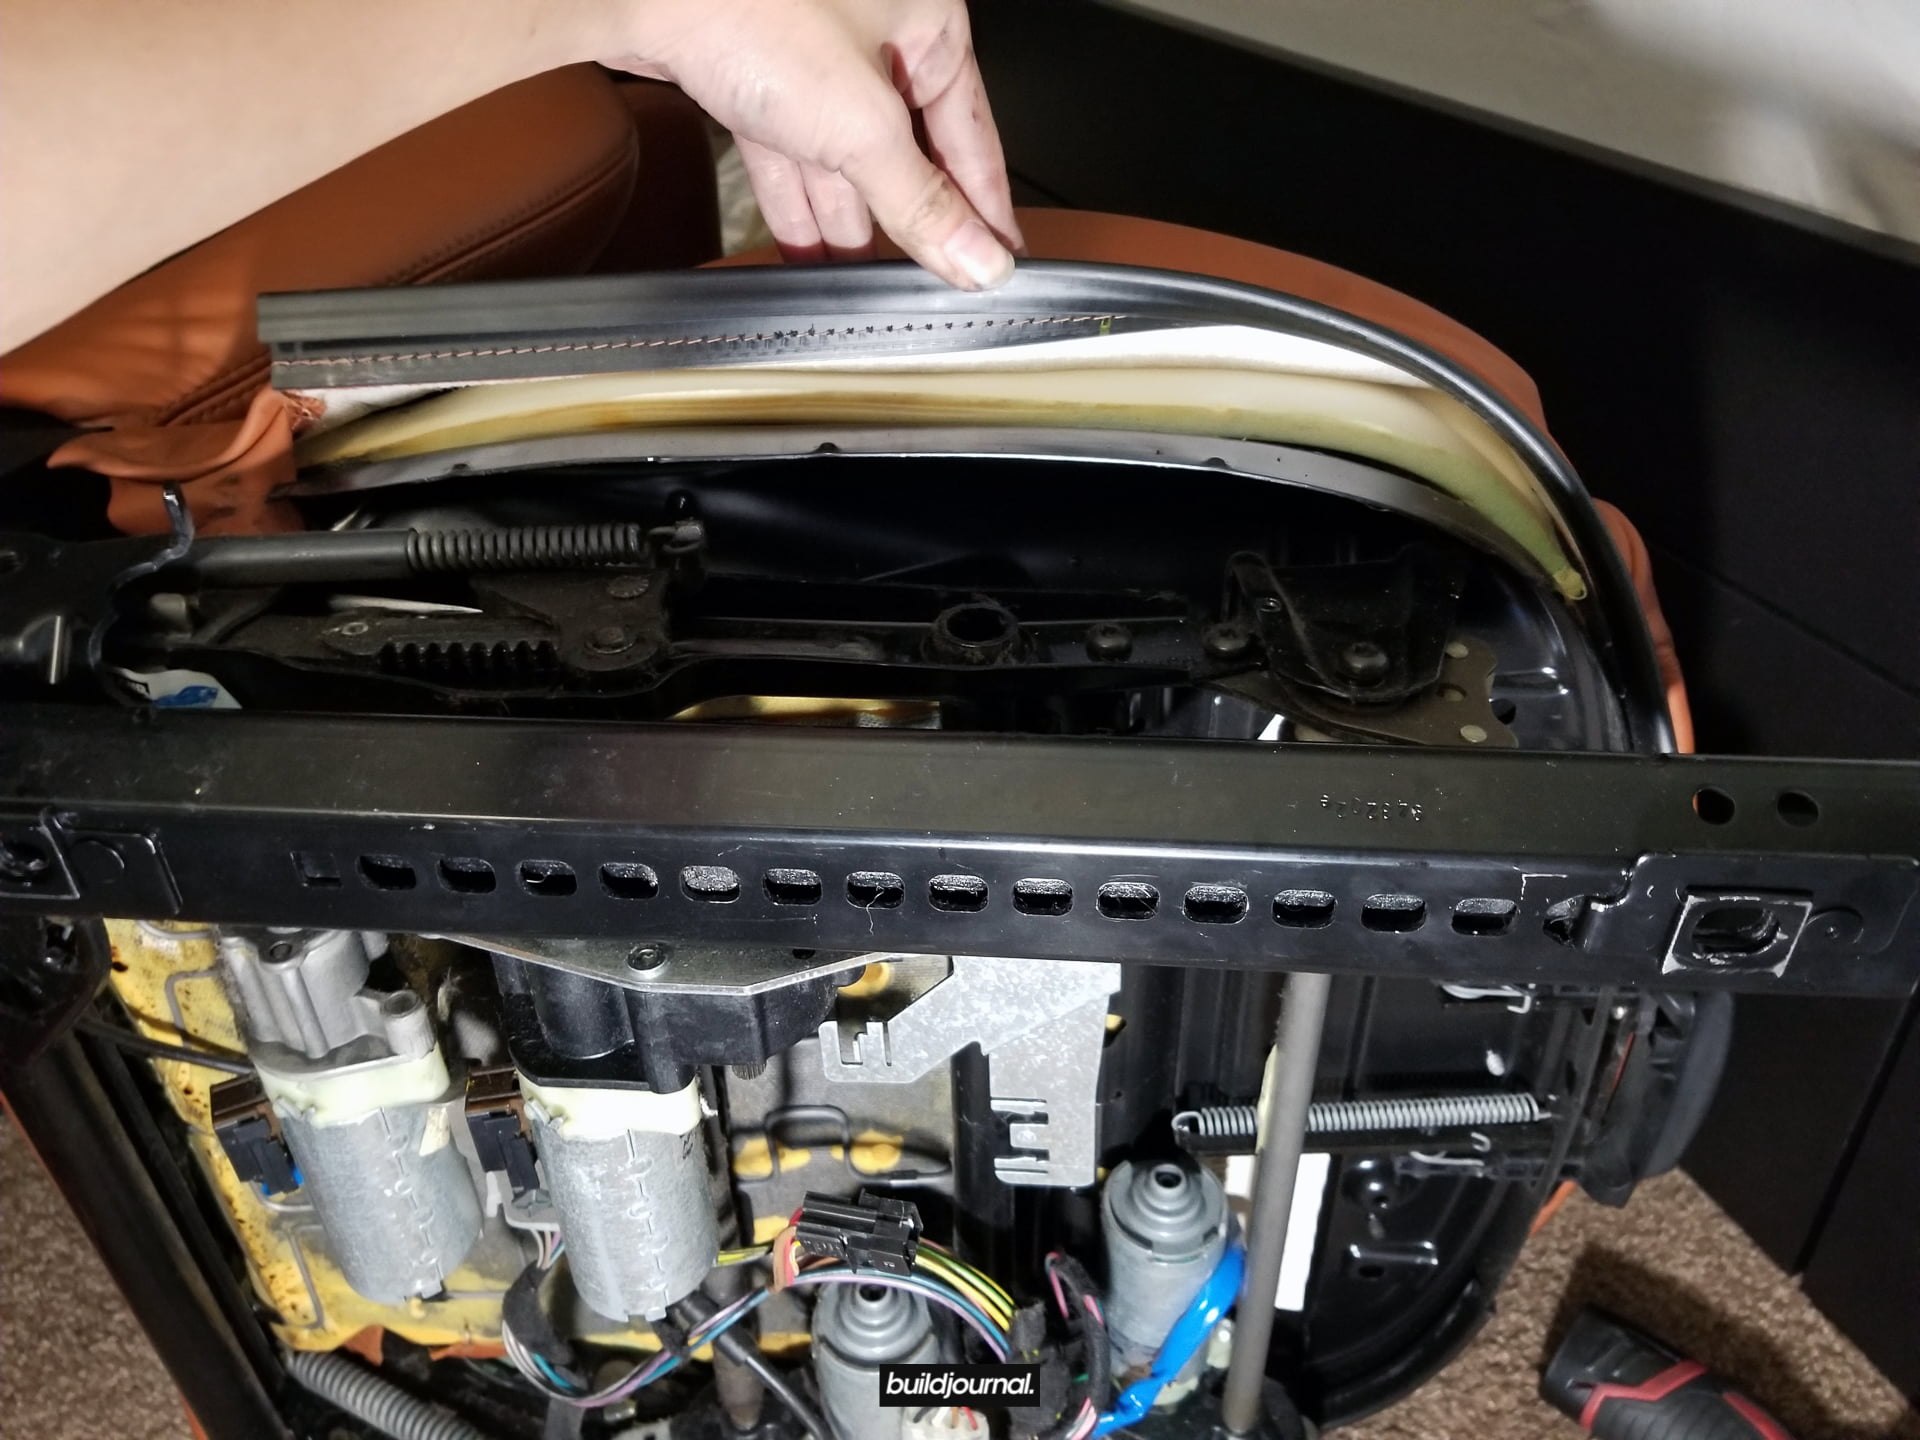
5.7 – On the back of the assembly, unhook the two rope hooks and release all the leather from the seat frame.

5.8 – The foam assembly and leather should all be released, and you can pull out and up to remove the whole thing. You may need to fiddle with the foam as it may get caught on edges of the seat frame.
6. Repeat and re-install new leather/foam assemblies
If you are doing a full swap like I did, you will need to do this for all four seats. If you’re only looking to replace a worn out bottom foam assembly, no need to remove the backrest. I would suggest that while the you have the leather pieces out, recondition them while you’re at it – ideally on a hot day. I will be doing a review on Leatherique Leather Rejuvenator and Prestine Clean next.
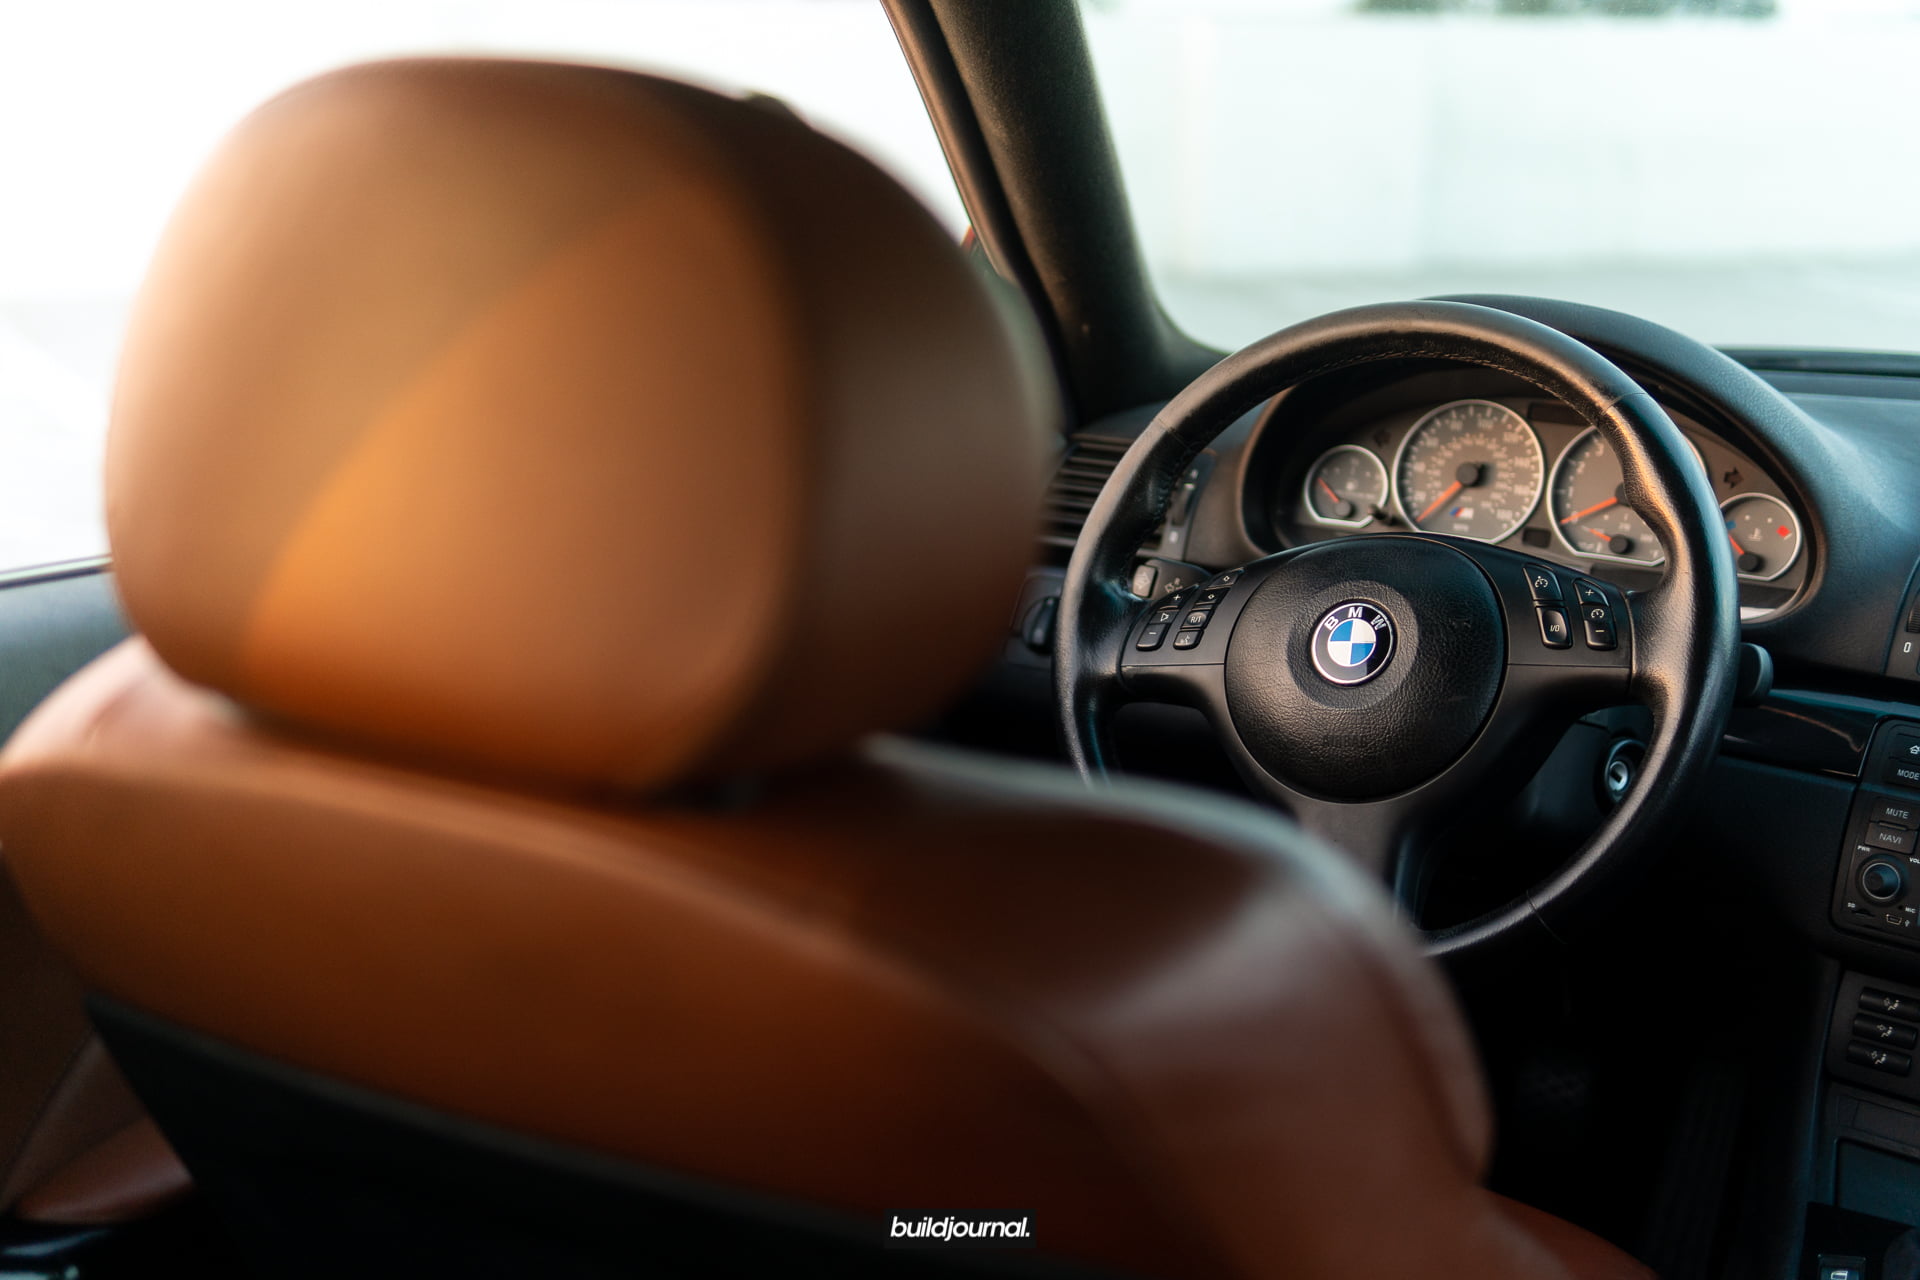
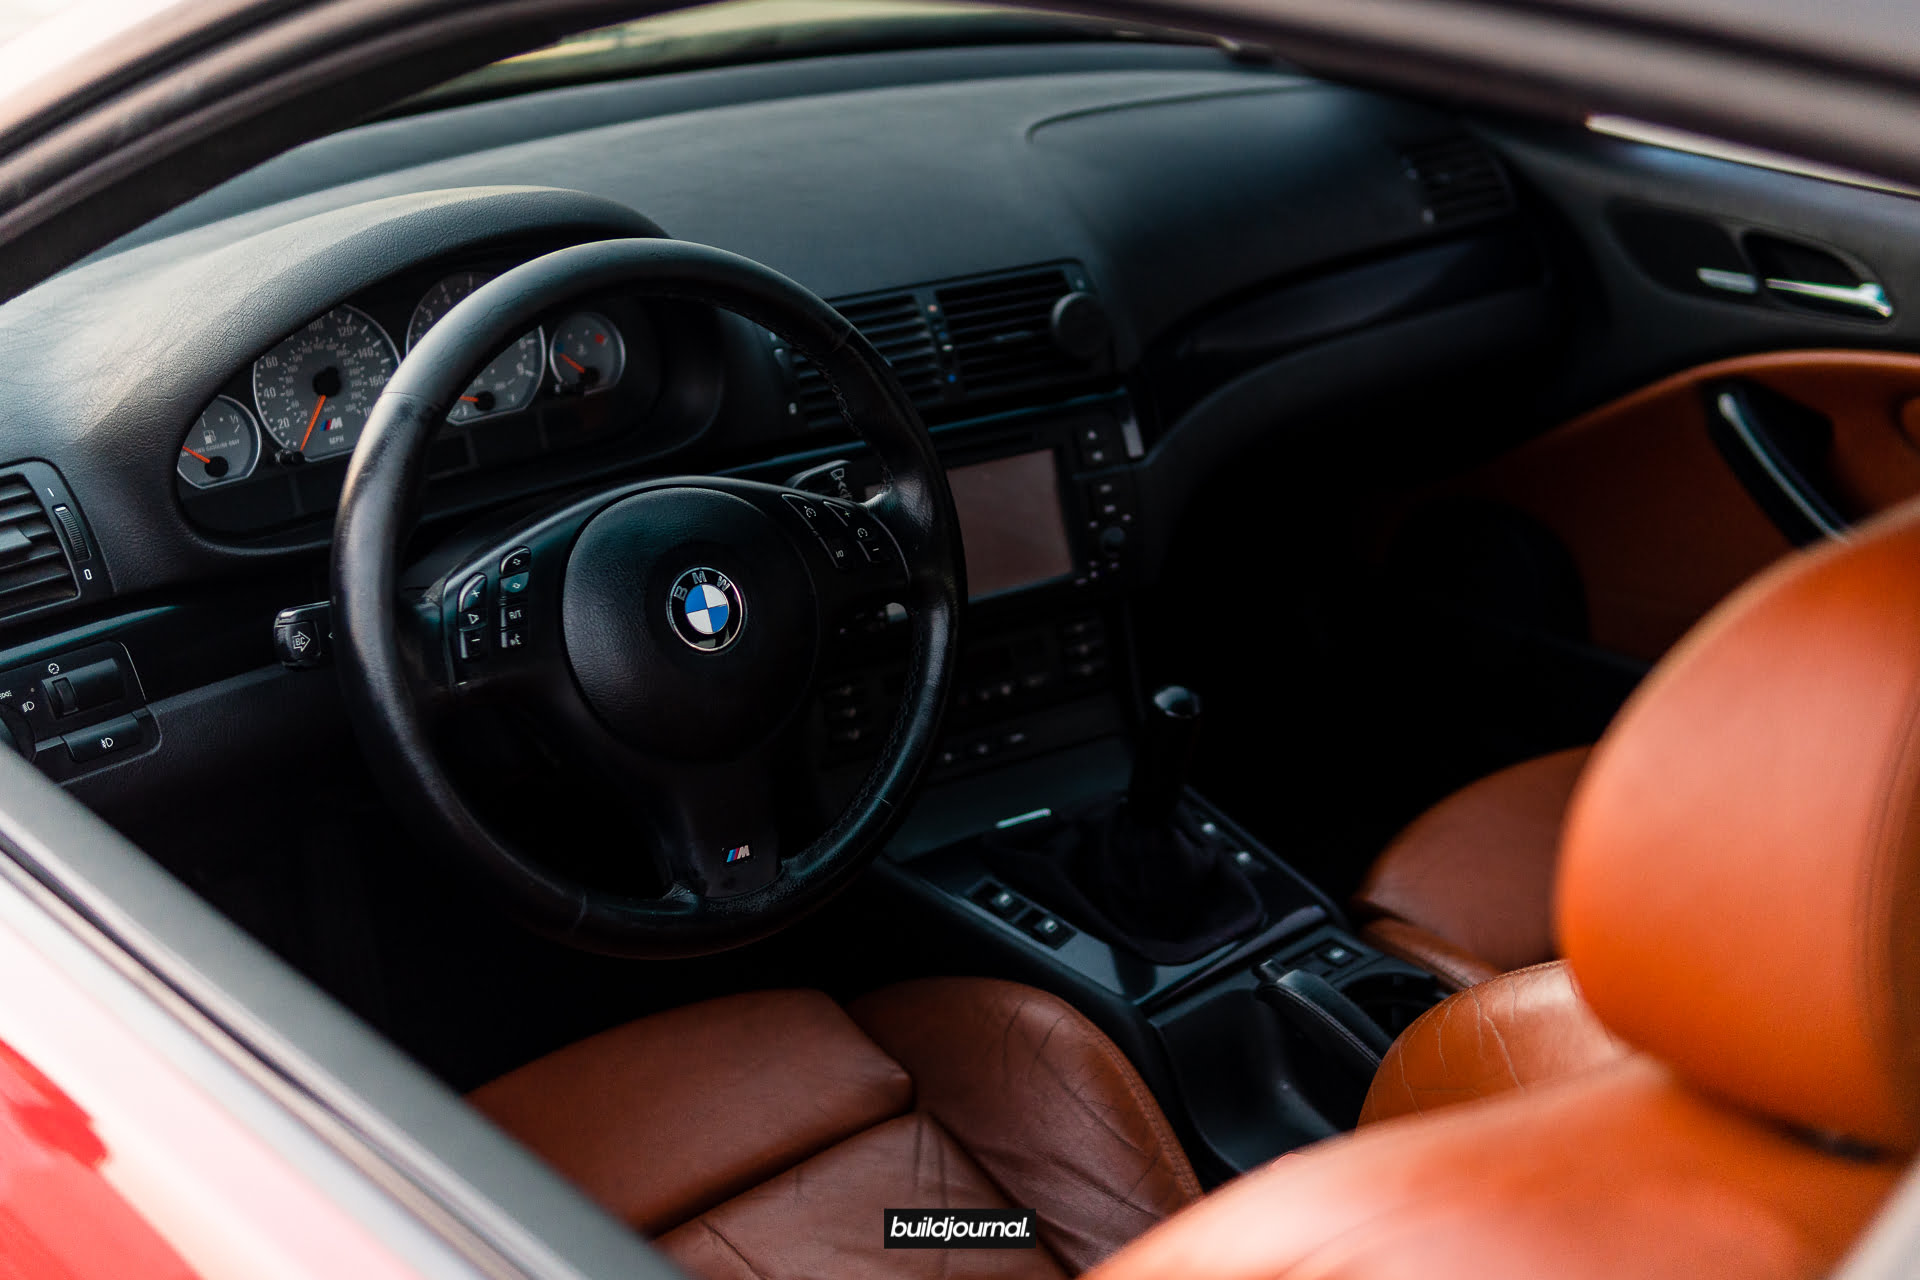
Here is the final result.
Black was originally manual, cinnamon was originally power.


I apologize that these photos are not as nice as our usual DIYs, but hopefully they help. If any of the steps seem unclear, please comment below so I can explain and add it to the DIY.
This is a great guide, first one I’ve seen this detailed. Did you use side cutters to cut the hog rings? and use new hog rings or cable ties? That’s the bit I’m worried about, that i don’t get the leather to fit & sit correctly back on the new foam
Brilliant guide mate! This is genuinely appreciated and will help me so much with my conversion! Cannot thank you enough for putting so much effort in to this DIY!
Glad it helps! Good luck! Post some pictures 🙂