UPDATE: THERE HAVE BEEN MULTIPLE CASES WITH USERS EXPERIENCING MELTED WIRES ON THE RADIUM FUEL PUMP KIT. PLEASE READ THIS ARTICLE BEFORE IF YOU ARE INTERESTED IN THIS KIT.
Don’t let your E46 M3 fuel pump die on you leaving you and your car stranded unexpectedly. I’m doing a quick DIY and write up on a recent Walbro fuel pump install I did on my E46 M3. I noticed a rough idle and hiccups when I’m stopped at the red light so I decided to look into replacing my fuel pump with an OEM.
What are my options?
I was planning on buying the entire OEM fuel pump kit with the housing so it can be a true drop in install without having to transfer the pump, however after researching a bit I came across a fuel pump kit with a Walbro 255lph that can be used on the E46 M3. Walbro is well known and their products are without a doubt top tier stuff. The only problem is that the fuel pump doesn’t fit into our stock housing holder. That is where Radium Engineering comes into play with their custom 39mm sleeve. They offer a simple solution to convert your OEM fuel pump to accept various fuel pumps from Walbro E85 pumps to even AEM pumps. I ended up purchasing the Radium Engineering Walbro GSS342 255lph (20-0082) kit since I don’t plan on going E85.
Why get the Radium kit?
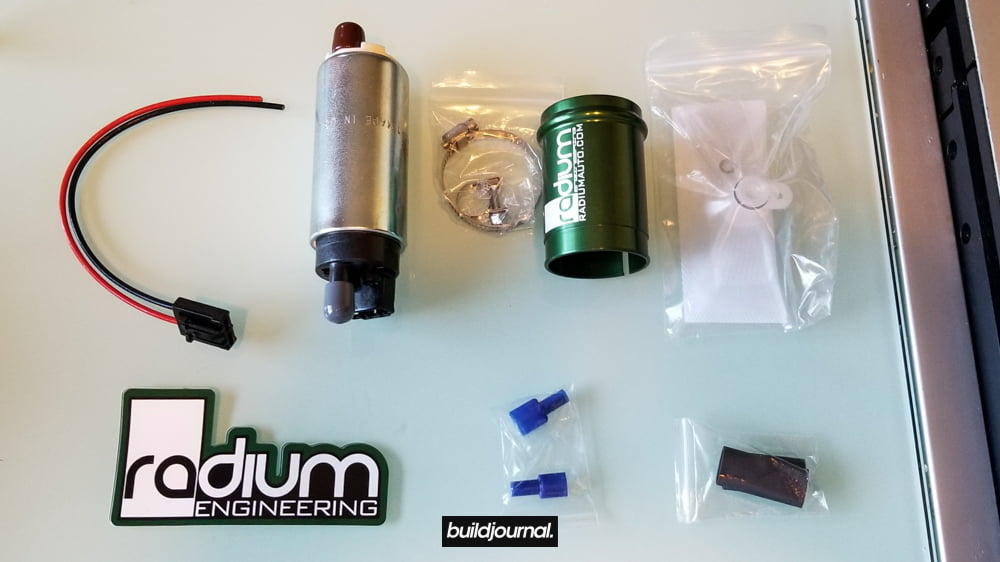
A lot of people will say you don’t need to spend money on the sleeve and you can just fit the Walbro in the stock holder with some creativity, but I would rather have the peace of mind knowing I have a proper sleeve holding the fuel pump in and convenience of having all the parts for a true plug and play fuel pump replacement solution.
Installing the fuel pump
First things first: Pull the 20 amp fuel pump fuse in the glove box! There are 2 white tabs on the ceiling inside the glove box. Twist to release the fuse box down and you’ll want to pull fuse #54. Double check your legend to make sure you’re pulling the fuel pump fuse. Then you want to start your car and let it stall. This will remove most of the fuel from the system so you don’t make a mess when you pull the fuel line later in the guide. Once the car is stalled you can put the fuse back in and shut the glove box, however I kept my fuse out during the installation. Now disconnect the negative terminal on your battery. I’m not going to go into too much detail on the fuel pump removal and focus on the Radium build.
1. Remove the stock fuel pump
1.1 Remove backseat. There are 2 pop clips on each side of the seat. Simply lift and it should pop off.
1.2 The fuel pump is located beneath the back passenger seat. You’ll see a circular metal cover with super fragile rubber material. There are four 10mm nuts holding the metal plate which needs to be remove to access the fuel pump. Gently lift each corner of the rubber to remove nut. Once all 4 are remove you can flip the plate over on it’s back. Be care careful as the rubber is very very fragile.
1.3 You’ll now see the fuel pump. Remove the wiring harness by pulling the latch to the side. Remove the fuel feed line by pressing the 2 push tabs; push in then out. Pro tip: if the fuel line is not coming off, look inside the fuel line plug and see if the white insert is visible or sticking out. My line would not come out initially. After trying to remove it for 30 minutes, I was able to remove after I pushed in the white insert in the plug with a small flat head. If it’s still not coming out, take it to a shop! You DO NOT want to break your fuel line. If you do, you’re going to need to drop your fuel tank.

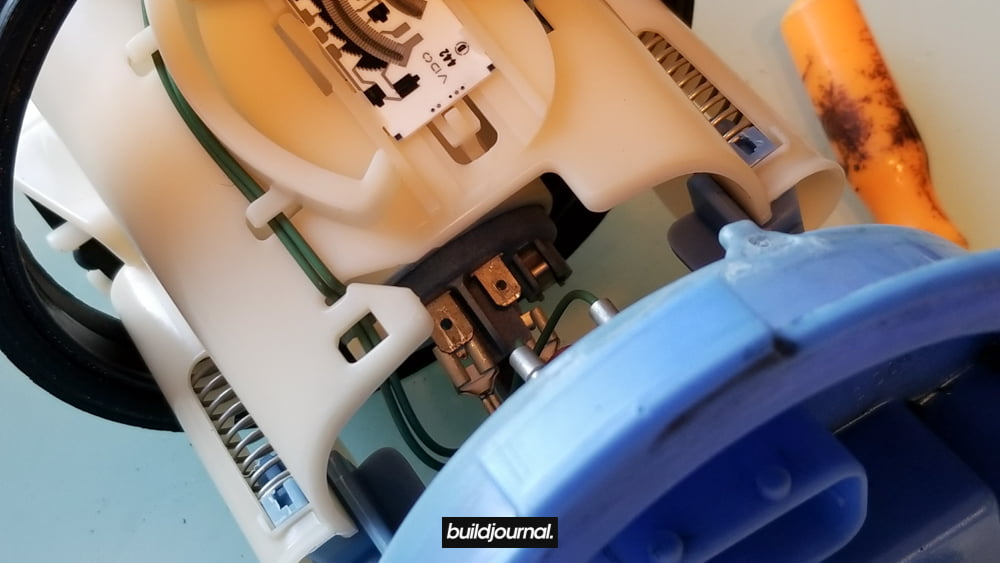
4. You should now see the fuel pump. There is a metal lock ring which you can remove by getting a BMW specialty tool. If you don’t have it, a screw driver and a mallet/hammer would suffice.
2. Installing the Walbro fuel pump
2.1 Lay your stock pump on a clean work bench. Don’t get your housing dirty as it’s going back in your fuel tank!
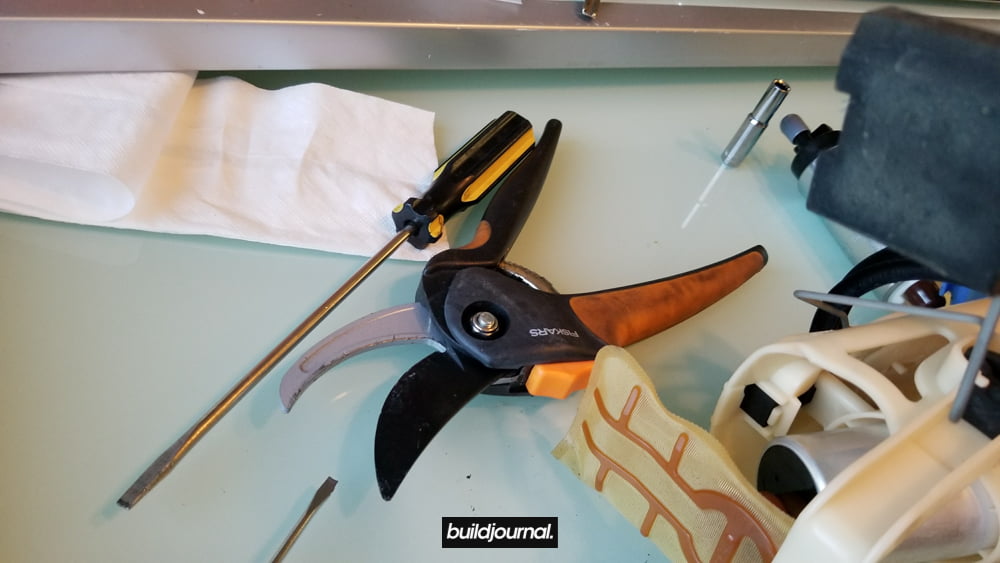
2.2 Find the metal pinch clamp on the fuel pump side hose. Find the small lock tab holding the clamp down. bend it up so you can being to pry the clamp. Remove the hose clamp with wire cutter pliers.

If I can get it off with my gardening tools, you can get it off too.
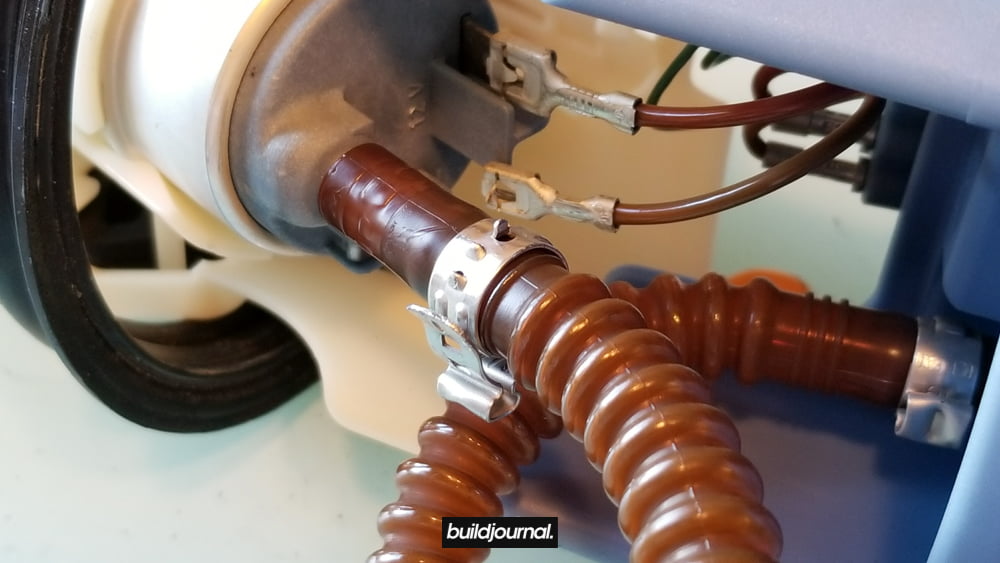
2.3 Find the 2 spade connectors on the fuel pump. Each connector is being locked with a metal tab. Push down on the tab and pry with a flat head to release each connector.
2.4 Remove the brown fuel tube from the fuel pump. I had to use a heat gun to warm up the base of the tube.
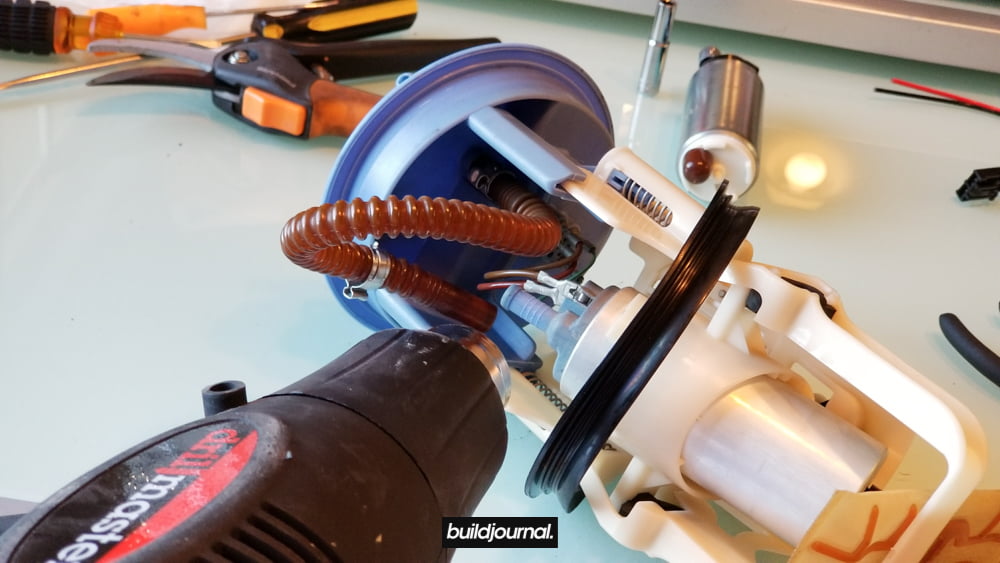
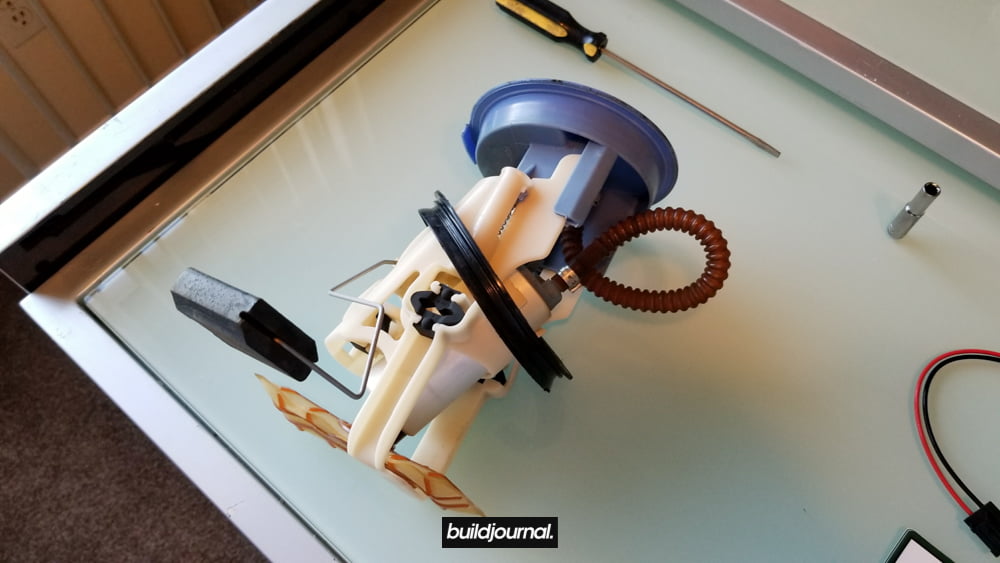
2.5 Remove the 3 rubber grommets holding the fuel pump housing from the assembly.
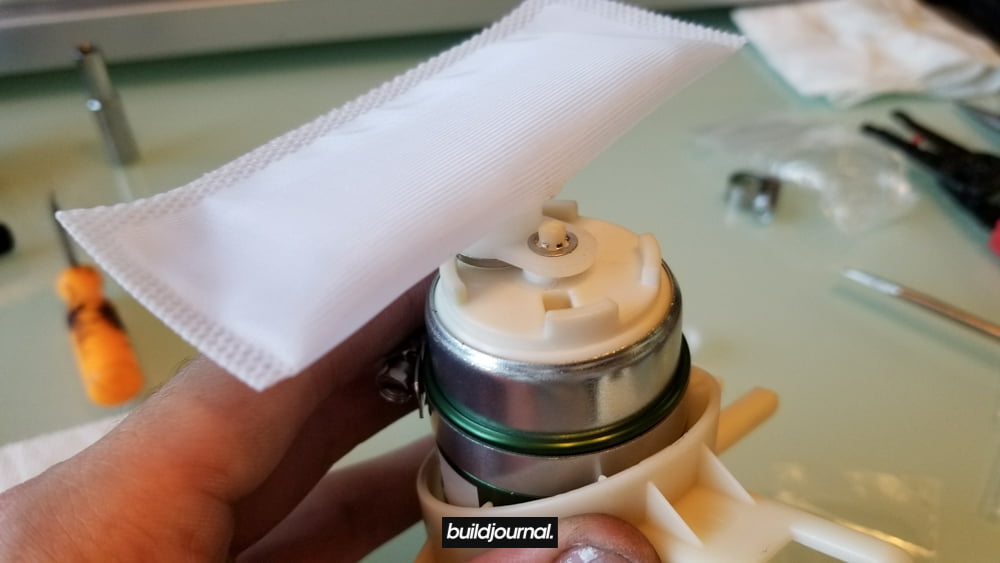
2.6 Remove the sock at the bottom. Simply twist and pull. Then separate the fuel pump from the housing.

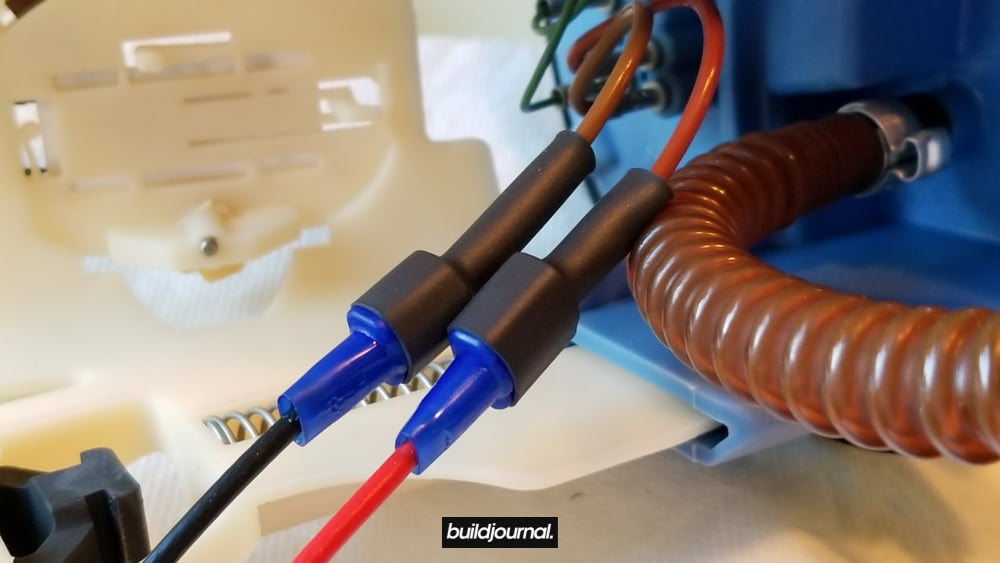
2.7 Crimp the small 3/16″ male spade on the black “-” wire and the larger 1/4″ male spade on the other “+” wire using the supplied connectors.
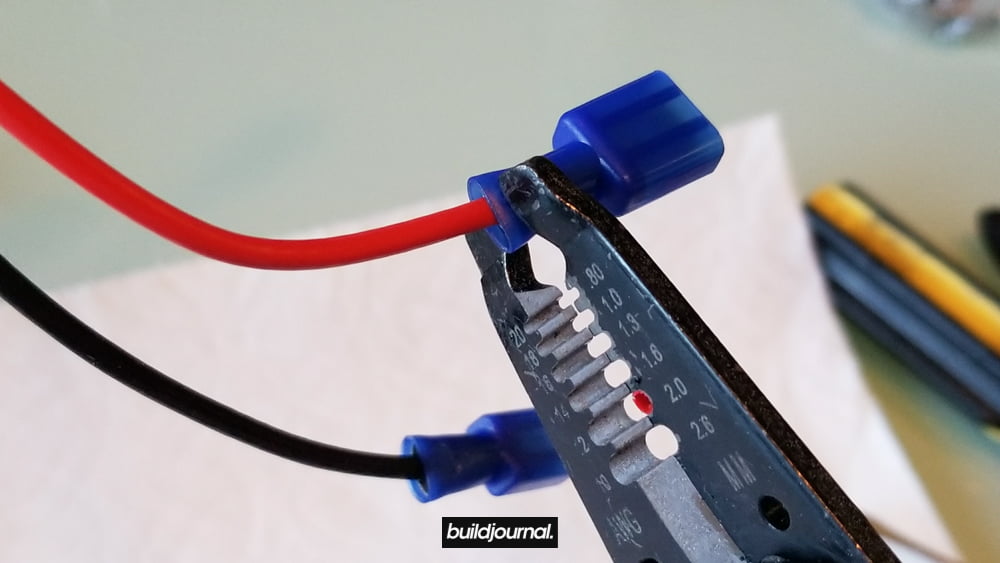
2.8 Plug the connectors in and gently give a tug to make sure they’re in. You may need to pry the metal tab back up again so the connectors lock. Heat shrink the terminals using a heat gun.
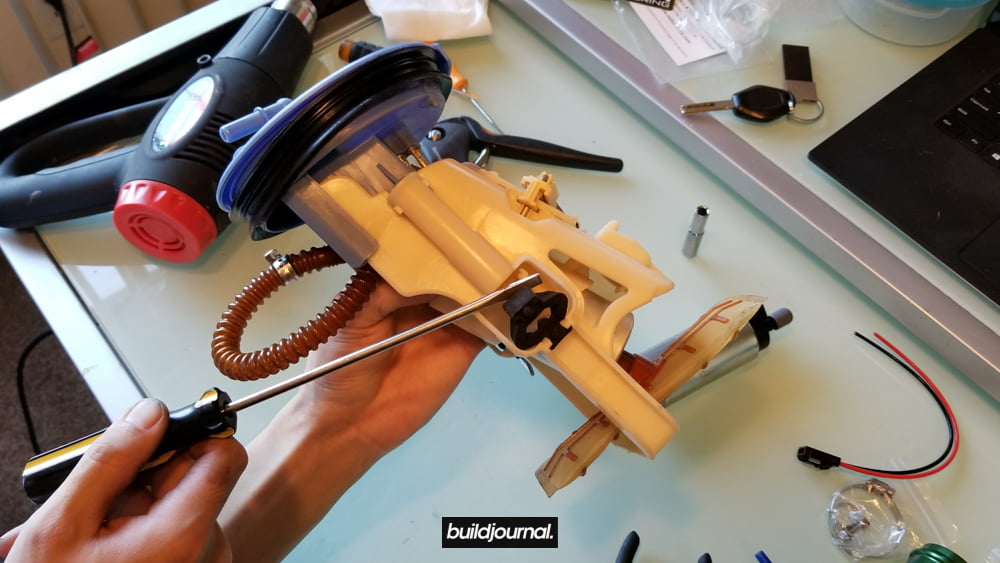
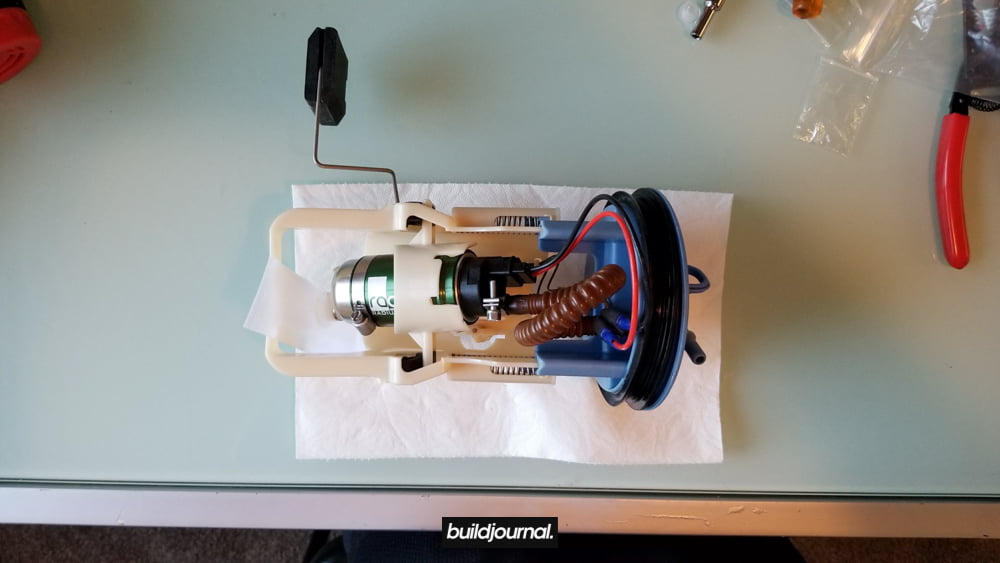
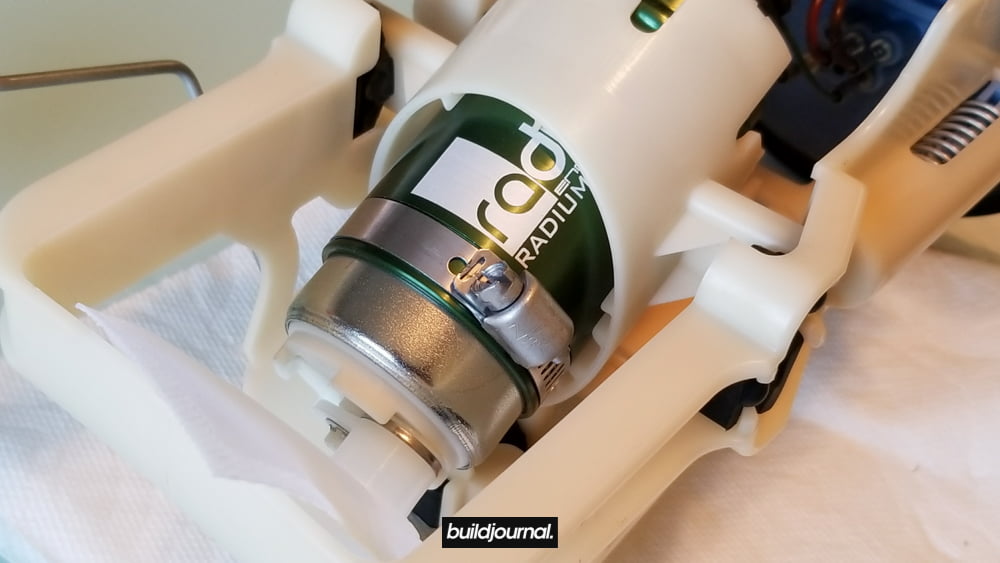
2.9 Fit the Radium sleeve. Notice the orientation.
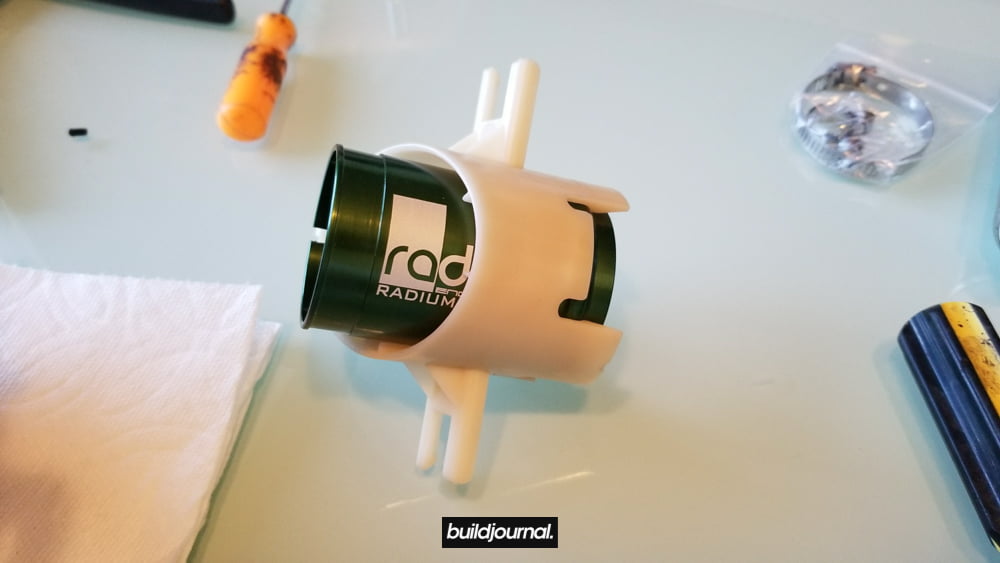
2.10 Fit the Walbro pump and use the c-clamp to tighten the sleeve. The top of the pump and top of the sleeve should be flush. Again, notice the orientation.
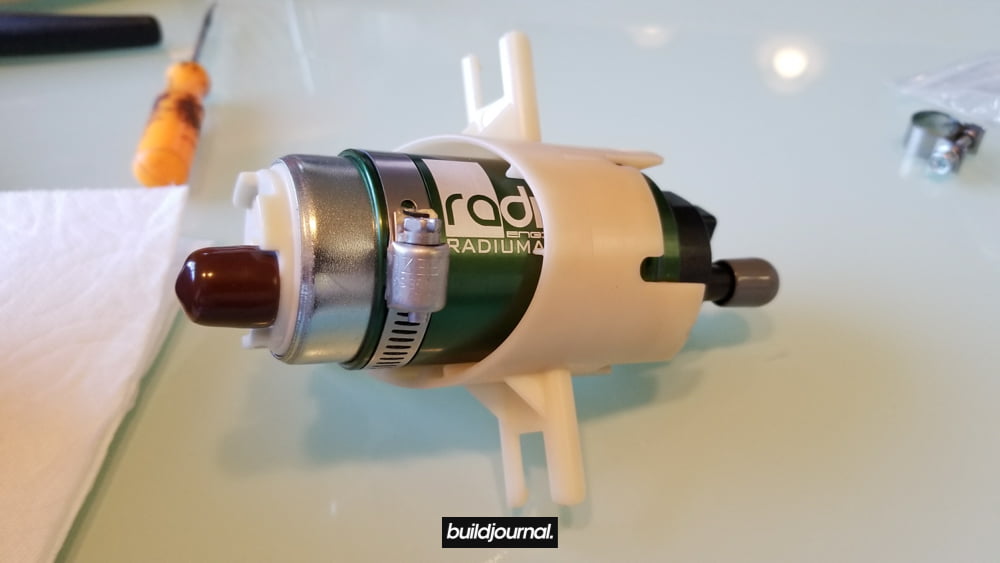
2.11 Remove the protection grommet on the sock and install. Secure with supplied lock washer.
2.12 Install the fuel pump housing into the assembly and connect the black connector on the Walbro. You’re all done! Please note I had to clock the fuel pump a bit sideways to retain the original orientation of the sock. The Radium instructions did not mention this, but I think it’s okay.
*UPDATE: forgot to mention you also need to connect the corrugated fuel hose to the new Walbro pump and clamp it down with the supplied small hose clamp. Then you’re finally done. Thanks to Ron Olexa for catching that!


I was a bit worried about premature fuel starvation because the stock sock is angled to be parallel with the bottom of the fuel tank, however the Walbro sock sits angled with one side sticking up high. If you’re worried about the same thing do not be. I clarified with the guys at Radium and they had this to say below:
“Because the Walbro 255lph is a gear rotor pump it does not need to be completely submerged as a turbine fuel pump does so there is no starvation worries.”
Now all you need to do is reverse the steps to install the fuel pump. Make sure to test the pump for leaks before you seal everything back up. Drop me questions in the comments section below or post pictures of your fuel pump setup. Did you go with OEM or something else? Let us know!
Hello does this kit works with no issues on a fully stock e46 m3 ?
Do you have an issue with this pump not holding fuel pressure after shutoff. I put in a walbro 255 in mine also but have to hold the key for a few seconds before starting or it’ll just crank
I do have that issue, but it’s mostly due to E85 content for my application. What fuel are you running?
Andrew,
Any particular reason you didn’t go with the Submersible PTFE Fuel Tubing that Radium Engineering also sells?
Just wanted to hear your 2 cents.
Honestly I didn’t even think about strengthening the tubes because I didn’t think I had to. That was the case until I started thinking about going E85. If I had to re-order I would’ve probably went for that as well as options for dual FP.
With this set up you can get fuel starvation because the filter and pump dont sit as low as the oem pump.
If you look at the oem filter it is angled.
If you could supply a similar angled filter that would help too suck the fuel from the bottom of the tank.
I know because its happened to me 2x
I noticed exactly that. When I installed the pump and sock, I tried to match OEM level as best as I can. I emailed Radium about premature starvation issues, but they said it won’t be affected. I really don’t know if this is true or not because last time I was at the track I started getting fuel cut with my fuel gauge between the 1/4 and 1/2 mark!
Very nice tutorial, but I think you forgot a step. Before or during step 12 you also need to connect the corrugated fuel hose to the new Walbro pump and clamp it down with the supplied small hose clamp. Then you’re all done!
12. Install the fuel pump housing into the assembly and connect the black connector on the Walbro. You’re all done!
Awesome thanks for catching that. I updated the post and gave you credit. 😉