Bimmerworld recently updated their E46 Fuel Starvation Kit so the stock fuel gauge is a lot more accurate. The new method involves taking out the sucking jet pump which was not part of the installation procedure in the previous revision. I don’t have the previous kit so I don’t know what the exact differences in this kit are.
Symptoms: Usually on the track where there are high-speed sweeping right-hand turns, the car starts to go into fuel cut because the fuel is forced to the driver side of the car, towards the sender unit, while the passenger side pump experiences fuel starvation.
Solution: Bimmerworld E46 Fuel Starvation Kit
Ever since I put in a Walbro fuel pump I’ve been getting fuel cut at half tank! It might not seem like a big deal, but at the race track a quarter tank can save you a trip to the gas station or one less fuel jug to haul. I decided to go with Bimmerworld because they had the most value. Here I’ll do a step-by-step DIY.
Tools and Parts Needed

- Sockets
- Hammer
- Flat head
- Drill bit + drill
- Soldering kit
- Wire cutter
- Cutter
- Shrink tube
- BMW OEM fuel sending unit gasket (P/N: 16141182905)
What’s in the Kit?

| Part No. | Part Name | Quantity |
|---|---|---|
| 1 | Fuel pump assembly | 1 |
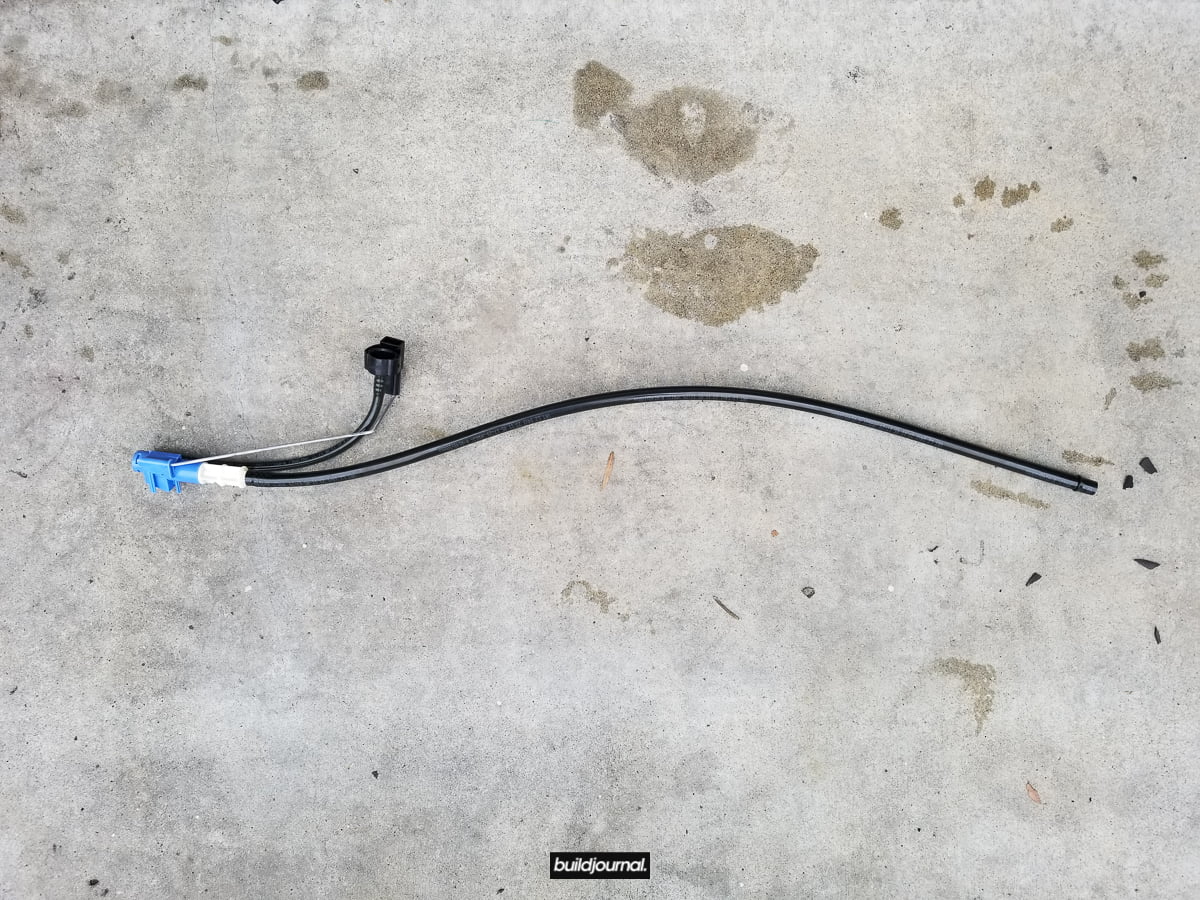
| 2 | Wiring harness (36″ long) | 1 |
| 3 | Wiring harness (18″ long) | 1 |
| 4 | Hose clamps (8-12 mm) | 3 |
| 5 | Hose clamps (12-20 mm) | 2 |
| 6 | Fuel hose (1 meter) | 1 |
| 7 | Fuel hose (0.25 meter) | 1 |
| 8 | Hose size reducer | 1 |
Installation Instructions
This installation does not require you to completely remove the fuel pump (passenger side) however it is recommended you replace your gasket (P/N: 16111184084) if you haven’t done it yet.
Please be mindful of safety hazards! Work in well-ventilated area away from sparks, open flames, or other sources of ignition. Be prepared with a fire extinguisher. Wear safety goggles and nitrile gloves.
1. Depressurize fuel system
1.1 Start vehicle.
1.2 Remove fuel pump fuse. (see fuel pump diagram in glove box)
1.3 Wait for car to die.
1.4 Turn off ignition and re-install pump fuse.
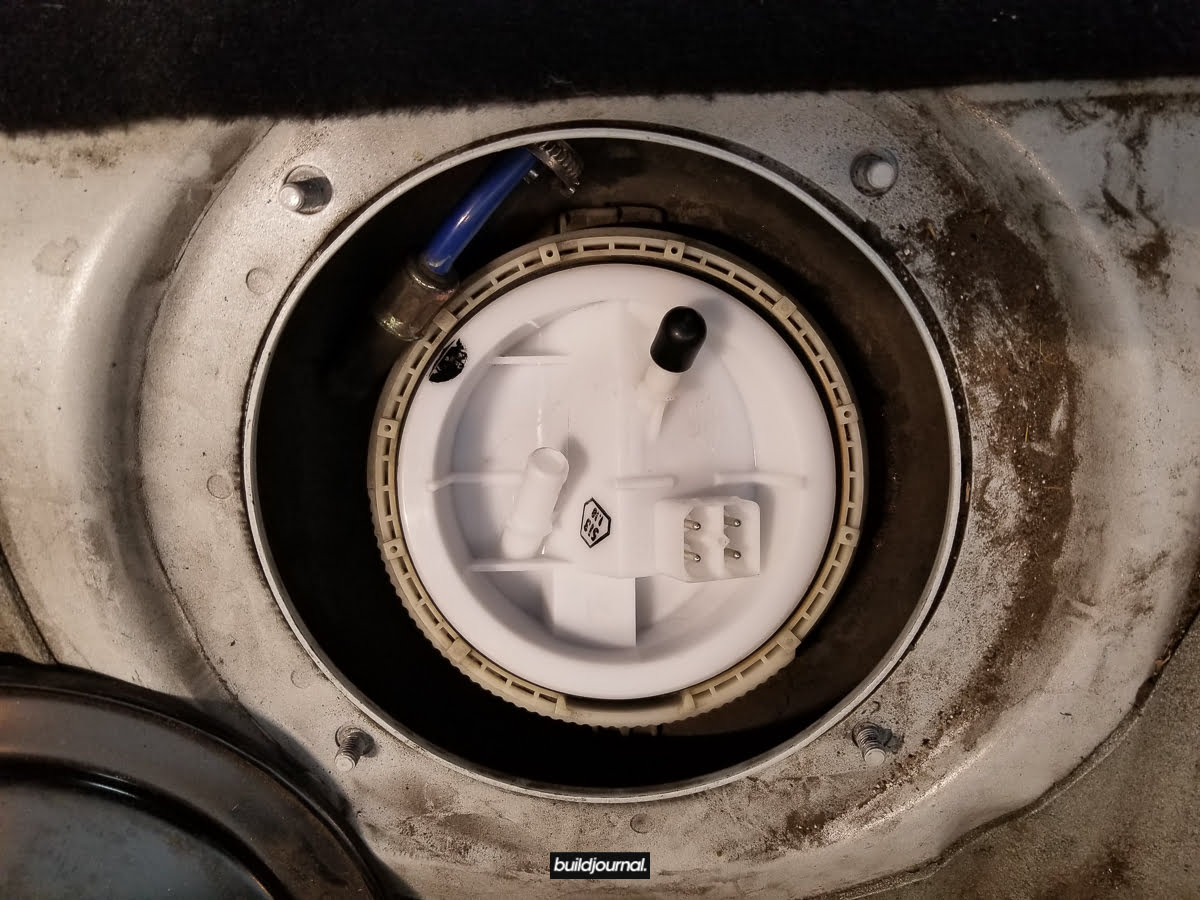
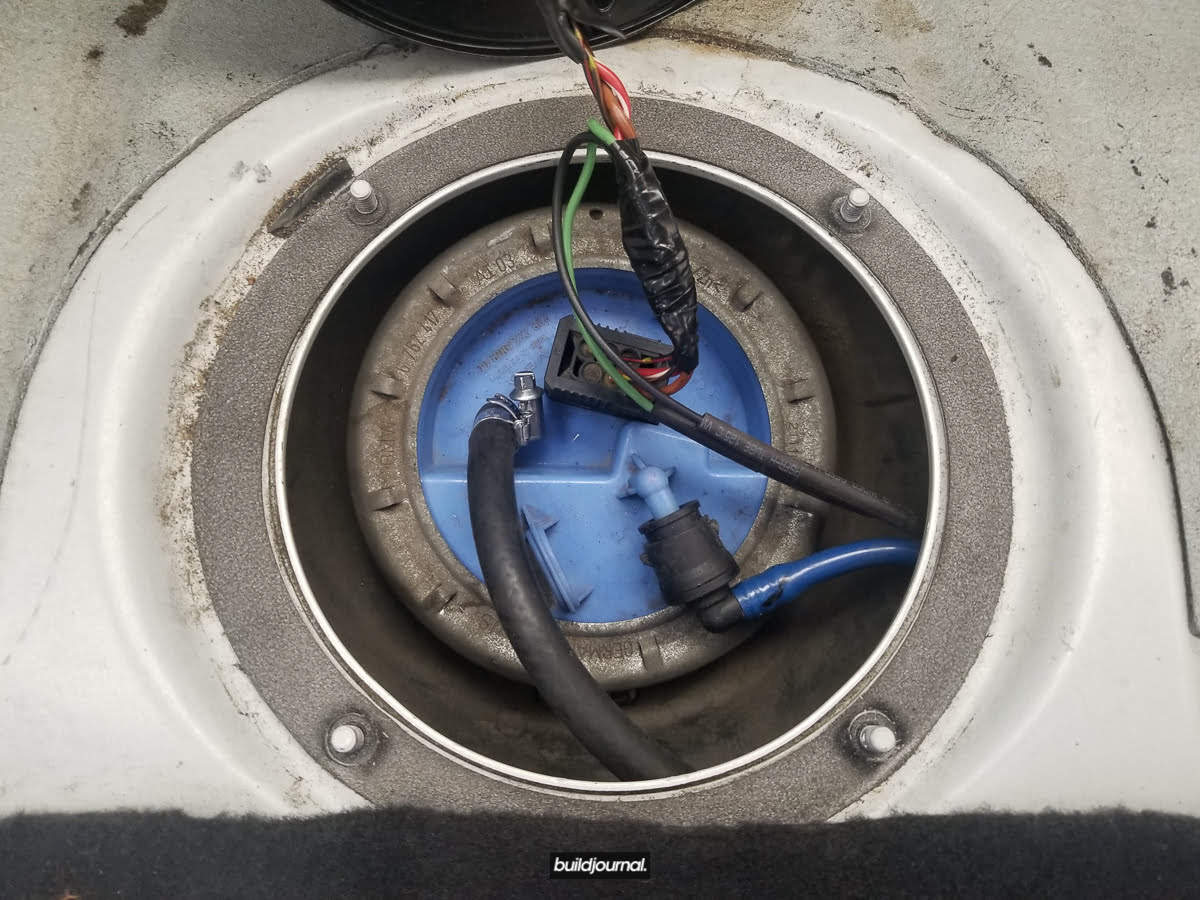
2. Remove stock fuel sending unit
2.1 Remove bottom rear seat.
2.2 Remove both fuel tank caps with 10 mm nuts.
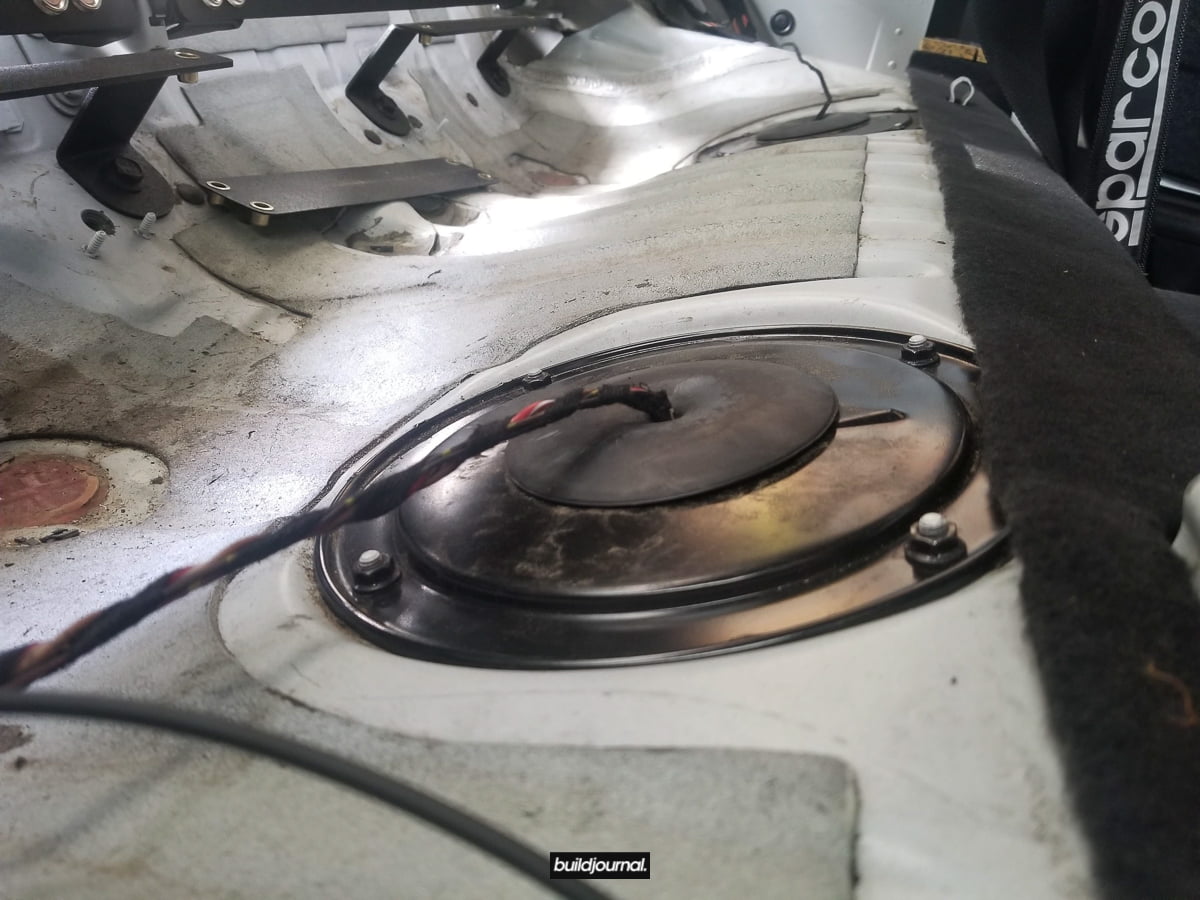
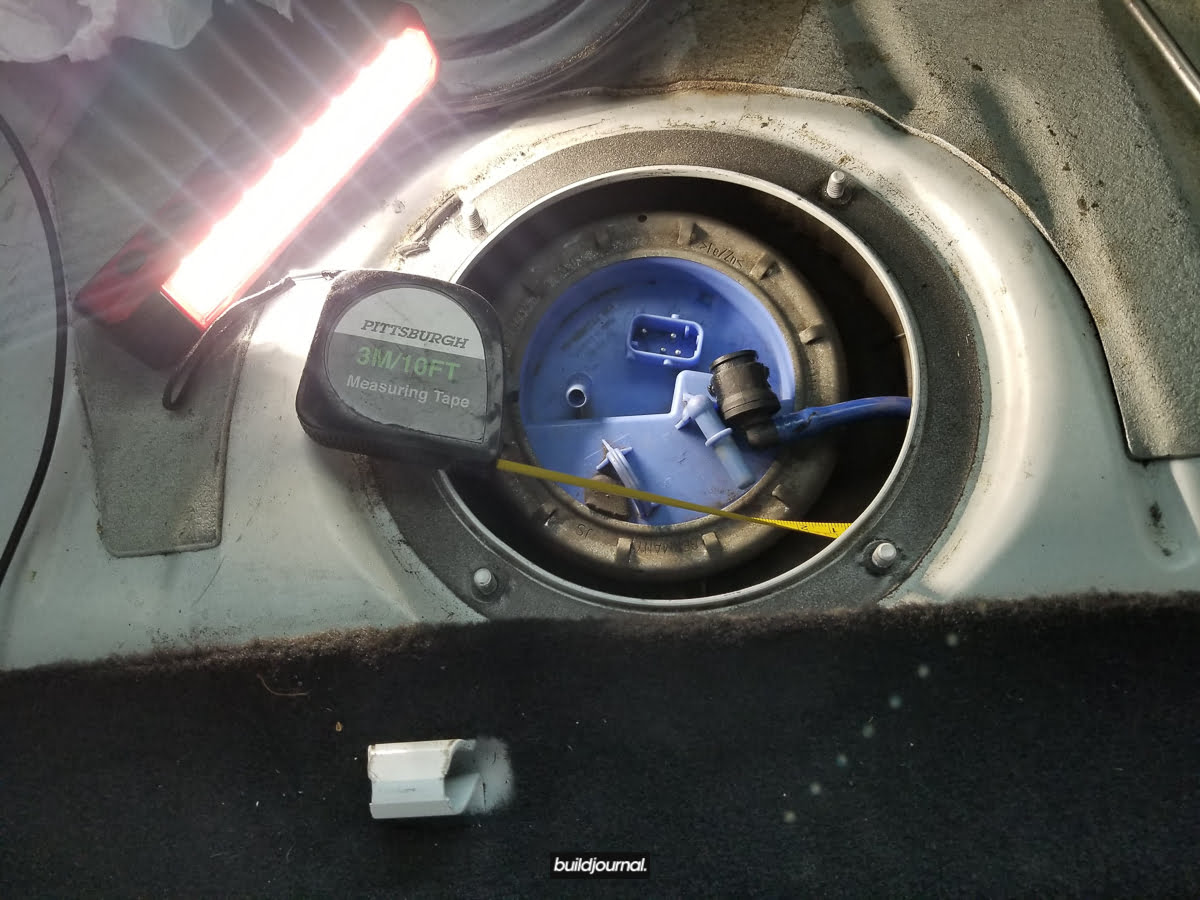
2.3 Remove metal ring retainer with flat head and hammer. Place flat head on the metal tab and loosen by tapping with a hammer counter-clockwise.
2.4 Disconnect fuel return line by loosening the stock hose clamp.

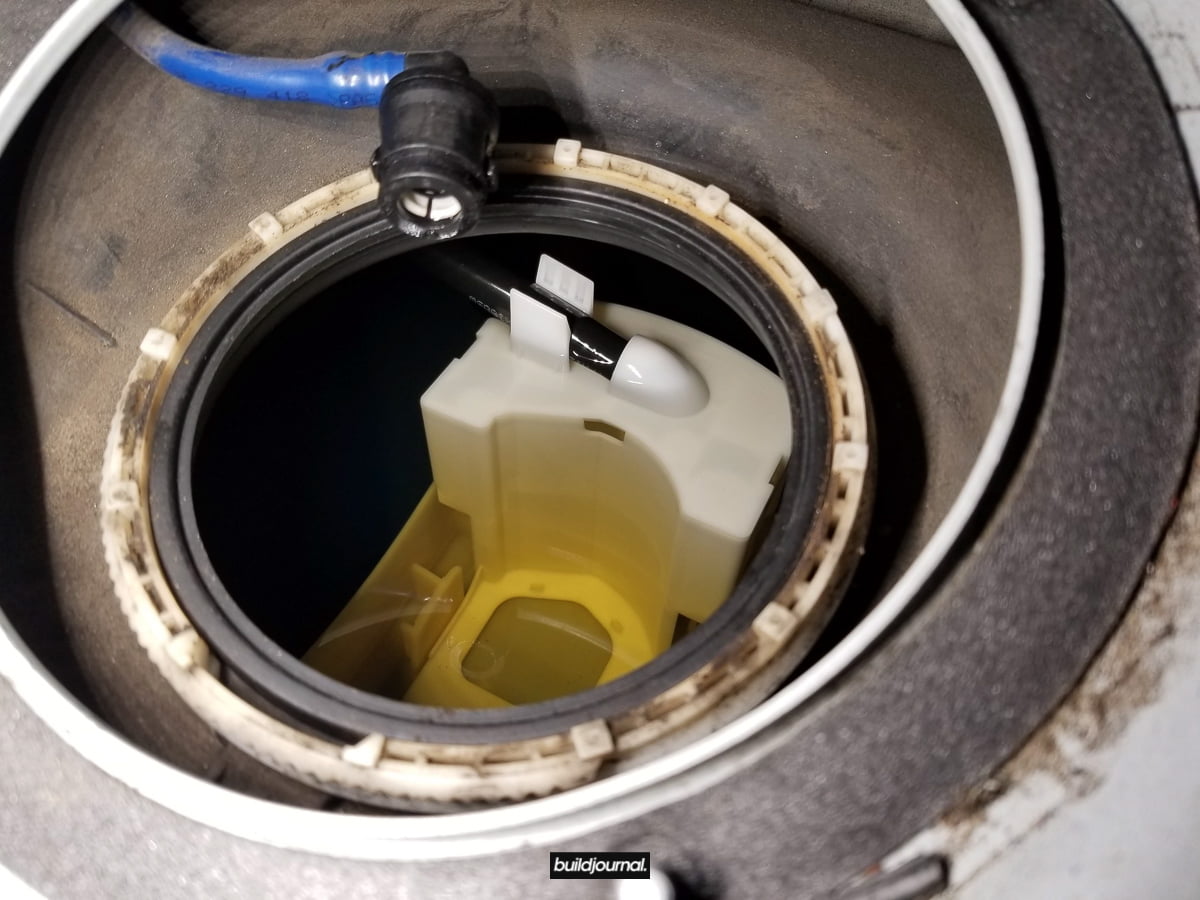
2.5 Remove stock fuel level sender, half way, from driver’s side; watch out for the float arm.
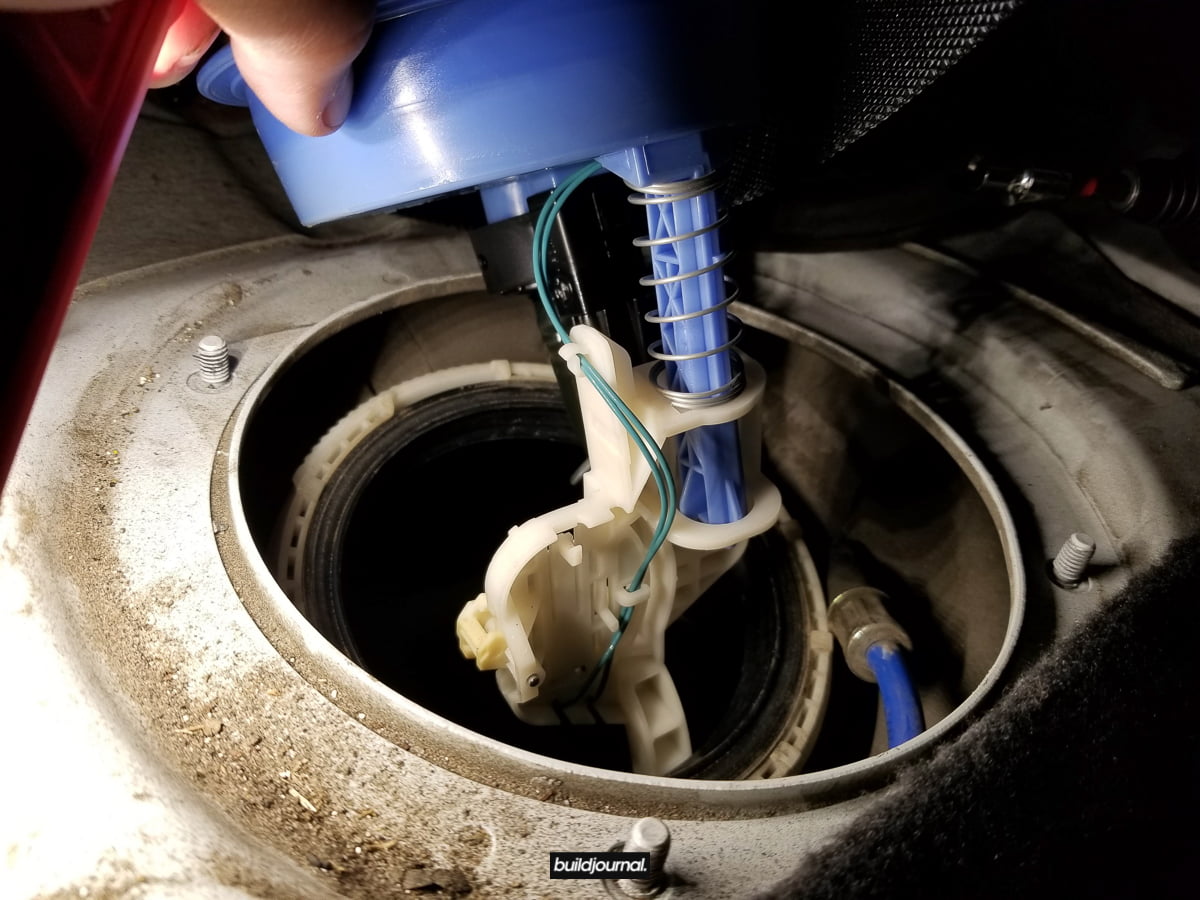
2.6 Disconnect the sucking jet pump from the sender unit. There is a clip you need to press on the black piece of the jet pump.
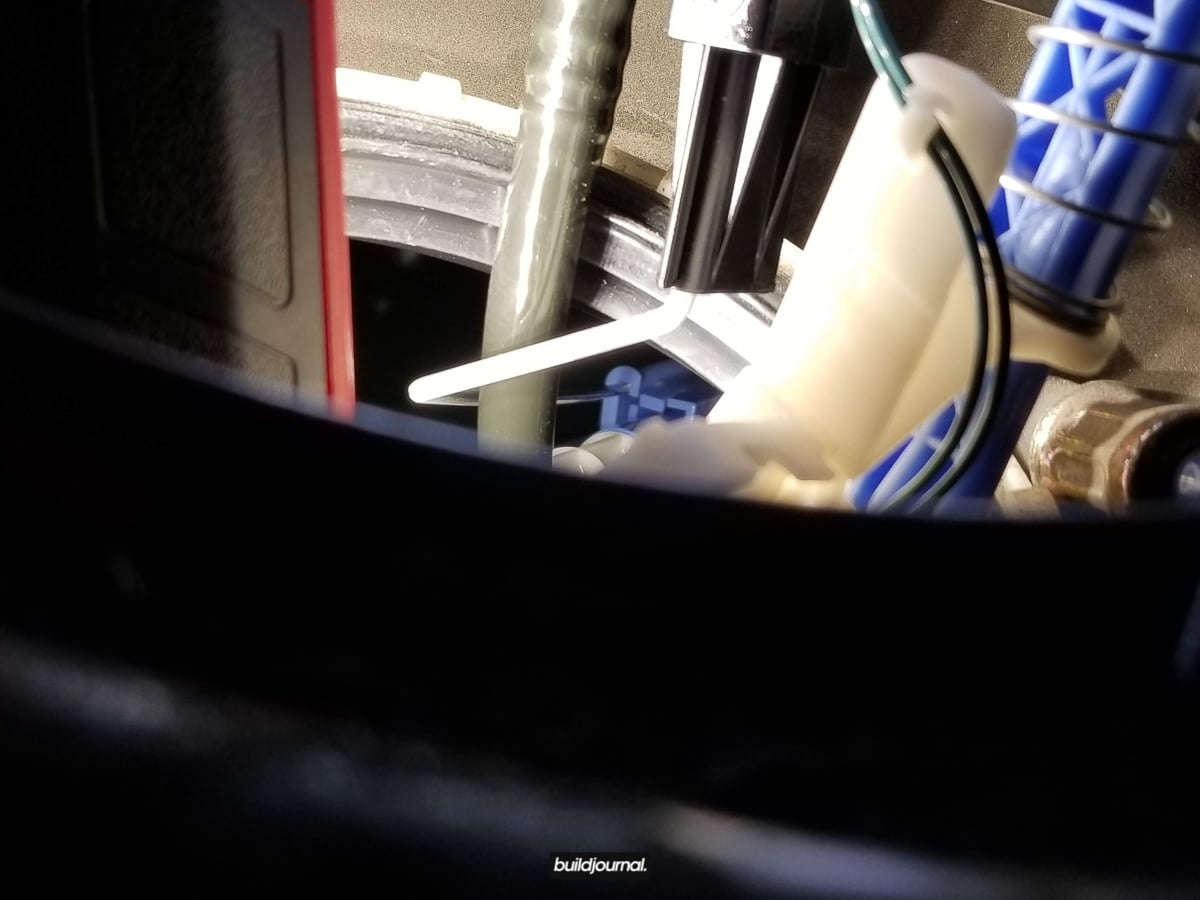
2.7 The other side of the jet pump is connected to the passenger side fuel tray. I just yanked mine out as it’s only connected by a slip ring. Be careful because you might pull the fuel tray out, but you can easily out it back. If you want to be safe, take out your passenger side fuel pump first and yank it from the head.

This is the fuel pump side. You can see where the sucking jet pump line connects.
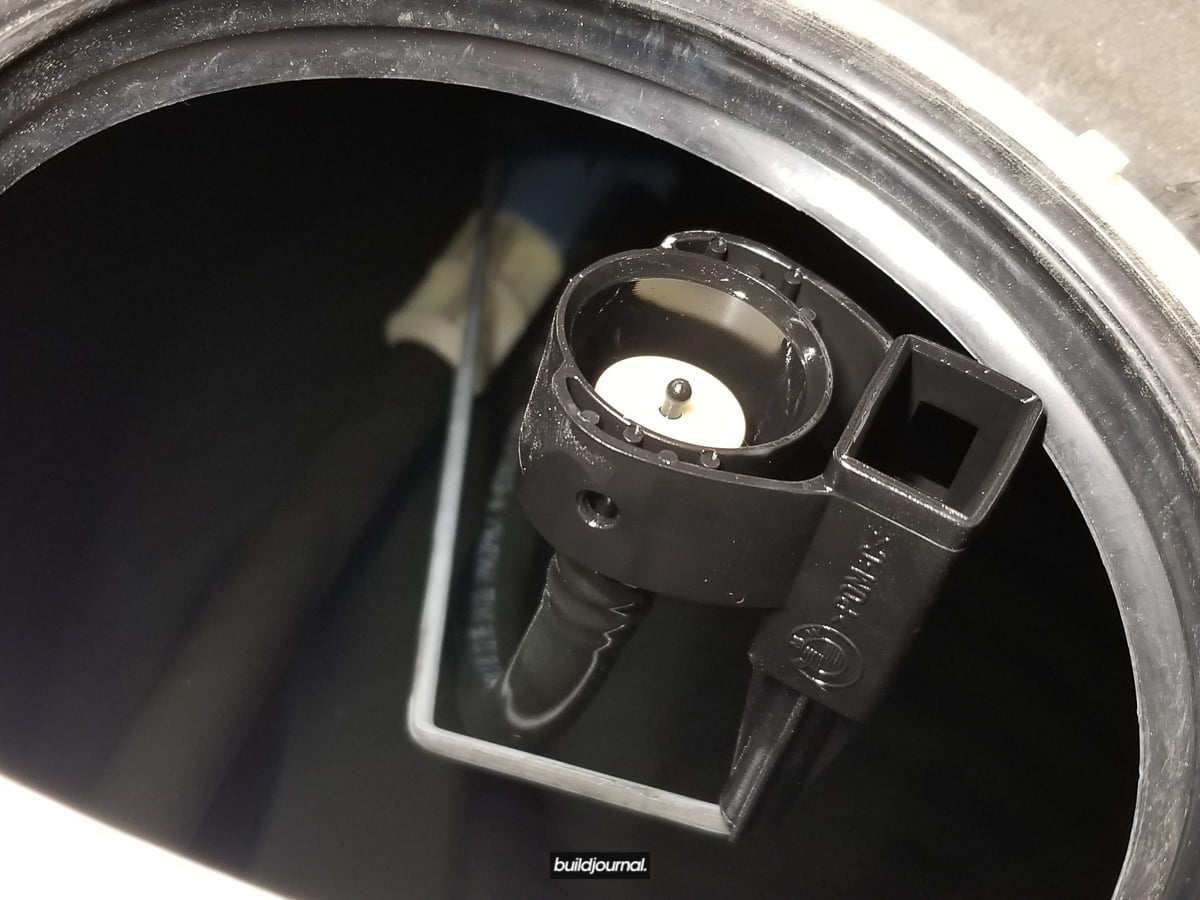
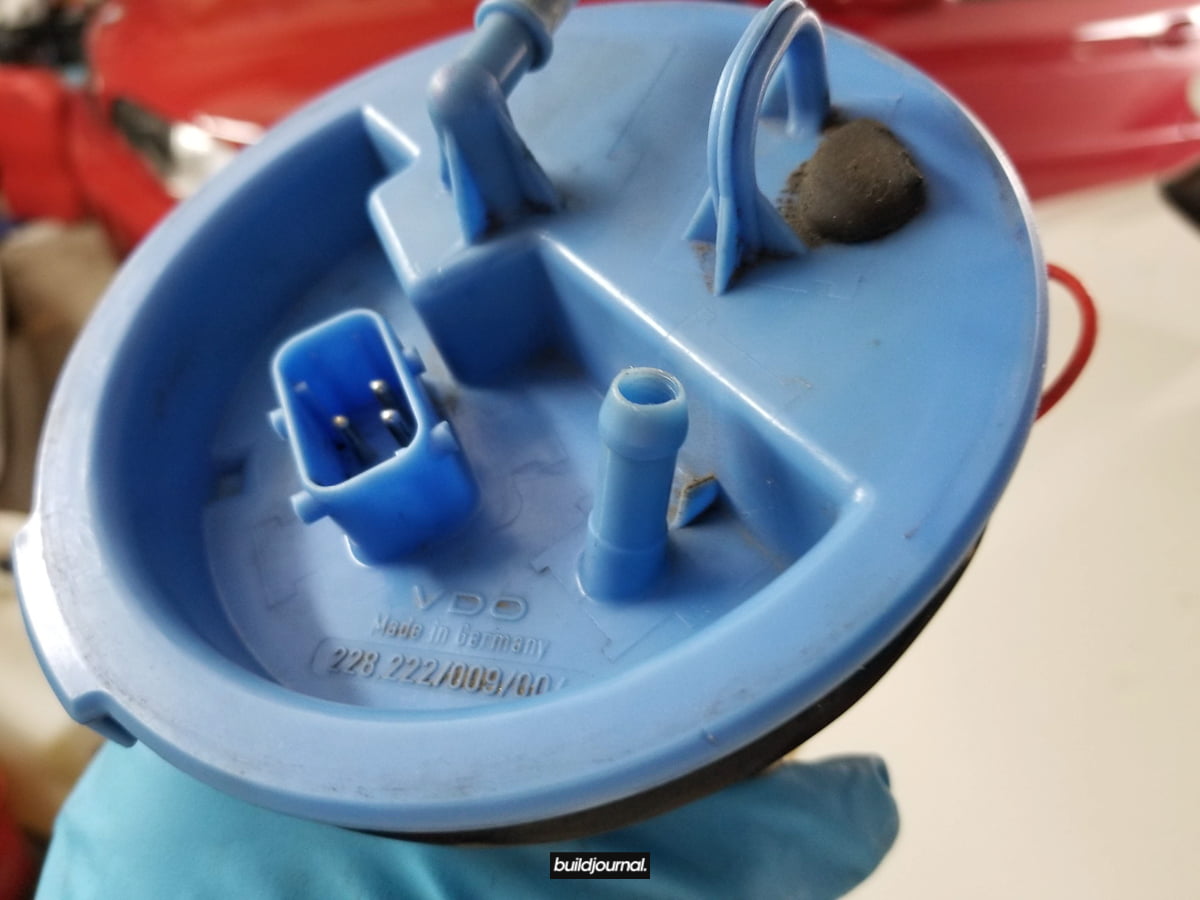
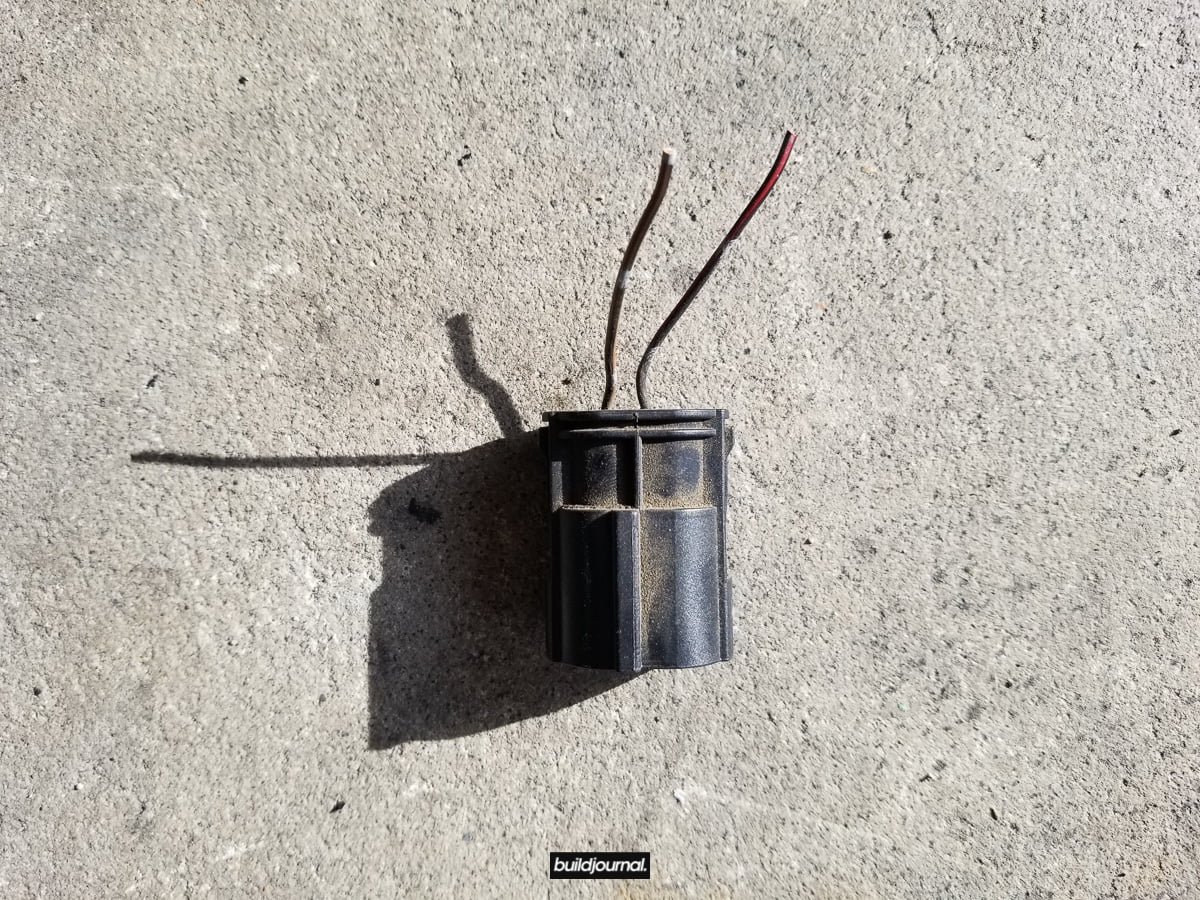
Old sender unit.
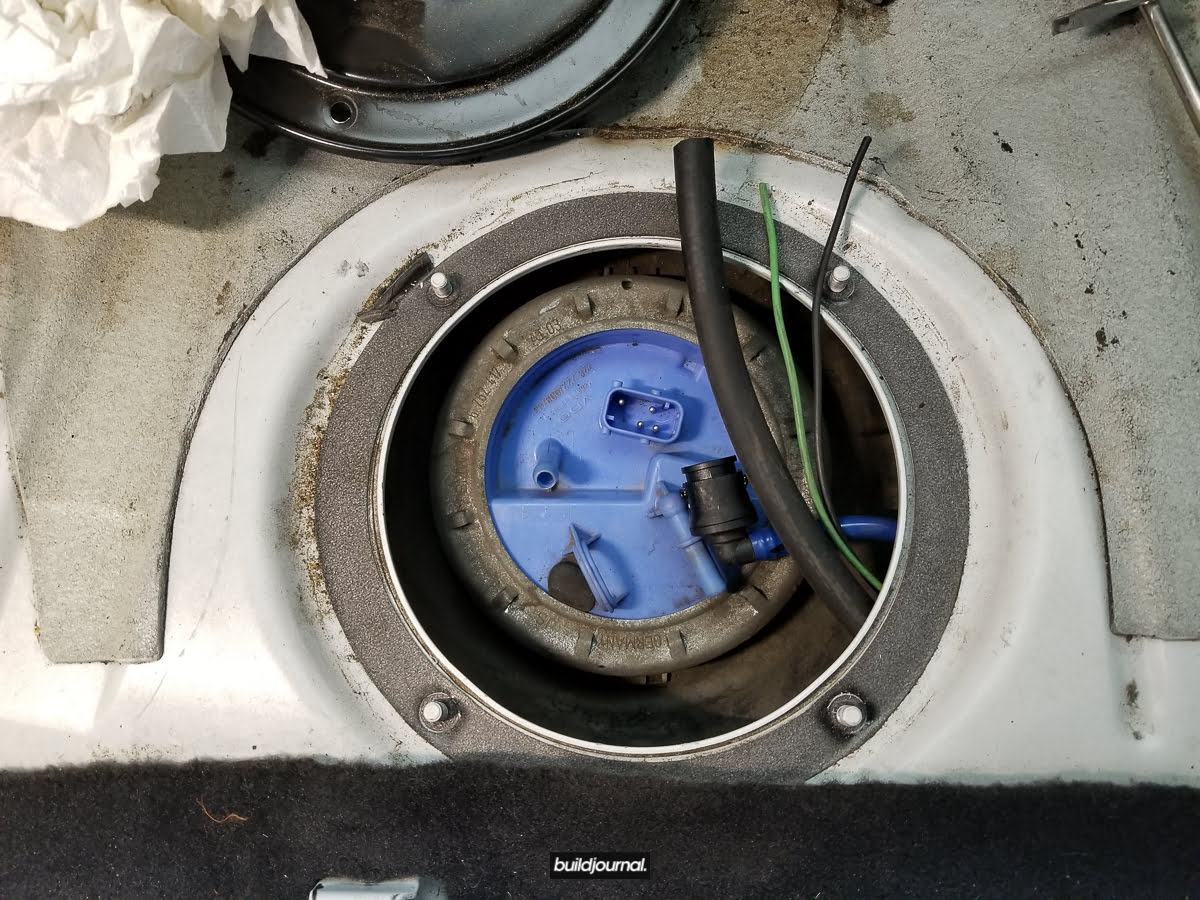
3. Install new Bimmerworld pump unit
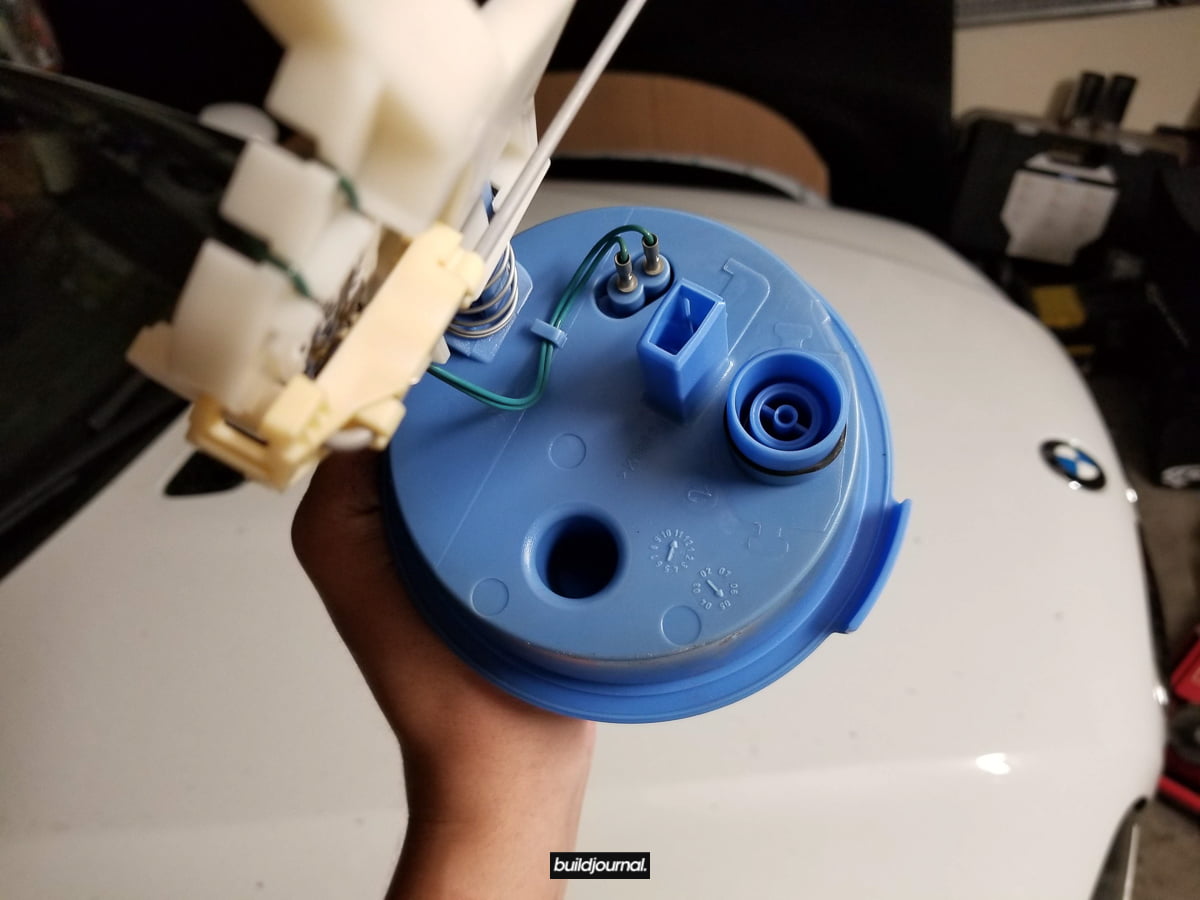
3.1 Get your new gasket for the sender side and properly seat it around the lip. Improper seal can cause a fuel leak so make sure the gasket is seated properly!
3.2 UPDATE 5/9/19: User Duncan Ross has pointed out that the correct orientation to have the fuel level gauge work properly is to clock the fuel pump about 45° clockwise and the black/white plugs should be facing a stud. The picture below is the incorrect orientation. In the picture below, the top of the picture is facing the rear of the car. If clocked properly, the black/white plugs will be facing the stud on the bottom right corner, in the picture.
3.3 Install 8 mm fuel hose over the 8 mm (small) nipple on the new pump. Use 8-12 mm hose clamp to secure hose in place. In the picture you can see I cut the hose significantly because the hose was too long and wouldn’t fit inside without pinching the hose. You can cut to your preference.
3.4 Install 12 mm fuel hose over large nipple, securing with 12-20 mm hose clamp. I had to trim this hose as well.
3.5 Insert hose size reducer into opposite end of 12 mm fuel hose, securing with additional 12-20 mm hose clamp. Your original fuel line will go into the adapter.

4. Remove fuel pump (passenger side) unit
This step may not be necessary for some, but this next step requires drilling through your fuel pump nipple so I did not want to risk getting plastic shaving into my tank.
4.1 Remove the fuel line by pressing the 2 black tabs. Slide in then out. A little bit of fuel may leak so be prepared with some towels.
4.2 Remove the wiring harness plug.
4.3 Unscrew the metal ring and remove the fuel pump assembly.
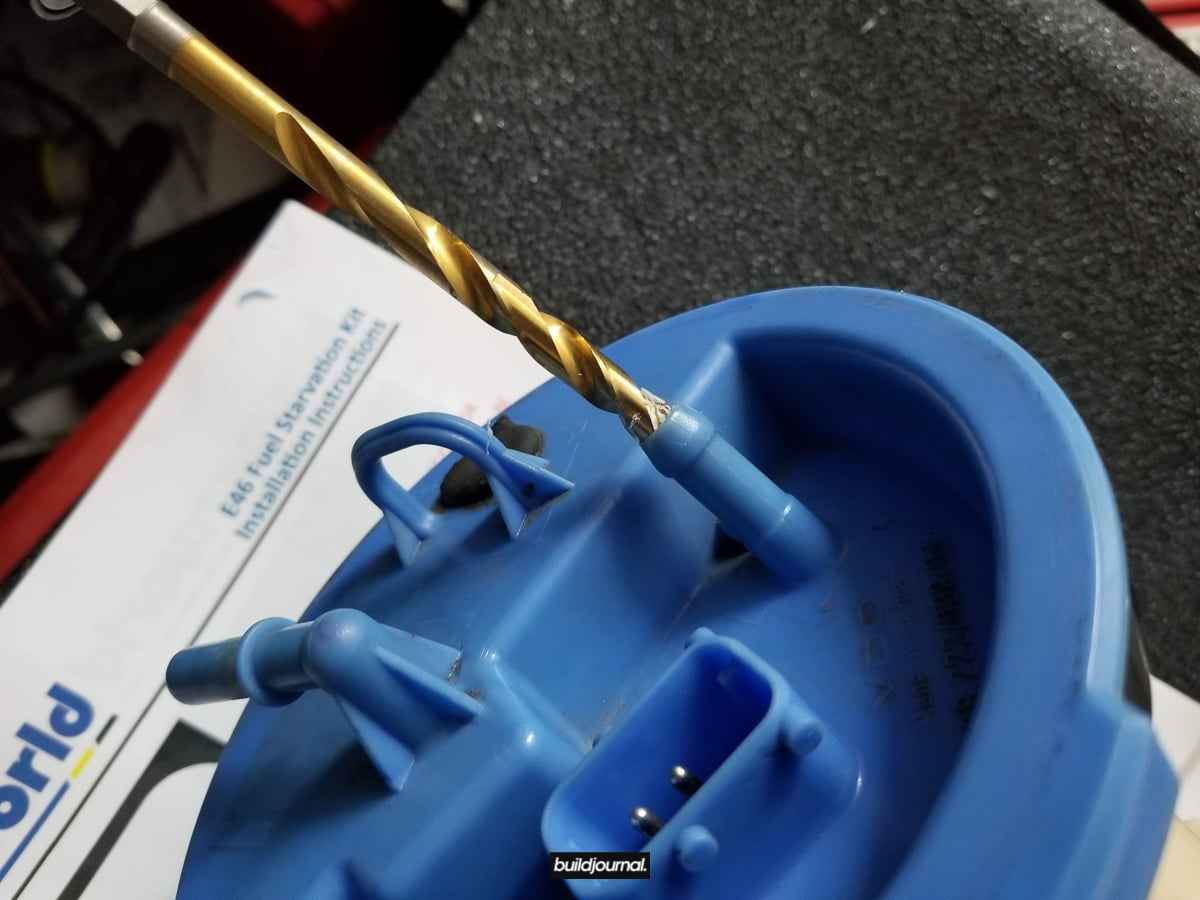
4.4 Drill hole into un-used nipple using a drill bit. I believe I used a 1/4″ bit. Recommended to start with a smaller drill bit to mark the center so you center the drill for the larger one.
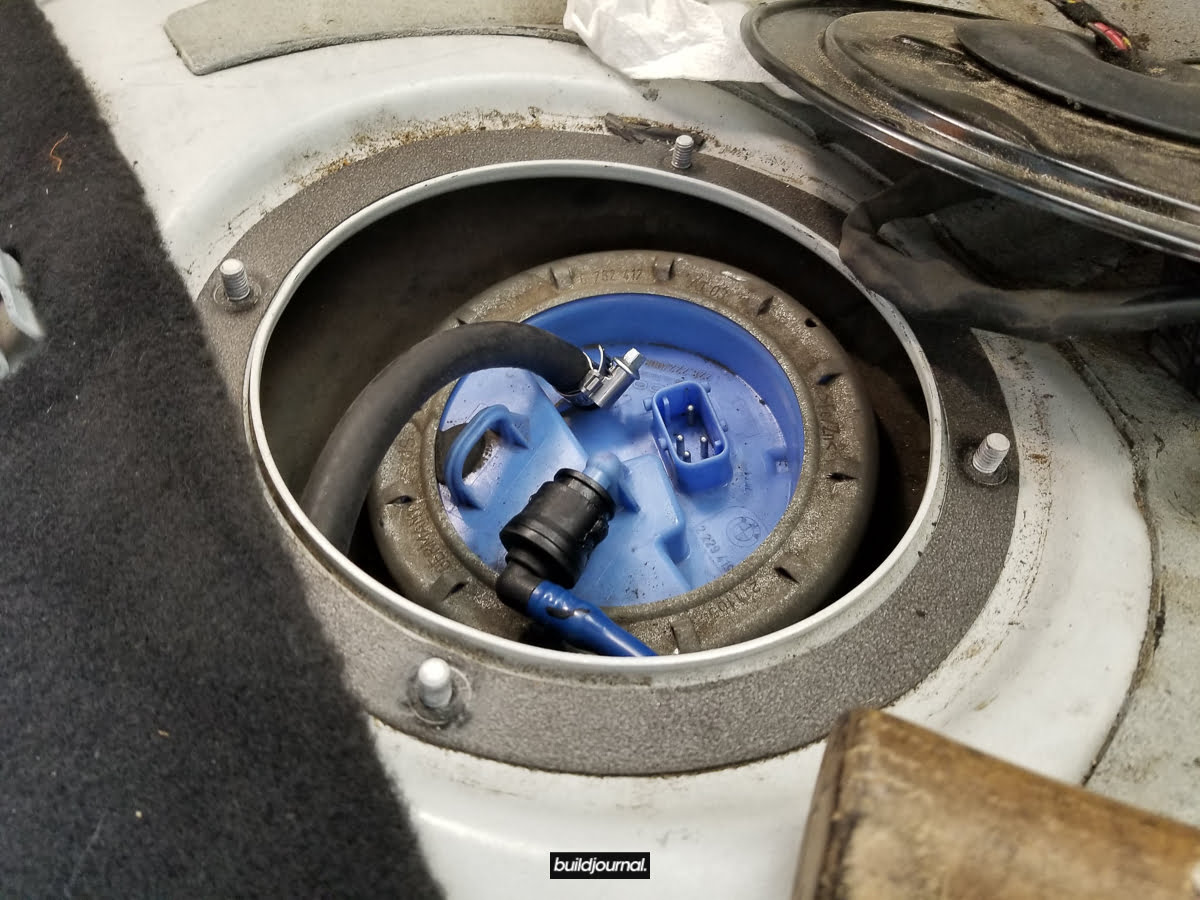
4.5 Seat the fuel pump gasket around the lip and re-install fuel pump. Re-insert fuel line, wiring harness and metal lock ring.
5. Route remaining fuel lines
5.1 Route 8 mm fuel line installed from new pump to existing fuel pump by fishing line underneath the sheet metal of the seat. A little trick I did was to fish a tape ruler from one side to the other and then taped both the 8 mm hose and 36″ wiring harness to the ruler to fish it out. Although we’re not ready to wire yet, you need to fish the wiring harness again so might as well do it at once.

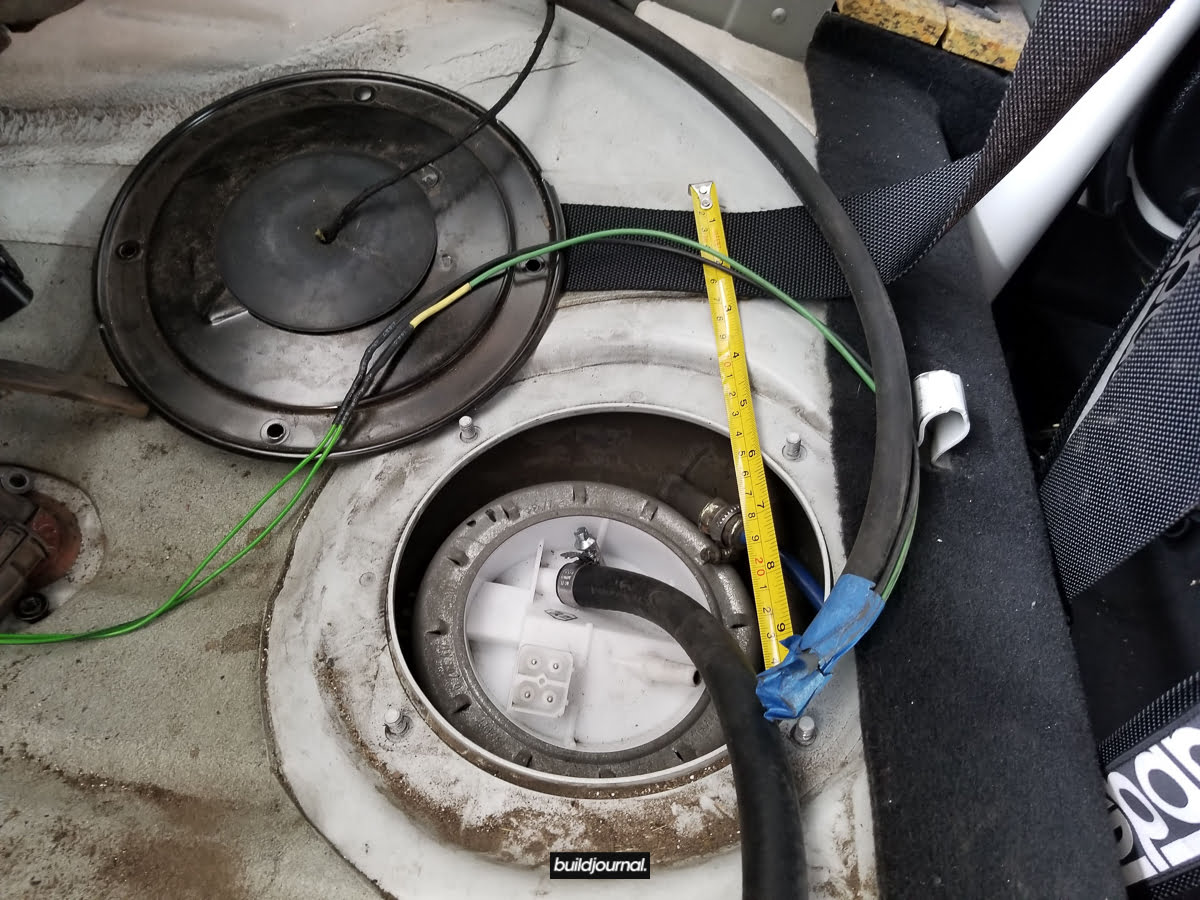
5.2 Insert 8 mm hose into the newly created nipple on the fuel pump then secure with 8-12 mm hose clamp.
6. Wiring the new unit
6.1 Insert 18″ wiring harness (white connector) into driver’s side connection on new fuel pump unit.
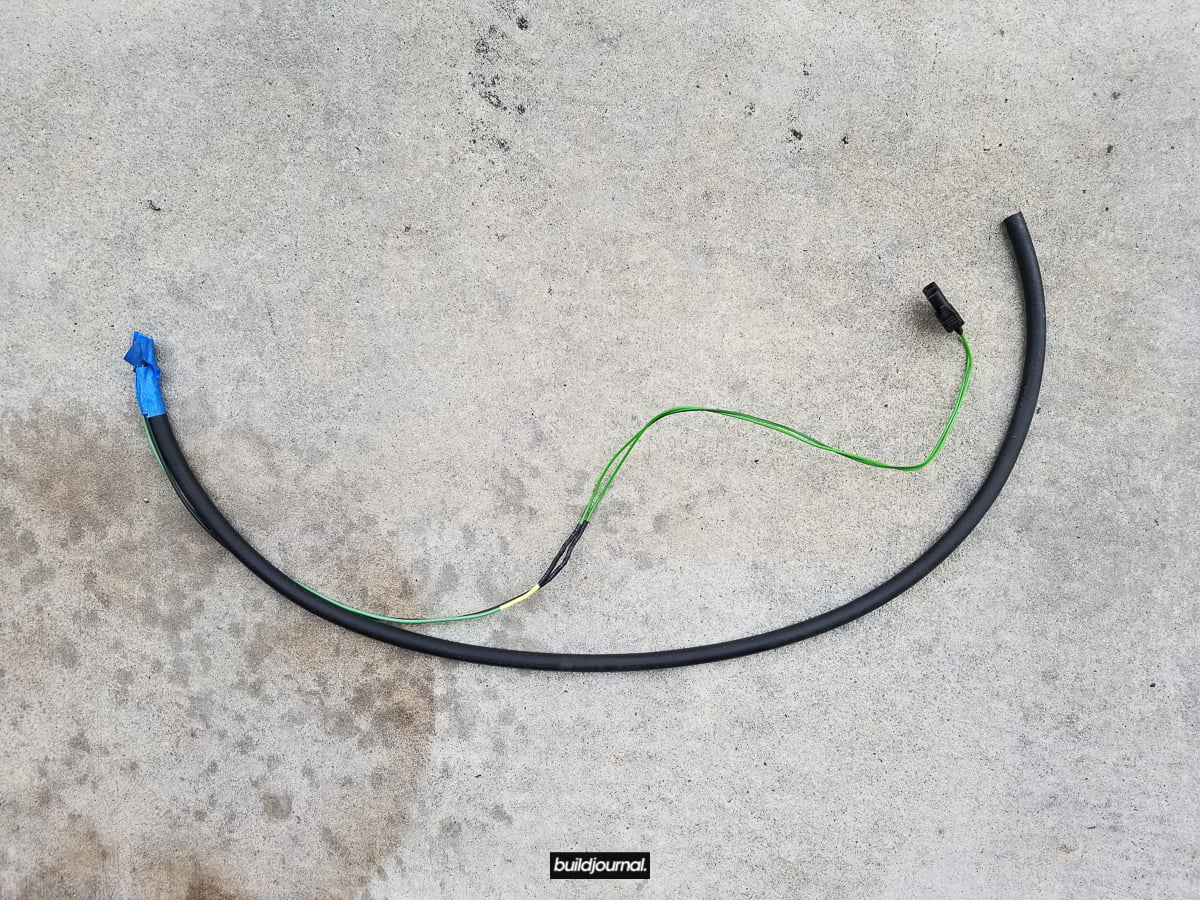
6.2 Solder solid green wire into black/red wire. Use heat shrink to protect the wire from the elements.
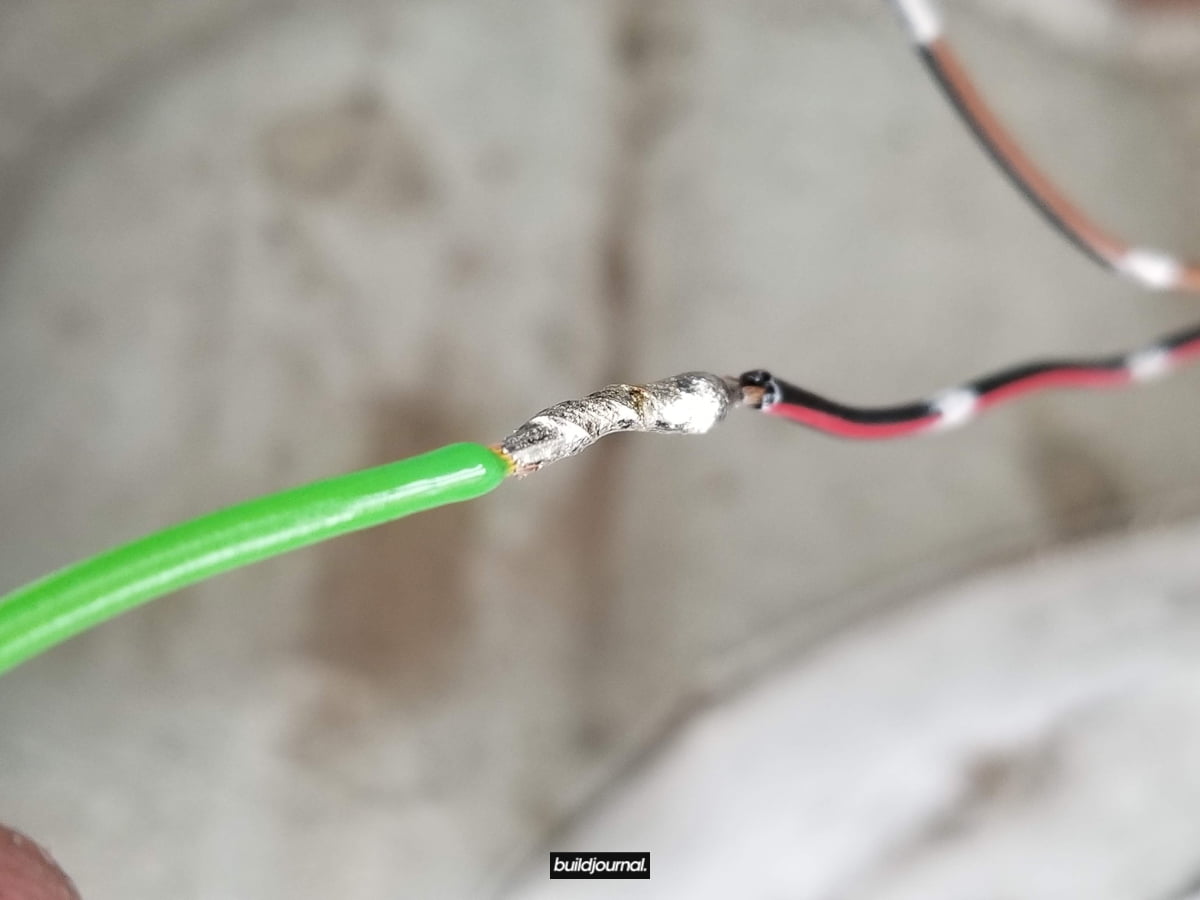
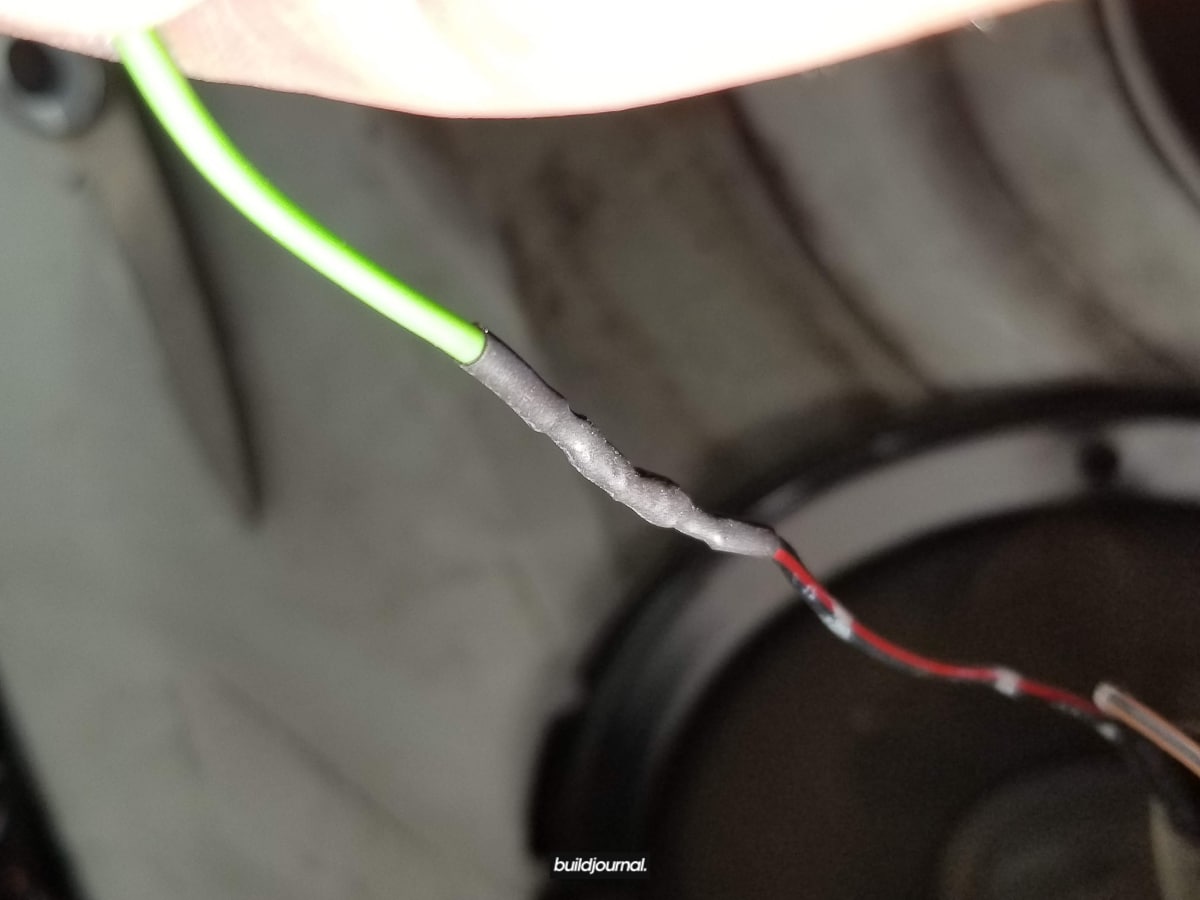
6.3 Splice green/black wire on harness into brown/black wire. This re-connects the fuel level sensor.
6.4 Connect 36″ wiring harness (black connector) to other connector on new fuel pump. Your wires should already be re-routed underneath the car from step 5.1.
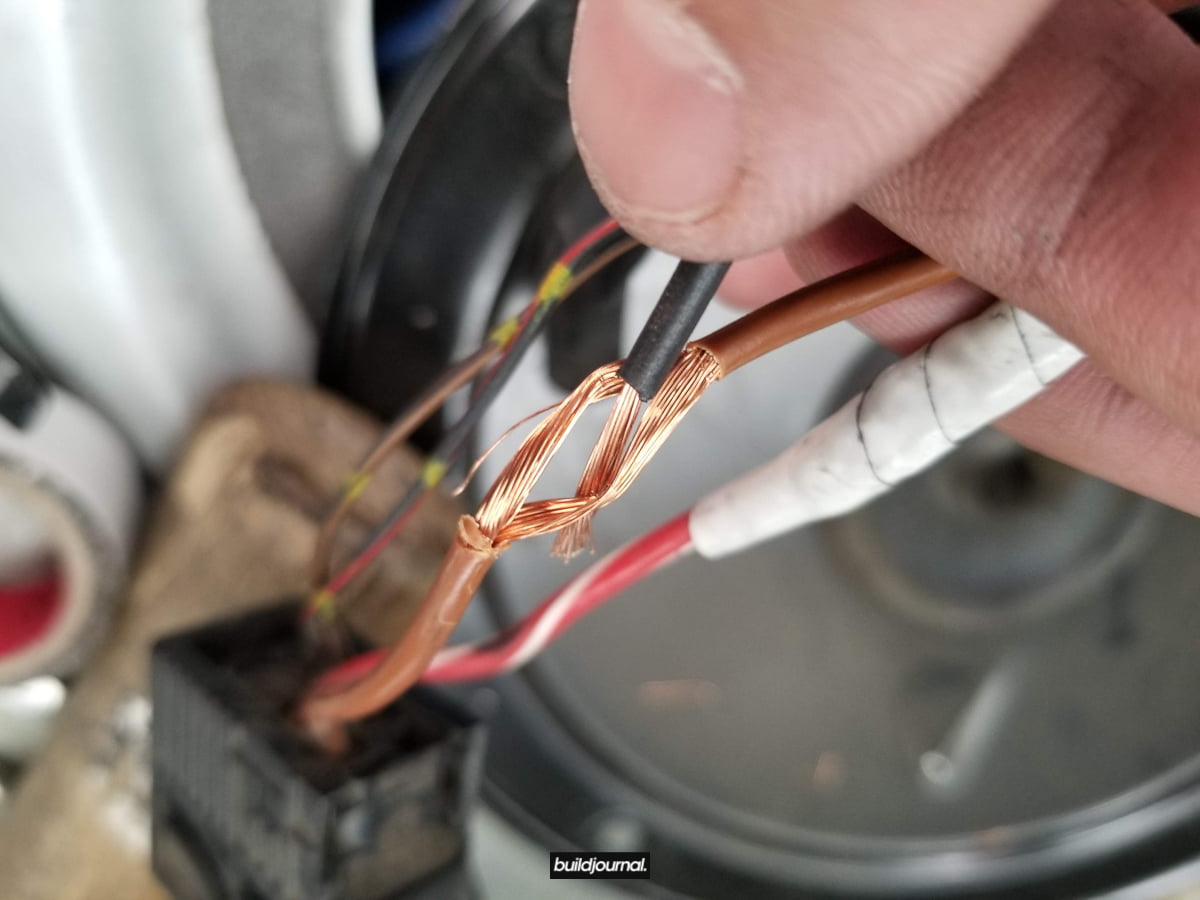
6.5 Cut power supply wires going to existing pump about 3 inches from top surface of old fuel pump.
6.6 Connect dark green harness wire to red/white (or blue/white on non-M E46) power using soldered y-splice. Seal with heat shrink tube.
6.7 Connect black harness wire to brown ground also using soldered y-splice. Seal with heat shrink tube.
6.8 Bundle wires together and wrap with electrical tape.
6.9 Re-install cover plate and seats. Installation is complete.
Testing at the Track
UPDATE 3/22/19 – The “Check Filler Cap” warning has not appeared ever since I wrote this article. It may have been a coincidence. However I noticed the fuel gauge does not show 100% even after topping off at the gas pump. Bimmerworld claims it the fuel gauge shows 100% on their install car.
I tested this on track after the installation and I ran down the car to half a tank and experienced zero fuel cut from fuel starvation. I ended up running the car all the way until a quarter tank and I still did not experience fuel cut. The only weird things I experienced was a “Check Filler Cap” warning and the gas pump nozzle auto-stops prematurely when I’m filling up. I’ve reached out to Bimmerworld to see what’s going on so I’ll update once I do, but I’m super pumped that this kit works! Oh yeah and the fuel gauge meter seems to be pretty accurate. The only way I can fully test the accuracy is to manually calculate the fuel usage or just drive and give it time. I will report back. Below is a video of my PB run at Chuckwalla with a little less than half a tank. Notice the sweeping right handers especially the ones I pull 1.5 G’s on.
Andrew, would it be possible for you to either PM or post the part number on the fuel pump used in the kit? I have another OEM E46 pump here but it appears to be too deep to fit in the other side of the tank.
I just installed the bimmerworld pump and I filled my car up with fuel to the maximum but it only shows just over half on the fuel gauge. Any ideas? Does yours show accurately when you are nearly empty as thats more important . Thanks
I had this issue as well and I still do. I contacted Bimmerworld and they said their car doesn’t do that and shows the fuel gauge needle at full. I didn’t follow up yet.
Thanks for the feedback. Does your gauge accurately show when you are low on fuel?
I’ve got it all the way down right above the lowest mark. I think it’s the sender level sensor position that just throws off the full tank. They advertised that it was fixed so it’s a little misleading on their product page. I’ve been meaning to hit them back up. Maybe you can chime in as well so they are aware this is an issue.
Ok thanks. I have been in touch with bimmerworld and they are keen to get to the bottom of it. When I have used some fuel I will pull both pumps and see if the arms are hung up on anything and maybe try turning the new pump slightly. I currently have it facing forward as instructed. Will let you know if I find a solution.
I fixed the fuel gauge issue.
Make sure you install the e36 pump so that the fuel level float arm is not hung up
I have sent bimmerworld a picture of position that works for me so hopefully they update their instructions.
I will know how successful mine is when i run down the tank but for now its reading correctly.
Nice! What do you mean not hung up? Can you send a pic here?
Thanks for excellent write up. Do you think the new pump might overheat once it has sucked all the fuel out of that side. Or does the return line go into that side and always replenishes and wont overheat?
fuel pump used in this kit is from e36. why not use e46 fuel pump as a secondary ? any update on “Check Filler Cap” ?
fuel pump used in this kit is from e36. why not to use e46 fuel pump ? any update on “Check Filler Cap” ?
The purpose is to transfer fuel over to the other side of the tank so the primary E46 FP is still the one and only pump that is actually feeding into the fuel lines. So it doesn’t really matter which pump to use as long as it’s pumping. The check filler cap warning is gone. I think it was just a weird coincidence.
They used a E36 fuel pump as the ohms resistance reading of the float sensor was more matched to the oem e46 sending unit. If they used a e46 pump it would throw off the fuel gauge reading more.