If you’re running into idling issues on your E46 M3 a dirty throttle body or idle control valve (ICV) may be the problem. In my case, it turned out to be exactly that. I’ve tried cleaning the MAF sensor, intake filter, injectors, checked for vacuum leaks, and added in octane booster (crappy CA 91 gas here) but my idle was still giving me issues. After I cleaned the throttle bodies and the ICC my idle was perfect. Below is a DIY on the E46 M3 Throttle Body and ICV Cleaning.
The issue: Car does not idle and just dies or car has a rough idle with RPM bogging constantly.
A solution: Clean throttle body and ICV. Overtime the throttle body flaps accumulate oil and dust causing interference with the flap opening. The ICV which controls airflow also gets dirty and causes the flaps to get stuck sending too little or too much air.
I’d rate this job around a 6/10 in difficulty because it does require you to take off your air box. Before doing this, for those that have idle issues I suggest you try cleaning the MAF sensor, intake filter, injectors, check for vacuum leaks, and add octane booster first. Try the easy stuff first. Otherwise dig right into this DIY.
Things you need:
- Basic tools including sockets
- Various extensions
- Torx bits
- Throttle body cleaner
- Microfiber towels
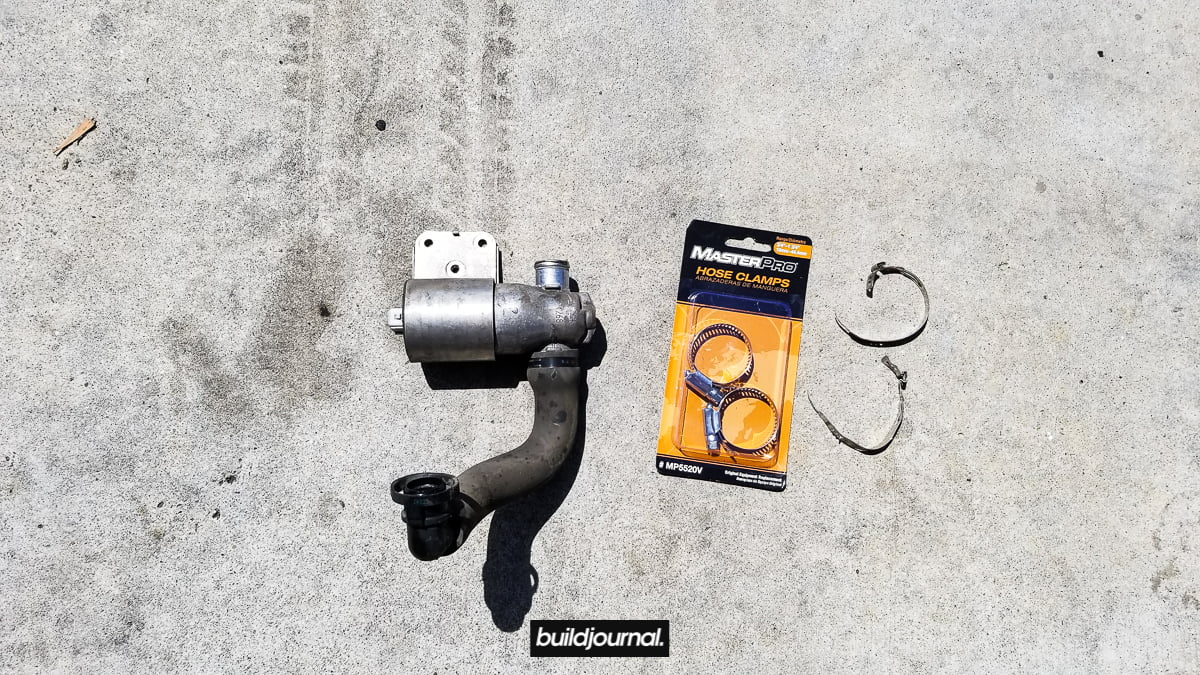
- Hose clamps (optional)
- Throttle position sensor (BMW Part # 13637840383)
E46 M3 Throttle Body and ICV Cleaning
1. Access intake box
1.1, remove 4 nuts holding front strut bar.
1.2, remove 4 torx screws holding cabin filter housing, remove filter.

1.3, remove intake including the nut for the oil dipstick.

1.4, remove crankcase vent hose.

1.5, remove vent hose grommet to give some more slack in the line when you take out the airbox.

2. Remove intake box
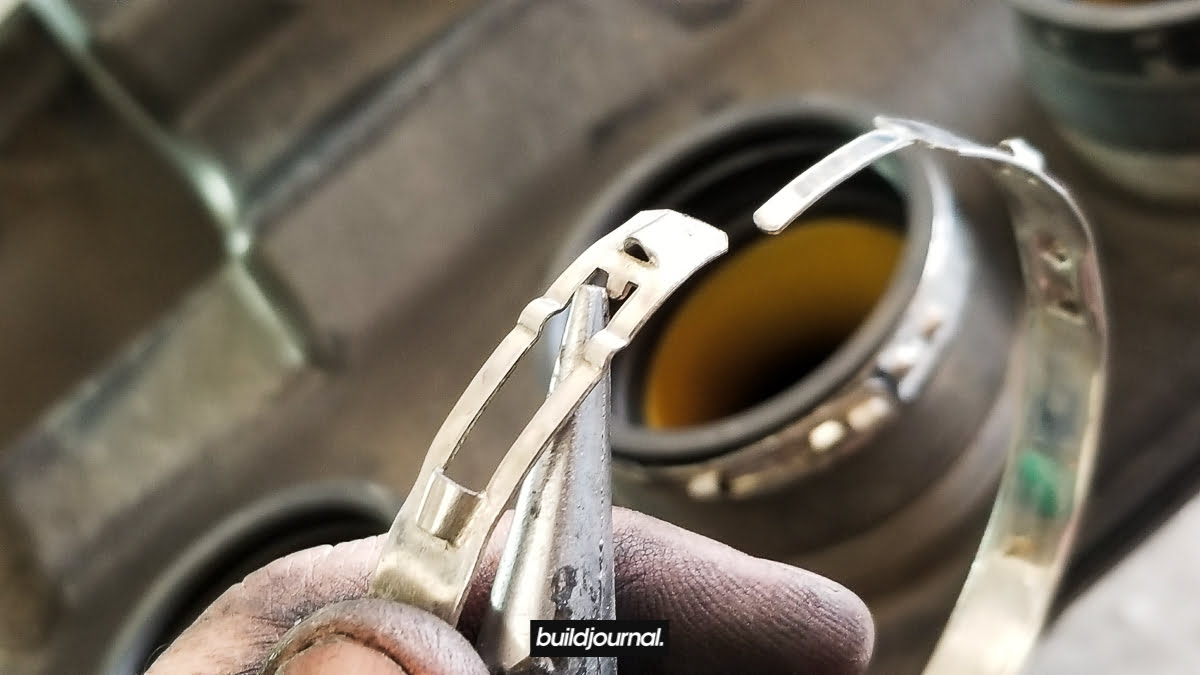
2.1, remove the throttle body hose clamps. There’s not much grip and clearance so I had to use angled needle-nose pliers and locking pliers to squeeze the rivets together and with a flat head pry out the clamp simultaneously. Basically in the bottom picture below, I pry the two rivets together to alleviate clamping force and then used a small flat head to pry out the end of the clamp pictured on top.

Clamp the rivets together. Remove all 6 clamps.
2.2, remove the (2) two nuts holding the bottom of the intake box. Detach plug grommet between the two nuts.

2.3, unclip the (large) vent hose on the bottom of the intake box.

Below is a better view of the (large) lower vent hose and the 2 nuts holding the airbox.

2.4, unclip the holder for the smaller vent hose on the side of the intake box – the small highlighted tab has to be pressed down and the plastic holder will slide up. (not away from box)


2.5, this part is a little tricky (any is the part everyone talks about breaking) so pay attention! Before the airbox comes out, you have to unclick the (small) vent hose below the intake box, but because the clearance is so small you have to wiggle the box out a little to slide your hand in. Be gentle because this part is fragile and if you break this hose, it’s going to be an annoying trip to the dealership.

The best thing to do is slightly pull the airbox halfway out and then unclip the (small) vent hose.

Here is a picture showing the underside of the airbox.

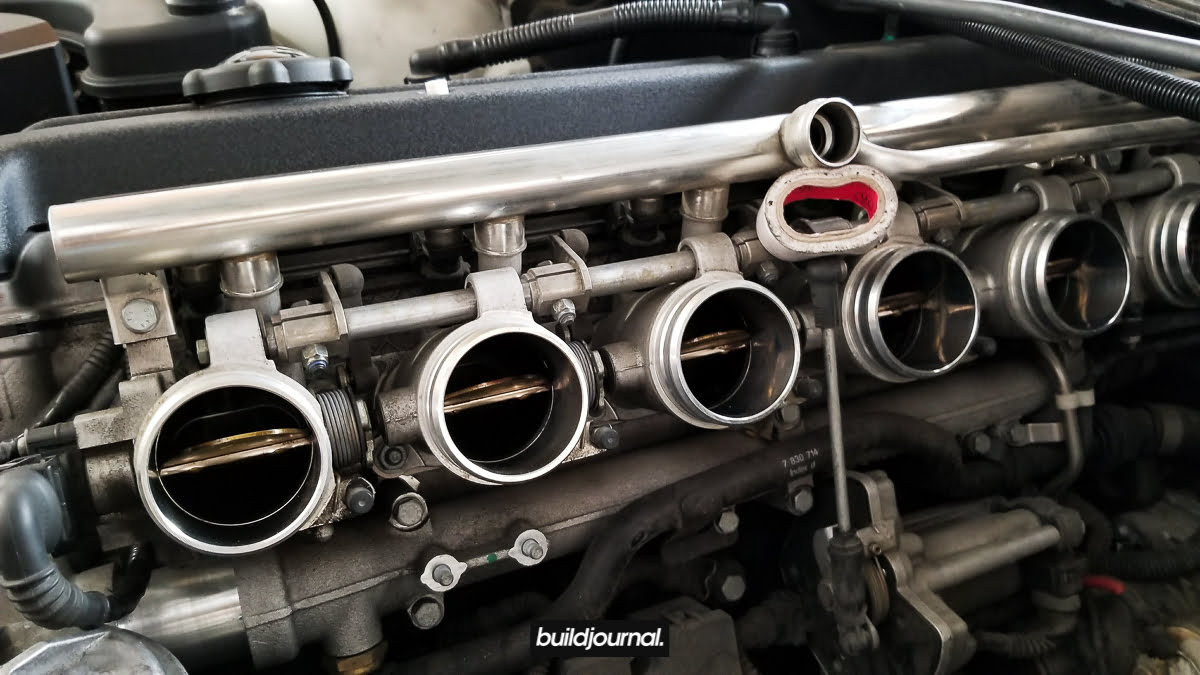
3. Clean throttle bodies and ICV
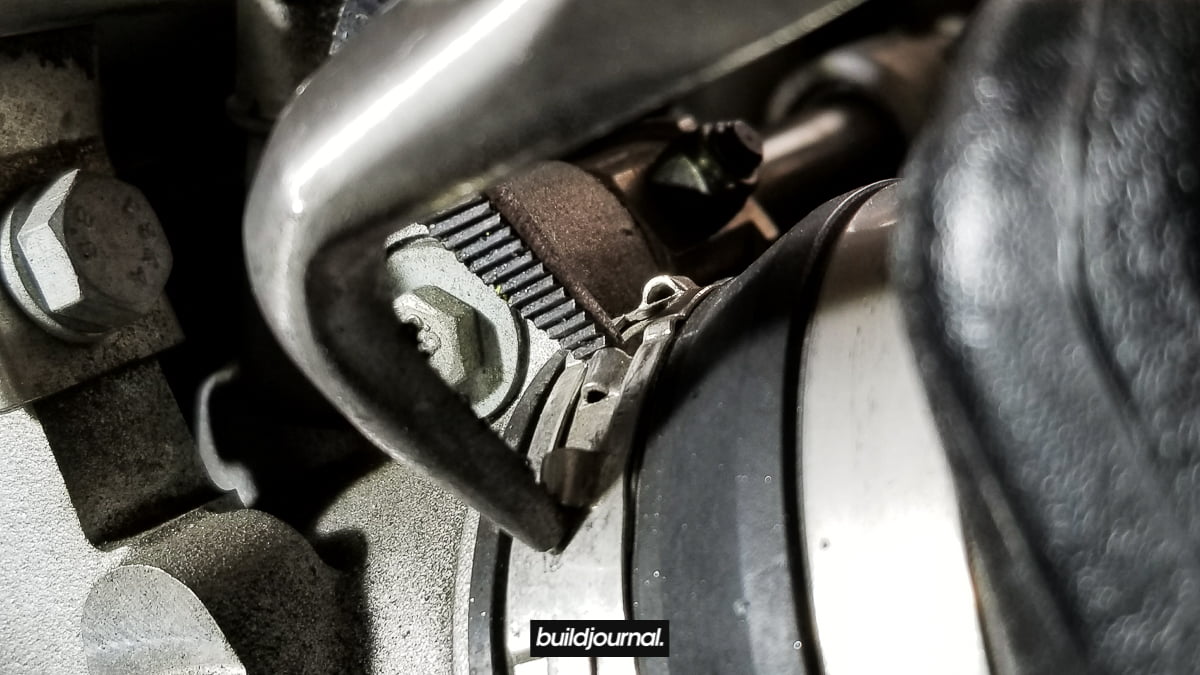
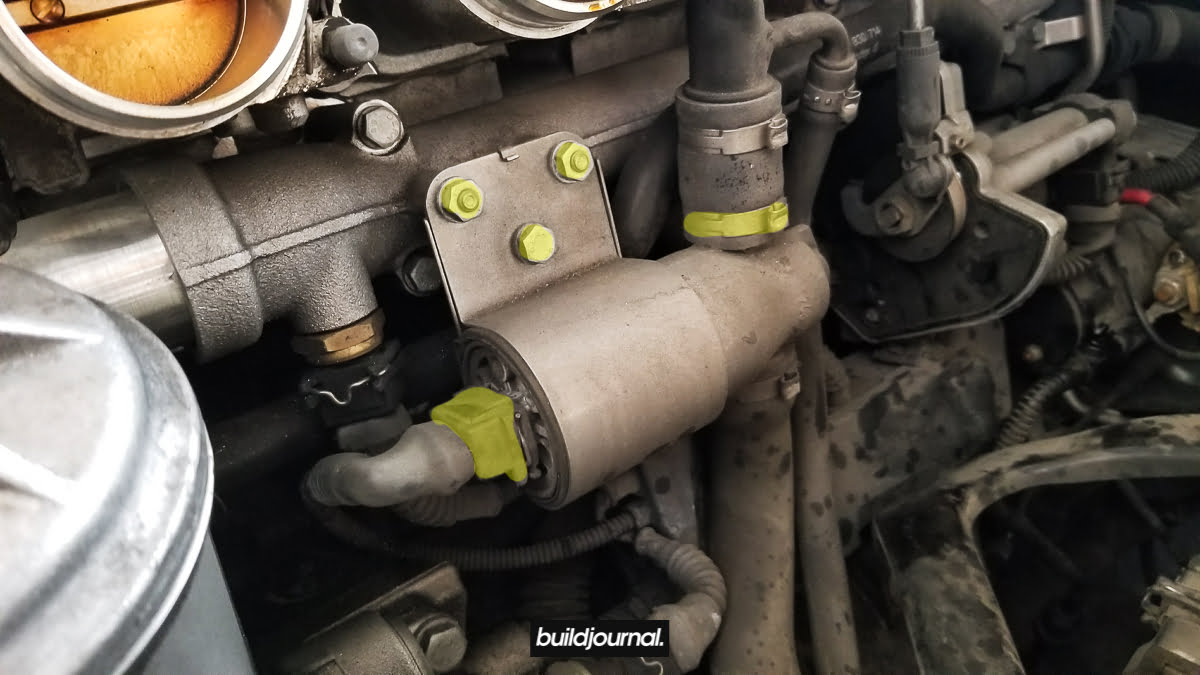
3.1, so now you have access to the ICV – remove 3 bolts, unclick plug, remove metal clamp. (Torque to 7.3 ft-lbs)
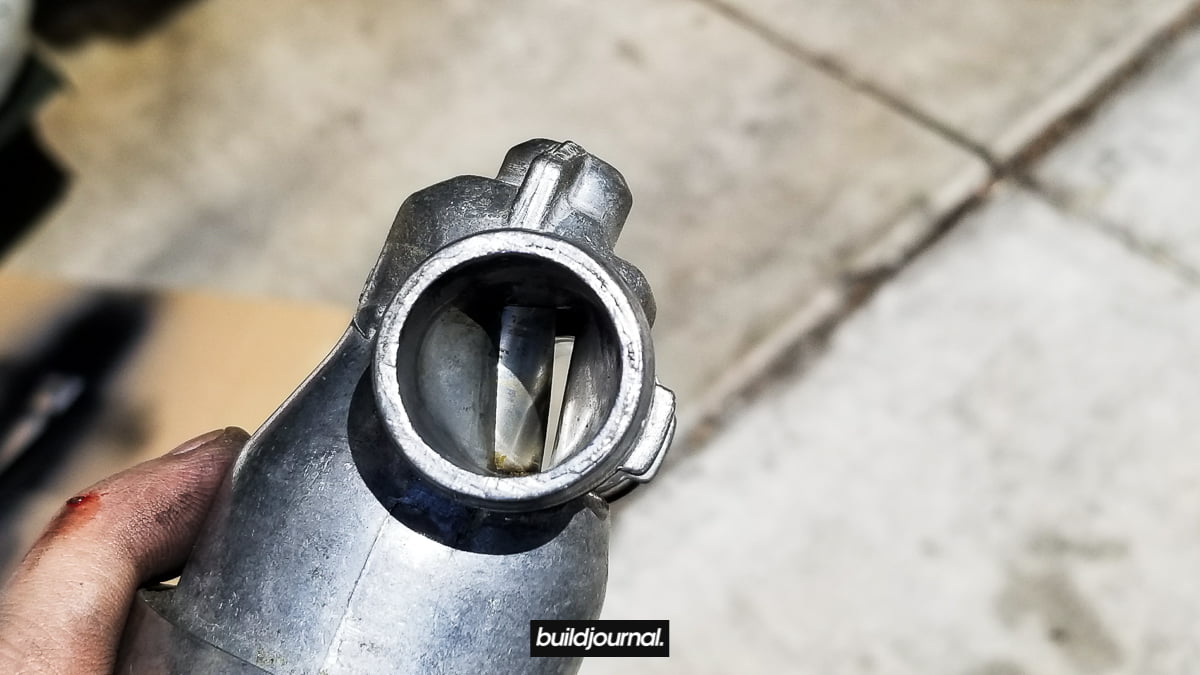
3.2, get your throttle body cleaner and spray both sides of the ICV inlet/outlet. Get your finger in the inlet and rotate the valve so you clean most of it. You can see build up on the bottom of the picture below.

3.3, now clean throttle bodies with valves closed first. I had 1/4 of a can left over after I was done cleaning everything.


3.4, open throttle body flaps and clean as far as you can. I used a roll of tape to hold the flap up, but be careful not to have the flaps close on your fingers while you clean the insides.
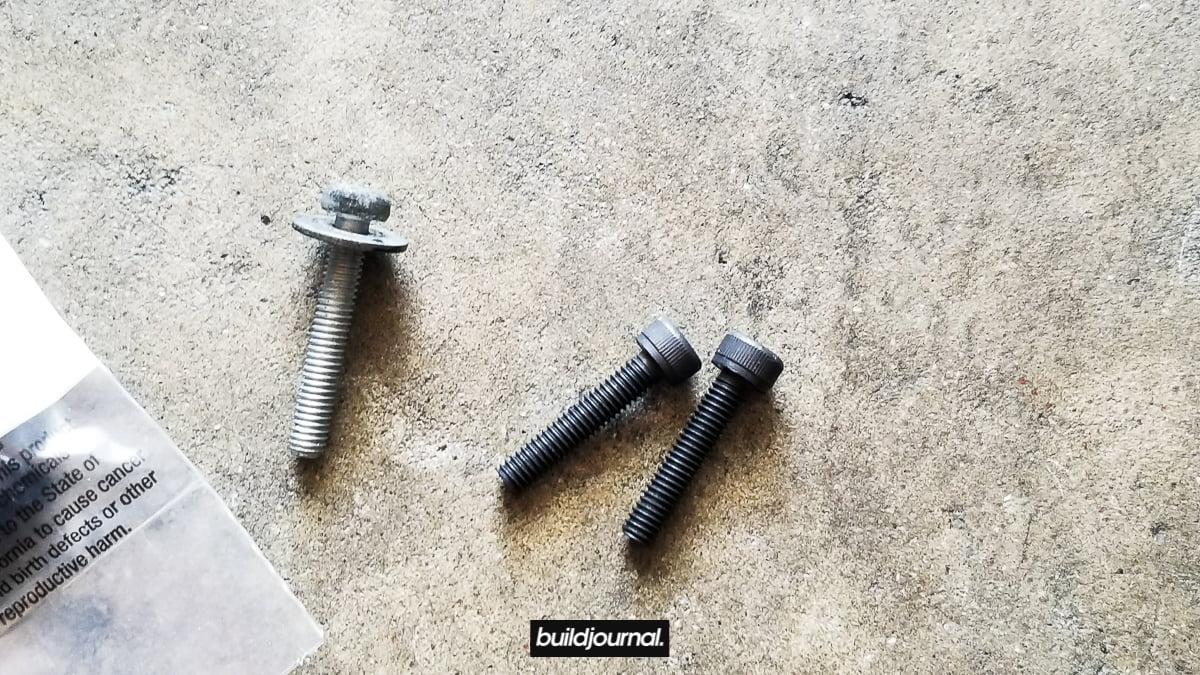
4. Replace Throttle Position Sensors (TPS)
4.1, now while you have the airbox out I highly recommend you replace the TPS sensors. There are 3 total, but 2 of them are in the engine bay but the one located on the throttle actuator is only accessible with the intake box out.

4.2, the other TPS sensor is located on the throttle body right in front of the oil filter housing.


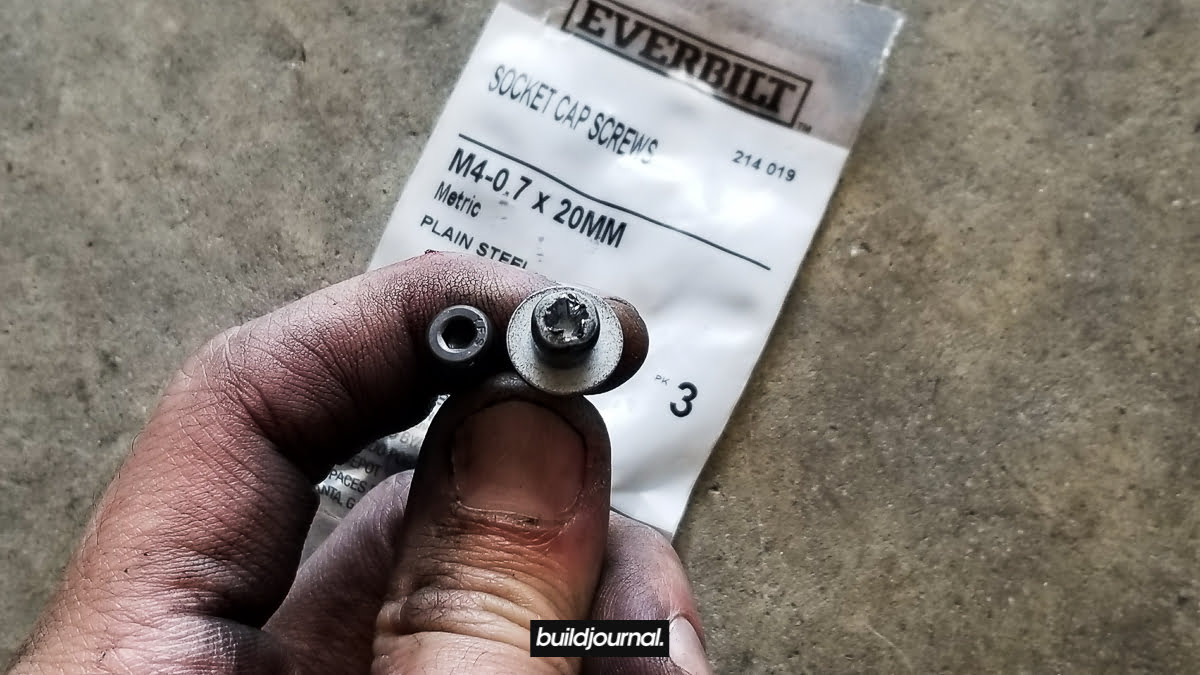
*Pro tip: I bought M4-0.7 x 20mm socket screws to replace the original TPS screws because they strip VERY easily.
5. Reinstall airbox
5.1, I re-used my throttle body clamps, but you can choose to get new ones with tie downs. The clearance is small so I recommend you use the original, slimmer clamps. Pre-install the clamps on the hose.
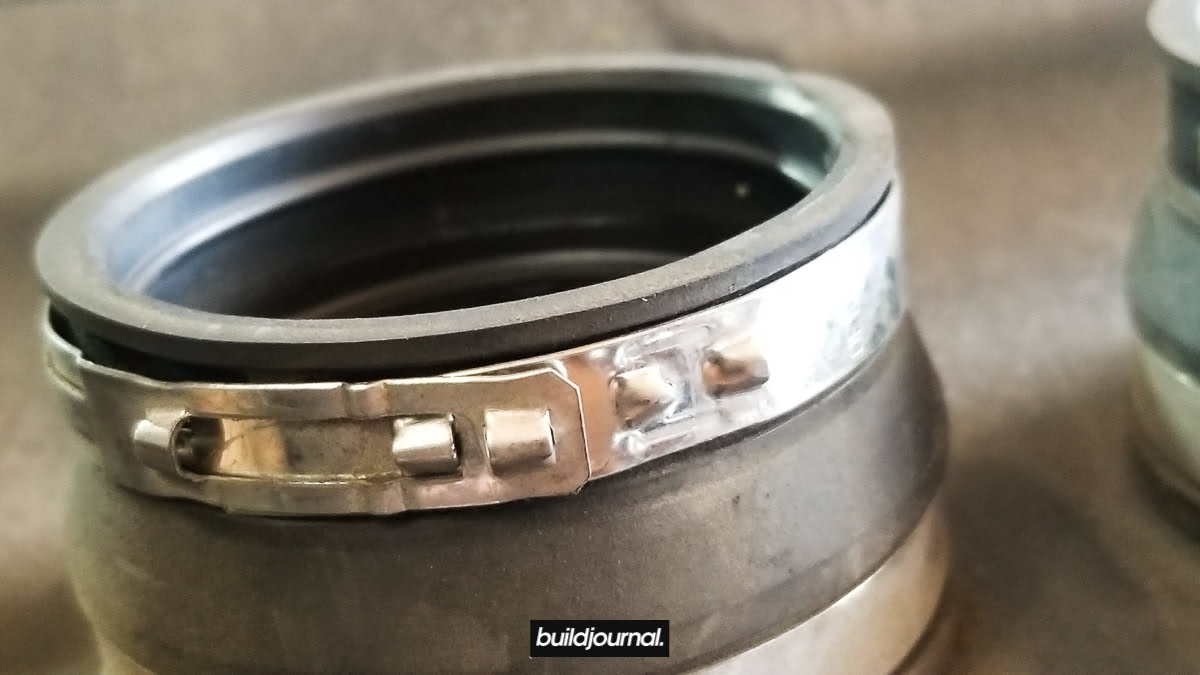
The trick is to bend down the little clamping nubs so they stay locked in position 1. (position 1 pictured above)
5.2, once the airbox is back on the throttle body, use the pliers to clamp down to position 2. Now you can reinstall everything back in reverse order including the ICV, intake, cabin filter, and strut bar.
The car may burn off residue from the throttle body cleaner so let it idle for a bit. As a bonus, check out the video from seans54. He does a great job visually showing the removal, but be careful because he broke his vent hose.
[tg_youtube width=”1920″ height=”1080″ video_id=”Cqsq_5DoAVU”]
Great documentation thank for taking the time to document it an for sharing it.
I have somewhat intermittent rough idle. It does not happen everytime. I checked my MAF and it is reading fine. Another thing is that my long term fuel trim is showing -7% suggesting its running rich. Could the ICV be a culprit? Trying to decipher before I take out the intake manifold. Thhanks