Cool down your E46 M3 water pump
In this DIY we’ll be going over the procedures for a cooling system overhaul for the E46 M3 water pump which includes thermostat, coolant sensor, fan clutch, and coolant flush.
In our Ultimate E46 M3 Maintenance Guide, we recommend doing the cooling refresh as part of the 100k “Refresh” maintenance. Although we say you can “wait it out” for some of the maintenance jobs on the E46 M3, this is one you should do right away. Even as early as every 75k miles. If your cooling system goes out, you might blow your head gasket or even worse warp your head. Don’t let a surprise water pump failure pull you off the road.
The most common issue with the cooling is the E46 M3 water pump thermostat being stuck in the open position. Although it’s not detrimental to your engine, it may be a sign of failure to come. Make sure to get codes read and diagnose exactly the problem if any. Like any car, the hardest part about predicting when the water pump is going out is, you can’t.
If you have a Engine Coolant Temperature Plausibility or Coolant Temperature Below Thermostat Regulating Temperature error code and it’s been around 75k+ miles since the last water pump and/or thermostat replacement, I would suggest you replace (and bookmark this page) as soon as possible.
Disclaimer: This DIY does require you to lift your car so please use proper tools and follow all safety procedures if you choose to attempt. This guide is for your reference only. We are not liable for any damages or injuries that result from this guide.
Tools Required

- Jack + two (2) jack stands
- 8mm socket
- 10mm socket
- 13mm socket
- 16mm socket
- T25 torx bit
- 8mm hex bit
- Ratchet + extensions
- Torque wrench
- 32mm wrench
- Water pump locking tool ()
- Needle nose pliers
- Flat head screwdriver
Parts and Supplies Required

- 1 thermostat ()
- 1 water pump ()
- 1 water pump steel gasket ()
- 1 thermostat O-ring ()
- 2 water pump O-rings ()
- 1 water pump O-ring ()
- 1 engine block coolant crush washer ()
- 2 gallons of distilled water
- 1 bottle of Water Wetter – 12 oz.

- Coolant catch bucket
- Lots of shop towels and rags
- Trays to organize screws and bolts
- Optional: radiator fan clutch (11527831619)
- Optional: auxiliary fan switch sensor (13621433077); auxiliary fan switch o-ring only ()
- Optional: coolant/oil temperature sensor (13621433076)
Note: there are 2 main coolant sensors. One is the auxiliary fan switch sensor which is the more common issue, located on the radiator hose. Some people experience leaks which can be easily fixed by replacing the o-ring. The other sensor is the coolant/oil temperature sensor which is used for cluster information. This is found behind the water pump. I decided to only replace the auxiliary fan switch sensor in this guide.
You can view the entire product parts list for which I’ve used here at the ECS Wish List – E46 M3 Cooling.
Directions
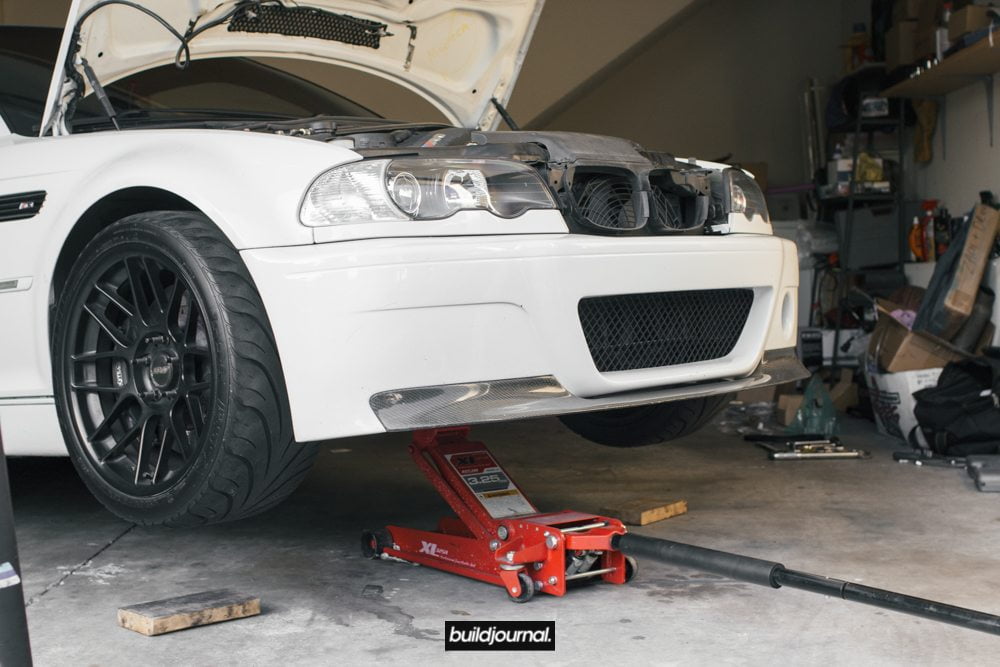
1. Jack up the car
1.1, straighten your wheel and use the center jack point to lift the front.
1.2, place 2 jack stands to keep the front of the car lifted.
1.3, use jack or tire as an emergency backup support.
1.4, remove plastic under tray located underneath the car. There are seven 8mm hex screws total.
2. Remove intake
2.1, open your hood and look for the plastic intake duct.
2.2, remove intake duct. There are 4 push pins holding it in. Use needle nose pliers to remove pins.

2.3, remove the intake elbow by unscrewing the c-clamp. I used a flat head screwdriver to loosen the clamp. Don’t remove the intake just yet, unplug the MAF sensor first.

2.4, remove MAF sensor. There are 2 push clips that hold it down. Wiggle carefully.

2.5, remove intake. Unclip the two metal clips on the right side of the air box. Now the intake should come off.

2.6, unplug the two plugs in the headlight ballast. Then remove cover to access 3 bolts. Use a 10mm socket with an extension to remove.

2.7, set aside ballast and remove bottom intake box. Wiggle carefully.

3. Remove radiator shroud and fan
3.1, remove the 3 push pins holding the shield. There is one on top directly center, one driver and one passenger. Remove using pliers. I don’t have pictures of the passenger side of the shield because I don’t run that. Below is a picture of the driver side shield.

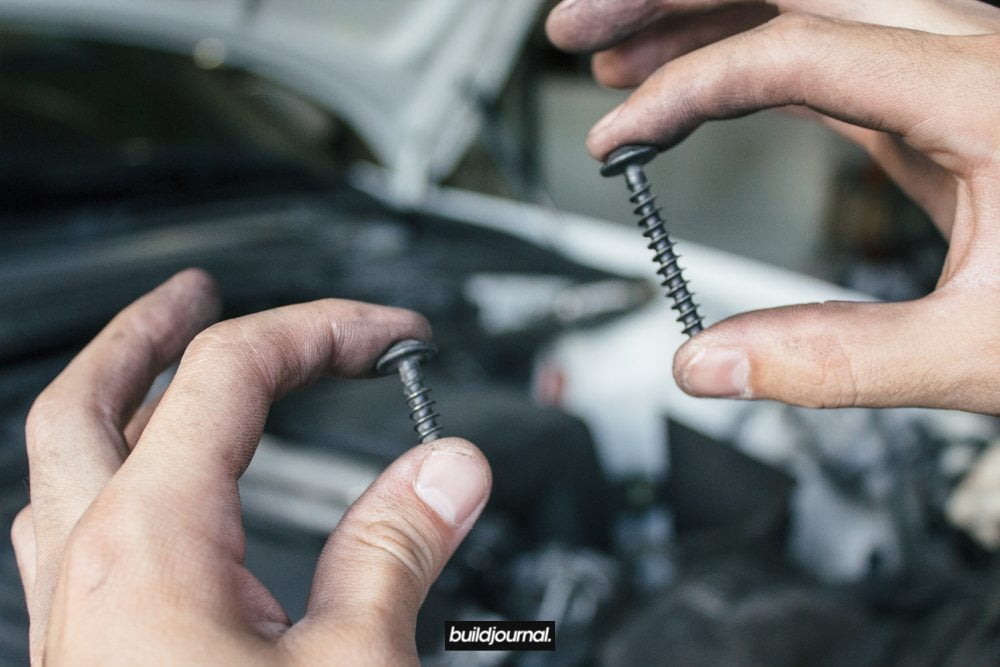
3.2, there are a total of four T25 torx screws (one on each corner) and 2 plugs on the passenger side of the radiator/shroud. Unplug cables first, then remove the four screws. The passenger side top torx screw (pictured below) is longer than the others. Tape up plugs and set aside.

3.3, remove passenger side lower screw.

3.4, remove driver side lower screw.
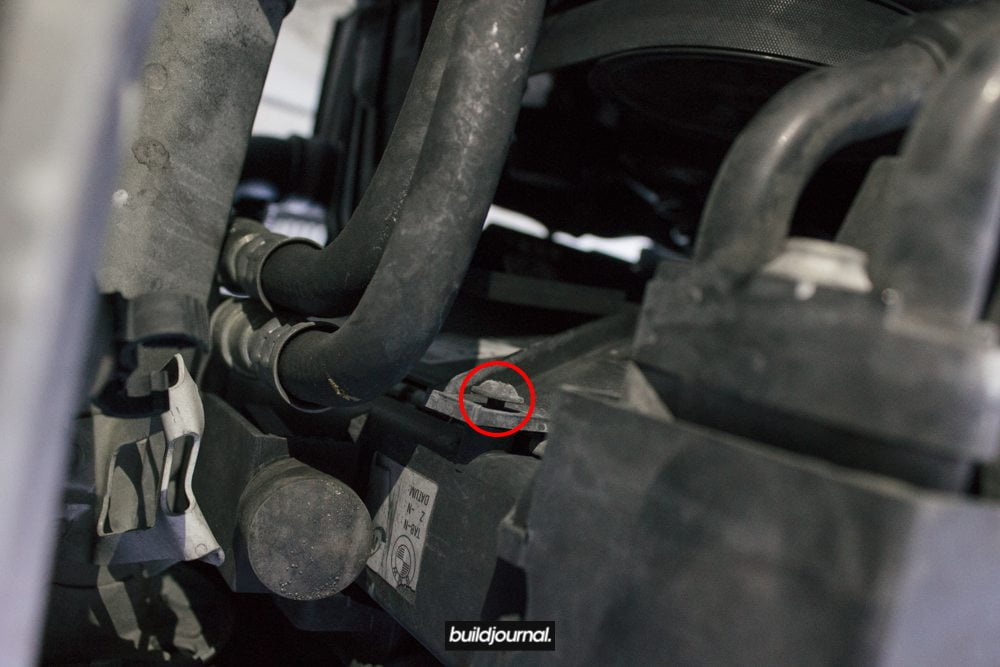
3.5, remove driver side top screw. There is also one little latch hooked on the heat shield. It should pop off with a little bit of wiggling.

3.6, remove fan using the E46 M3 water pump locking tool (001170SCH01A) and a 32mm wrench. The fan clutch nut is reverse threaded. Lock in the water pump pulley and unscrew using the 32mm wrench. Spin the fan to unscrew a little faster, but make sure you don’t let the fan drop.
4. Remove belts
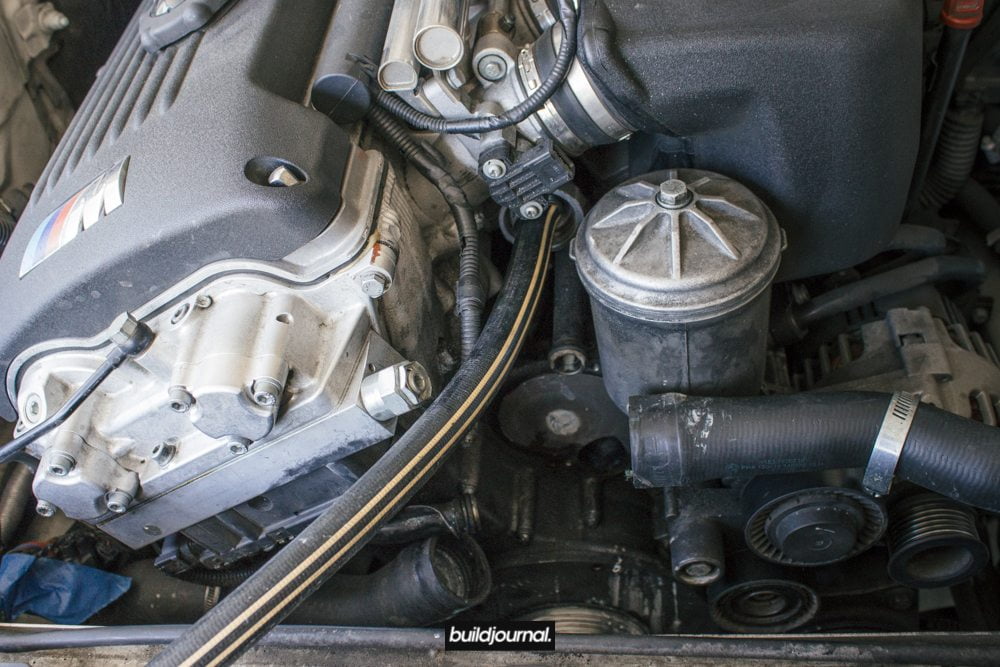
4.1, remove A/C belt using a 16mm socket with a small extension. The tension nut is not to unscrew, but a lever to loosen tension. Have a friend loosen the tension to remove belt. Pictured below is the main E46 M3 water pump/alternator belt (longer) on the right and the A/C belt on the left.


4.3, remove the water pump/alternator belt. Similar to the A/C belt, use a 8mm hex bit to loosen tension to remove the belt. Use the image below to remember orientation.

5. Partial drain coolant
5.1, remove the coolant temperature plug and sensor, plug first. The plug sits on top of the sensor with a metal retaining clip. The sensor is clipped on to the radiator hose with 2 side clips.

5.2, leave a bucket below the car to catch coolant as it drains. Leave the bucket underneath as you’ll need to catch more fluid in the next steps.

5.3, replace auxiliary fan switch sensor if needed. You can see the old sensor on the left with a deformed o-ring and a lot of gunk on the sensor. If you plan on replacing wait until the end when you put everything back together. You’re going to need to leave the radiator hose open to drain even more.

6. Accessing the E46 M3 water pump
6.1, remove the water pump pulley by removing four 10mm hex bolts.


6.2, unclip plug and wire on thermostat housing.


6.3, remove thermostat housing bracket by removing three 10mm hex bolts with an extension.

6.4, remove upper and lower radiator hose from thermostat housing. My radiator hoses were partially melted to the housing tubes so I had to use a flat head to pry around the edges. Be careful if you do this because you may rip the hose. Use a flat head to loosen c-clamp on upper and lower radiator hoses.


6.5, now this is the tricky part! Remove the thermostat housing by pulling up and out. You have very little wiggle room since the thermostat is lodged inside the pump and housing. I had to use needle nose pliers to grab the thermostat and dislodge it from the housing. I definitely damaged the thermostat, but I’m replacing it so it didn’t matter. Once it was dislodged into 2-pieces, there was wiggle room to remove. I will warn you, even after dislodging it’s a PITA to remove. Below is a picture of the thermostat “lodged” into the housing.


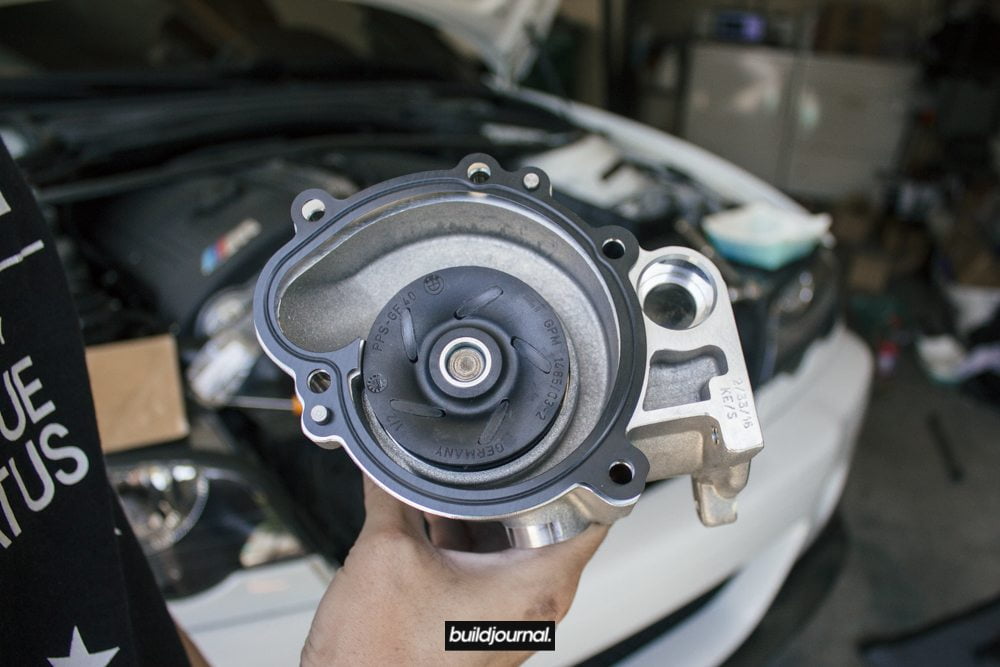
6.6, here it is removed. The E46 M3 water pump exposed!
UPDATE: this is a good time to check your VANOS chain guide tensioner as some people experience the bolt coming loose. It’s the hex bolt just left of the water pump in the picture below. Thanks to Max V. for that tip!

6.7, now we need to remove the water pump. There are five 10mm hex bolts holding this sucker in. The very bottom one is the hardest to reach. Careful when pulling the water pump out as it’s connected to 2 black metal tubes. Once this is out, now we can start to do a coolant flush, if you decide to, and prep the new water pump and thermostat.

7. Drain and flush remaining coolant
7.1, locate this cylinder underneath the passenger side of the car, directly above the power steering high pressure hose. Behind the cylinder is a engine block coolant drain plug that we need to get to. On the left side of the cylinder is a 10mm bolt to clamp the cylinder. Remove bolt to swing open left door. The door might be stuck to the cylinder. If so use a flat head to pry open door.

7.2, tuck the cylinder away from the coolant drain spray area and remove the bolt using a 13mm socket with an extension. Coolant will drain out, a lot! Get a catch bucket ready.


7.3, with the engine block coolant plug open, you can flush out your coolant using a hose. You can feed the lower and upper radiator to flush those areas as well. After the system is flushed, plug the engine block coolant plug back in using a new engine block coolant crush washer (07119963200). Torque to 18 ft-lbs. Then, install the cylinder back on.
8. Prep new E46 M3 water pump for install
8.1, install new water pump O-rings (11537830712) on black water pump connecting pipes.

8.2, install new water pump steel gasket (11517831099) on new water pump (11517838159).
8.3, for the O-rings I dipped it in dish wash soap to lubricate for easy install. During installation of your water pump and thermostat housing, your O-rings, especially the large water pump O-ring, may move during the install. Make sure they’re lubricated a little bit so they don’t fall out of position.

8.4, find your water pump bolts and clean the threads for the re-install. Clean them good cause they’re going to require torquing.

8.5, now you’re ready to install the new E46 M3 water pump. Make sure the steel gasket is seated properly and install the water pump back in. Watch out for the 2 black water pump connecting pipes as they should be reinserted properly.
8.6, install the five 10mm bolts back in to the water pump and torque to 7 ft-lbs.
8.7, install new thermostat O-ring (11531318402) on water pump. Lubricate this O-ring before thermostat housing install. (read notes on step 8.3)

8.8, clean up the thermostat housing using Scotch-Brite pad. I’ve seen leaks happen after E46 M3 water pump installations and it is due to bad gaskets or gunk creating improper sealing of the water pump connecting pipes. Make sure you try to get the lip of the thermostat housing and every single O-ring surface free of any gunk.

8.9, install new water pump O-ring (11537830709) on thermostat housing.

8.10, get new thermostat (11531318274) and install thermostat housing back on. Use knowledge from step 6.5 for installation notes. Reconnect lower and upper radiator hose.

8.11, install the thermostat housing bracket back on with three 10mm hex bolts and torque to 7 ft-lbs. Once again, make sure threads are clean.

8.12, install water pump pulley using four 10mm hex bolts and torque to 7 ft-lbs. Use either a screw driver or specialty tool to hold pulley in place.

8.13, reinstall auxiliary fan switch sensor (13621433077) to radiator hose.
8.14, reinstall A/C and water pump belts.
9. Install fan clutch and shroud
9.1, I bought a new radiator fan clutch (11527831619) to replace since mine was pretty old. I got a Behr replacement that was 1/3 the price of the OEM and guess what? The BMW OEM part is from Behr.


9.2, refer to steps 3 and 2 to put everything back in order, but leave step 2.2 out for now since you need access to the bleeder valve for the next step.
10. Fill up with coolant and bleed
10.1, make sure everything is back on! Then time to fill up the new coolant. I used distilled water + a bottle of Water Wetter – 12 oz. Read up on this stuff if you’re not familiar. Great alternative to regular coolant 50/50 mix.


10.2, fill up your coolant/water through the expansion tank with the bleeder open. Fill until bleeder valve overflows. I used around 1.8 gallons until I started to see coolant/water overflowing from the bleeder valve.
10.3, once the coolant/water is filled, turn on your engine with the heater running on highest temp and lowest fan speed. You’ll start to hear coolant/water circulate around the system. Leave the engine on and continue to bleed the valve until you don’t see any more bubbles coming out. Warning: do not over tighten bleeder valve!

10.4, once you see a steady stream of coolant/water bleeding from the valve, close the bleeder and top off the expansion tank if necessary.
10.5, reinstall your intake duct and everything else to run your car. Take your car around the block and re-check your coolant levels.
For the next few days, you’re going to need to keep an eye on your engine temperate and coolant/water temperature. You’ll need to check the floor to see if there are any major leaks. If you experience sudden rise in temperate or large puddles on the ground, you’ll need to reinspect the installation procedure to make sure there are no major leaks. If you experience sudden coolant/water loss, you might have a bad seal in the E46 M3 water pump.
I’ve seen it happen before and it was no fun taking everything back apart. It happened to a friend. Otherwise, you got a brand new cooling system and you just saved yourself a lot money by doing it yourself. Feel free to ask me any questions or post photos of your installation in the comments below! Hope this DIY helped.
Hi,
I’m new to the E46 M3 having just purchased one, and found that the water pump had a lot of play in the shaft so decided to replace it before things went further downhill.
I read your stuff with interest and decided that life would be a lot simpler if you removed the thermostat housing and water pump as one unit.
It worked a treat!
First you have to remove the 6mm bolt that holds the front black steel pipe to the exhaust side of the cylinder head.
Then undo the water pump bolts – yes they are harder to see this way.
The front steel pipe can then be pulled loose from the pump, and with a good pull and a wiggle the whole lot comes loose as a unit.
I did loosen the thermo housing bolts to give a bit more wiggle room but it wasn’t really necessary.
I put the pump and housing back bolted together to make sure the O ring didn’t shift and it lined up without a problem.
Just make sure to get the tag that secures the front steel pipe under a bolt head on the water pump and replace the bolt that secures that pipe to the head.
Thanks for your pic showing the belt routing – that was really handy.
On talking the job over with a friend who is a very experienced BMW mechanic he said that they always took out and replaced the pump and housing as a single unit.
Hey there, thanks for the write up.
The only thing I need to do in this guide is the thermostat part. I’ve currently got the bracket, the wires and all of the ducting out as you’ve described, however for the life of me I cannot get the thermostat housing off the water pump housing.
When I pried the thermostat housing off, unfortunately the water pipe behind it came off with it now there’s f*** all space to jimmy it out. I noticed in your pictures you did it the same way, whereas I usually see people just pry out the thermostat housing so there’s no “neck” on it when you pull it out.
I’m hoping the author is still around to be able to give me a tip on how to get this thermostat housing off the water pump – I can see the thermostat inside it and if I wedge a screwdriver in there I can “dislodge it” however the thermostat looks like it’s extended itself into the water pump housing so there’s no enough room to move it out on the angle that it’s on.
Am I going to have to remove the intake manifold to open up some room or do you have some handy advise?
Hey Danny, I feel your pain. I wrote it so fast in the article, but the amount of time it took doesn’t convey in the article. The key here is to dislodge your thermostat so you can give yourself a few millimeters of extra clearance to get it out. You don’t need all the space to remove the thermostat because you’re not. After you dislodge the thermostat you’ll have to angle it out while it’s still in there. If you have a new/extra thermostat going in don’t be afraid to bend parts of the thermo. It’s good that you remove the water pipe hose when you removed the housing because you should be replacing that o-ring gasket while you’re in there. Replace every single gasket. Hope that helps. Patience is key.
Hey Andrew, appreciate the response. Thrilled you’re still around!
So are you saying I should just keep pulling on the thermostat at the angle till it comes out? At the moment, when i dislodge it, the “head” (brown cap thing) falls down which DOES give me a bit more clearance, however I can only get one side of the thermostat housing “over” the cap whereas the rest of the thermostat is well and truly wedged under the thermostat housing.
I’m not afraid of breaking or damaging the thermostat as you’ve already mentioned, since a new one will be going in. I’m afraid of damaging the water pump housing or causing excess wear to the walls of the pump.
Would you suggest that it’s ok to keep pulling until the thermostat eventually gives out and it all comes out?
So far I’ve tried silicone spray, pulling and prying on the thermostat housing to try and get the water pipe free but no luck.
To the “up” side, I’m getting stuck on the manifold/TPS sensor bracket, and to the “outside”/”towards me” side (radiator side)I’m getting stuck where the thermostat angles out and obviously I run out of space for the direct ascent up.
Hope this all makes sense, and hope your blessing is just grab it and send it because if it isn’t I can only think getting the manifold out is the next step.
P.S. I’m doing this without removing the clutch fan, which I believe isn’t causing any issues clearance-wise.
Thanks in advance, hope it didn’t sound too garbled.
Did you ever get it out? It’s hard to paint a picture with just words, but it sounds like I was in the same situation as you. I did “send” it also and it ended up coming out without any damage to the pump walls. Only the thermostat was mashed in.
To help with removing/installing the thermostat without damaging it, I’ve found that loosening the water pump bolts (or leaving them loose when reinstalling) provides just enough wiggle room for the thermostat & housing to ingress/egress without damage. Just be ready for the flood of coolant from the loose water pump!
Great guide, thank you!
Great tip Matt! If I ever have to do this again, I’ll try that.
I followed this guide and managed to get my M3 back together. Make sure you order the steel water pump gasket separately, BMW does not supply it with their OEM pump (ECS non-OEM pumps include it). I made that mistake and had to wait for it to ship. Also, I found the water pump pulley was seized to the pump, I had to modify a 3-jaw puller to fit in the space between the pulley and the radiator! Besides that, it was pretty smooth sailing and I had a ton of fun. Gonna tackle valve adjustment next!
Thanks for the guide!