Installing the Turner Motorsport CSL Style Intake Airbox
Ever since Turner Motorsport released the CSL Style Intake for the S54, a lot of people have been interested because of the price point. For those that have bought or plan to purchase this intake, I’ll cover the overall installation in this article, but also detail in some of the small things because during my research there were a lot of small details that were critical, yet not being really talked about.
This article is strictly about the Turner Motorsport intake install. If you’re looking for more information on what it takes to convert your S54 to run a CSL intake, we’ll be writing another article that covers all of that.

Turner Motorsport CSL Style Intake
Parts List
For those that don’t need to buy everything in the kit, use this parts list below to piece together what you need. I realized after I installed everything, I didn’t need everything.
CSL Vent Valve Bracket – I’m honestly not sure what this part is used for. I used it as a zip tie location for some of the hoses that run underneath the plenum. You don’t need this part, however you do need screws, or something else, to plug the thread.
Washer, Hex Bolt, Hex Nut – I did not use any of these parts. The two Hex Nuts are for the 10mm nuts that secure the intake to the bracket, but I ended up re-using mine. The other hardware, I’m not sure what it’s used for.
CSL Air Shut Off Valve – You can modify your existing shut off valve by re-using the two male connectors on each ends and replacing the hard line with a soft vacuum line.
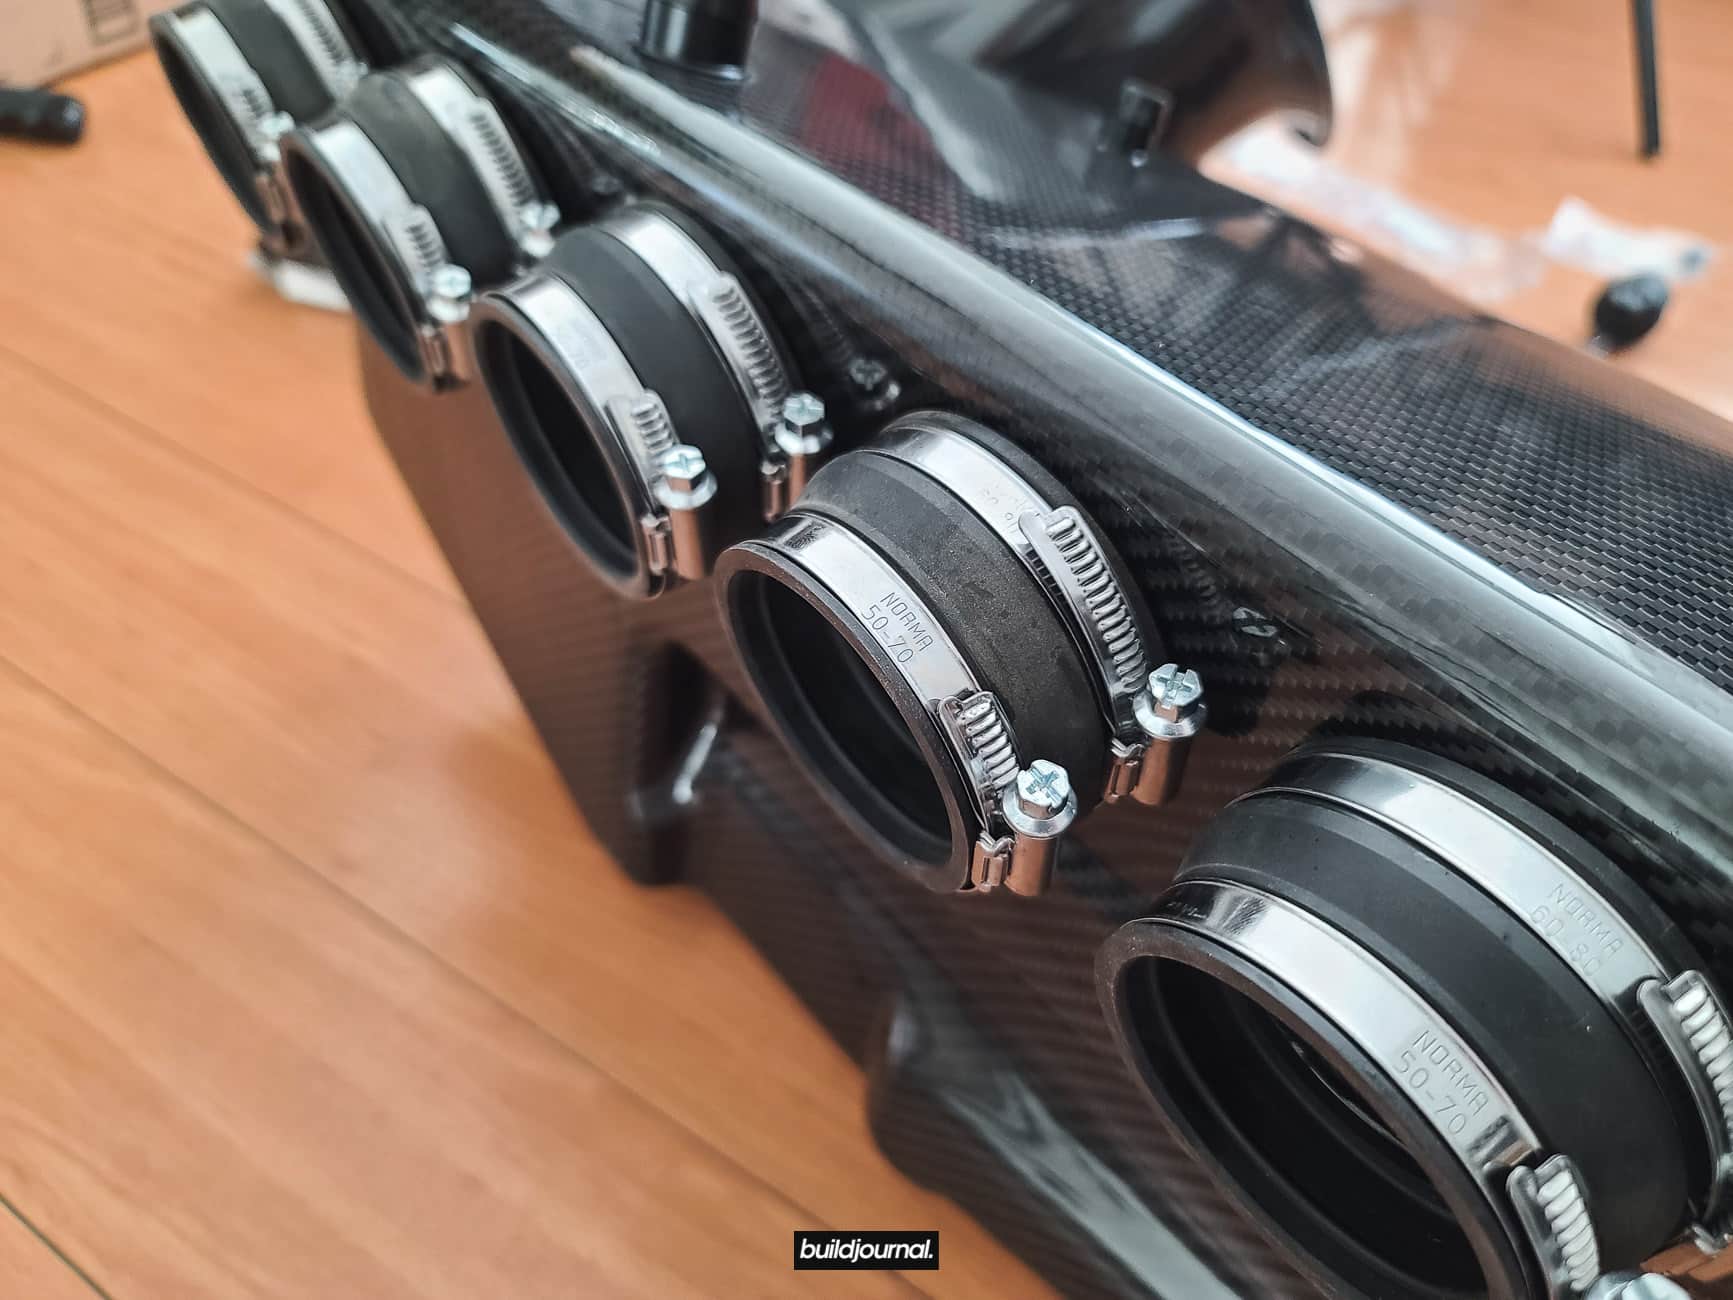
S54 Silicone Throttle Body Boot Set – I ended up re-using my boots from my OEM intake. Some people say only 01-03 model boots can be re-used, but according to ECS/Turner their boot set fits all plenums including OEM and CSL. I also sourced my own worm-style hose clamps. You just need 6x of the 50-70mm and 6x of the 60-80mm clamps.
CSL Oil Tube and Dipstick – You can bend your OEM tube and retain ability to check without removing anything. If you opt for the CSL Oil Tube and Dipstick, you’ll need to remove your swaybar and intake inlet to check oil. I highly recommend you stick to modifying the OEM for convenience.
| Quantity | Item | Price | Link |
| 1 | CSL Style Intake – Gloss | $1,499.95 | View Product |
| 1 | CSL Style Intake – Matte | $1,499.95 | View Product |
| 1 | CSL Vent Valve Bracket | $41.00 | View Product |
| 2 | Washer | N/A | View Product |
| 1 | Hex Bolt | $1.05 | View Product |
| 2 | Hex Nut | $0.99 | View Product |
| 1 | CSL Air Shut Off Valve | $111.95 | View Product |
| 1 | CSL Air Filter | $149.95 | View Product |
| 1 | S54 Silicone Throttle Body Boot Set | $109.95 | View Product |
| 1 | Turner Plug-And-Play IAT Relocation Kit | $117.90 | View Product |
| 1 | CSL IAT Sensor | $26.95 | View Product |
Additional for SMG
| 1 | CSL SMG Expansion Tank Bracket | $29.95 | View Product |
| 1 | CSL SMG Expansion Tank | $128.95 | View Product |
Optional
| 1 | CSL Dipstick Tube | $89.95 | View Product |
| 1 | CSL Oil Dipstick | $32.95 | View Product |
Tools Required
- 7mm socket
- 10mm socket
- 13mm deep socket
- 15mm or 16mm deep socket
- 4mm hex
- Torx screw set
- Ratchet
- Hose clamp removal tool or pliers
3
Hours
2/5
Difficulty
CSL Intake Install DIY
1. Access intake box
1.1, remove 4 nuts holding front strut bar.
1.2, remove 4 torx screws holding cabin filter housing, remove filter.

1.3, remove intake including the nut for the oil dipstick.

1.4, remove crankcase vent hose.

1.5, remove vent hose grommet to give some more slack in the line when you take out the airbox.

2. Remove intake box
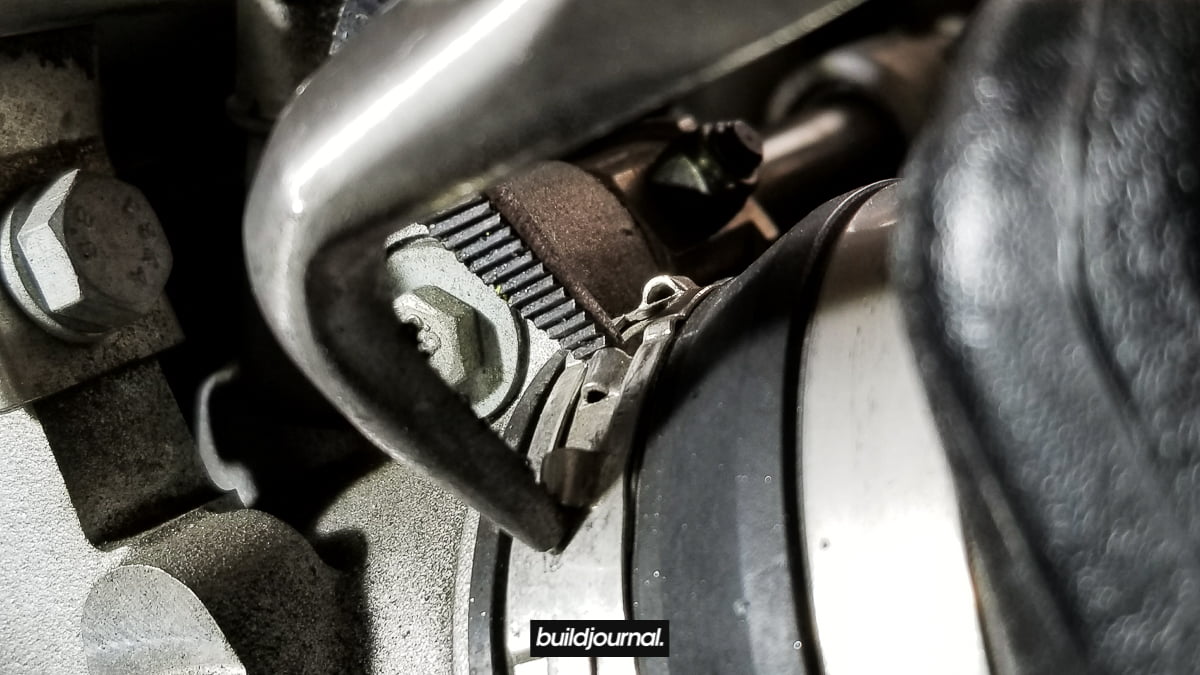
2.1, remove the throttle body hose clamps. There’s not much grip and clearance so I had to use angled needle-nose pliers and locking pliers to squeeze the rivets together and with a flat head pry out the clamp simultaneously. Basically in the bottom picture below, I pry the two rivets together to alleviate clamping force and then used a small flat head to pry out the end of the clamp pictured on top.

Clamp the rivets together. Remove all 6 clamps.
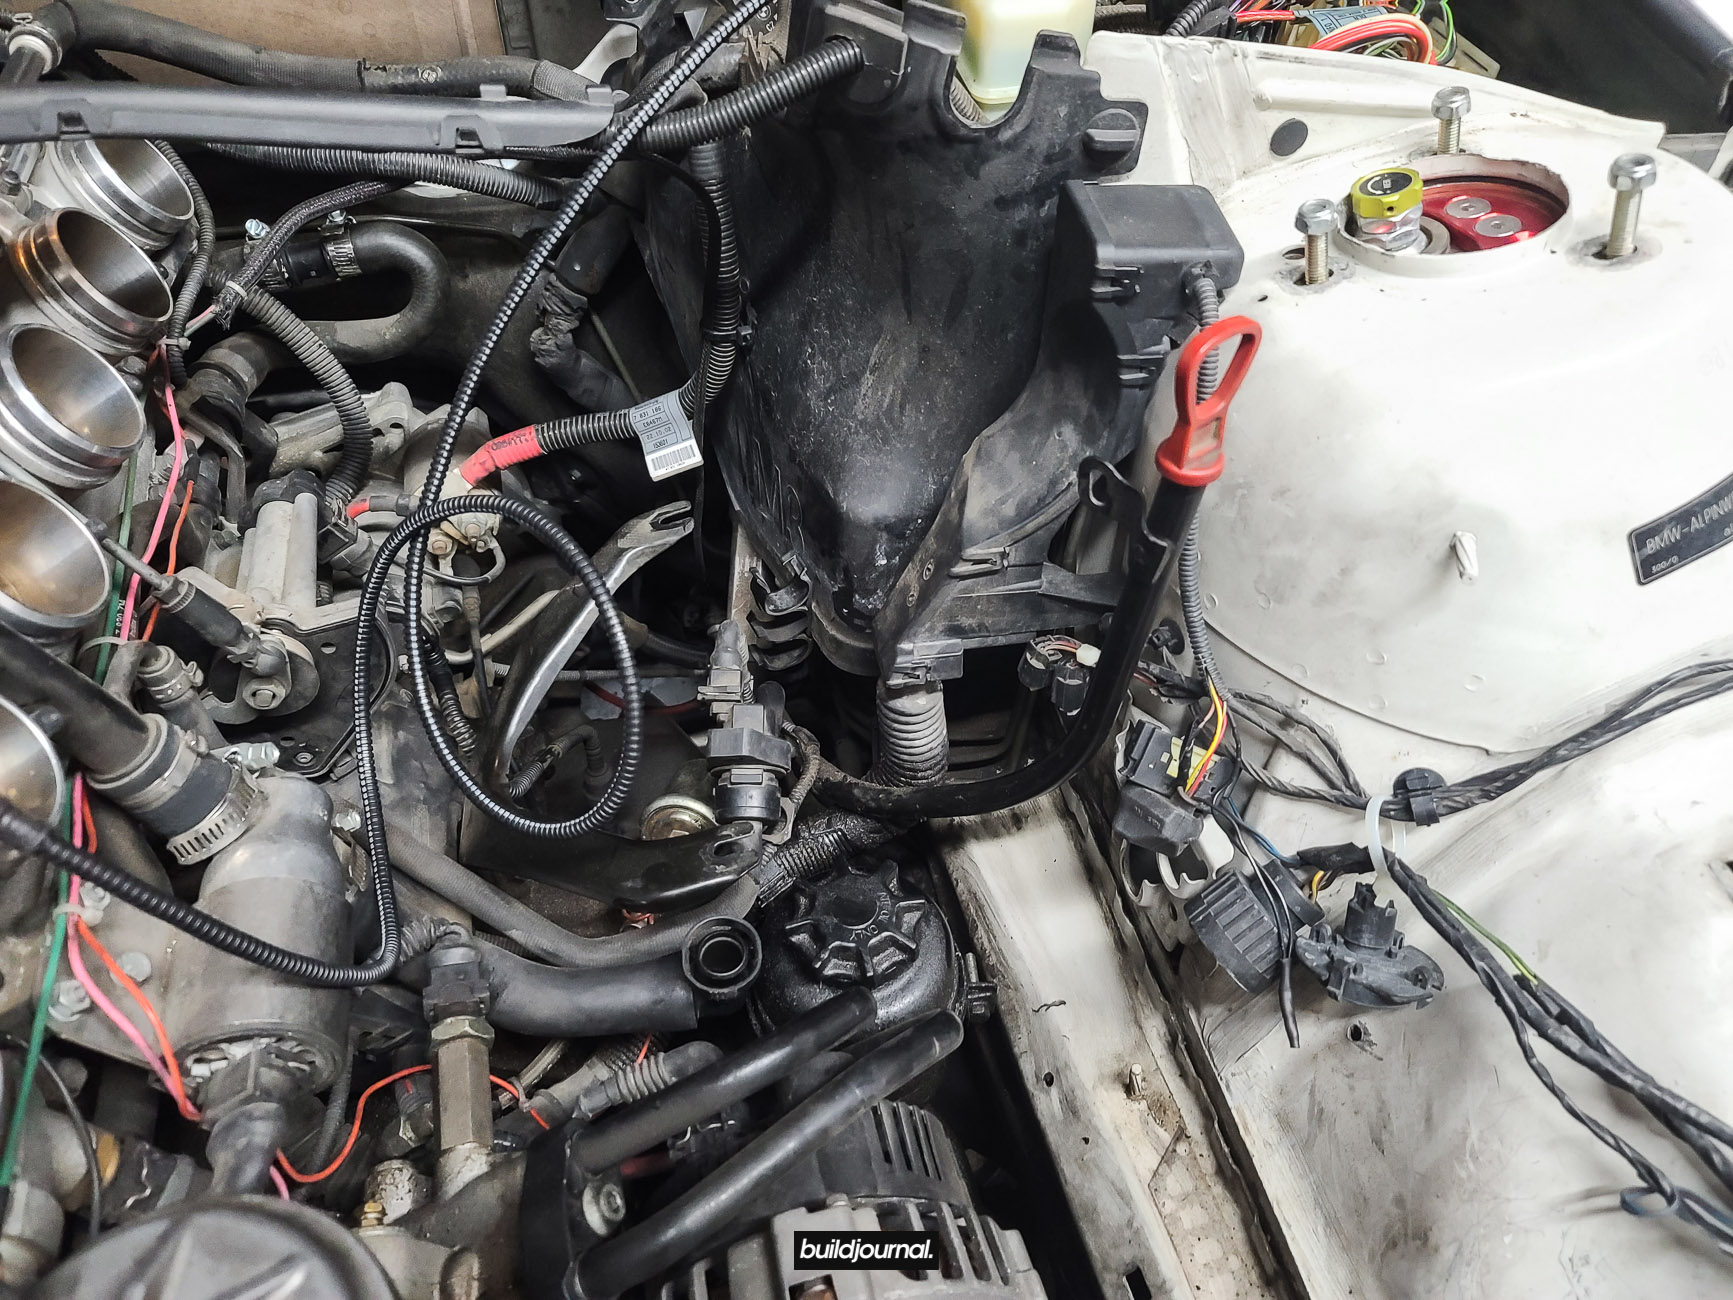
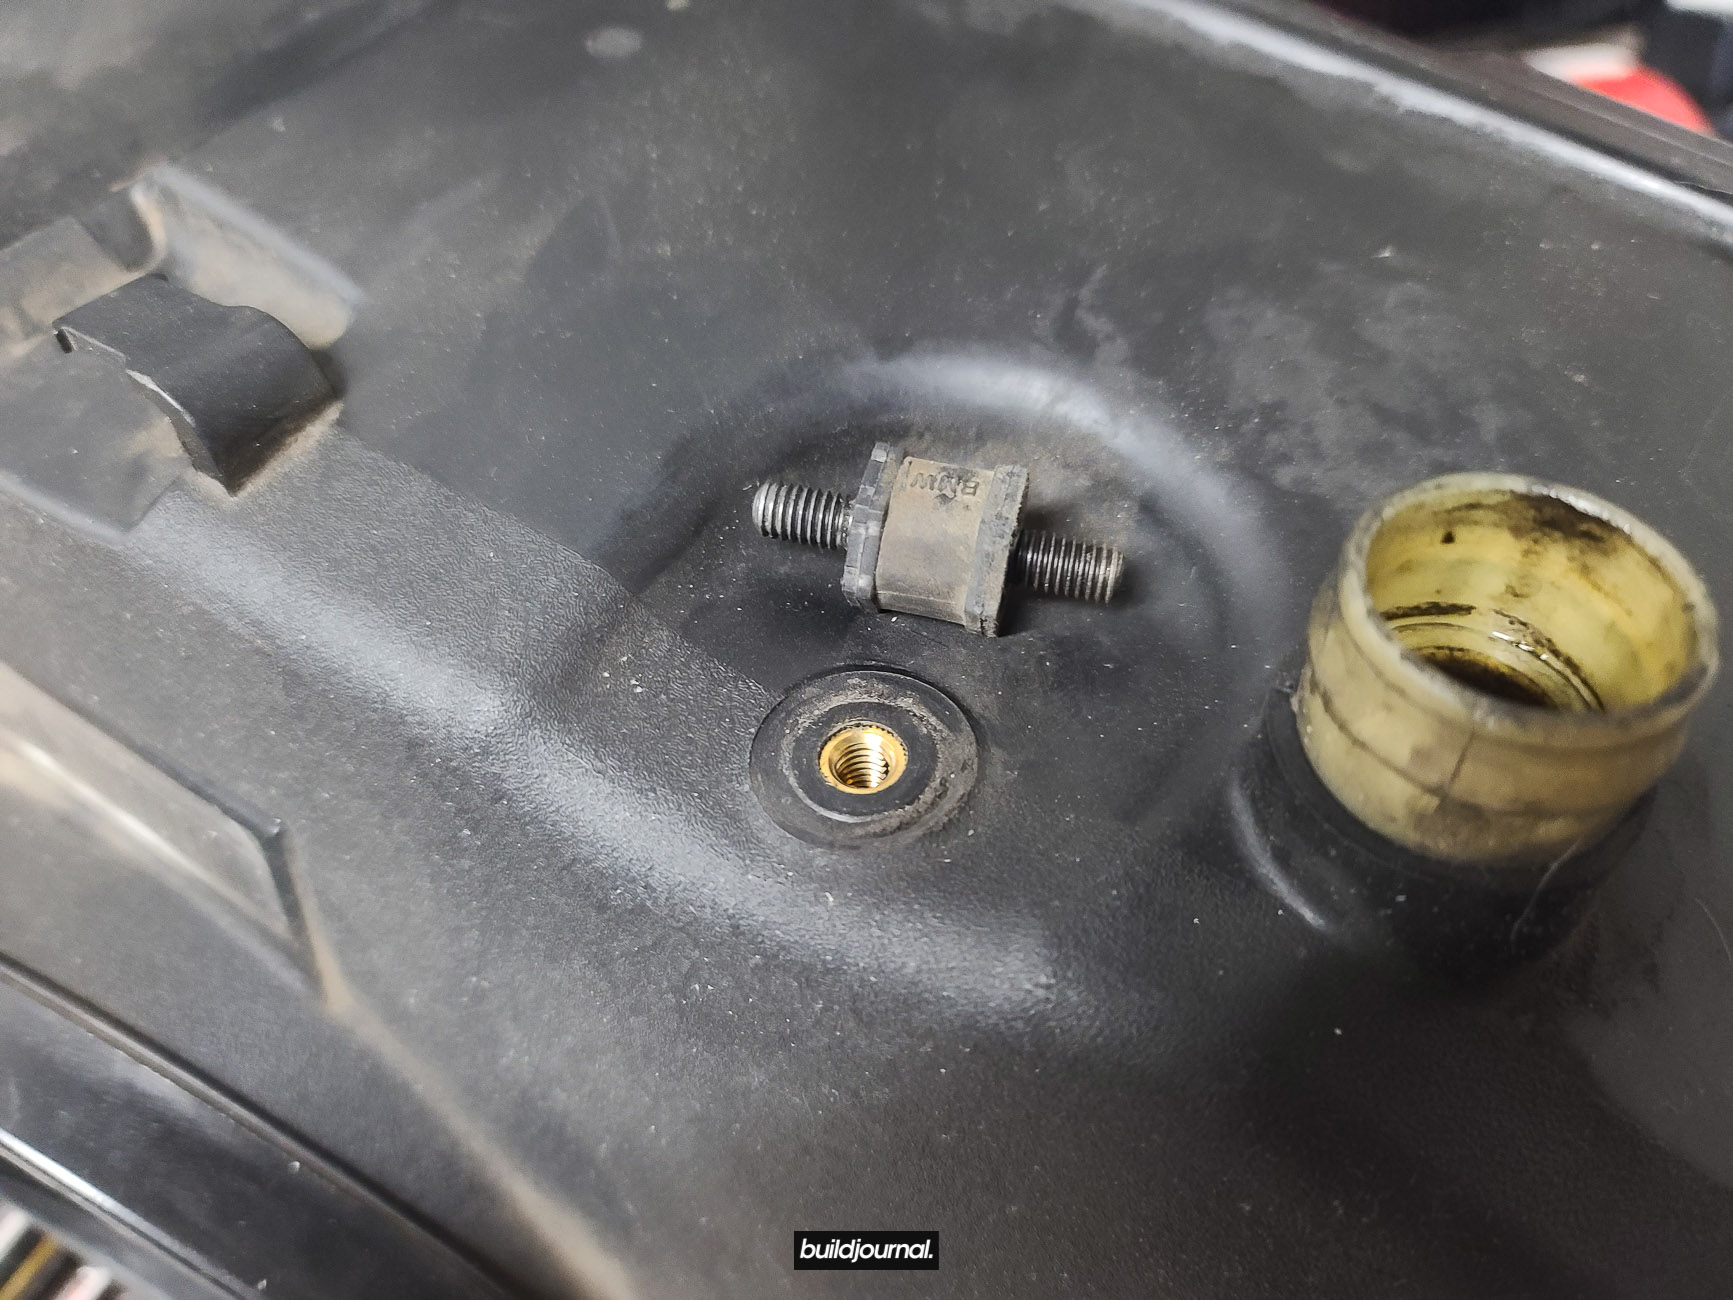
2.2, remove the (2) two nuts holding the bottom of the intake box. Detach plug grommet between the two nuts.

2.3, unclip the (large) vent hose on the bottom of the intake box.

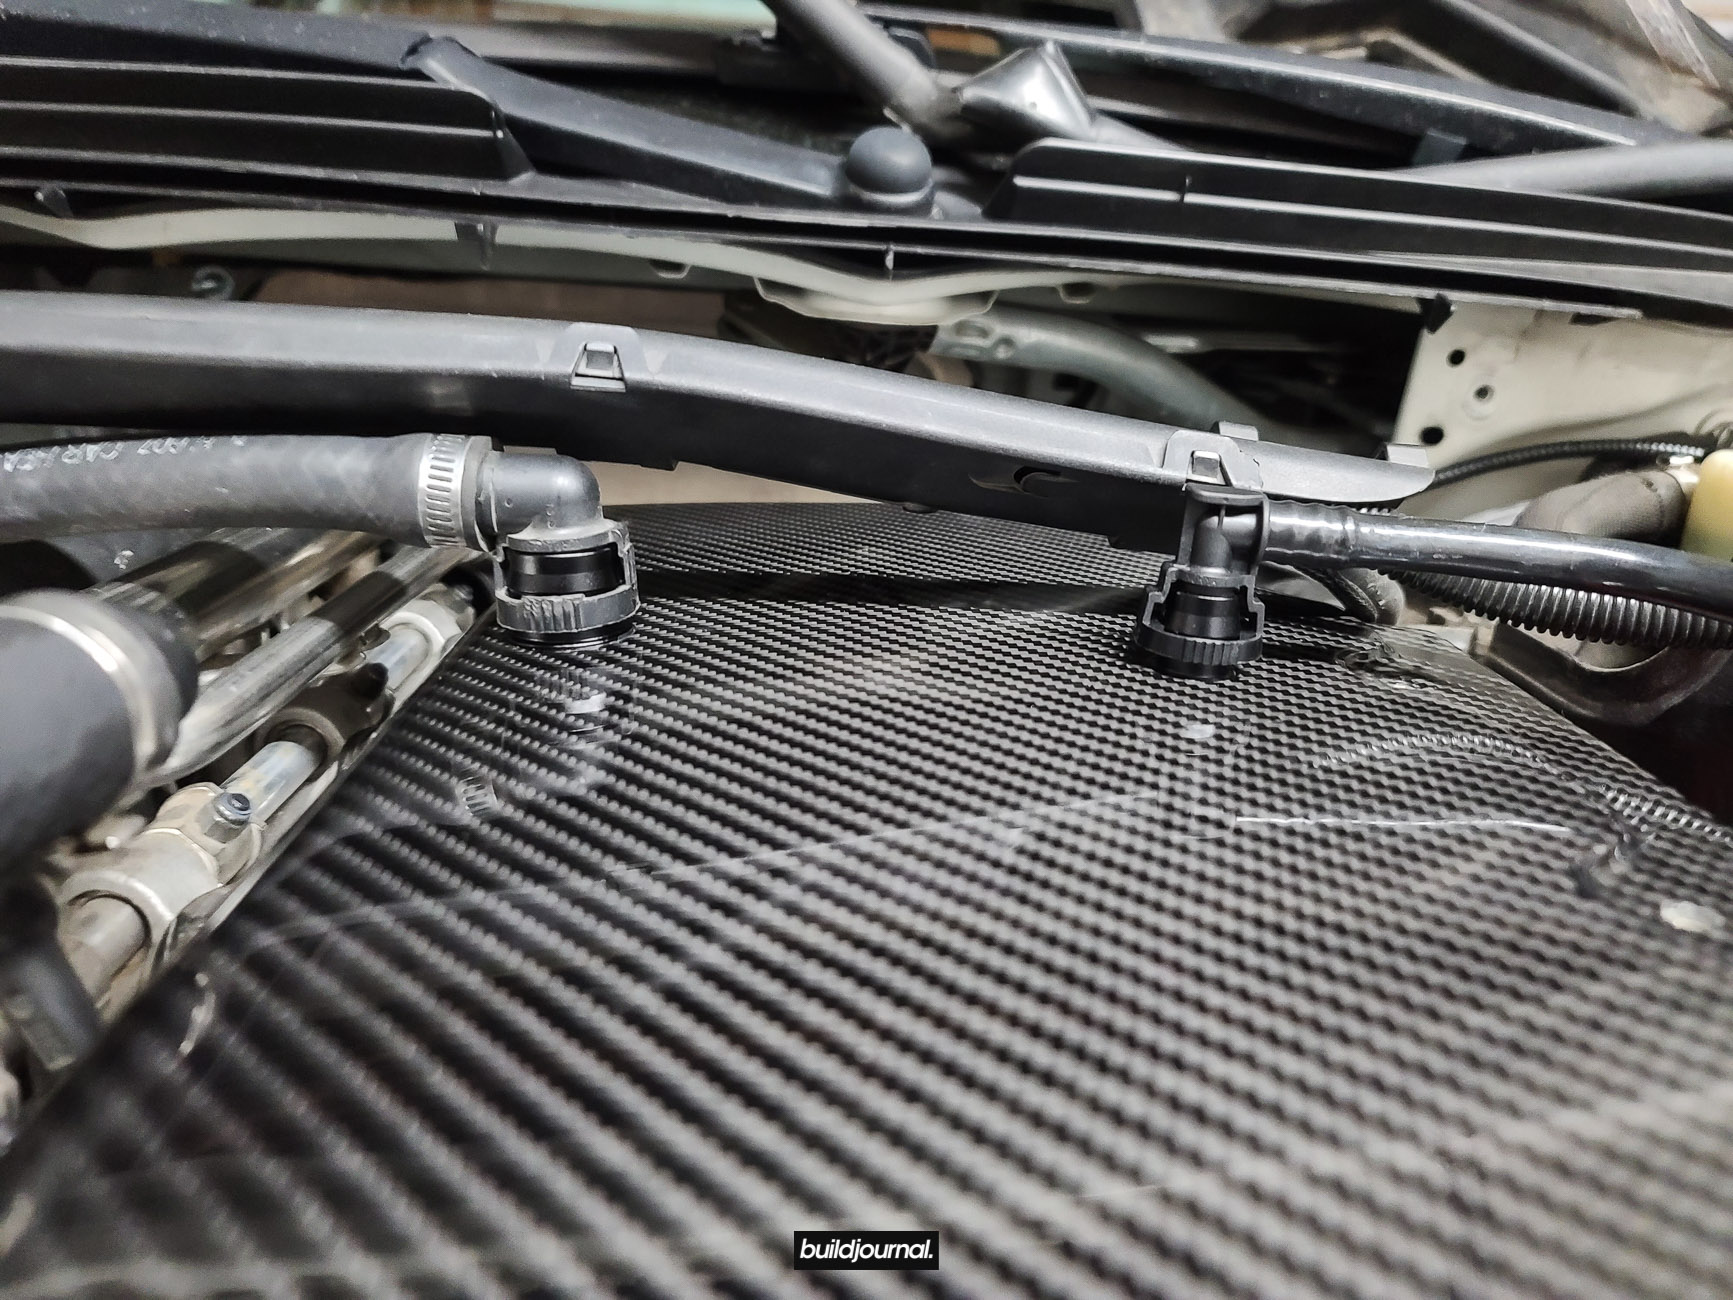
Below is a better view of the (large) lower vent hose and the 2 nuts holding the airbox.

2.4, unclip the holder for the smaller vent hose on the side of the intake box – the small highlighted tab has to be pressed down and the plastic holder will slide up. (not away from box)


2.5, this part is a little tricky (any is the part everyone talks about breaking) so pay attention! Before the airbox comes out, you have to unclick the (small) vent hose below the intake box, but because the clearance is so small you have to wiggle the box out a little to slide your hand in. Be gentle because this part is fragile and if you break this hose, it’s going to be an annoying trip to the dealership.

The best thing to do is slightly pull the airbox halfway out and then unclip the (small) vent hose.

Here is a picture showing the underside of the airbox.

3. Setup engine bay for install
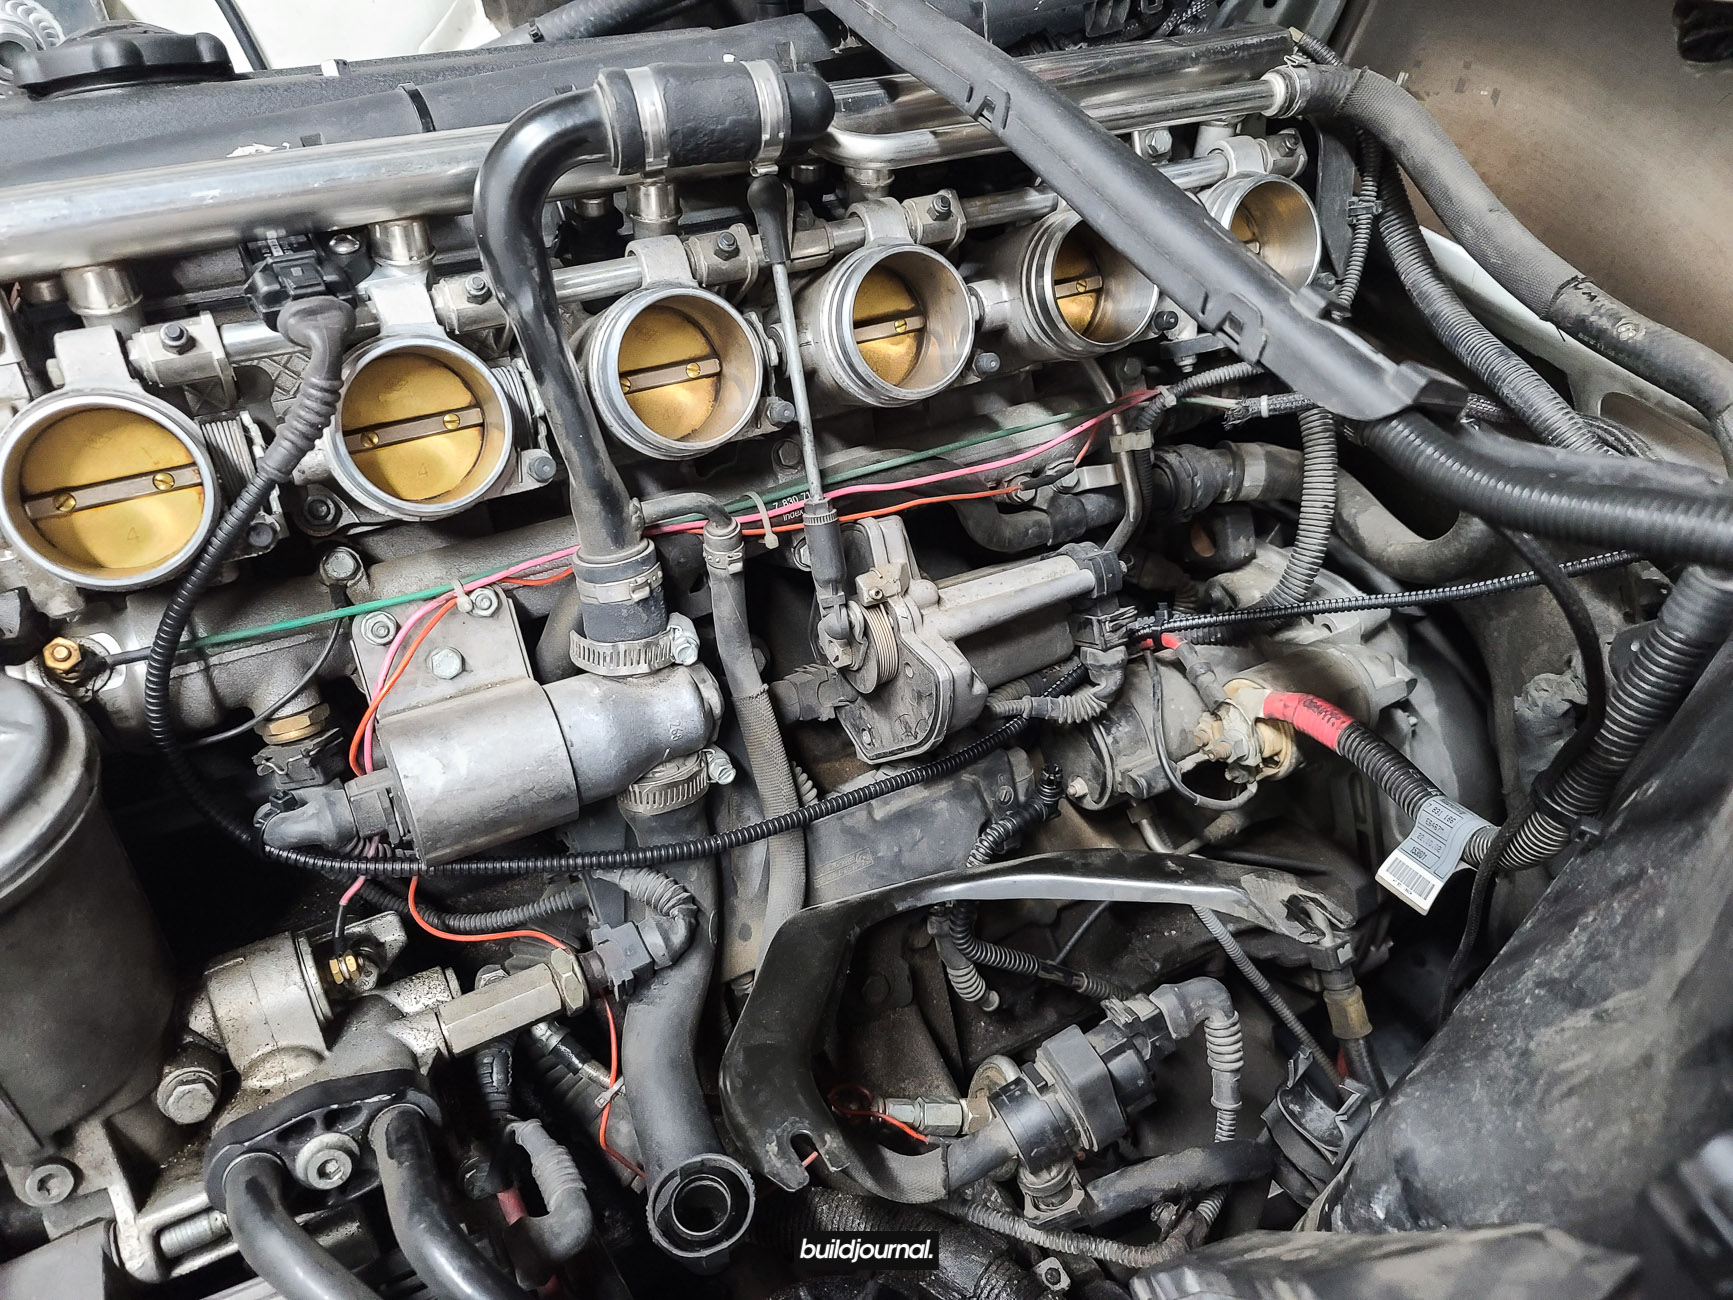
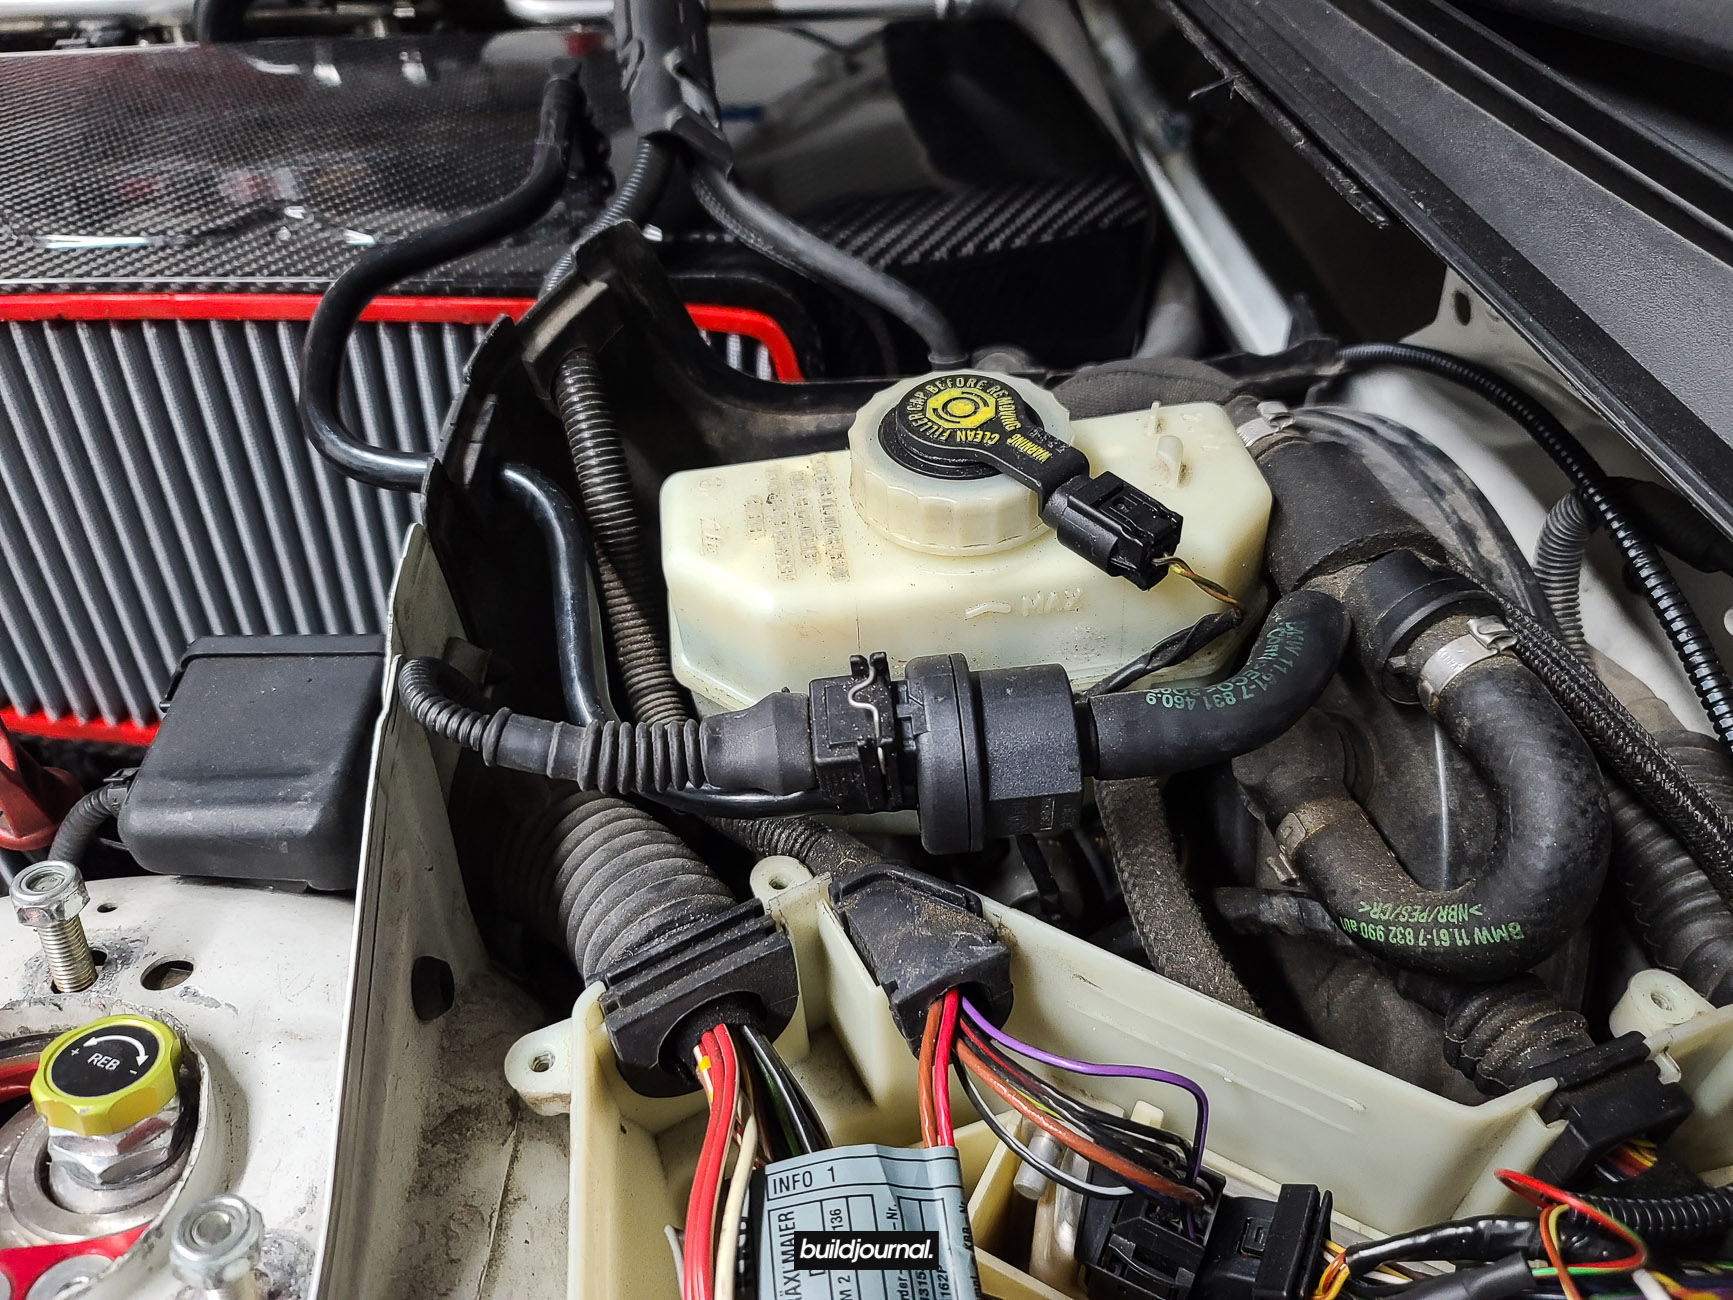
3.1 If you’re re-using the OEM dipstick, slightly bend or pivot your dipstick to the left shock tower right next to the plastic wire box. I just used a zip tie to hold the tube.
3.2 Now is the time to take care of all the hoses and wiring underneath the plenum between the two intake brackets. You’ll also notice the wiring loom for the MAP sensor. We’ll go over the MAP/IAT wiring in the next step, but you’ll want to secure this loom with zip ties as well.
4. Wire MAP and IAT sensor
4.1 I did a separate DIY article to configure the wiring. Please see our article for this step: Wire MAP and IAT Sensor for MSS54HP CSL ECU DIY

5. Install CSL intake
5.1 Remove the OEM intake boots and move it to the new CSL box. Use the bigger hose clamps for the box side and the smaller hoses for the throttle body side.
5.2 Remove the two rubber OEM intake mounts and install on the new CSL box. This is either a 15mm or 16mm deep socket. Please let me know in the comments which one it is.
5.3 Install the CSL Vent Valve Bracket, should you choose, onto the airbox. The orientation in the picture is incorrect. The tab that sticks downwards should be facing towards the air filter.
5.4 Install the air filter and install the main plenum. Make sure to install the hose clamps now while the boots secure to the throttle bodies. Line up the two intake mounts underneath onto the intake bracket.
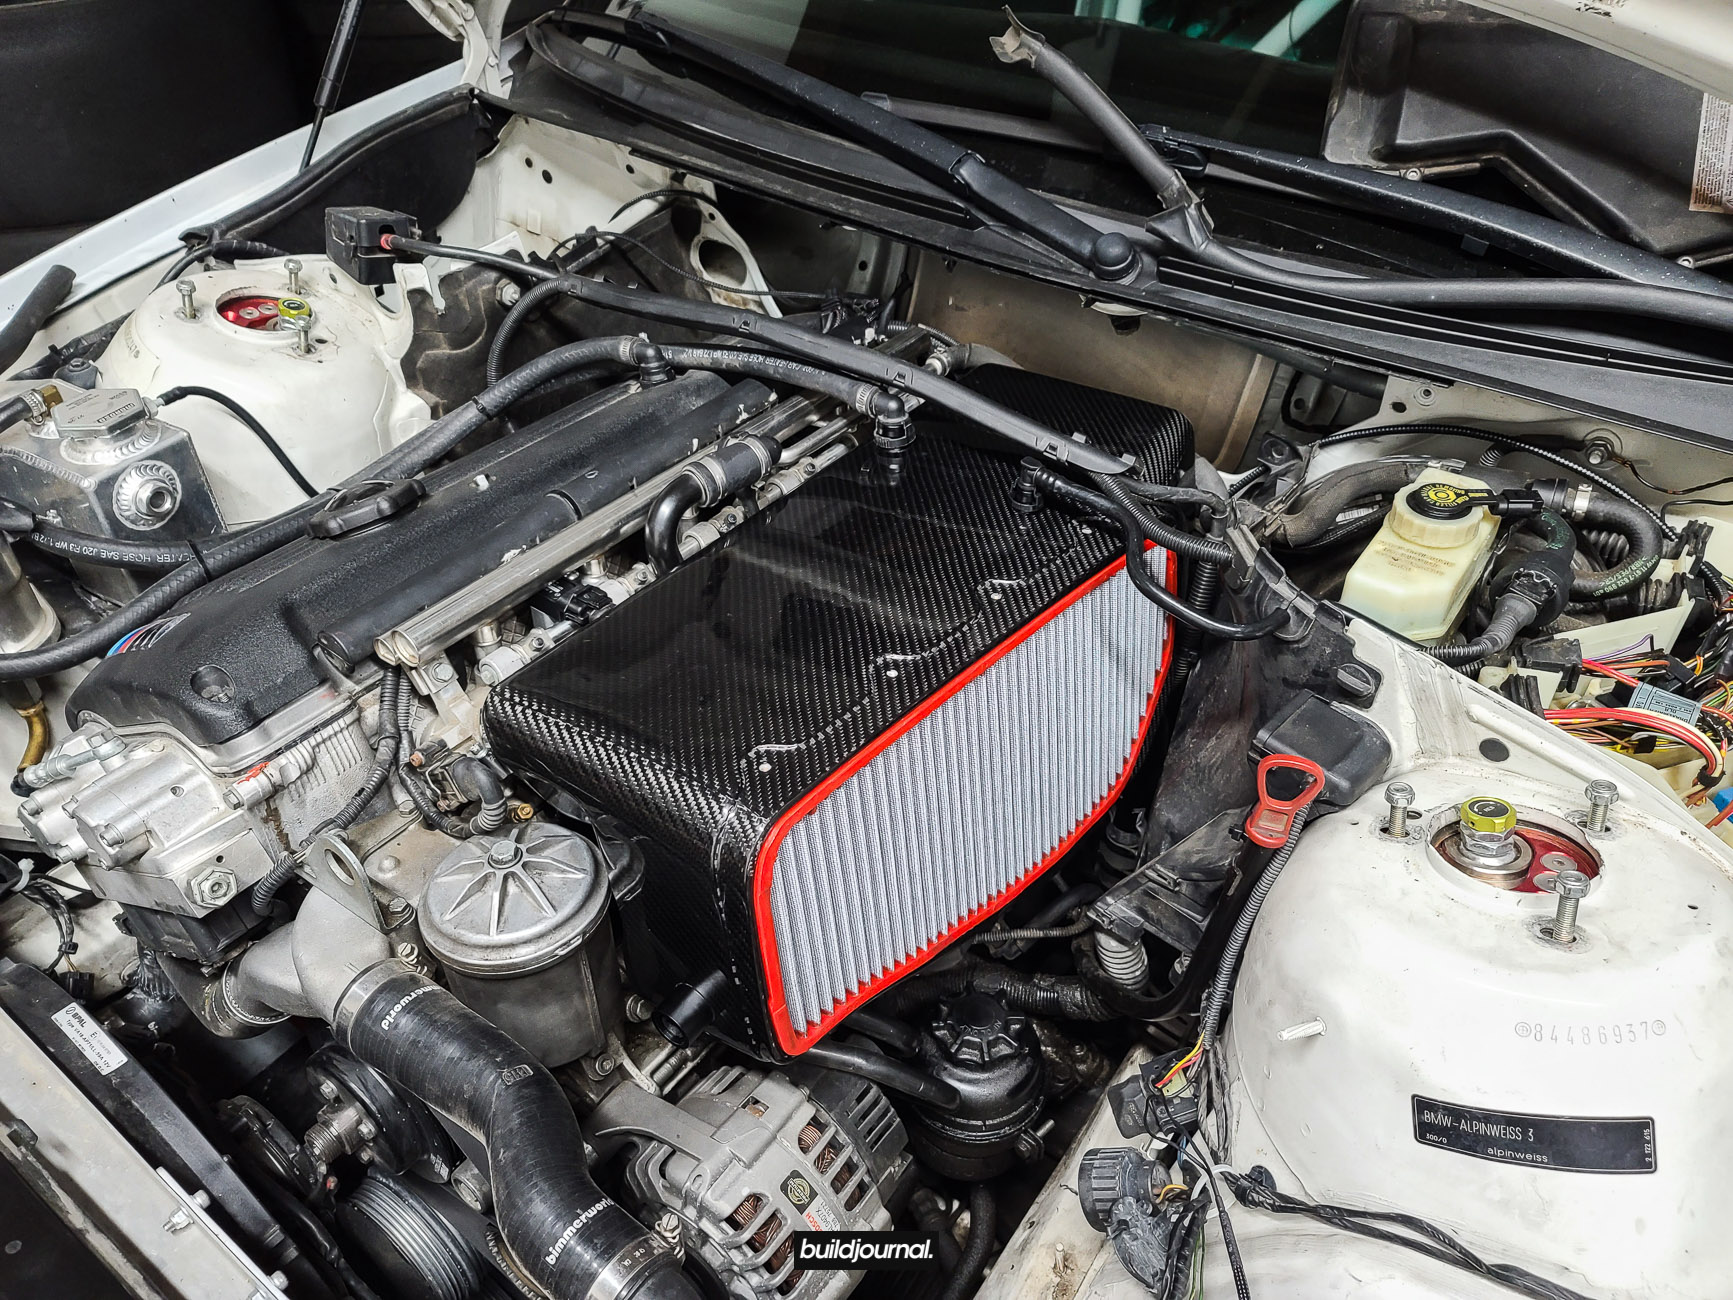
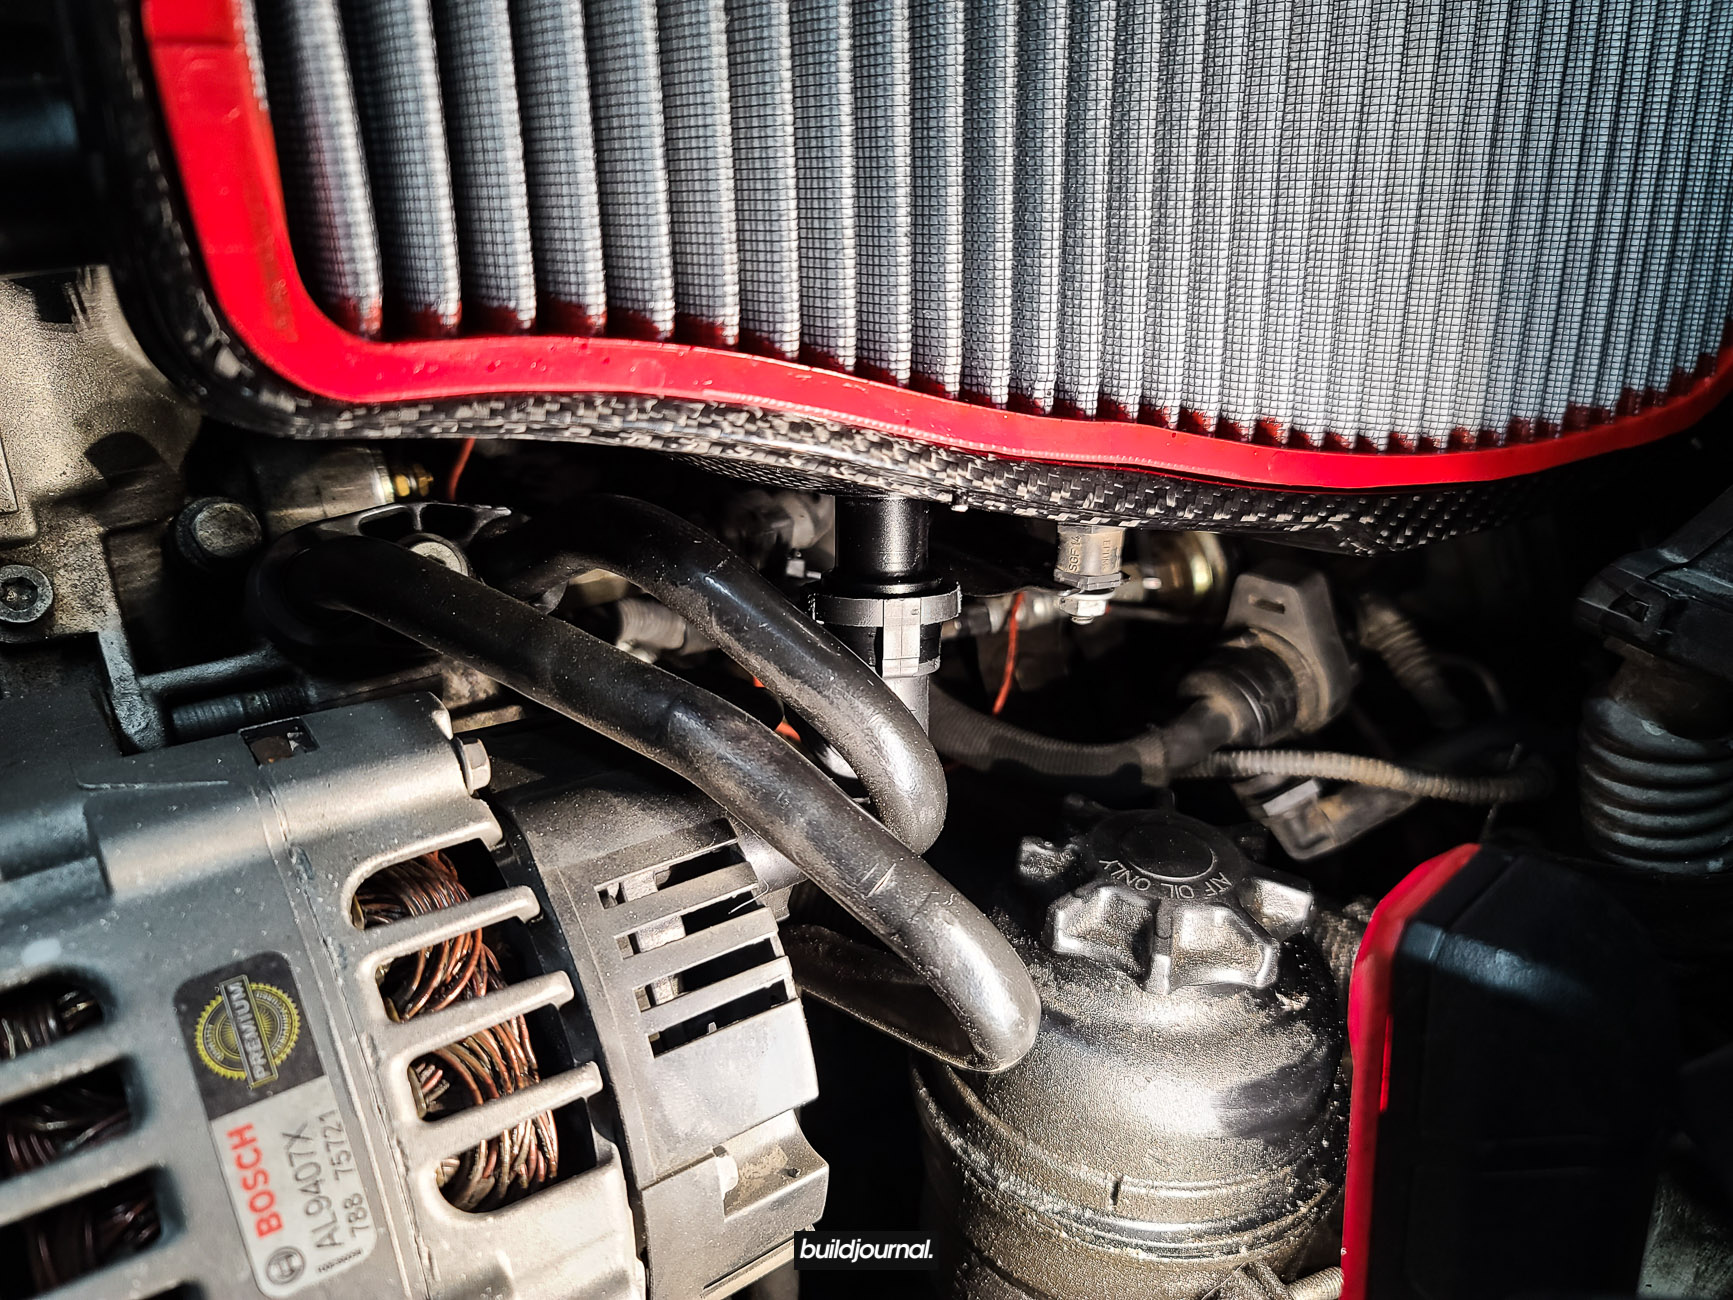
5.5 Attach the two hoses underneath. There is a bigger hose coming from the ICV and a smaller vent hose. If your ICV hose does not line up with the airbox connector, your airbox is probably not seating right and is too high. If this is the case, I would recheck the intake brackets to make sure they weren’t bent upwards. Also be very careful with the ICV hose connector as it has a weak epoxy. Some users, including me, had to re-epoxy this connector because it came unglued.
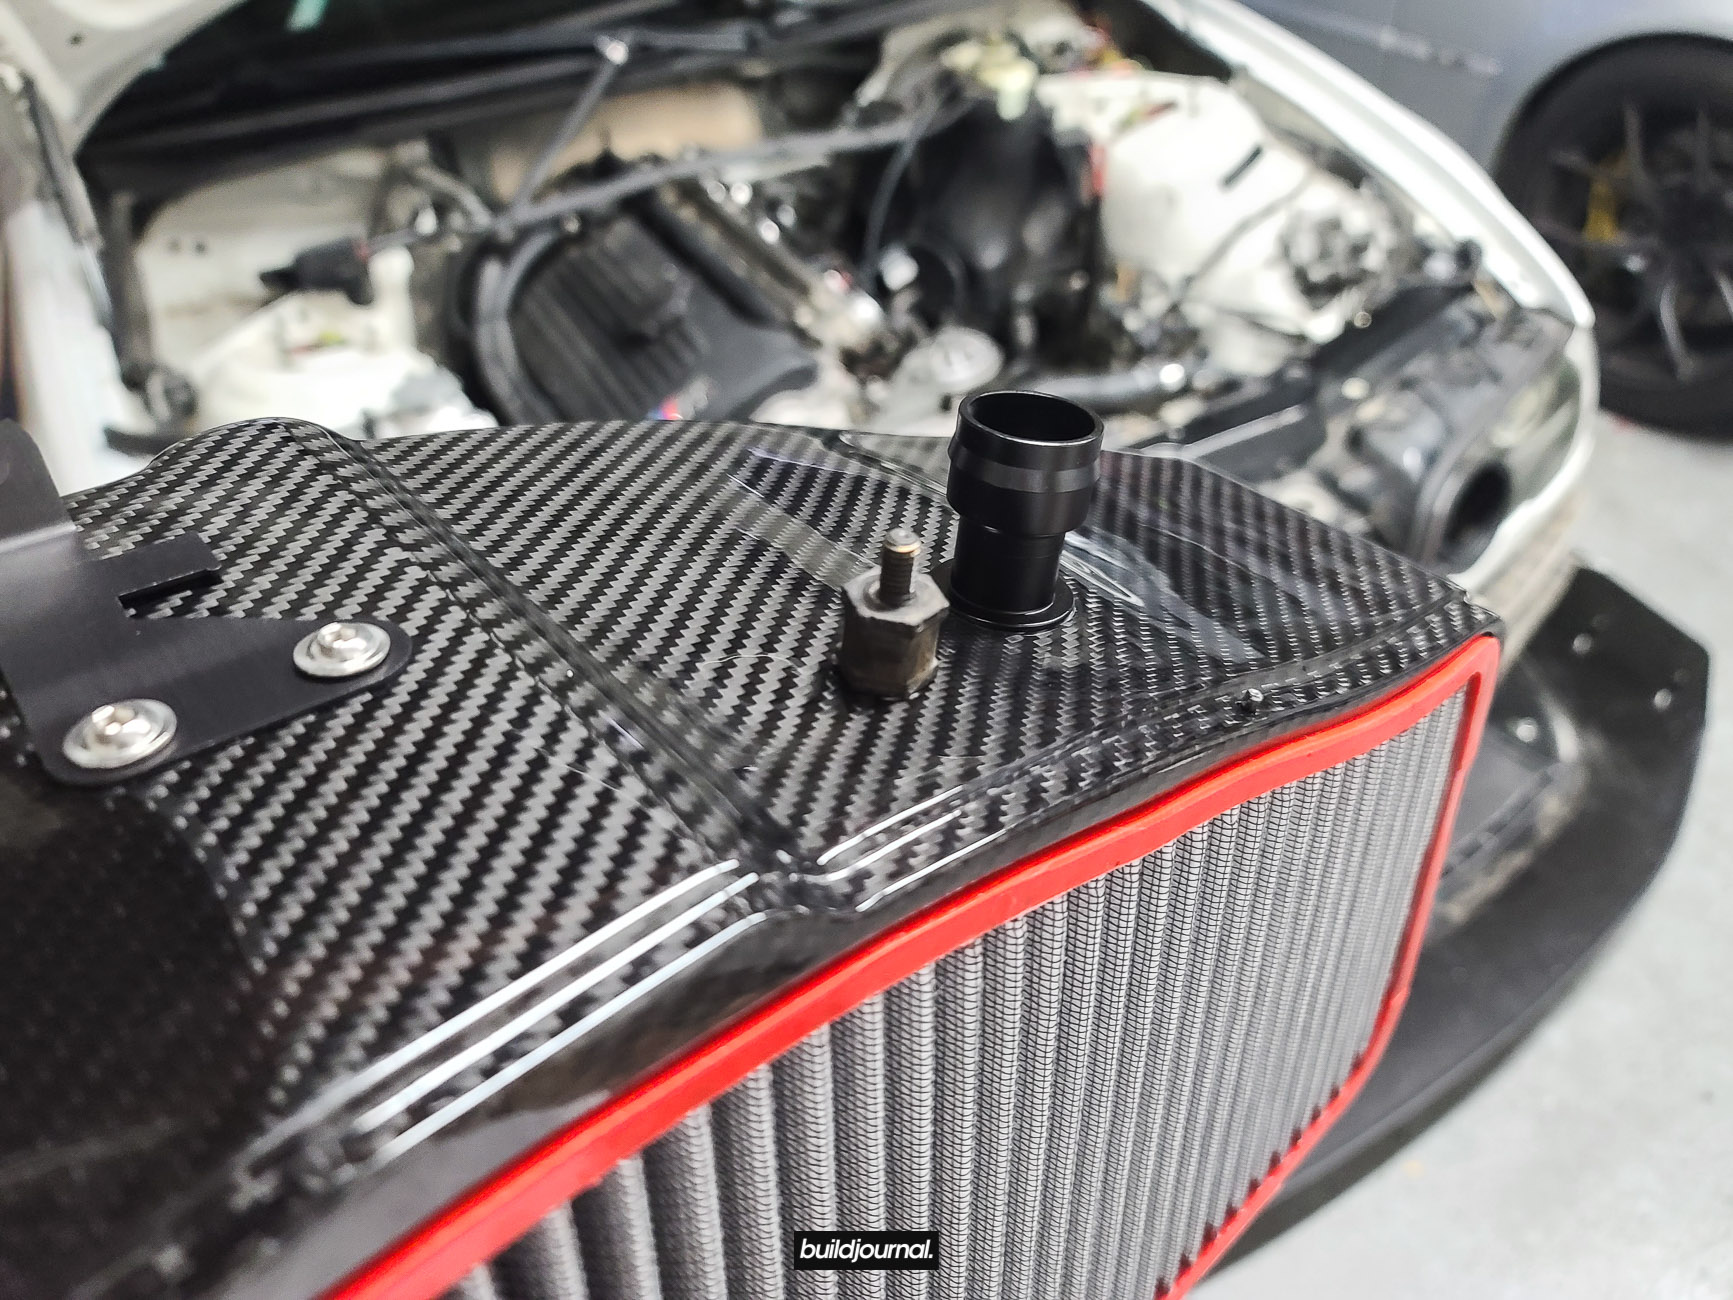
5.6 Install the new CSL Air Shut Off Valve.
5.7 Attach the new crankcase vent hose and shut off valve on top of the box. It’s worth to mention, ECS/Turner does not include a CSL crankcase hose as the OEM can be re-used. I’m using an aftermarket oil catch can so I can not confirm this. Please let me know in the comments if this can be successfully re-used.
5.8 Install the intake inlet using the supplied 4mm hex screws. Make sure the bottom two tabs beneath the airbox are clamped on first.

5.9 Install the CSL IAT sensor into the bung located next to the oil filter housing. Plug in your IAT harness.
5.10 Re-install everything in reverse order for the strut bar, cabin filter, etc. Your install is now complete!
What year is your car? I’m trying to figure out if I’ll need to replace my boots, or if the stock ones on my 2005 can be reused with my Karbonius CSL style intake. Thanks!
In your parts list, you have the IAT relocation harness. That one is for the stock intake and not the CSL “style” Turner air box. FYI.
The rubber intake mounts are 15mm.
not seeing the guid for the IAT harness? did you use the turner harness?
We used our own IAT kit. DIY is here: https://thebuildjournal.com/diy-install/wire-map-and-iat-sensor-for-mss54hp-csl-ecu-diy/