Coilover Suspension Installation Guide for Your E9X M3
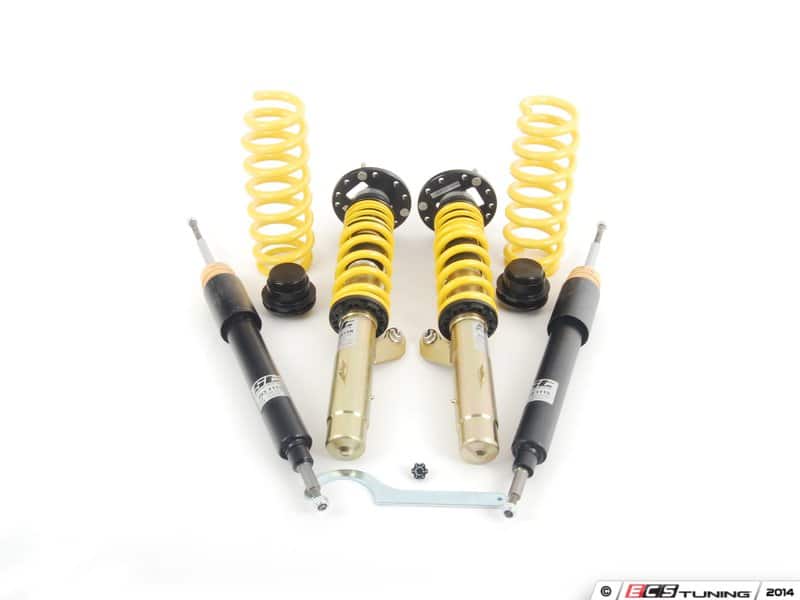
The BMW E90 E92 E93 M3 suspension can be upgraded to coilover style shocks and springs to improve performance. Although the ride is usually firmer with coilovers, a good quality set of coilovers can drastically improve the handling characteristics while retaining ride comfort. For this DIY, I will be installing the ST XTA Performance Coilover System featuring adjustable dampening to control suspension rebound.
The installation process takes about 3-4 hours for first timers and about 2 hours for installers with previous experience. Installation procedure may differ depending on your coilover model.
Do I have EDC?
Before you purchase your coilover kit, it’s important to figure out which kit you need. There are two main options for the E9X M3: with EDC or without EDC. If you’re confused what this is, you can take a look in your engine bay and look for the Electronic Damper Control modules on top of each shock tower. The EDC module is very visible with a trailing wire that comes out of the shock tower cap/cover.
The only difference between each kit is that the non-EDC rear shock has a 10mm shaft while the EDC version has a 12mm shaft. Technically you can use a non-EDC coilover kit on a EDC car by running 10mm rear shock mounts – and vice versa. Make sure you select the correct shaft diameter hardware for your application! It is recommended to switch out the RSM during the install to ensure your bushing are fresh. Worn out RSM’s can lead to alignment issues and poor handling.
Tools Required
- Rear shock mount (RSM) - ECS Tuning
- Torque wrench
- Breaker bar
- Flat head screwdriver
- Jack + stands
- Spring compressor (for stock suspension)
- 21mm socket
- 18mm socket
- 16mm socket
- 13mm socket
- 10mm socket
- 8mm socket
- 6mm socket
- 21mm wrench
- 16mm wrench
- 19mm wrench
- 10mm wrench

Coilover Installation Instructions
1. Prepare for Suspension Removal
1.1 Jack up the car. I started with the fronts first, but you can work on the rear if you choose to. Jack up the car using the center jack point and place jack stands to support the car.
1.2 Disconnect the headlight auto-level sensor located on the driver’s side control arm using a 10mm socket and wrench. This is an optional step however be careful not to droop your control arm all the way down if you plan to leave connected.
1.3 Remove wheels.
1.4 Disconnect brake line, ABS sensor and other wiring located on the inside of your shock.

2. Remove Suspension (Front)
I’ll be removing KW V3 coilovers, but if you have a non-coilover style suspension system (including stock) you will need to use a spring compressor to remove the strut assembly.
2.1 Remove end links. The stock end links can be removed with a 16mm socket and a 16mm open-ended wrench.


2.2 Remove the 3 M8 nuts on the top of each strut tower using a 13mm socket. Provide support from underneath while you remove these nuts so the control arm does not fall.

3. Install New Suspension (Front)
3.1 Once the old strut is out, you can install the new strut. My ST comes with a sleeve that needs to be inserted first. Line up the sleeve, in accordance to the spindle gap, and insert the new ST shock with the metal nub sliding down the spindle gap.

3.2 The best thing about the ST kit is that it comes with camber plates. After the sleeve and strut is inserted, use a jack from underneath to slowly raise it towards the shock tower.
3.3 Tighten the 3 shock tower nuts firm, but not torqued yet. We will torque once the car is loaded.

3.4 Install your new end links. Stock end link M10 bolt calls for 42.7 ft-lbs.
3.5 Install brake lines, ABS sensor wiring, and bracket to strut housing.
3.6 Install headlight auto-level sensor if removed. Torque to 6 ft-lbs.
3.7 Load the front suspension by lowering the car back to the ground and then torque the three M8 strut tower bolts to 25 ft-lbs.

4. Remove Suspension (Rear)
4.1 Jack up the rear of the car.
4.2 Remove the inner trunk liner on both sides of the trunk to expose the rear strut tower.
4.3 Remove the top strut mount by using an open ended 16mm wrench and a hex socket to hold the spinning strut in place.
4.4 Remove the headlight auto-level sensor on the driver side rear using a 10mm socket and wrench.

4.5 Support the bottom control arm with a jack and remove the 18mm and 21mm bolts. The 21mm bolt will require a 21mm wrench to hold the other side which spins.

5. Install Suspension (Rear)
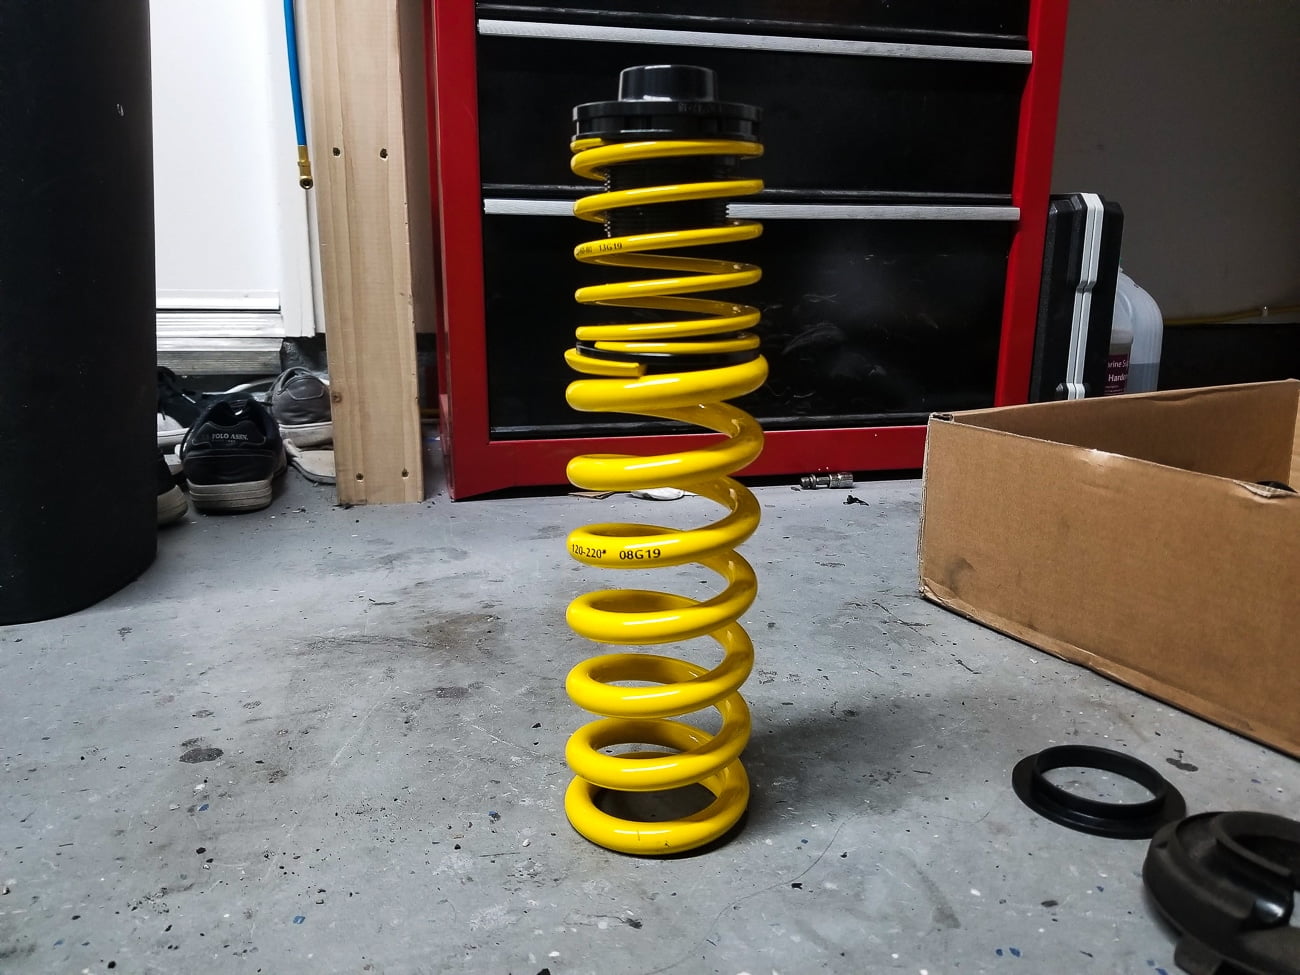
5.1 Prepare your rear spring for installation. My ST kit came with a helper spring which I added to the top half. You may need to re-use your spring pad for the bottom of the spring which sits on the spring perch. ST advises not to, but others may vary. I actually decided to re-use the pad on mine. On some coilover kits, you may have to re-use the upper spring perch as well. For my ST I did not.

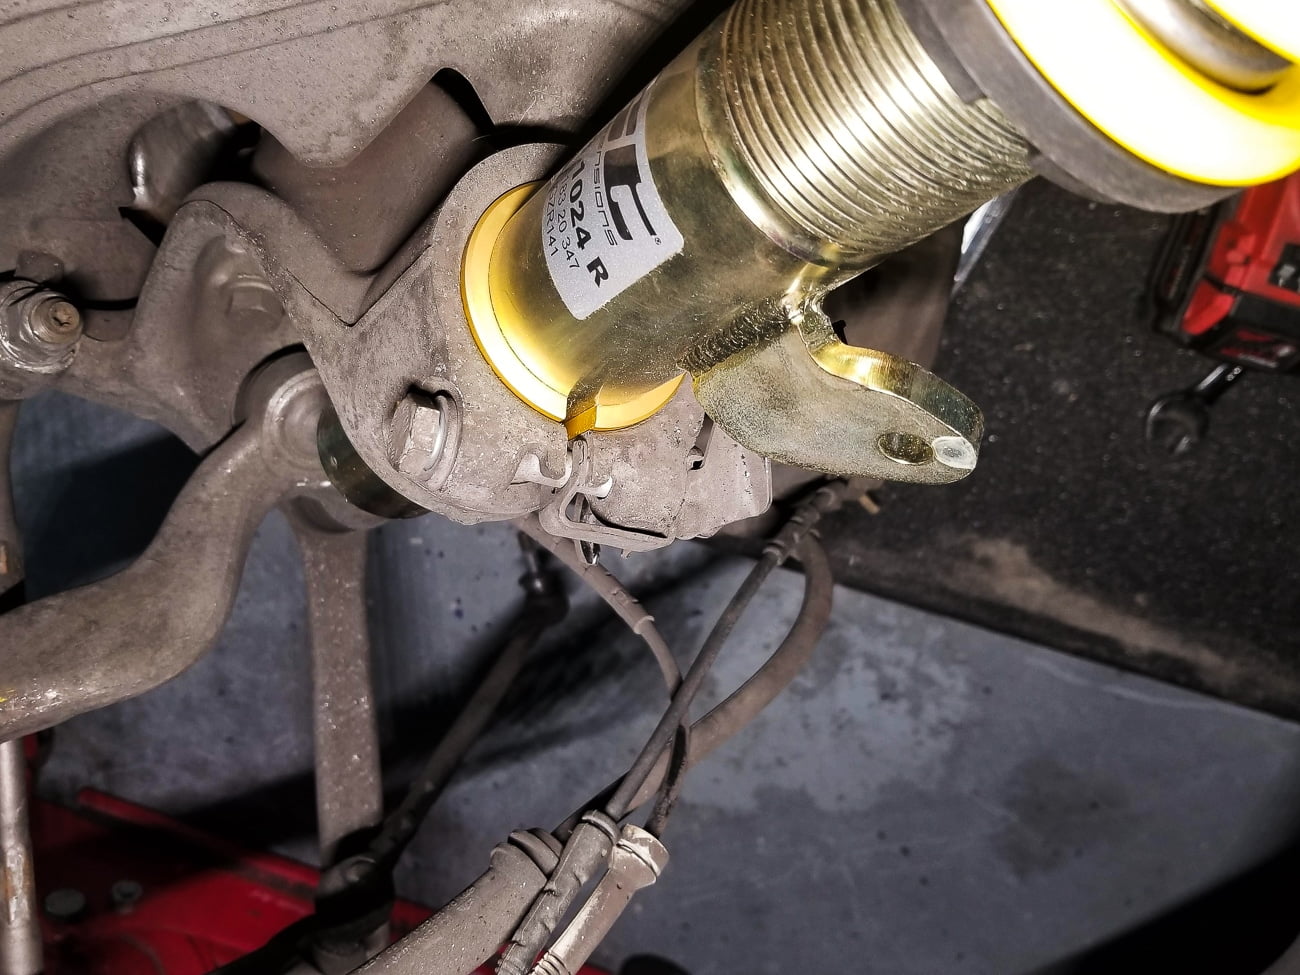
5.2 Prepare your new rear shocks for installation by inserting the lower half of the rear shock mount (RSM).

5.3 Place the new shock into the rear shock tower.
5.4 Simultaneously insert the new spring setup into location.


5.5 Once the rear spring and shock is in place, line up the lower control arm and lower shock hole. This part can get a little tricky because the knuckle needs to slide in between the control arm, however the knuckle bushing may flex instead of sliding into place.
5.6 After everything is lined up, reinstall the 18mm first then 21mm bolts. Torque the 18mm M12 bolt to 74 ft-lbs and the 21mm M14 bolt to 122 ft-lbs. Once the car is loaded and back on the ground, re-torque these values. It’s important that the car is loaded when final torque is applied.

5.7 Go back up to the upper strut mount and install the other upper half of the rear shock mount. Tighten the 16mm nut to 27 ft-lbs.


*Than
Do they go lower then kw v3?
The rear spring order is incorrect, the helper spring goes on the bottom not the top. There is also a little book that comes in the box that explains that it should be on the bottom as well.
I think he got it correct. I dont’ think the main spring will sit right on top. the helper spring should go on top.
Thank for this it was helpful for my e90 335 set with the my XTA ST Coilovers
Great write up! Would be great to now how these performed versus stock.
I am also thinking of doing the same coilover set up. With the rear would you have the part numbers or names of the bits that you reused for the install?