Whoa and woes with E46 M3 reinforcements
The aluminum cast construction of the rear lower spring perch on the E46 M3 can deform or crack when running aftermarket coilover kits therefore we high recommend the rear spring perch reinforcement plate fix to be a mandatory job. The main issue here is that the rear coilover adjusters put a lot of load onto a small diameter of the spring perch causing it to cave in overtime.
Although a lot of people on the forums argue but the necessity of reinforcement plates for the rear spring, but hey. It’s $35 bucks.


Photo: Rogue Engineering
Most kits come with spring pads to reduce the amount of stress, however we found that even with spring pads the lower spring perch started to cave a bit on our cars. By using a plate, it spreads the load over a larger area therefore greatly reducing the stress. It’s one of those jobs that is relatively cheap to do so we listed this job as a mandatory job in our E46 M3 Ultimate Maintenance Guide. Below is a DIY on the procedure.
Tools

- 17mm socket
- 18mm socket
- 18mm wrench
- Mallet
- Ratchet
- Torque wrench
- Jack
- Floor jack
- Jack stands
- PB B’laster
- Loctite Threadlocker (Red or Blue)
Materials

- (2) Spring Perch Reinforcement Plates
- Garagistic – $35
- Rogue Engineering – $55
Instructions

The DIY is pretty simple and it took us about 1.5 hours to install both sides. You’re going to need to remove both rear springs out in order to place the rear spring perch reinforcement plates in so this will require you to jack up your car and partially remove your shocks. If you installed coilovers before, this should be no problem.
Disclaimer: This DIY does require you to lift your car so please use proper tools and follow all safety procedures if you choose to attempt. This guide is for your reference only. We are not liable for any damages or injuries that result from this guide.
1. Remove Wheels
1.1, straighten your wheel and break loose the 5 lug nuts on each wheel in the rear.
1.2, jack up the rear to lift the tires off the ground. Make sure car is on a flat surface.
1.3, remove the 5 lug nuts on the wheel using a 17 mm socket and a breaker bar/wrench.
1.4, remove your wheel.
1.5, keep you emergency brake down/disengaged.

2. Unbolt Rear Shock Absorbers
2.1, find the 18mm bolt holding the rear shock absorber to the rear trailing arm. Spray PB B’laster on the 18mm bolt.
2.2, get a secondary jack and add pressure to the rear arm so there is no stress/weight on the bolt. You might end up damaging the 18mm bolt if you try to remove without any support. I find it best to jack up all the way until it makes contact with the control arm. Stop, and then add a very small pump to raise it by 1mm.
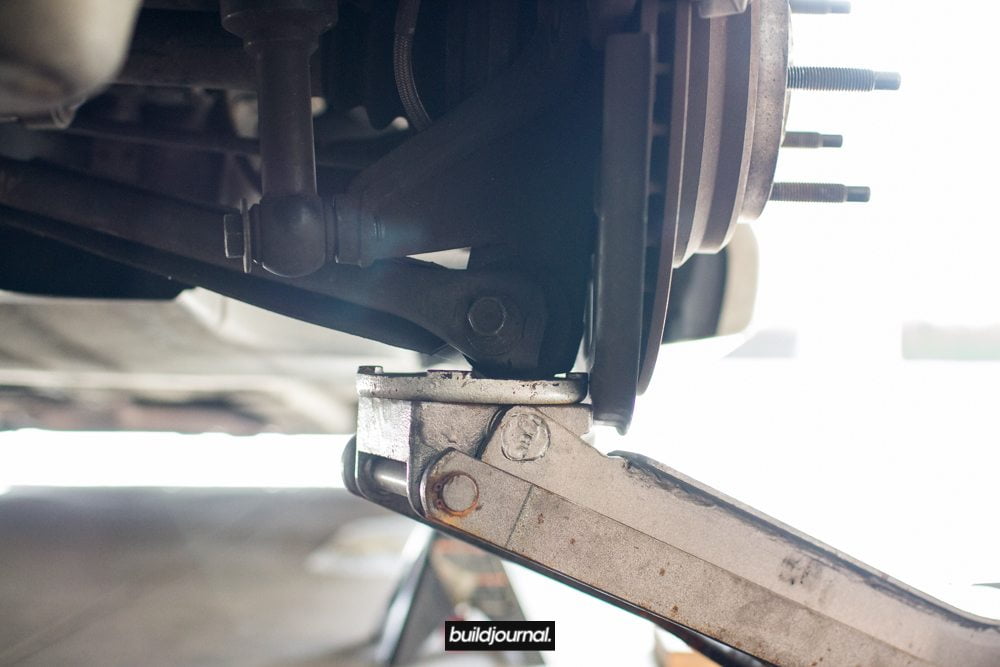
2.3, remove 18mm bolt with your impact wrench or wrench/mallot combo. This should come out rather easily after you break loose.
2.4, once the bolt is fully out, you can start slowly setting down the jack holding the rear arm. Your brake lines should have enough play to just hang lose, but keep an eye on it so you don’t damage anything.
3. Remove Springs
3.1, your spring should now be accessible and should drop right out with a small pry. If it doesn’t want to come out, check to make sure your emergency brake is not engaged.

3. Install Rear Spring Perch Reinforcement Plates
3.1, clean base.
3.2, install rear spring perch reinforcement plate.

4. Install Springs
4.1, keep in mind with the plate added on, your height will increase by a few millimeters because of the thickness of the plate. This is a good time to readjust your height settings if you want to retain your same ride height. I recommend lowering your adjuster by 2mm to compensate for the plates.

4.2, pop the spring back in and make sure it sits flush.
4.3, get the floor jack and begin to raise the control arm until the rear shock absorber meets the rear trailing arm.

4.4, clean the 18mm bolt threads and apply 2 drops of Loctite Threadlocker on the bolt. Red is high strength and blue is medium strength.

4.4, insert 18mm bolt and tighten to 74 ft-lbs. You will have to re-torque to 74 ft-lbs once car is in normal loaded position.
Pro Tip: If you decide to work on both sides at the same time, keep in mind that it may be harder to insert the spring if the other side has the rear shock absorber and the rear trailing arm connected. You may need to either pry extra hard or loosen the rear shock absorber and the rear trailing arm to install spring. Also make sure your emergency brake is down.

4.5, now your rear is done!

5. Install Wheels
5.1, install all 5 lug nuts and bolts.
5.2, torque lugs to 88 ft-lbs.
