This article will go through the steps to install an oil diverter valve to your E46 M3 S54 oil filter housing (OFH) to lower engine oil temps. I’m constantly running upwards of 300 °F on hot summer track days and the oil diverter valve is a great way to decrease temps by 30 °F. The S54 oil filter housing comes with a thermostat to close the oil circuit on cold starts so that the engine may warm up faster however the valve does not open up 100% after warming up therefore it regulates the oil circuit to a shorter loop. The Bimmerworld Oil Cooler Diverter Valve Kit allows the engine oil “full-flow” throughout the system. Although this is a great way to decrease oil temps, it’s not recommended for a street driven car because the oil temperature may not reach normal operating temperature. Yeah, it works that well.
Disclosure: Some of the links in this article are affiliate links, meaning, at no additional cost to you, we will earn a commission if you click through and make a purchase. Your contribution helps us purchase new tools and equipment to continue creating articles such as this. We thank you for your support.
The issue: Engine oil temperature exceeds the maximum high-performance driving limits of 300 °F / 150 °C on track.
A solution: Install Bimmerworld Oil Cooler Diverter Valve Kit into oil filter housing.
I would rate this job a 6.5/10 because it does require you to remove your intake manifold, belts, alternator and oil filter housing. It is possible to do this job without removing the intake manifold, however it’s going to be a pain in the ass to get to the bolts. If something is going to be a pain in the ass, I’d suggest removing the intake manifold. While you’re doing this job I pretty much will tell you it is mandatory to fix/check your throttle position sensors (TPS), clean your ICV valve and clean your throttle bodies. You’re right there.
Parts and Tools Required
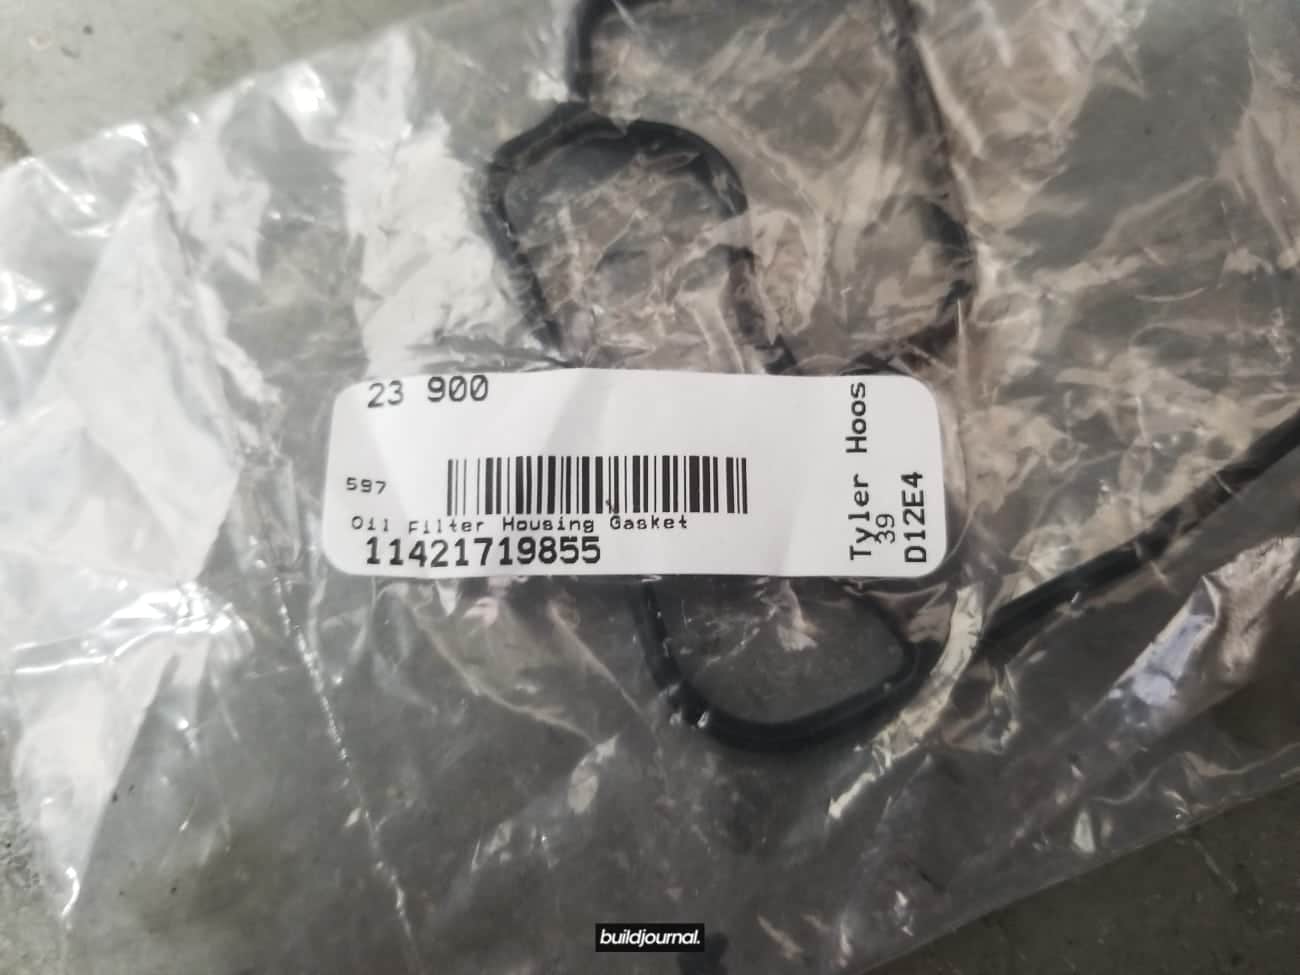
- (1) Oil filter housing gasket – 11421719855 or DuPoint Viton OFH gasket – 11421719855V
- (2) Oil cooler o-rings – 12221664890
- Bimmerworld Oil Cooler Diverter Valve Kit (comes with OFH gasket)
- 13mm socket
- 16mm socket
- 8mm hex head
- Basic tools including various sockets
- Various extensions
- Torx bits
[amazon_link asins=’B000GYLGU8,B000J0TF6G,B000RB3XBA,B00CPL918E’ template=’ProductCarousel’ store=’builjour-20′ marketplace=’US’ link_id=’3fc392ca-ac9d-4ce3-a3fb-fd1f84f1a5cc’]
1. Remove intake
1.1, remove 4 nuts holding front strut bar.
1.2, remove 4 torx screws holding cabin filter housing, remove filter.

1.3, remove intake including the nut for the oil dipstick.

1.4, remove crankcase vent hose.

1.5, remove vent hose grommet to give some more slack in the line when you take out the airbox.

2. Remove intake manifold
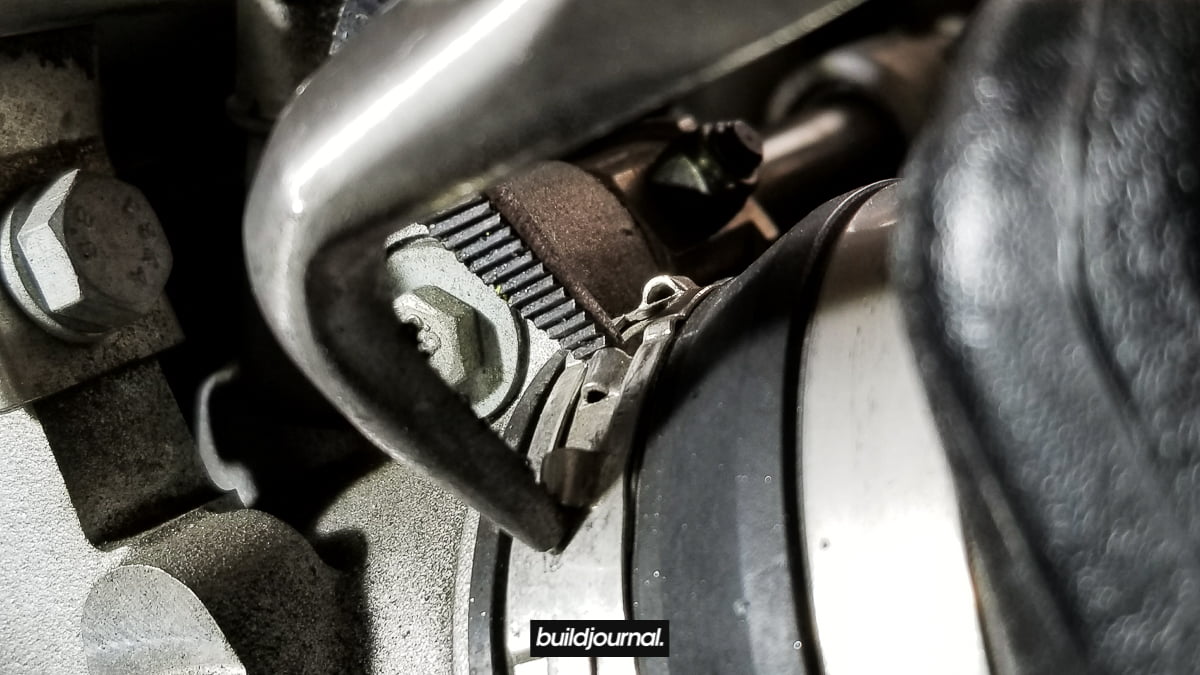
2.1, remove the throttle body hose clamps. There’s not much grip and clearance so I had to use angled needle-nose pliers and locking pliers to squeeze the rivets together and with a flat head pry out the clamp simultaneously. Basically in the bottom picture below, I pry the two rivets together to alleviate clamping force and then used a small flat head to pry out the end of the clamp pictured on top.

Clamp the rivets together. Remove all 6 clamps.
2.2, remove the (2) two nuts holding the bottom of the intake box. Detach plug grommet between the two nuts.

2.3, unclip the (large) vent hose on the bottom of the intake box.

Below is a better view of the (large) lower vent hose and the 2 nuts holding the airbox.

2.4, unclip the holder for the smaller vent hose on the side of the intake box – the small highlighted tab has to be pressed down and the plastic holder will slide up. (not away from box)


2.5, this part is a little tricky (any is the part everyone talks about breaking) so pay attention! Before the airbox comes out, you have to unclick the (small) vent hose below the intake box, but because the clearance is so small you have to wiggle the box out a little to slide your hand in. Be gentle because this part is fragile and if you break this hose, it’s going to be an annoying trip to the dealership.

The best thing to do is slightly pull the airbox halfway out and then unclip the (small) vent hose.

Here is a picture showing the underside of the airbox.

3. Remove accessory belt
3.1, use an 8mm hex head to loosen the (lower) pulley tensioner and remove the accessory belt.
4. Remove alternator
4.1, use a flat head to remove safety cap on the idle pulley. There are two 16mm hex bolts holding the alternator on the front near the accessory belts. One on the (upper) idle pulley and one below that. Remove both.
4.2, once the alternator is loose, disconnect the power plug in the rear by pushing down on the metal clip.
4.3, use a 10mm socket to remove the battery cable.
5. Remove oil filter housing
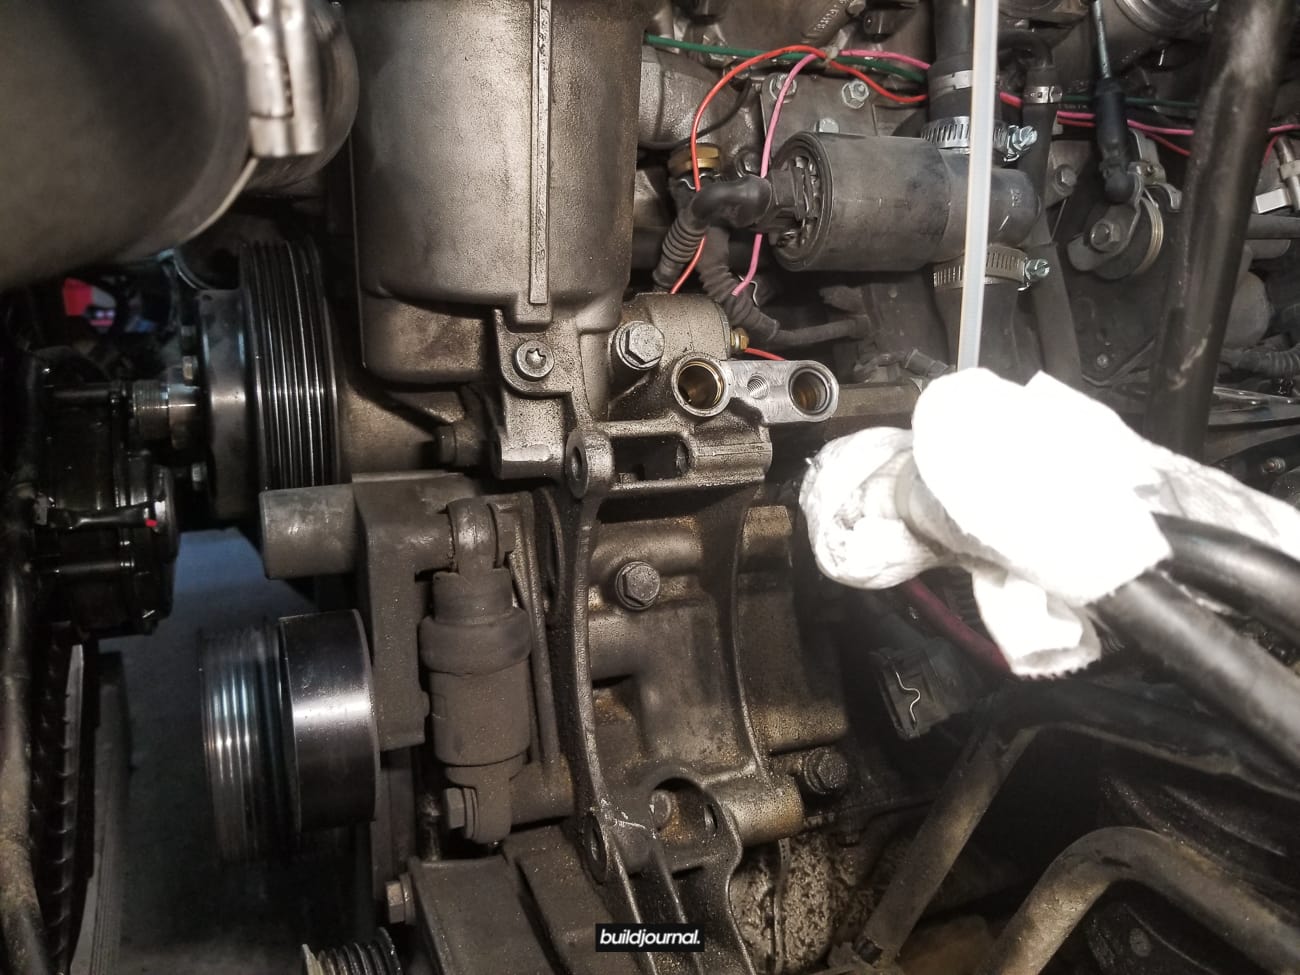
5.1, using an 8mm hex key, remove the bolt attached to the two oil cooler lines. Tuck the oil cooler lines away. Make sure to remove the o-rings stuck inside the inlet or lines. You’re going to replace these with new ones when re-installing.
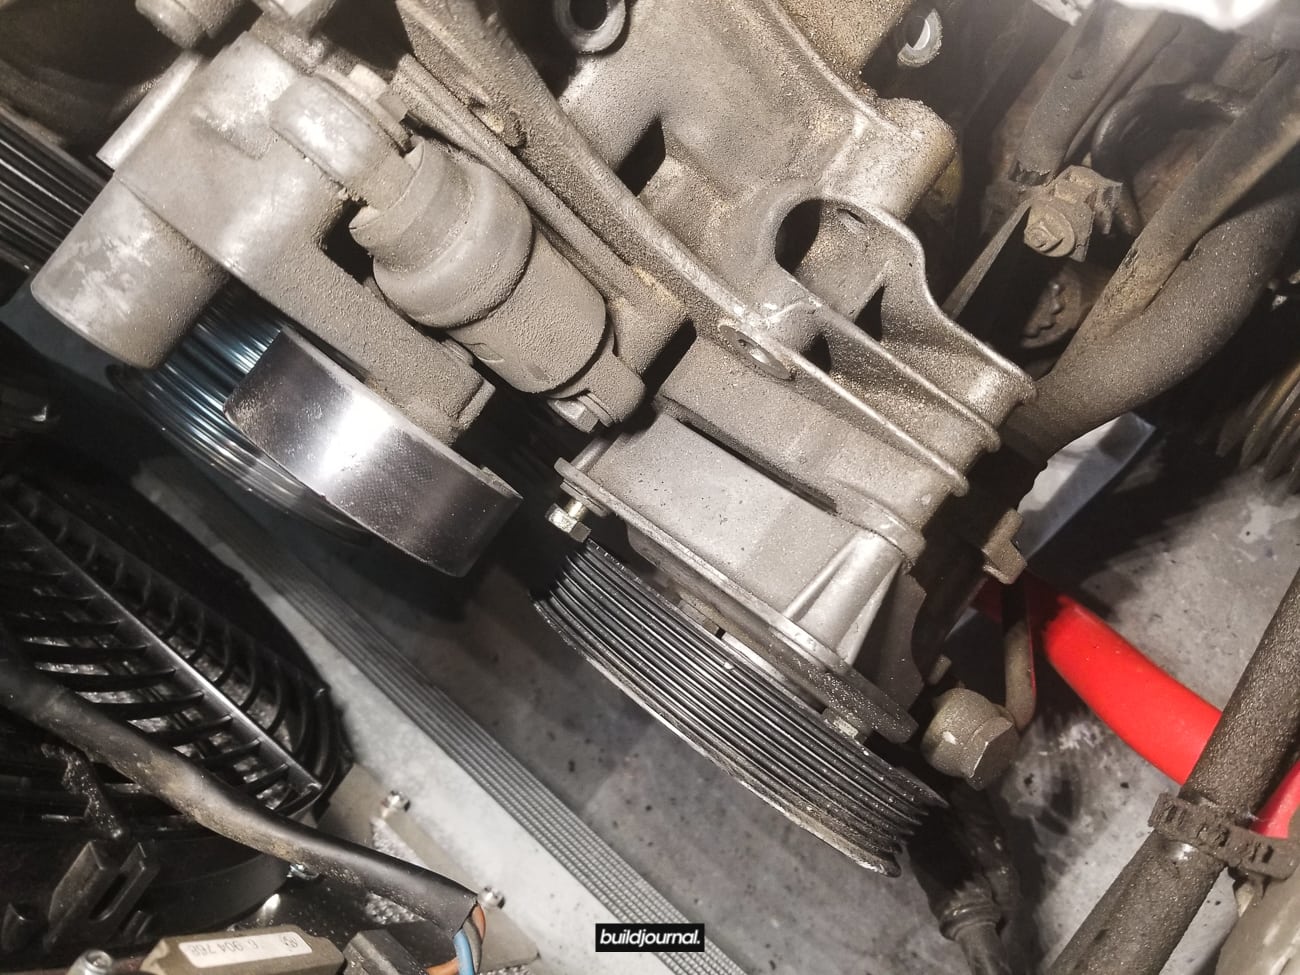
5.2, remove the two 13mm bolts on the hydraulic tensioner found above the power steering pump pulley.
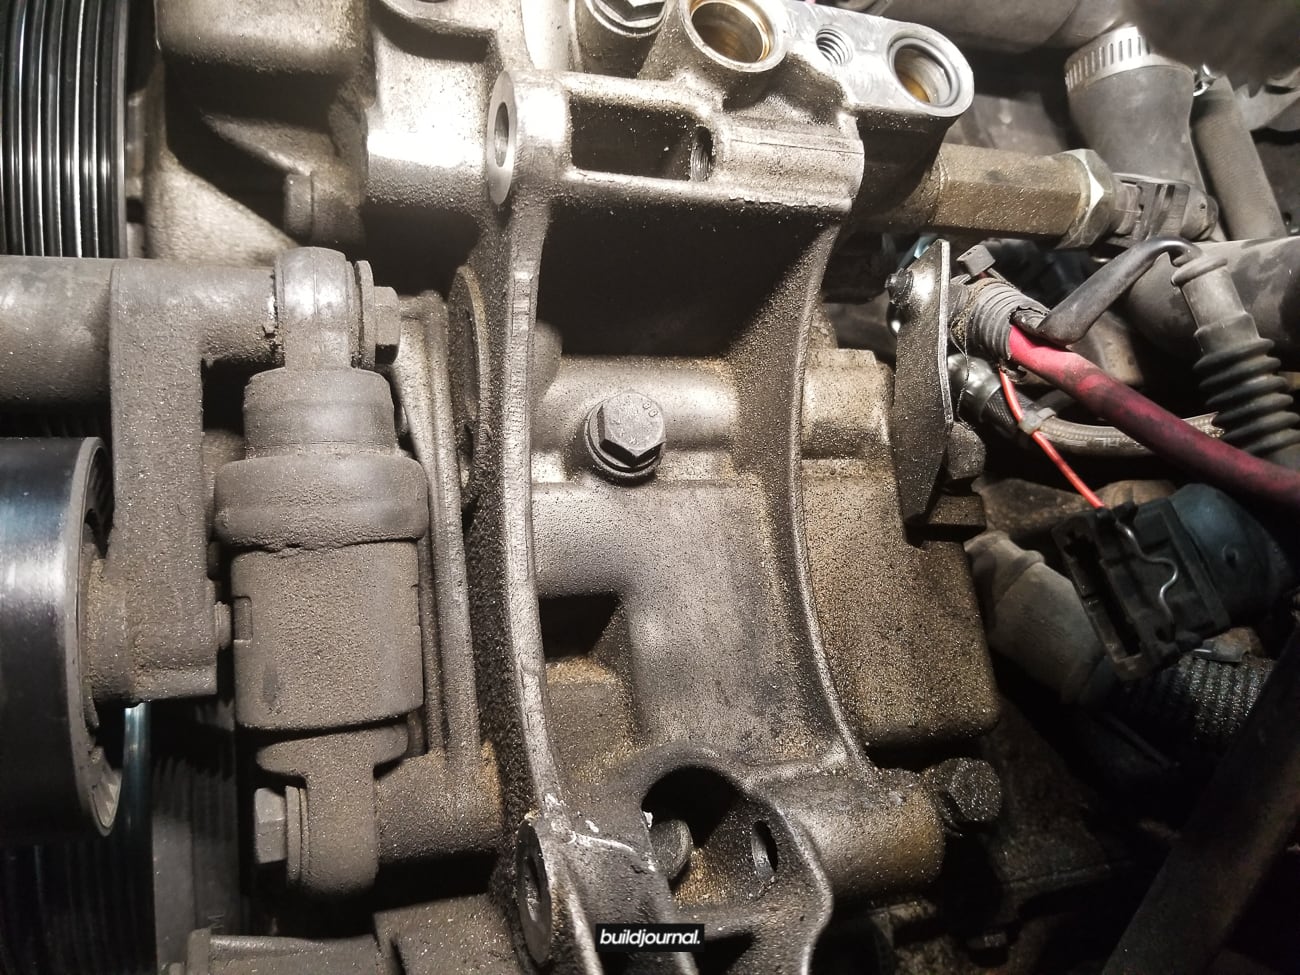
5.3, remove the six 13mm bolts holding the the oil filter housing. You can see the bottom four in this picture. The other two are above, just cut out and hidden from the picture below. As you start to loosen these bolts, oil will drip below. Get a catch bin ready.
5.4, as you pull out the bolts, make sure you notice the longer of the six bolts which goes on the top left.
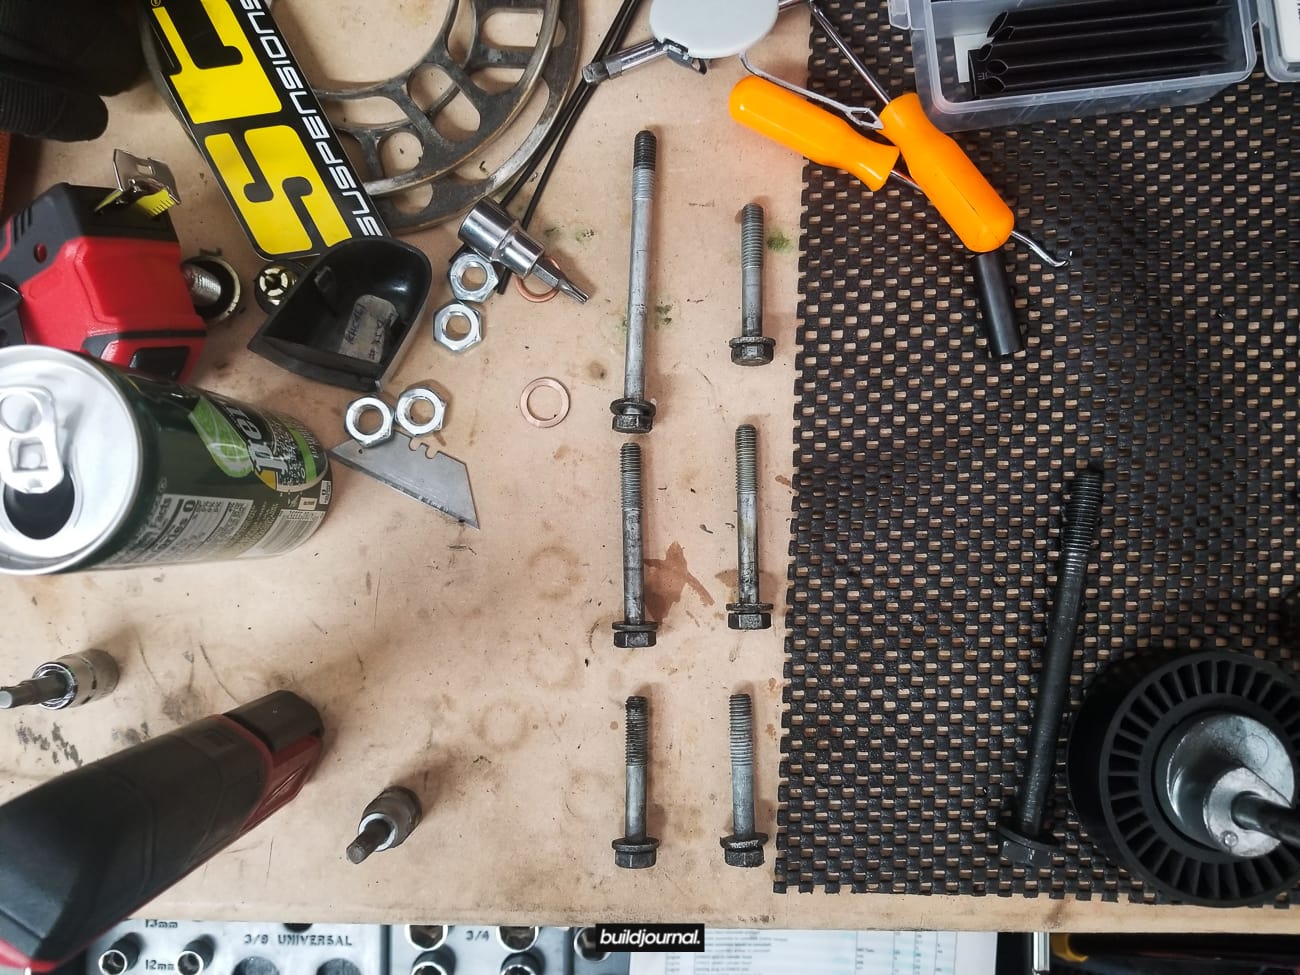
5.5, boom. Your OFH is apart.

5. Remove stock oil cooler thermostat
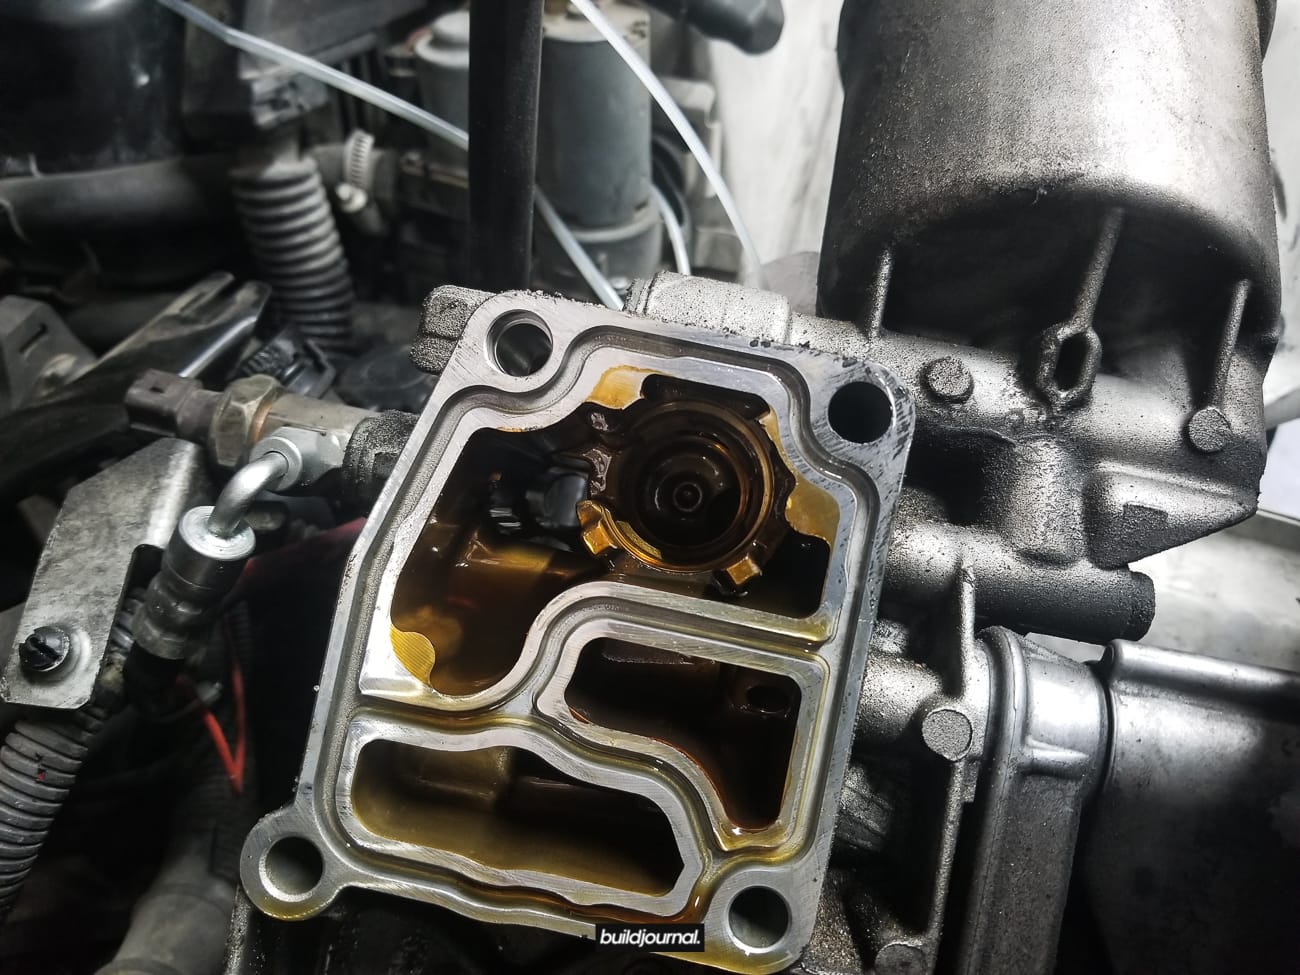
5.1, inspect the upper half of the OFH and you’ll locate the thermostat circular in shape.

6.2, remove the c-clip from the stock thermostat.
6.3, careful when the c-clip comes out because that thing shot out nearly missing my eye. It’s like opening up a jack in box – spring included.

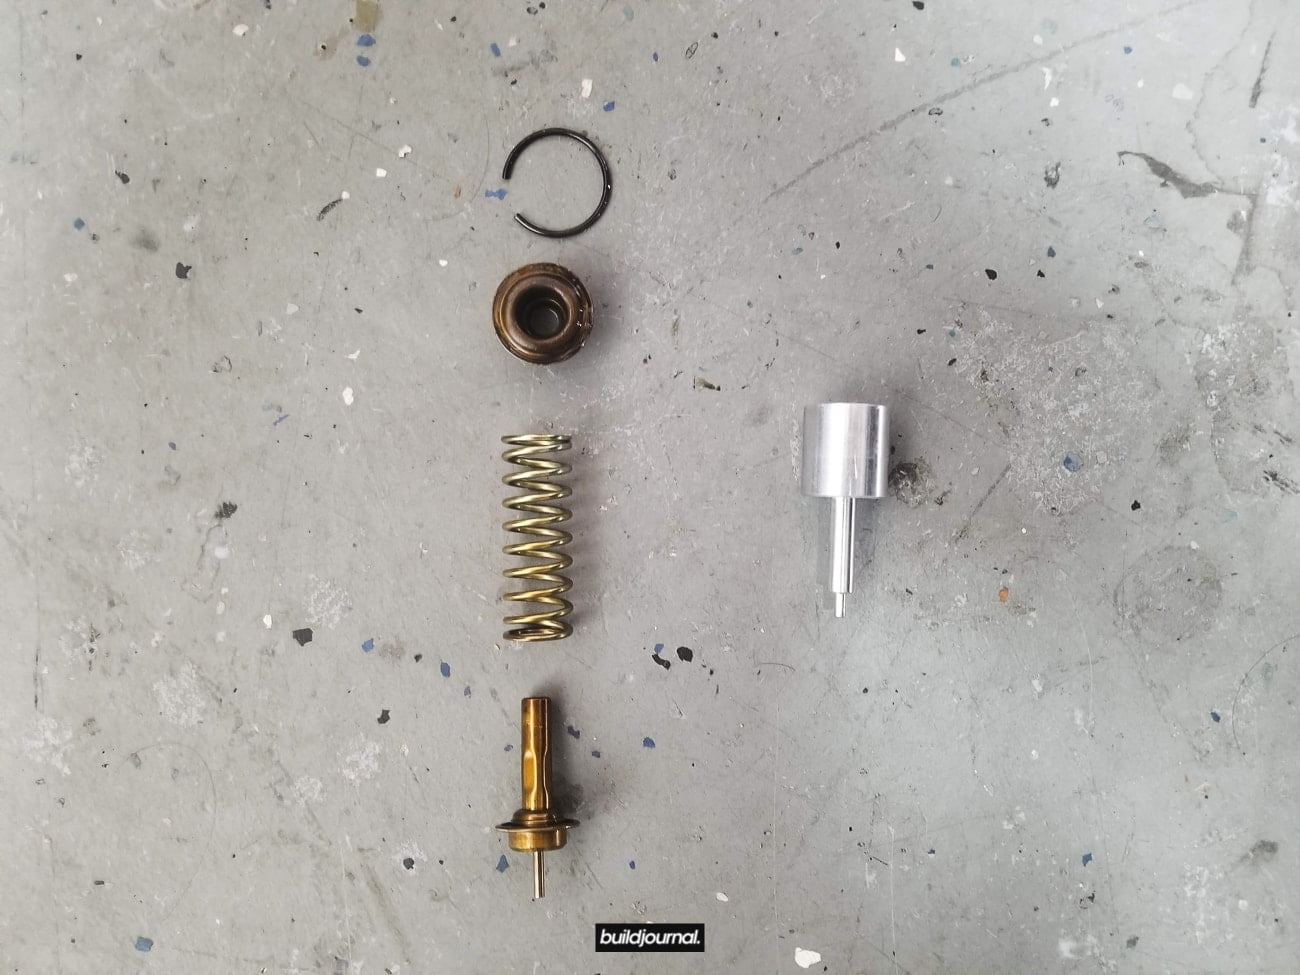
These are the pieces within the thermostat (left) and the oil diverter valve (right). The Bimmerworld Diverter Valve will re-use the top two pieces from the stock thermostat.
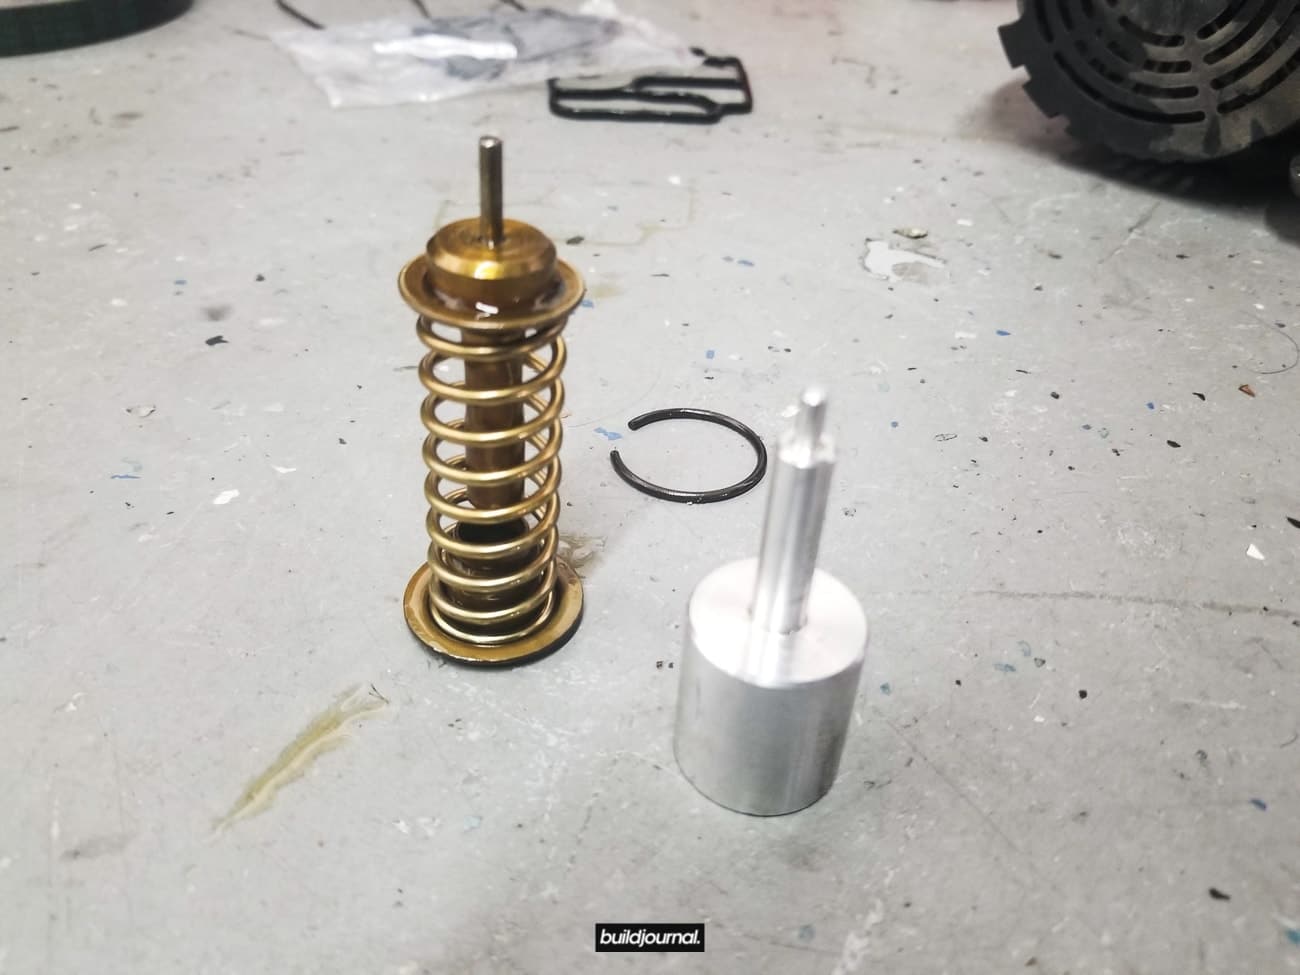
6.4, insert the oil diverter valve with the thin side going in first.

6.5, insert the top piece from the stock thermostat and insert the c-clip. Make sure the clip is fully seated flush into the slot.

6.6, lastly install the new OFH gasket. This is very important! Don’t re-use your old gasket or else you will have leaks.
7. Re-install parts in reverse order
7.1, use the following chart to torque all the bolts back to spec. If you like the table below you’ll love our Ultimate BMW E46 M3 Torque Spec Guide. It’s also available to download as a formatted and print-ready sheet for the garage.
| Category | Location | Bolt | Ft-lb | Nm | In-lb |
| Engine | Oil filter cover filter housing | 18 | 25 | ||
| Engine | Hydraulic tensioner | 17.7 | 24 | ||
| Engine | Idler pulley | 28 | 38 |
8. Top-off oil
8.1, make sure to fill the engine with oil since some may have drained out from the OFH. Run the car and check for leaks, as always.