E46 M3 FCAB Front Control Arm Bushing DIY
The E46 M3 FCAB connects the front control arm to the chassis and it is a regularly serviced bushing which you can find on our Ultimate E46 M3 Maintenance Guide. Front control arm bushings are very important to replace every 100k miles or so on a daily-driven car as it affects the car’s handling characteristics. The control arm connects to the front control arm bushing which is mounted on the chassis. A worn out FCAB may result in uneven tire wear and/or dull steering response.
Different bushing types
Factory rubber, polyurethane, delrin, spherical and monoball. What’s the difference between the different bushing materials? The one word you need to understand is deflection. Deflection basically means articulation and depending on the component deflection can be good or bad. For example, the front control arm bushings perform better with less deflection, however the RTAB needs articulation to bring power to the ground. For those that seek comfort, we recommend staying with factory, polyurethane, or even delrin.
Disclaimer: This DIY does require you to lift your car so please use proper tools and follow all safety procedures if you choose to attempt. This guide is for your reference only. We are not liable for any damages or injuries that result from this guide.
Products and Tools Required
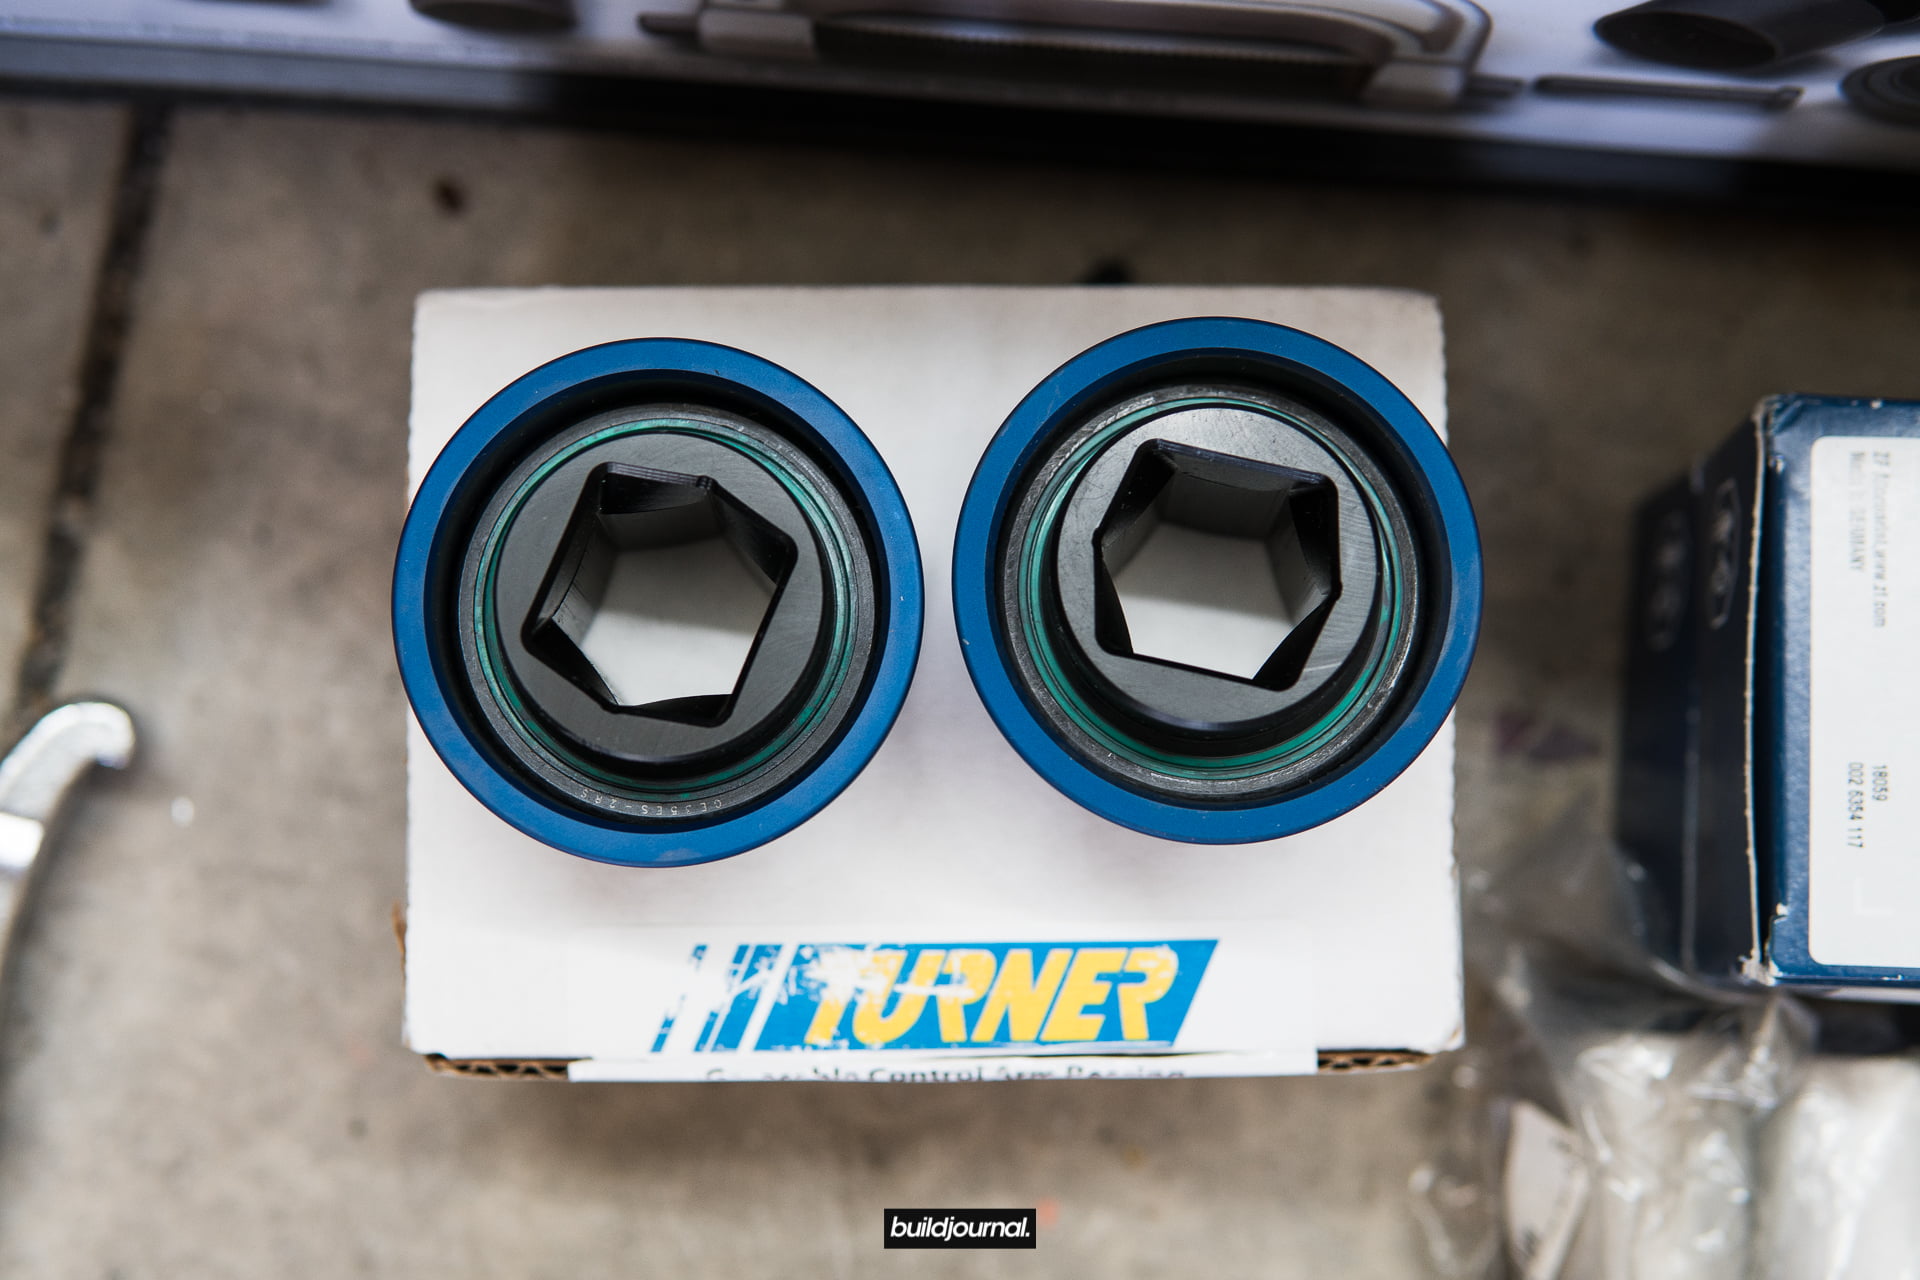
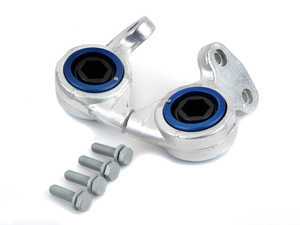
Turner Motorsport Monoball FCAB
![]()
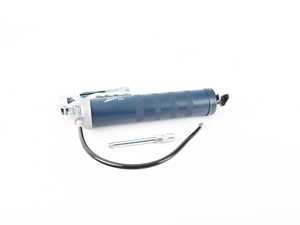
Grease Gun
![]()
Grease Gun Fitting

![]()
FCAB Installation Directions
I ended up getting the Turner Motorsport Greasable Monoball Front Control Arm Bushings for my car since I mostly use it for track. The monoball design basically eliminates any deflection in the bushing for the sharpest steering response, however for the Turner FCABs there is a delrin bushing between the monoball and bushing lollipop to decrease NVH. They swear it’s quiet enough to street. I’ll save that for another review, but let’s get into the install. This is my first time installing the E46 M3 FCAB and I’ll walk you through the steps so you don’t make the same mistakes I did. The installation is rather easy and the hardest part is pressing the bushing in and out.
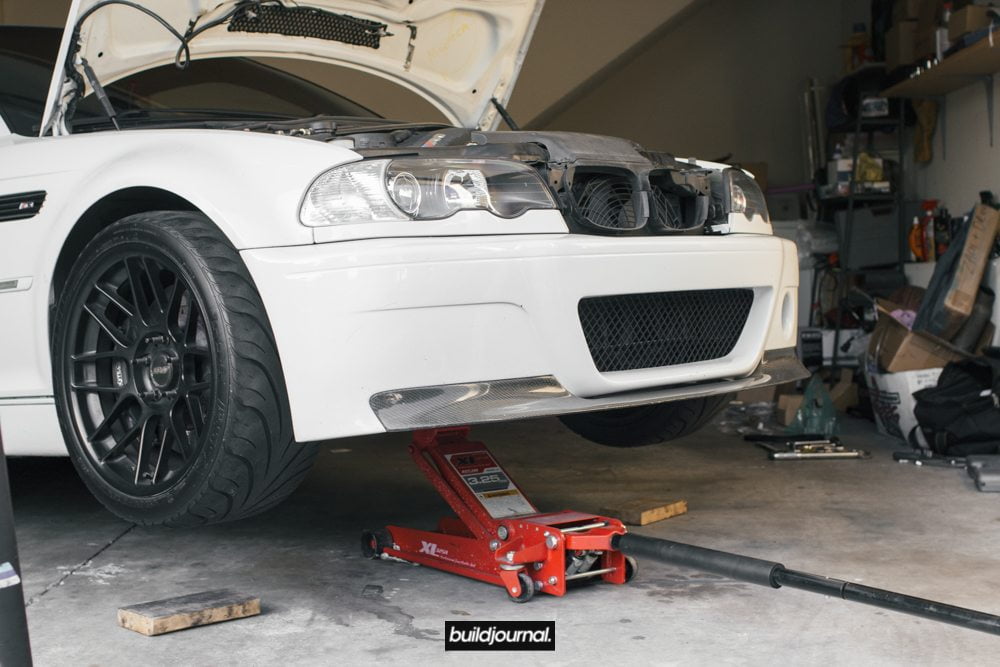
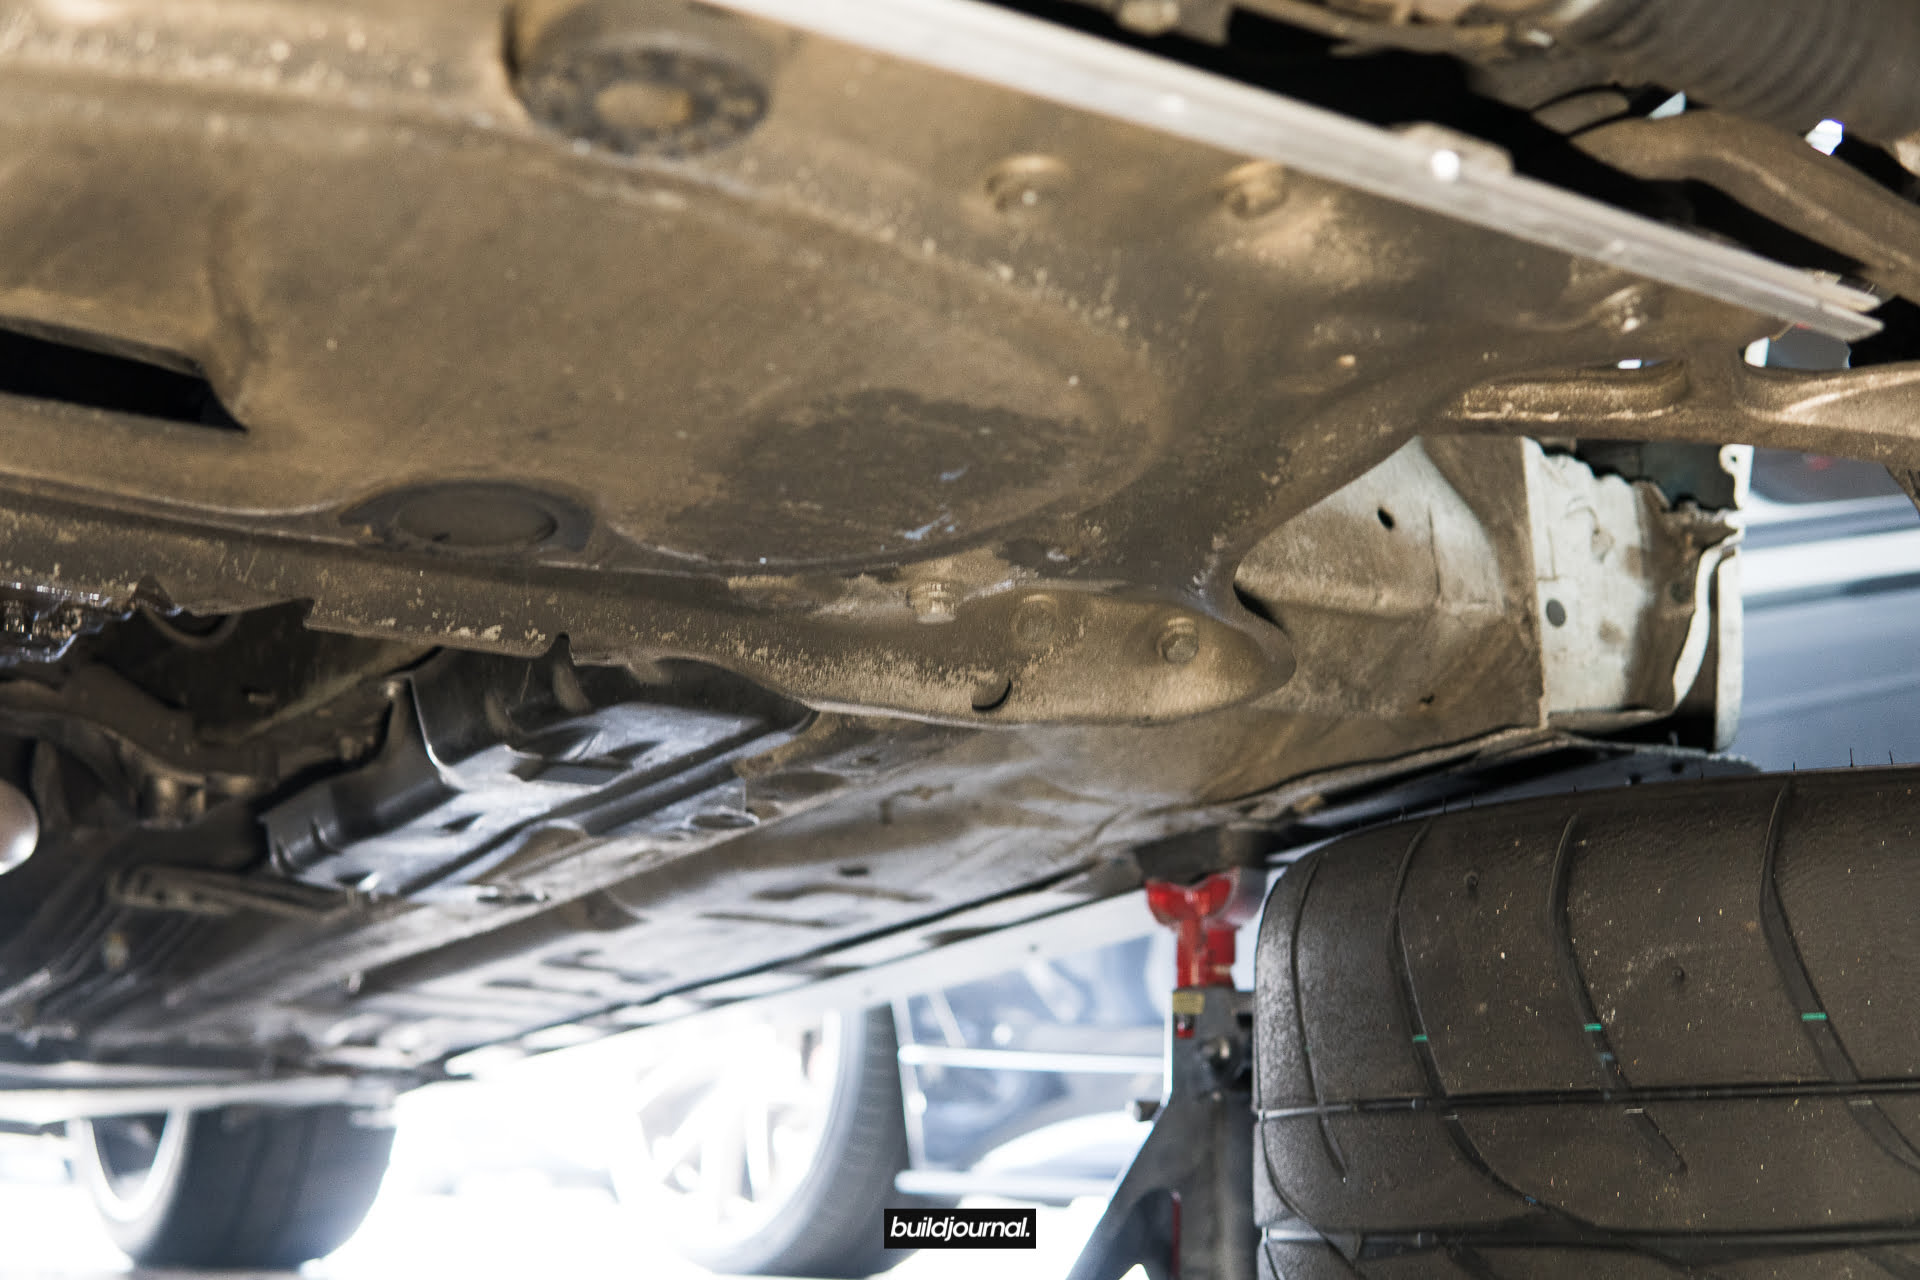
1. Jack up the car
1.1 Straighten your wheel and use the center jack point to lift the front.
1.2 Place 2 jack stands to keep the front of the car lifted.
1.3 Use jack or tire as an emergency backup support.
1.4 Remove plastic under tray located underneath the car. There are seven 8mm hex screws total.
1.5 Remove metal under tray brace using 16mm socket.
2. Remove headlight auto leveling sensor (for those applicable)
2.1 Take a small pry bar or flat head to release the clip on the passenger side front control arm.
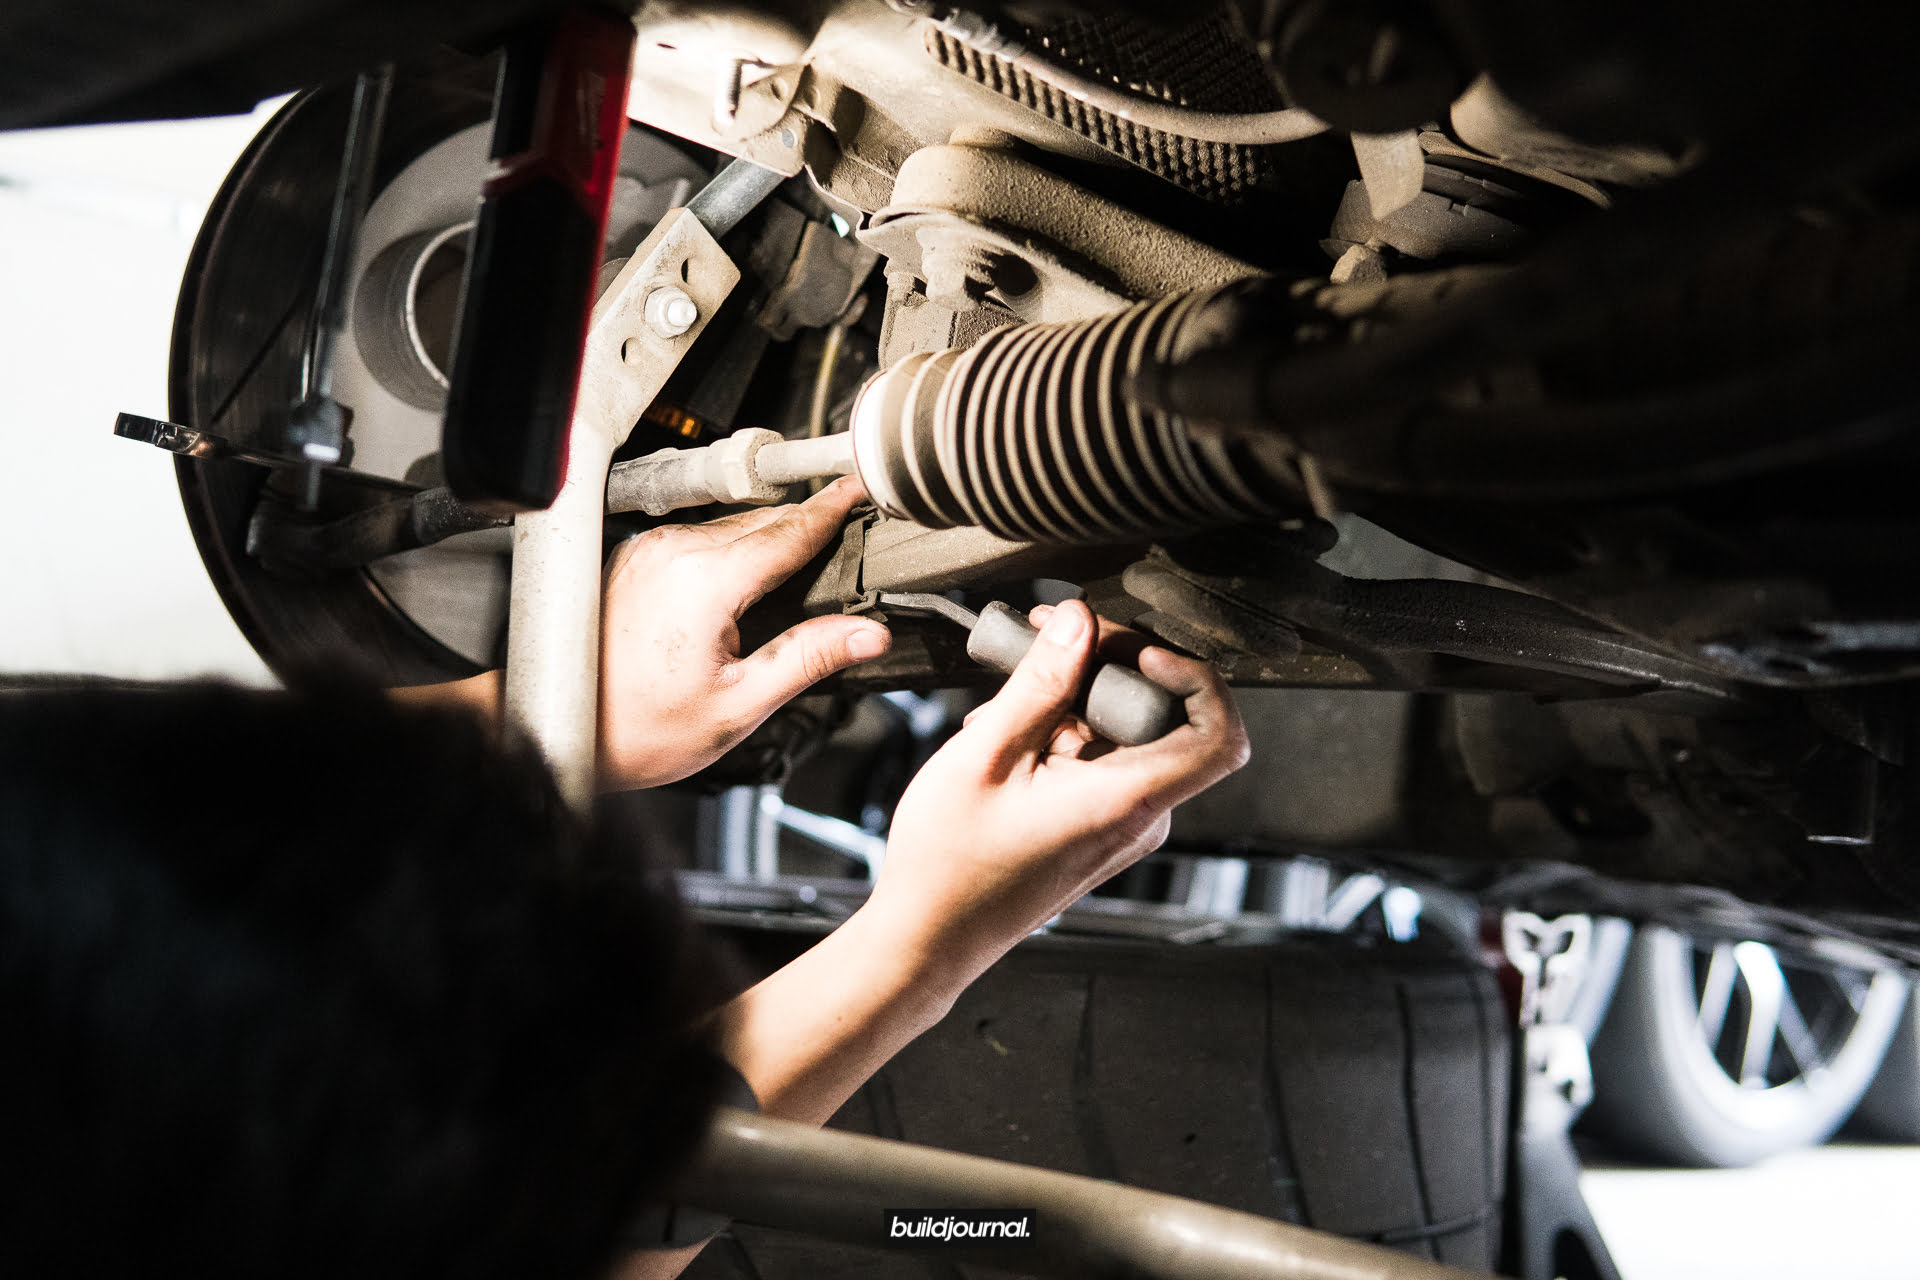

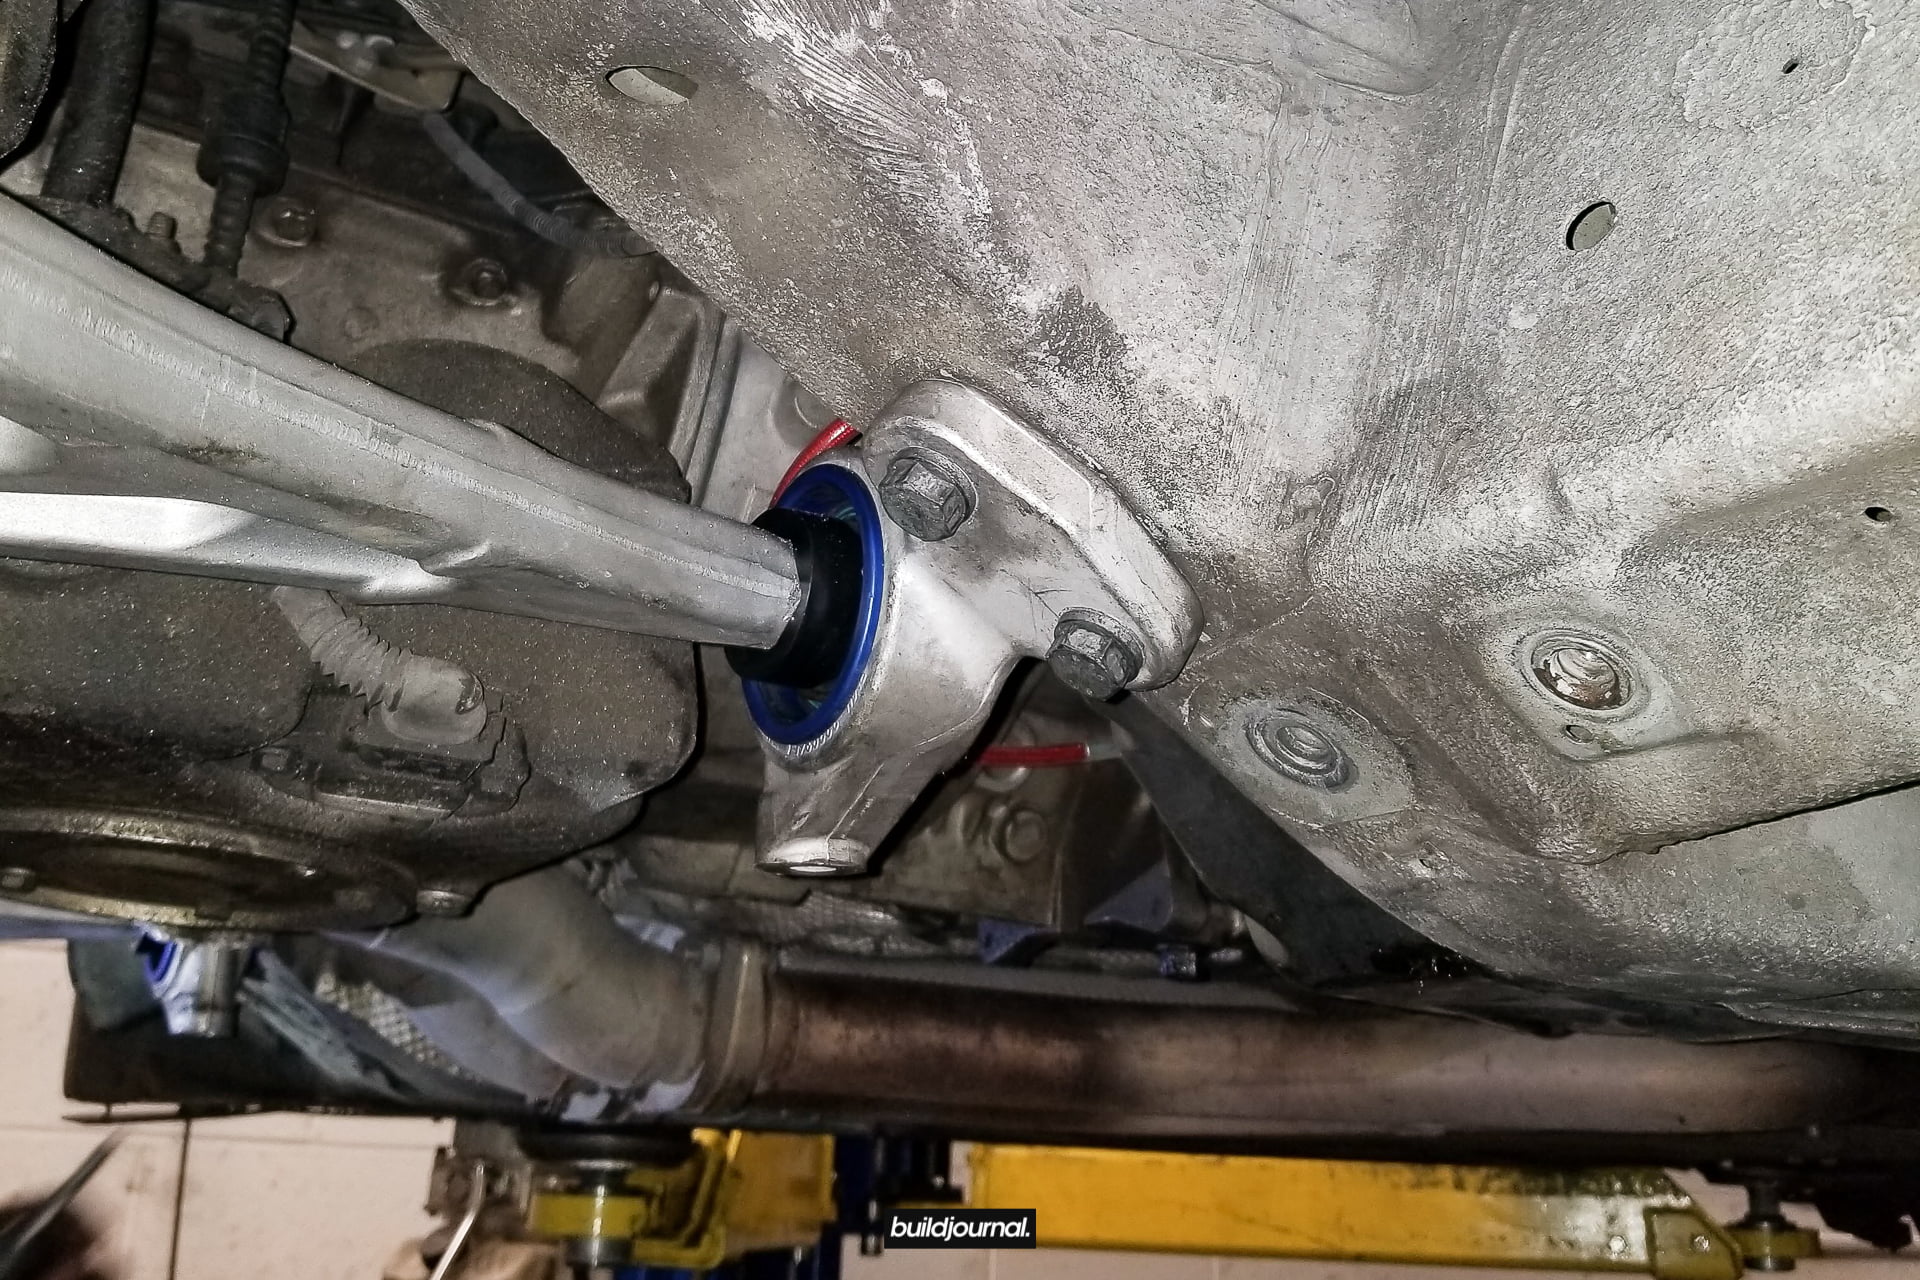
3. Remove FCAB lollipop housing
3.1 There are 2 16mm bolts holding the lollipop in place. Your control arm will droop down to access the bushing.

3.2 Use a 3-jaw puller to remove the bushing from the front control arm. In this picture below the front control arm is completely off the car because I replaced the arms as well. You should be able to use the puller while the arm is still on.
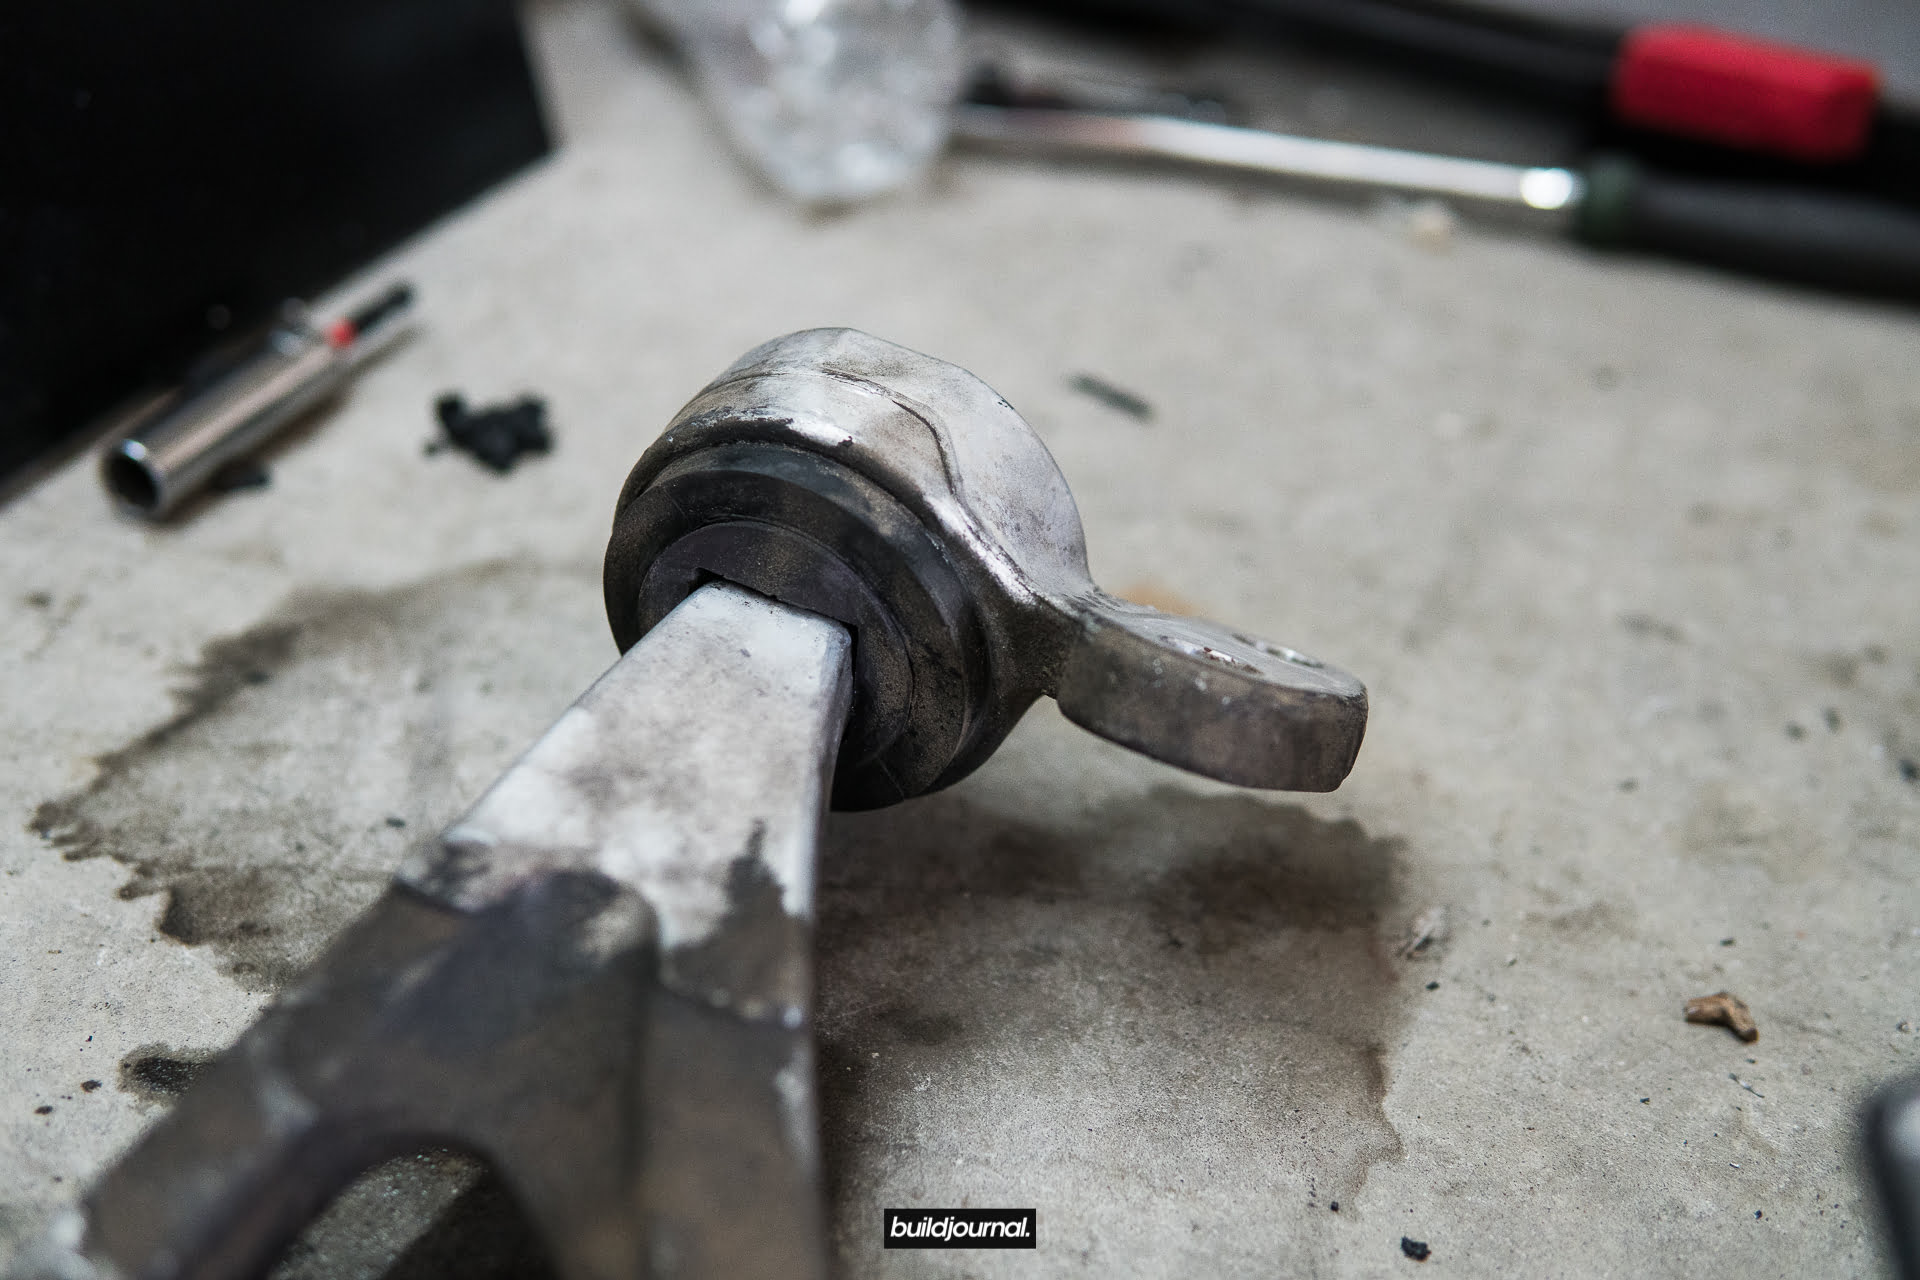

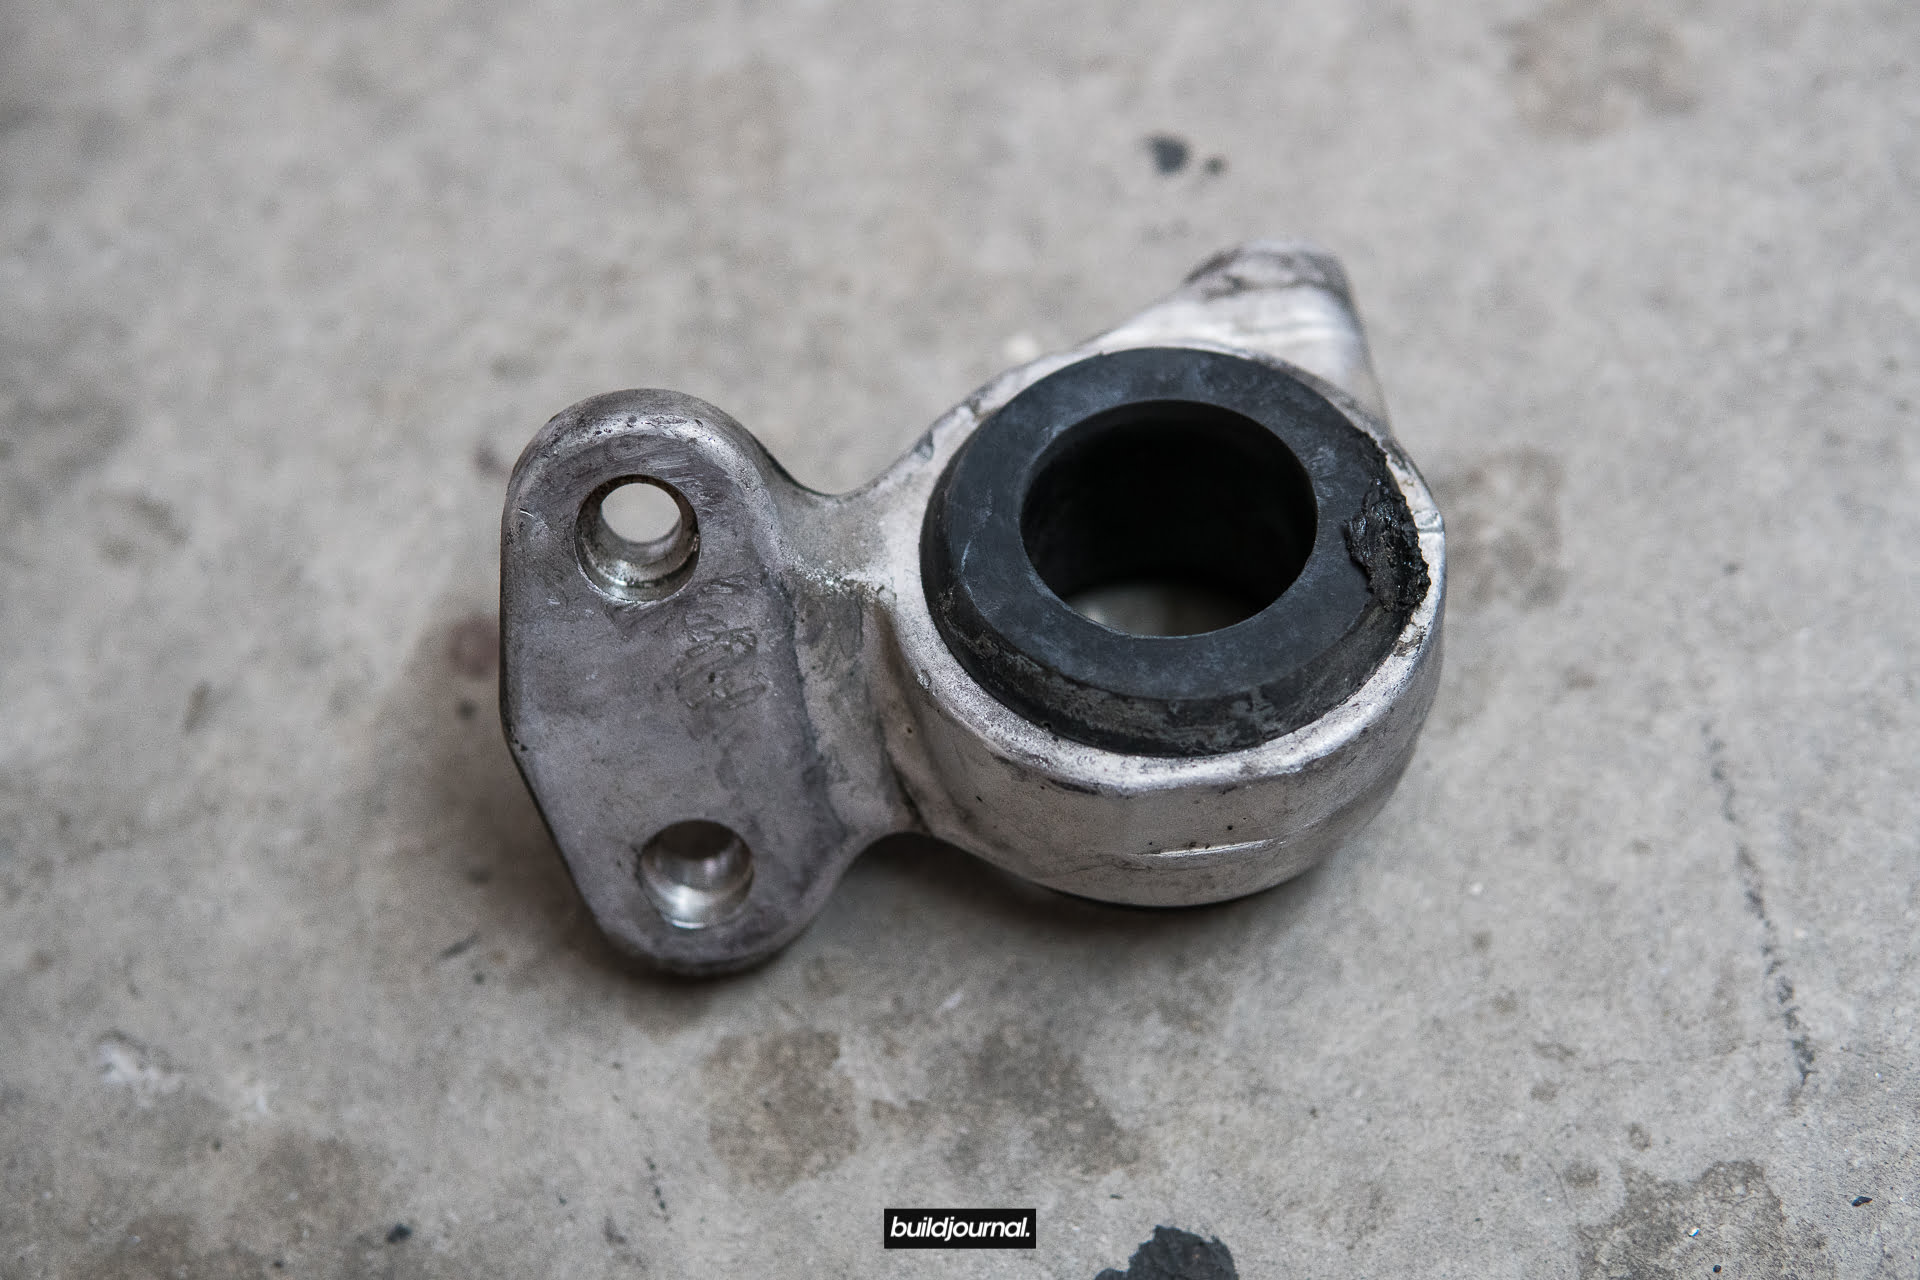
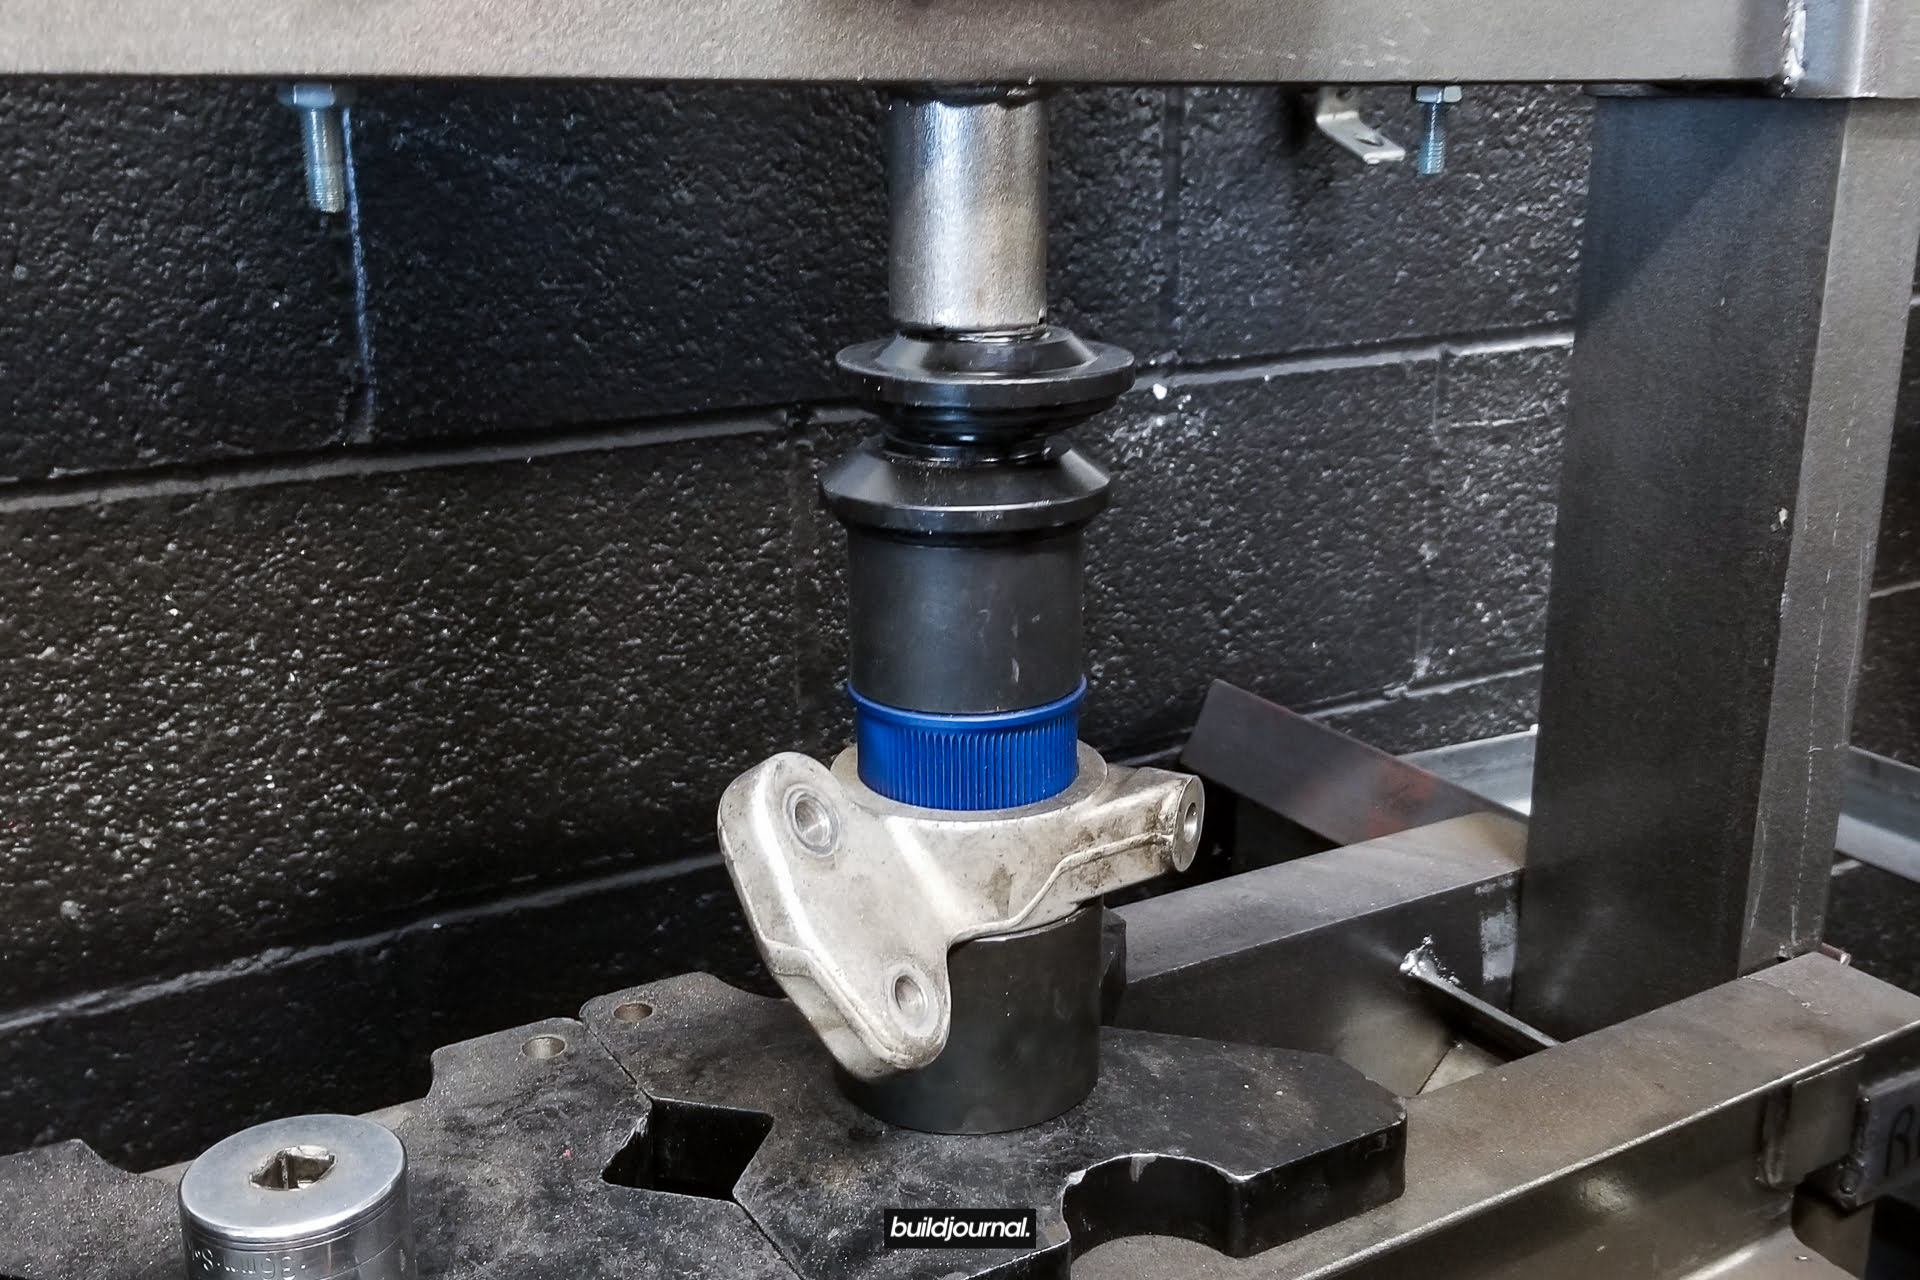
4. Press out the old FCAB
4.1 Use a bushing press tool to remove the old FCAB. I rented a ball joint separator from Autozone, but I do not recommend using this tool! It’s worth a try though since it’s free, but I couldn’t find a spacer that fit the circumference of the bushing.
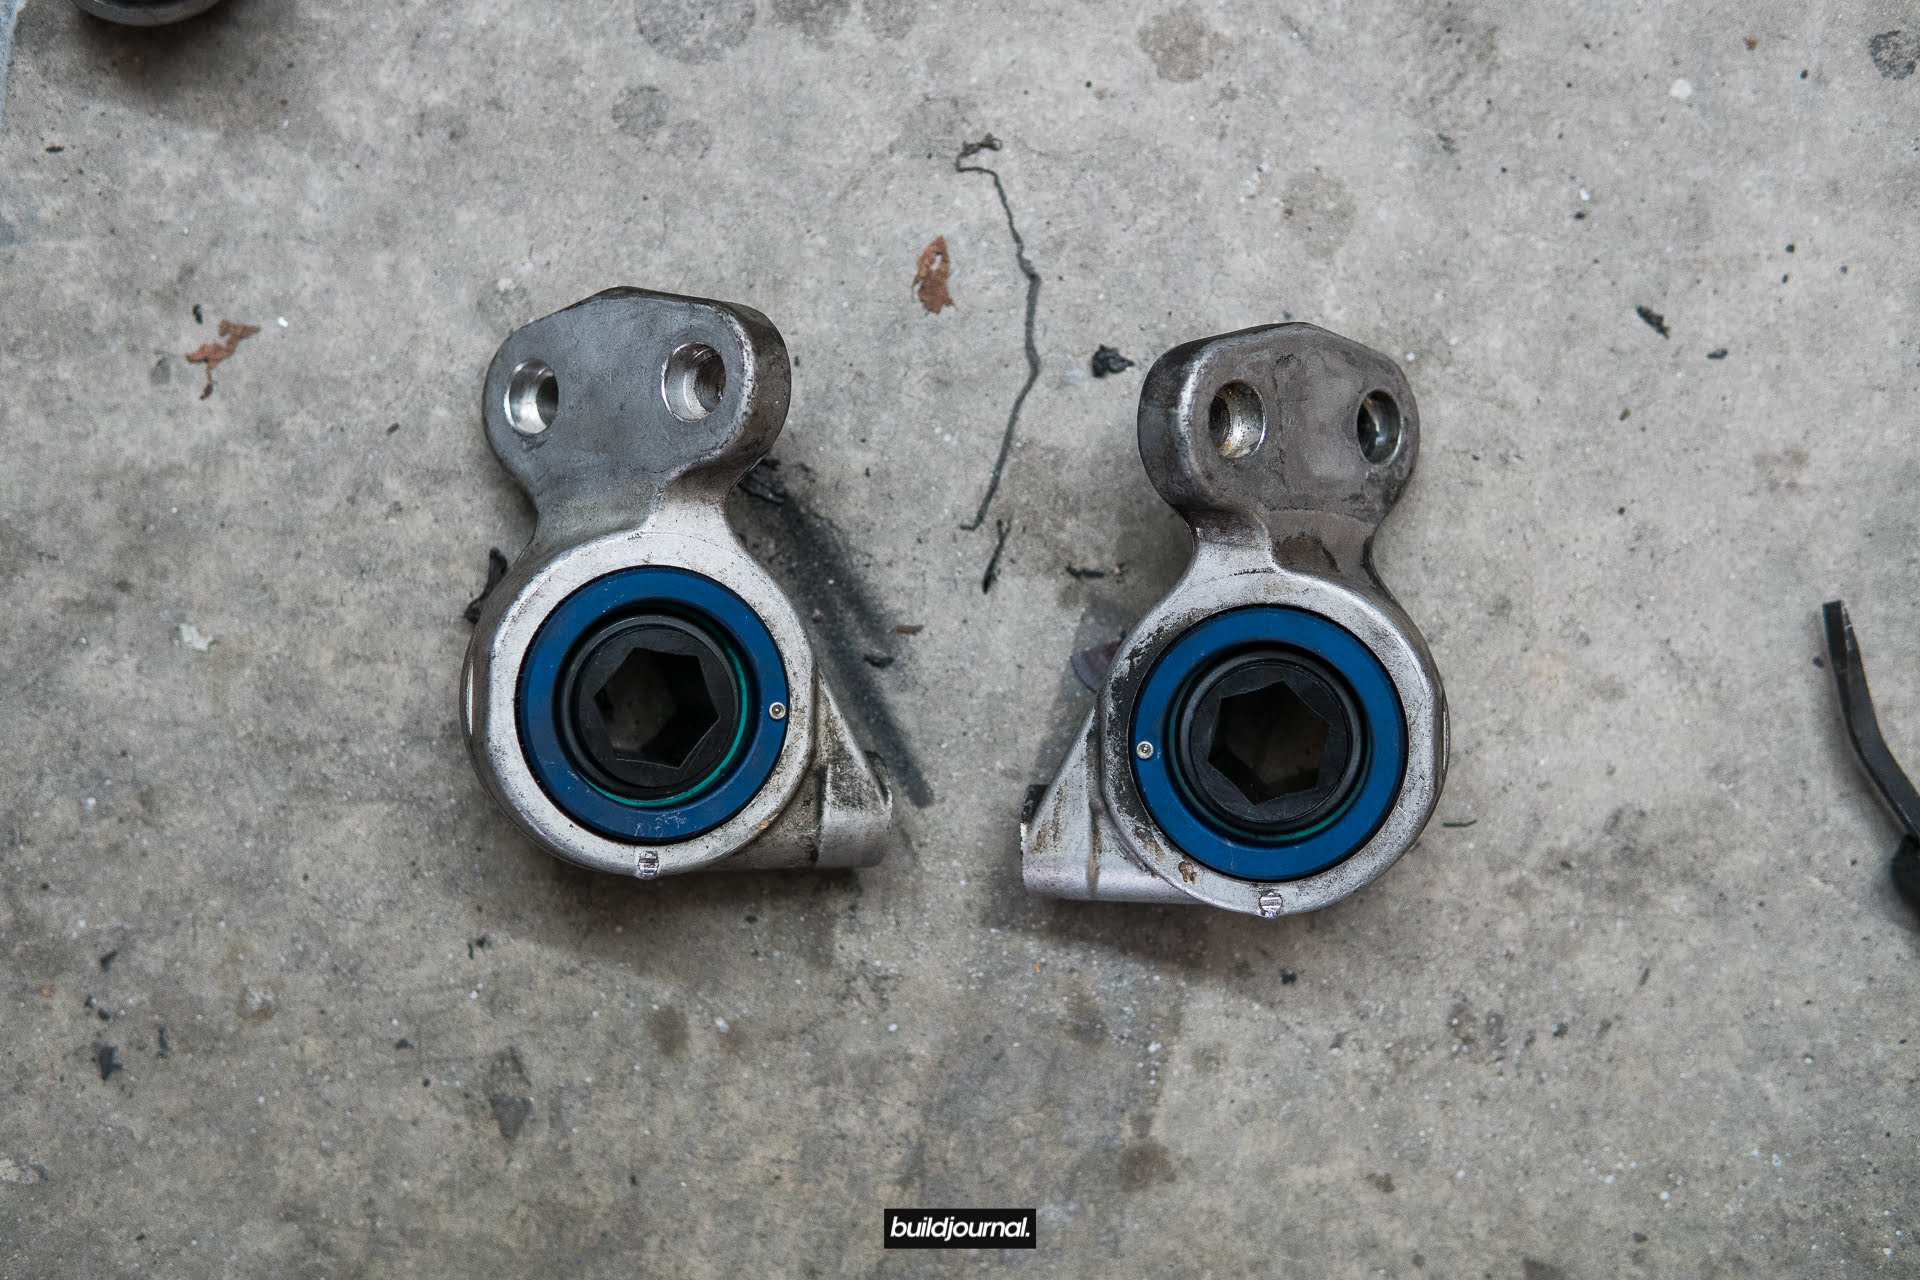
5. Press the new FCAB into the original lollipop/housing
5.1 I went to a shop to get the new ones pressed in. Did not want to chance on the brand new bushings.
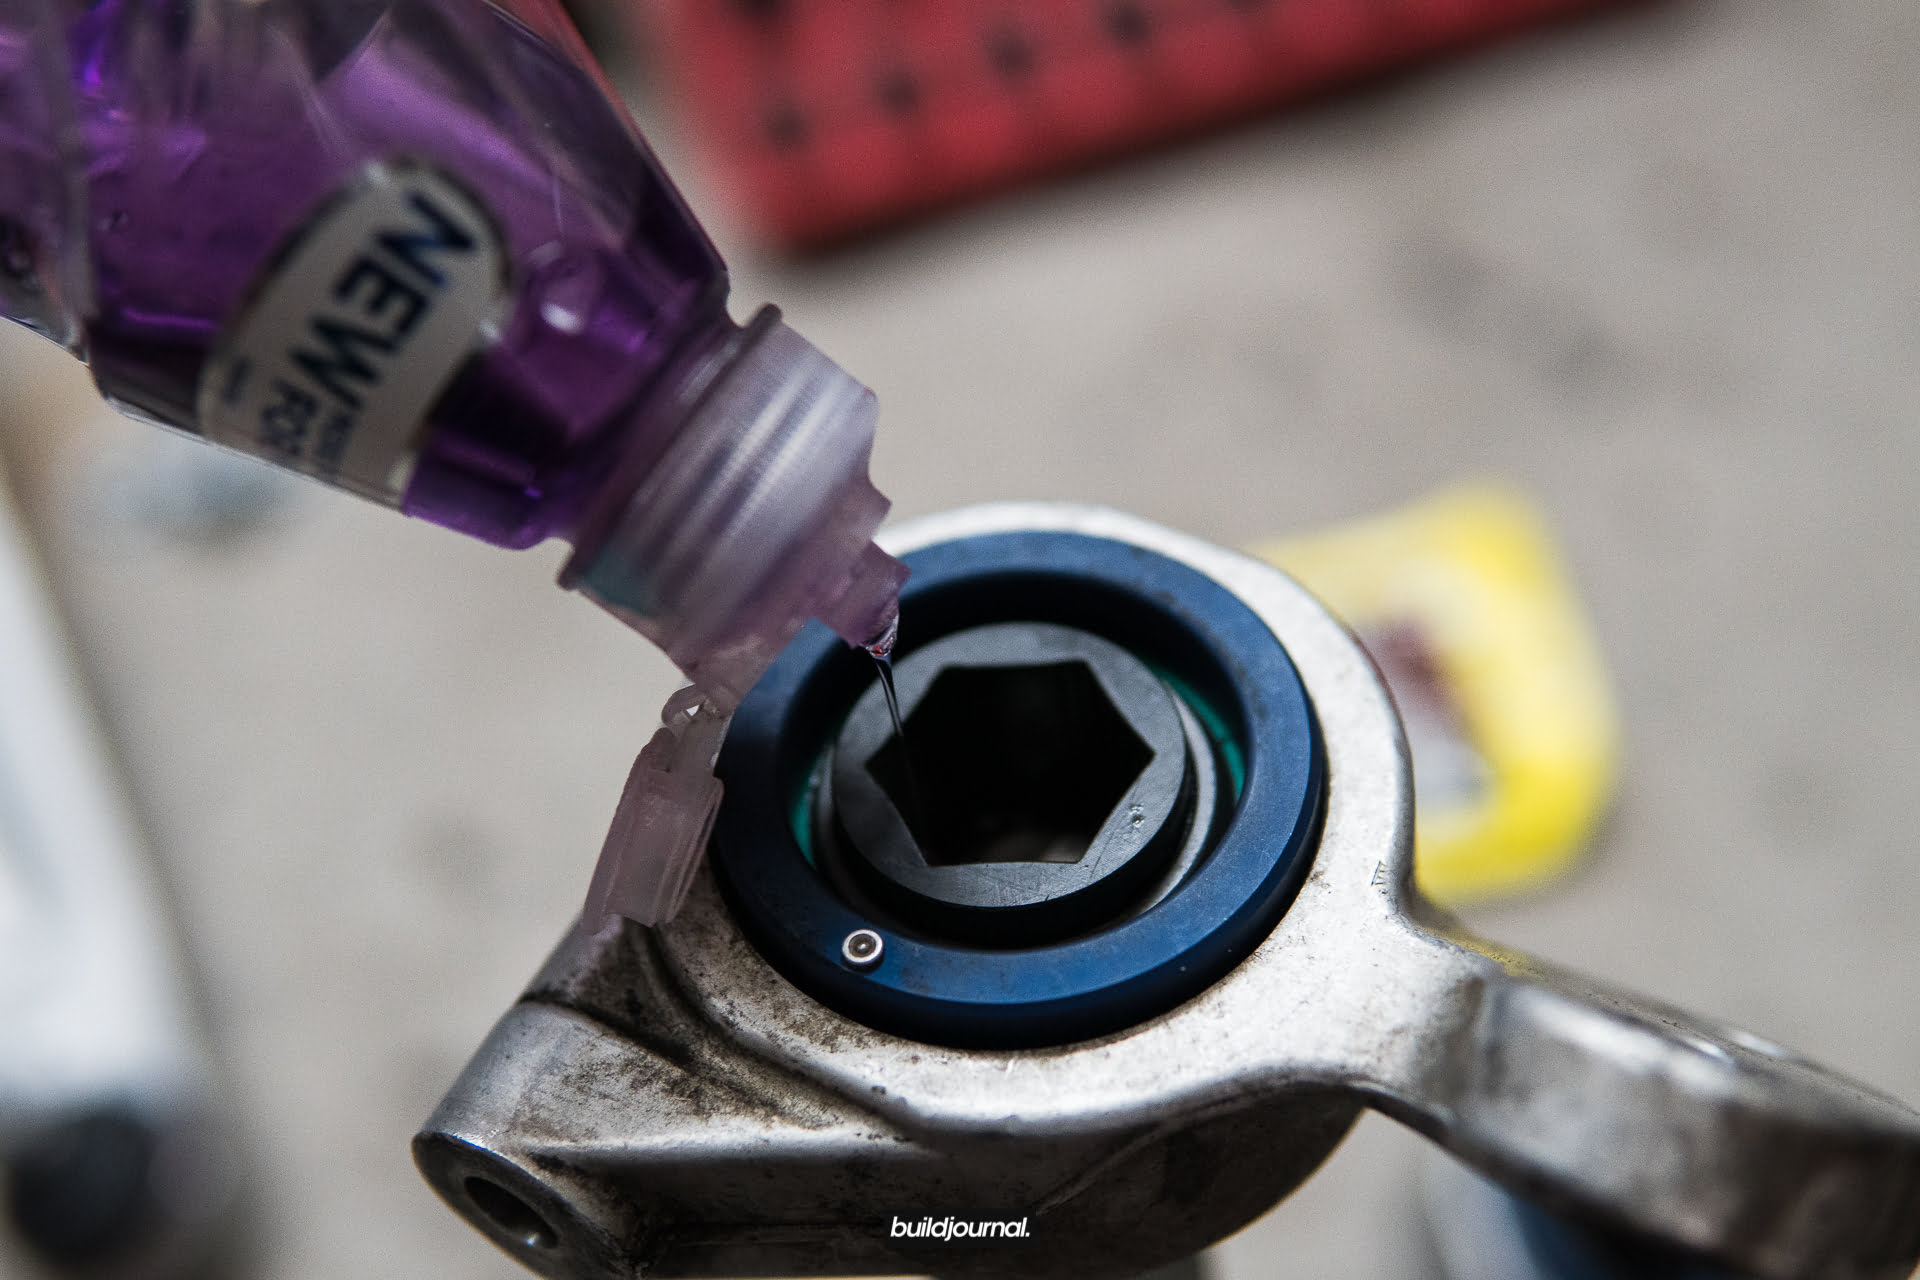
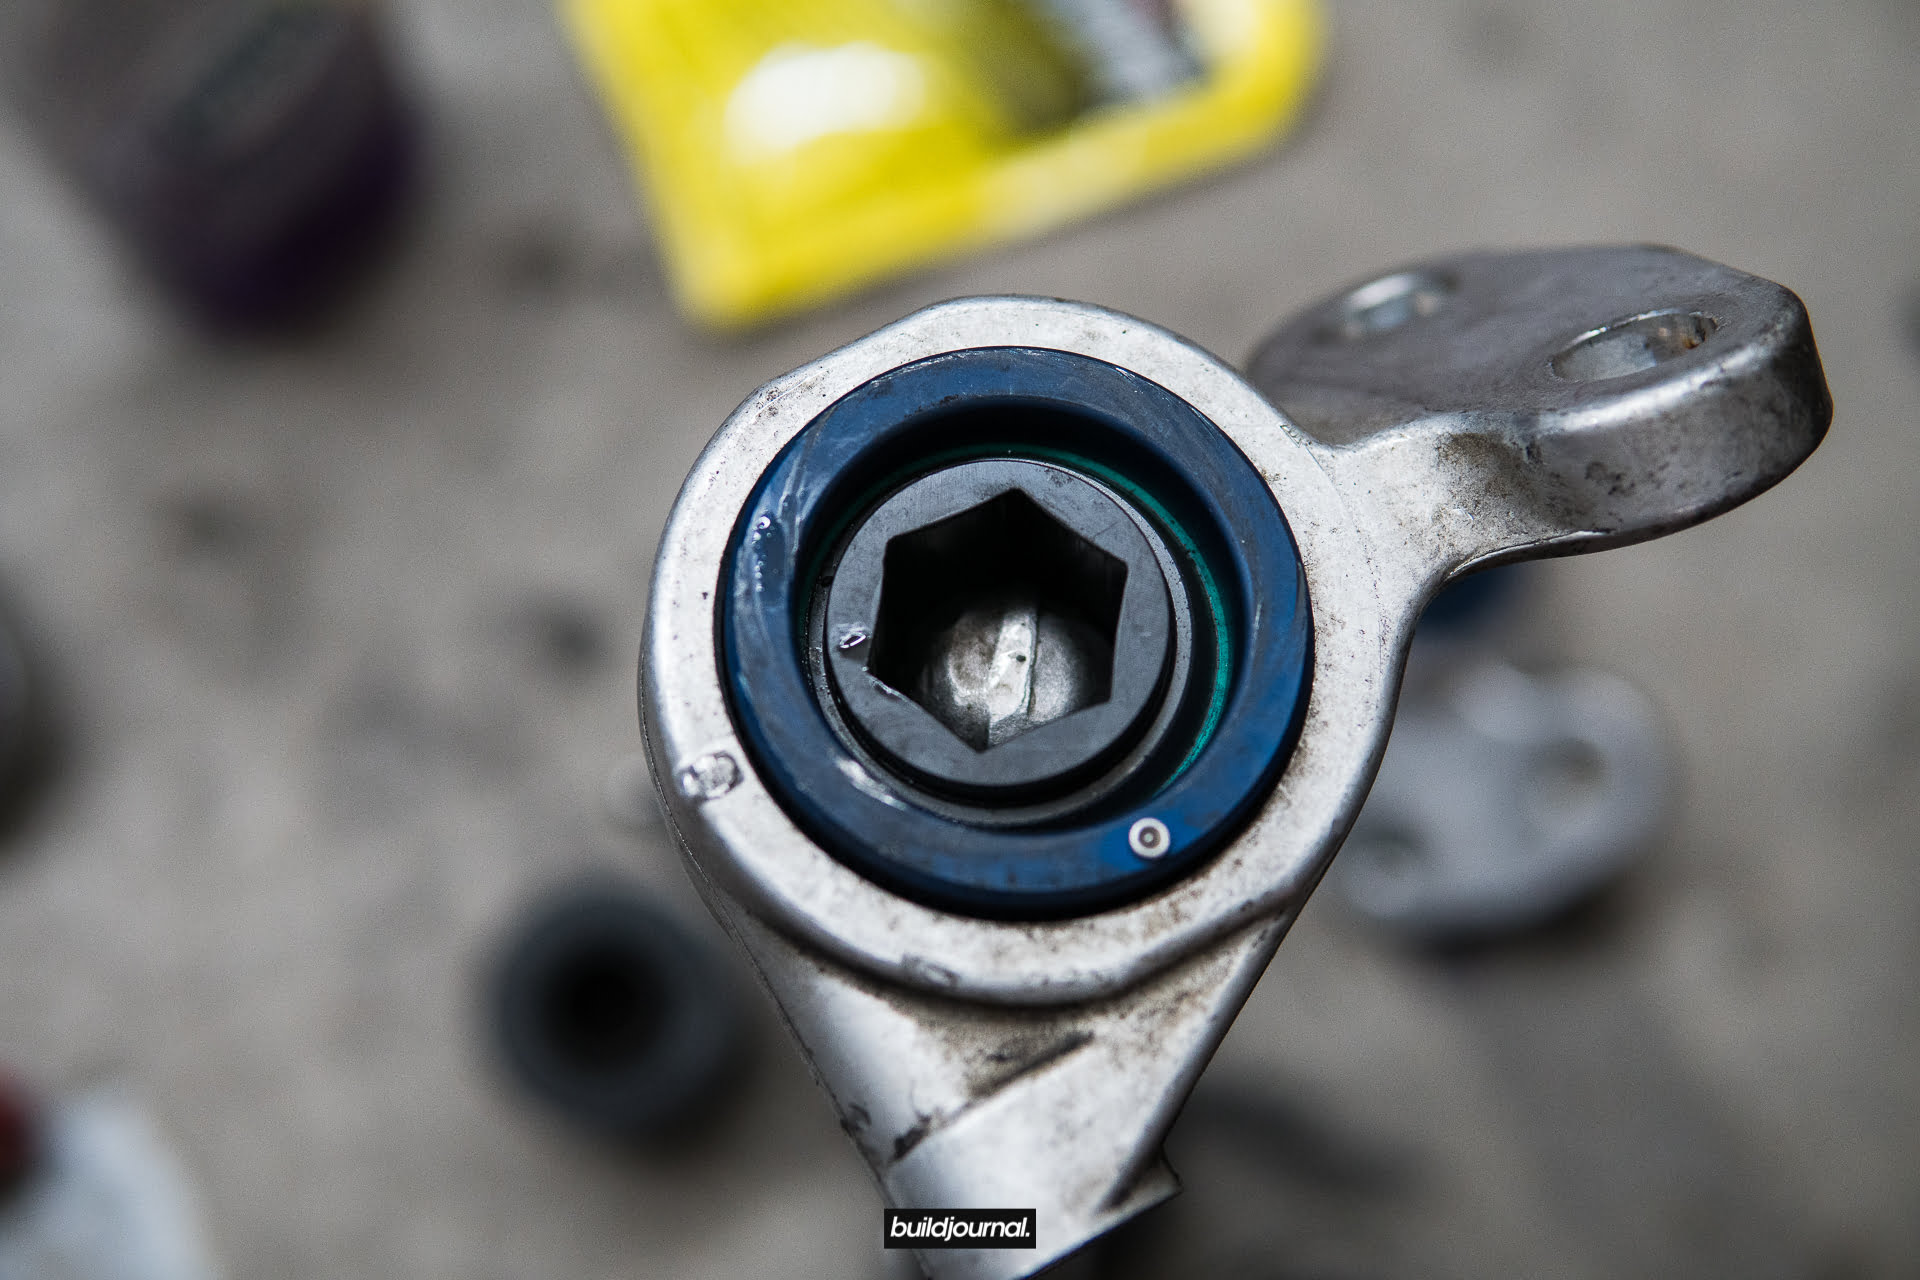
6. Install FCAB onto control arm
6.1 I lubed the inside of the bushing with dish soap since everyone does this method, however it is very important that you seat the car on the ground while the soap is still wet. Settling the car after the soap dries up will result in the bushings not sitting correctly.
7. Install FCAB
7.1 Insert the two 16mm bolts and torque to 44 ft-lbs (60 Nm).
7.2 Install headlight leveling sensor, front brace and under tray. Torque front brace to 43.5 ft-lbs + 45-90 degree turn.
E46 M3 Quick Release Splitter Mount Prototype
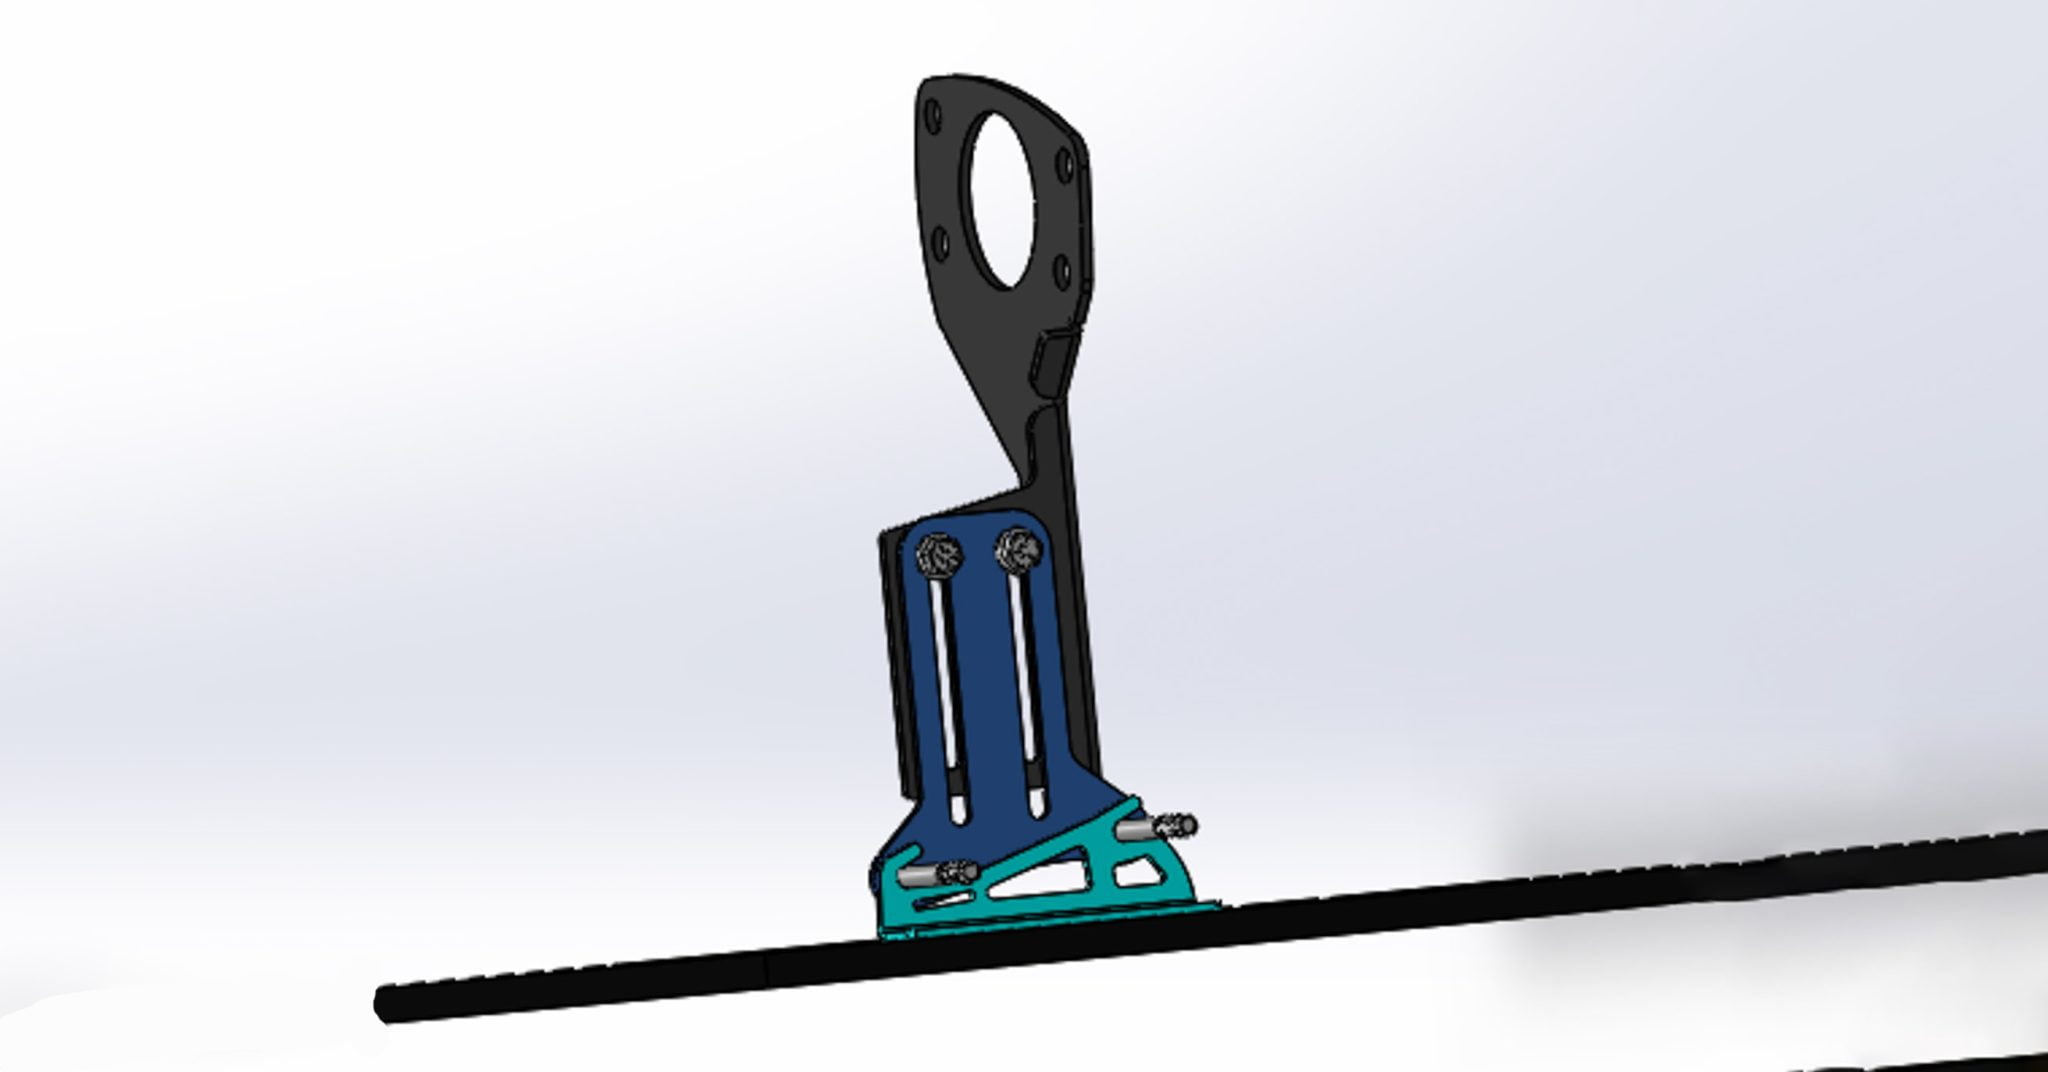
We've been very busy developing new products for the E46 M3 and our next release will be a custom designed quick release splitter mount featuring an aluminum feet/base designed to break on hard impact. Along with the quick release splitter mount, we will be creating our own splitters specifically designed to work with the quick release. The splitter comes off in 10 seconds and can be put back on in about 30 seconds with our unique splitter mounting system which we will release more details later.
This is a brand new design for the E46 M3 market made for function and convenience, something that is not currently available in the market. We will have more updates as we come along, but here is a quick teaser of the product.
Here's a teaser of our E46 M3 quick release splitter mount prototype featuring 0.125" steel plates and 5052 aluminum feet mounts designed to break on hard impact. Stay tuned for release dates. pic.twitter.com/SJdJL14fvy
— buildjournal (@buildjournal) February 5, 2019

BMW E46 M3 Buttonwillow CW13 1:58.409
Finally hit the sub-2 minute mark at Buttonwillow CW13! I remember the first time I was out here and thinking how the heck do people get to sub-2, but it’s very possible just need a lot of seat time. This is a milestone for me and I’m super pumped.
I usually can hit close to 100 mph on Riverside, but I was running no aero up front with no under tray either so my front grip was lacking.
I wanted to do a full front and rear aero setup, but now I’m contemplating because I’m confident more than ever with my setup.

Bimmerworld E46 Fuel Starvation Kit DIY
Bimmerworld recently updated their E46 Fuel Starvation Kit so the stock fuel gauge is a lot more accurate. The new method involves taking out the sucking jet pump which was not part of the installation procedure in the previous revision. I don’t have the previous kit so I don’t know what the exact differences in this kit are.
Symptoms: Usually on the track where there are high-speed sweeping right-hand turns, the car starts to go into fuel cut because the fuel is forced to the driver side of the car, towards the sender unit, while the passenger side pump experiences fuel starvation.
Solution: Bimmerworld E46 Fuel Starvation Kit
Ever since I put in a Walbro fuel pump I’ve been getting fuel cut at half tank! It might not seem like a big deal, but at the race track a quarter tank can save you a trip to the gas station or one less fuel jug to haul. I decided to go with Bimmerworld because they had the most value. Here I’ll do a step-by-step DIY.
Tools and Parts Needed

- Sockets
- Hammer
- Flat head
- Drill bit + drill
- Soldering kit
- Wire cutter
- Cutter
- Shrink tube
- BMW OEM fuel sending unit gasket (P/N: 16141182905)
What’s in the Kit?

| Part No. | Part Name | Quantity |
|---|---|---|
| 1 | Fuel pump assembly | 1 |
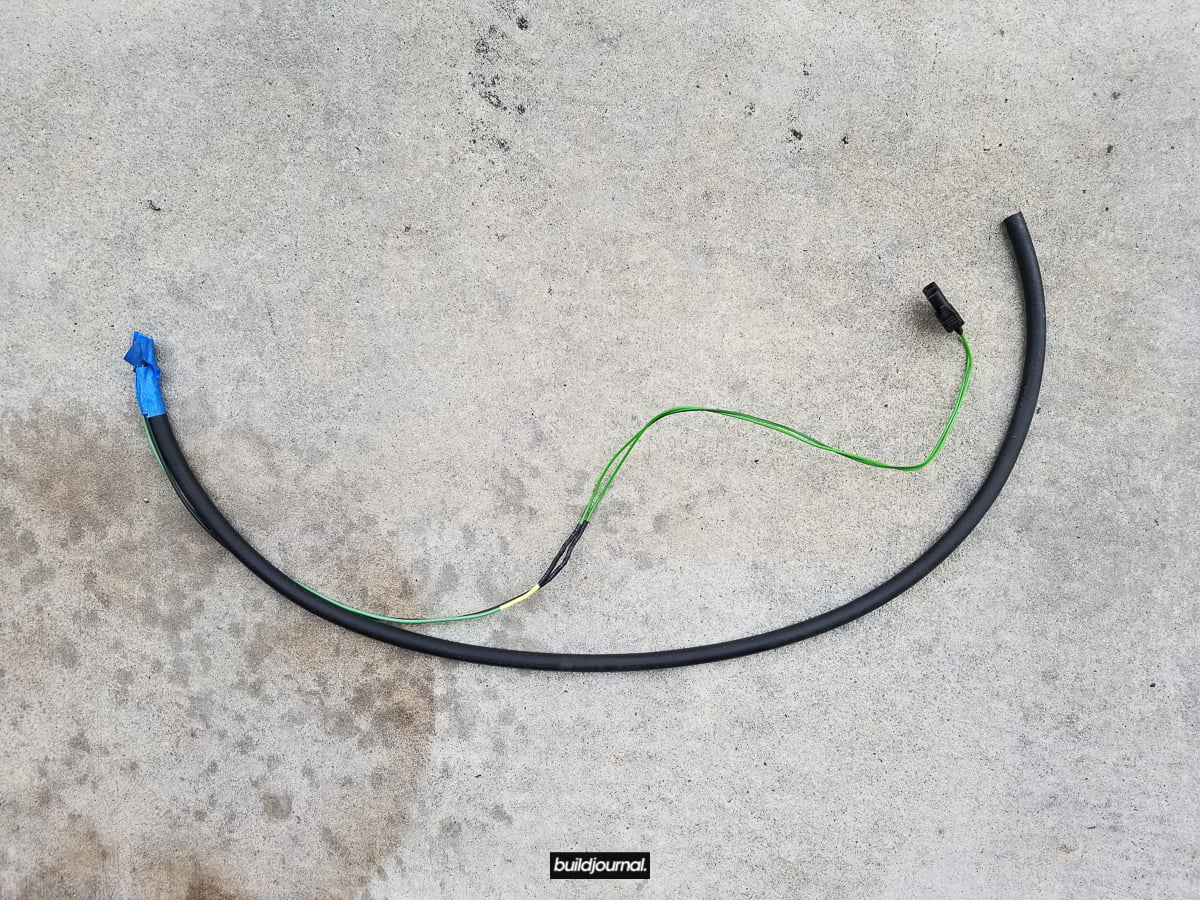
| 2 | Wiring harness (36″ long) | 1 |
| 3 | Wiring harness (18″ long) | 1 |
| 4 | Hose clamps (8-12 mm) | 3 |
| 5 | Hose clamps (12-20 mm) | 2 |
| 6 | Fuel hose (1 meter) | 1 |
| 7 | Fuel hose (0.25 meter) | 1 |
| 8 | Hose size reducer | 1 |
Installation Instructions
This installation does not require you to completely remove the fuel pump (passenger side) however it is recommended you replace your gasket (P/N: 16111184084) if you haven’t done it yet.
Please be mindful of safety hazards! Work in well-ventilated area away from sparks, open flames, or other sources of ignition. Be prepared with a fire extinguisher. Wear safety goggles and nitrile gloves.
1. Depressurize fuel system
1.1 Start vehicle.
1.2 Remove fuel pump fuse. (see fuel pump diagram in glove box)
1.3 Wait for car to die.
1.4 Turn off ignition and re-install pump fuse.
2. Remove stock fuel sending unit
2.1 Remove bottom rear seat.
2.2 Remove both fuel tank caps with 10 mm nuts.
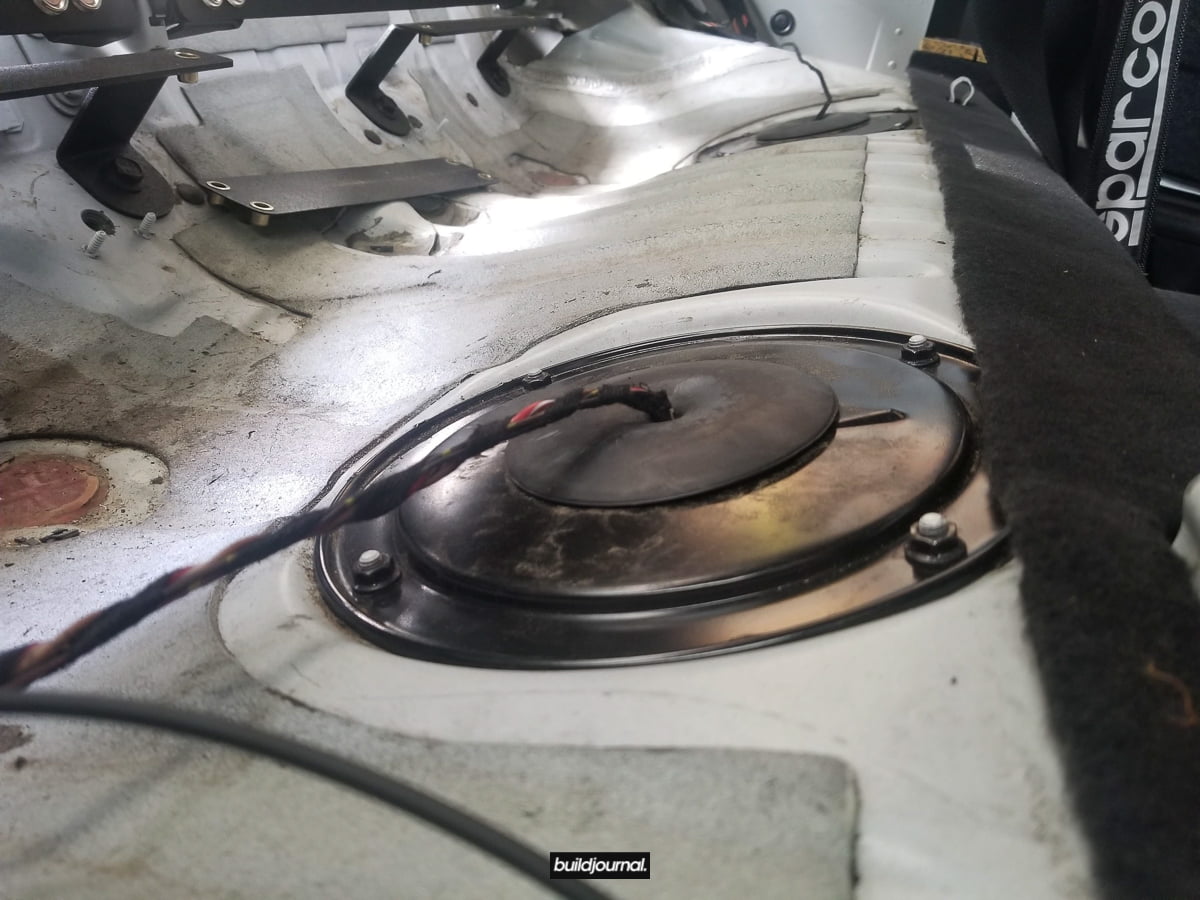
2.3 Remove metal ring retainer with flat head and hammer. Place flat head on the metal tab and loosen by tapping with a hammer counter-clockwise.
2.4 Disconnect fuel return line by loosening the stock hose clamp.

2.5 Remove stock fuel level sender, half way, from driver’s side; watch out for the float arm.
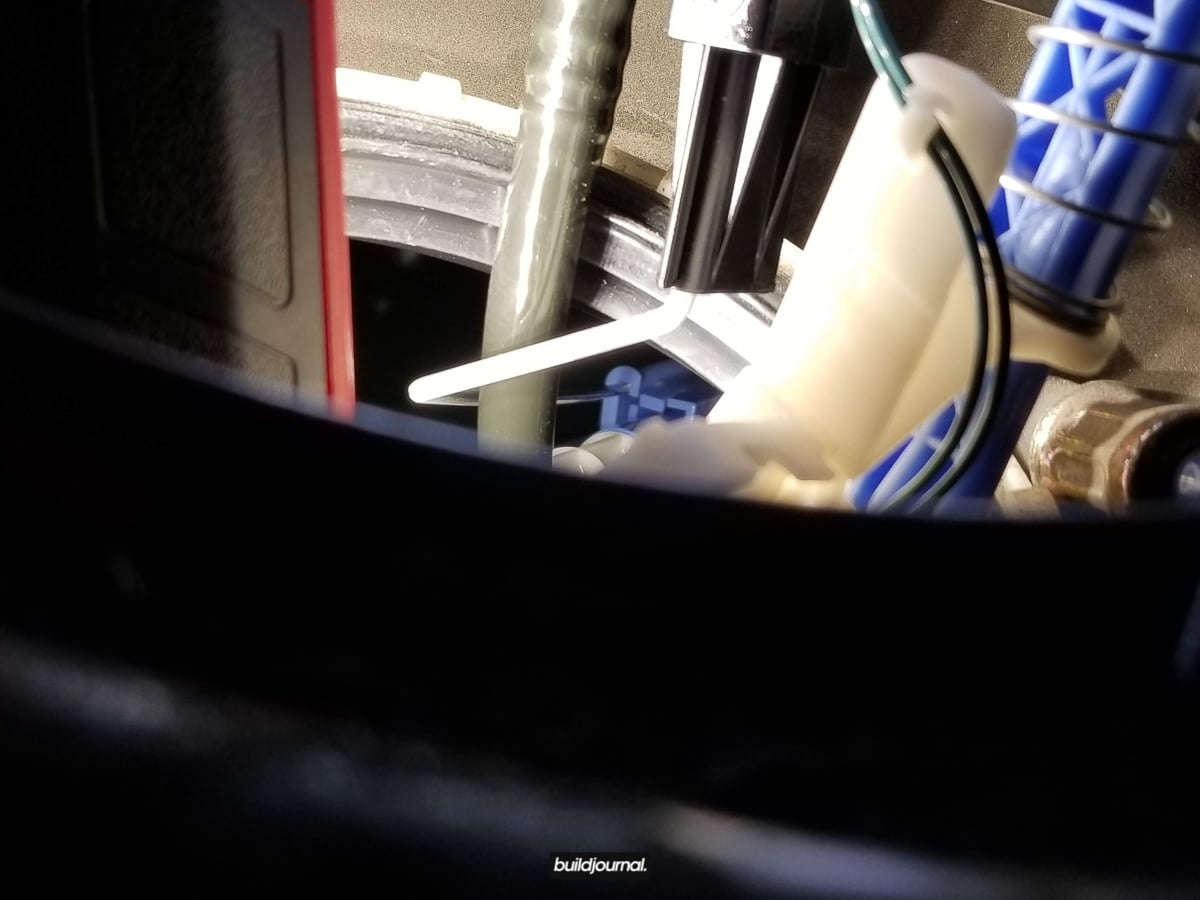
2.6 Disconnect the sucking jet pump from the sender unit. There is a clip you need to press on the black piece of the jet pump.
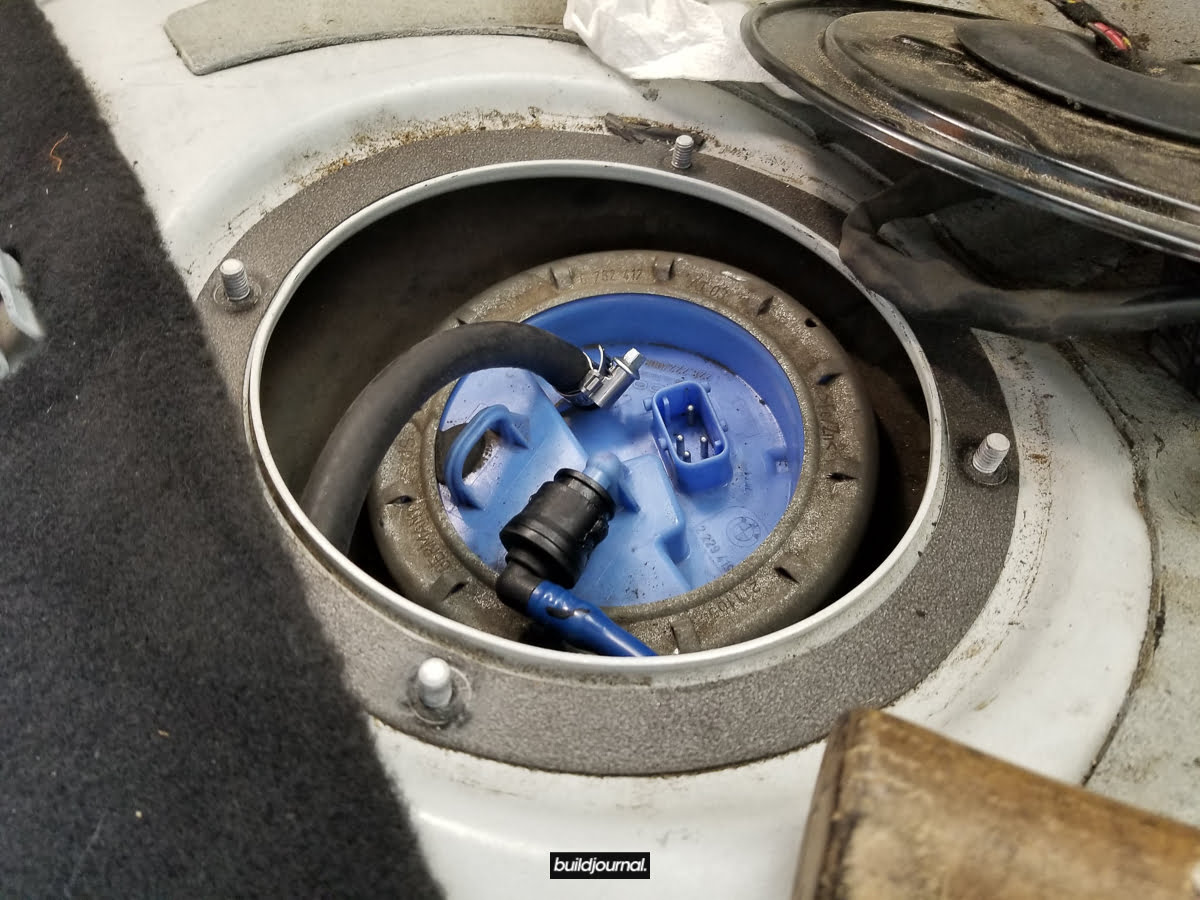
2.7 The other side of the jet pump is connected to the passenger side fuel tray. I just yanked mine out as it’s only connected by a slip ring. Be careful because you might pull the fuel tray out, but you can easily out it back. If you want to be safe, take out your passenger side fuel pump first and yank it from the head.

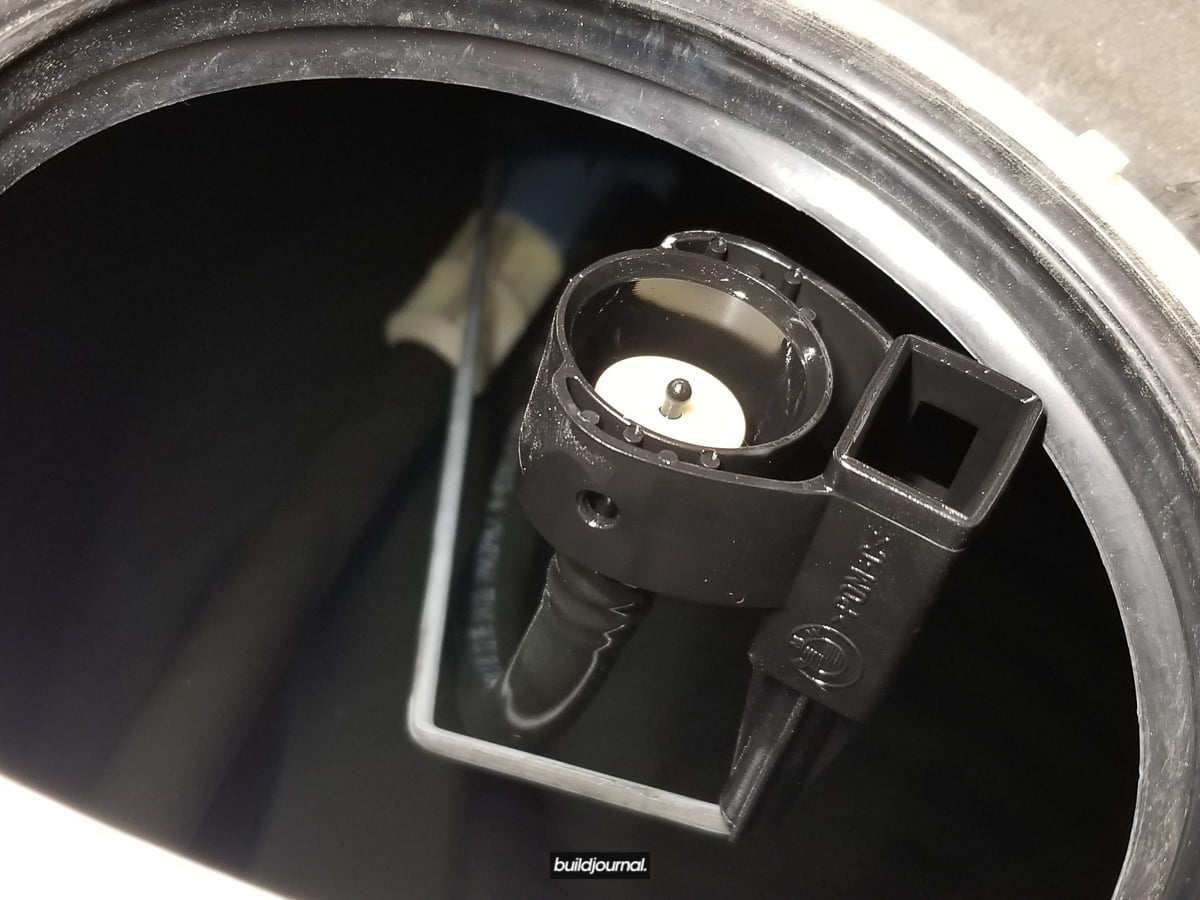
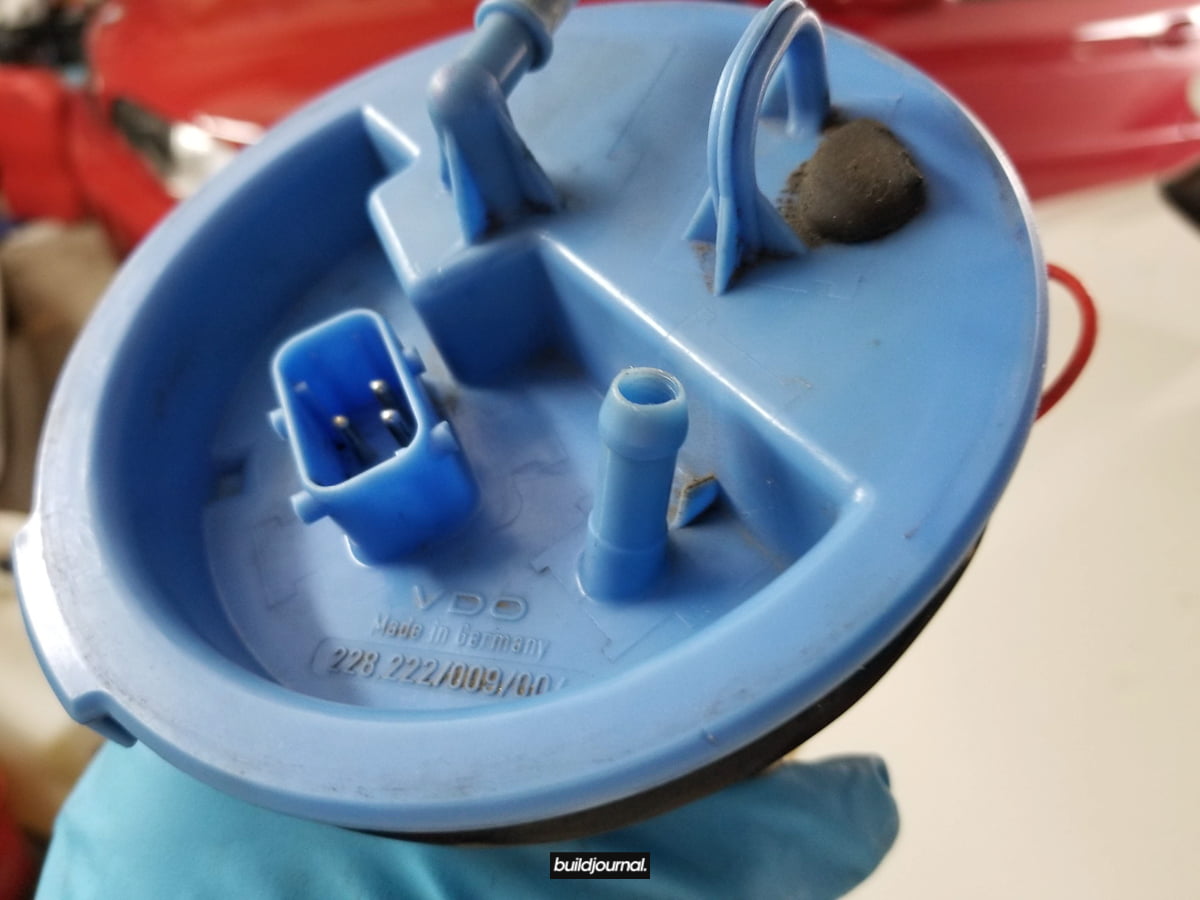
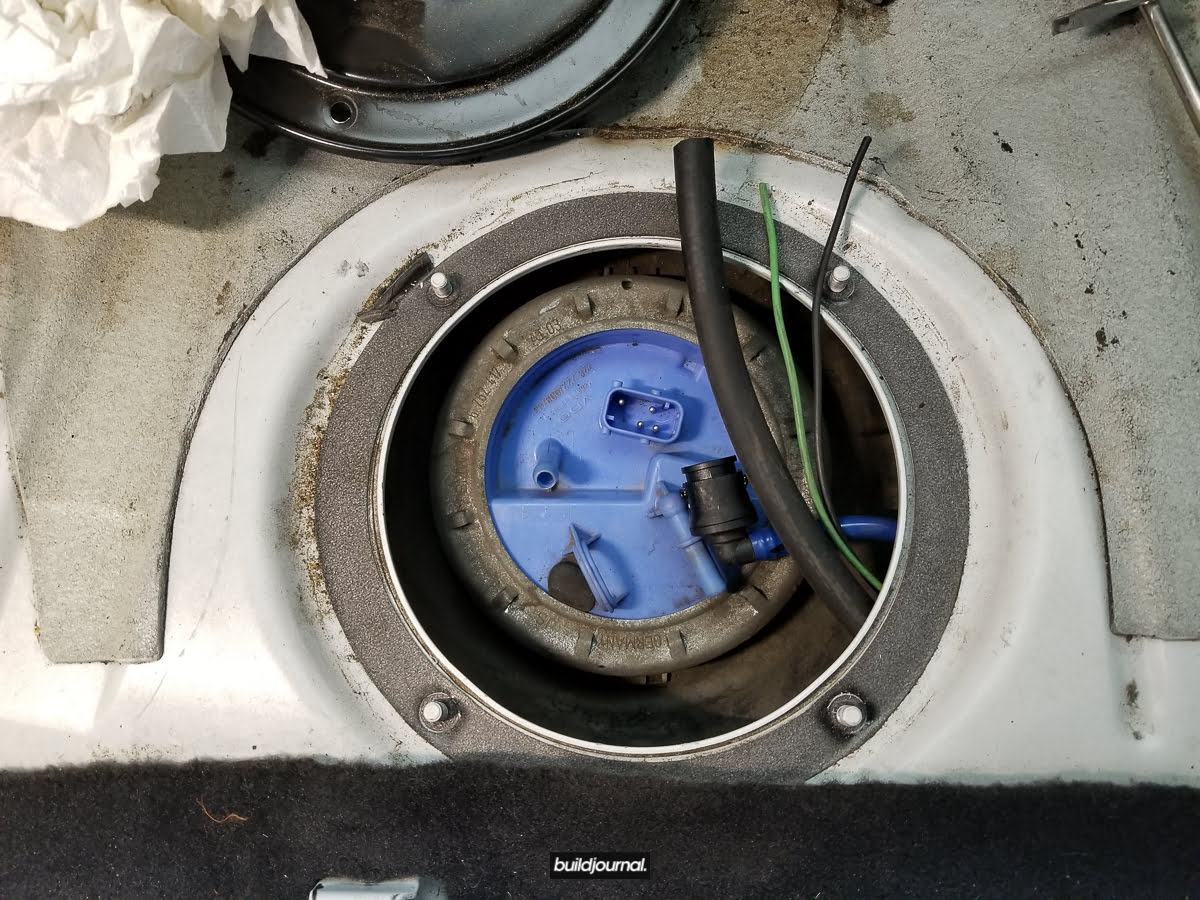
This is the fuel pump side. You can see where the sucking jet pump line connects.
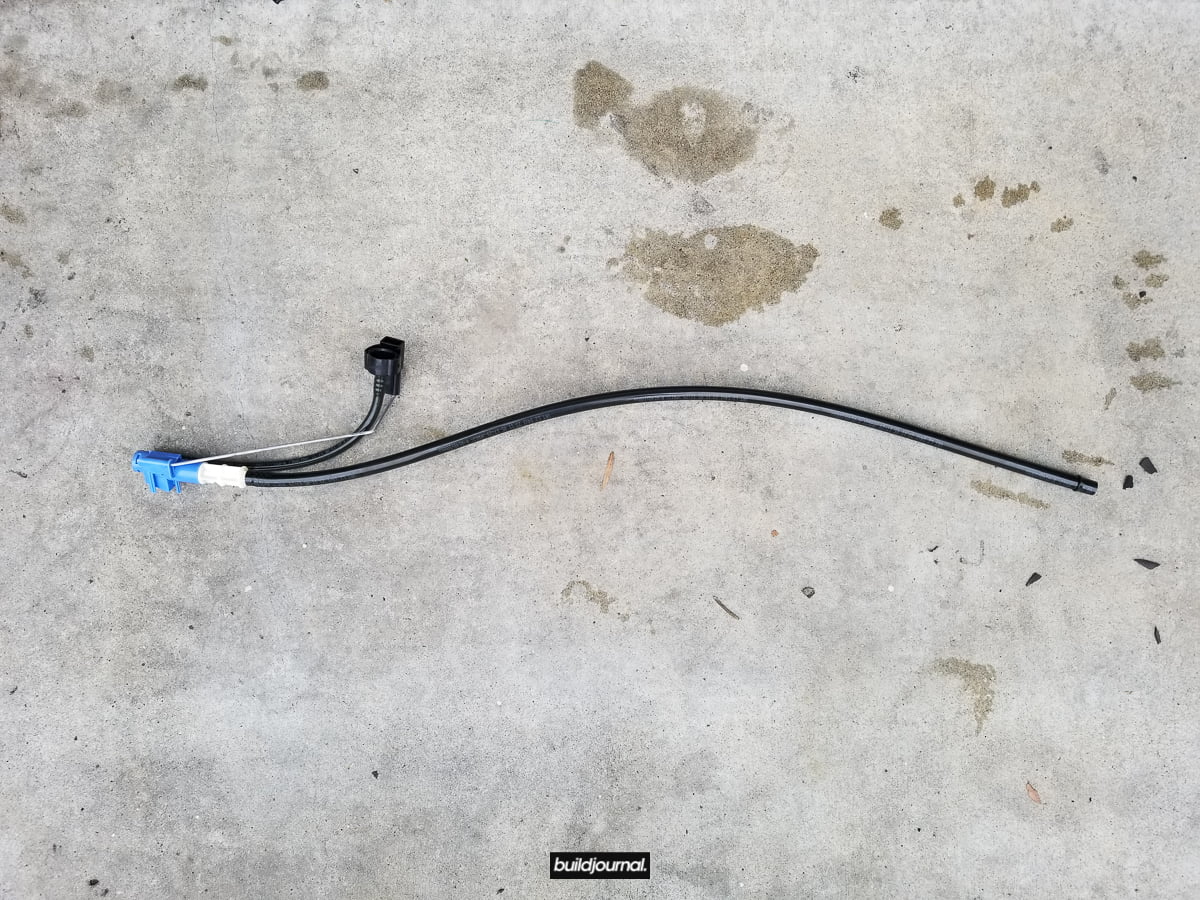
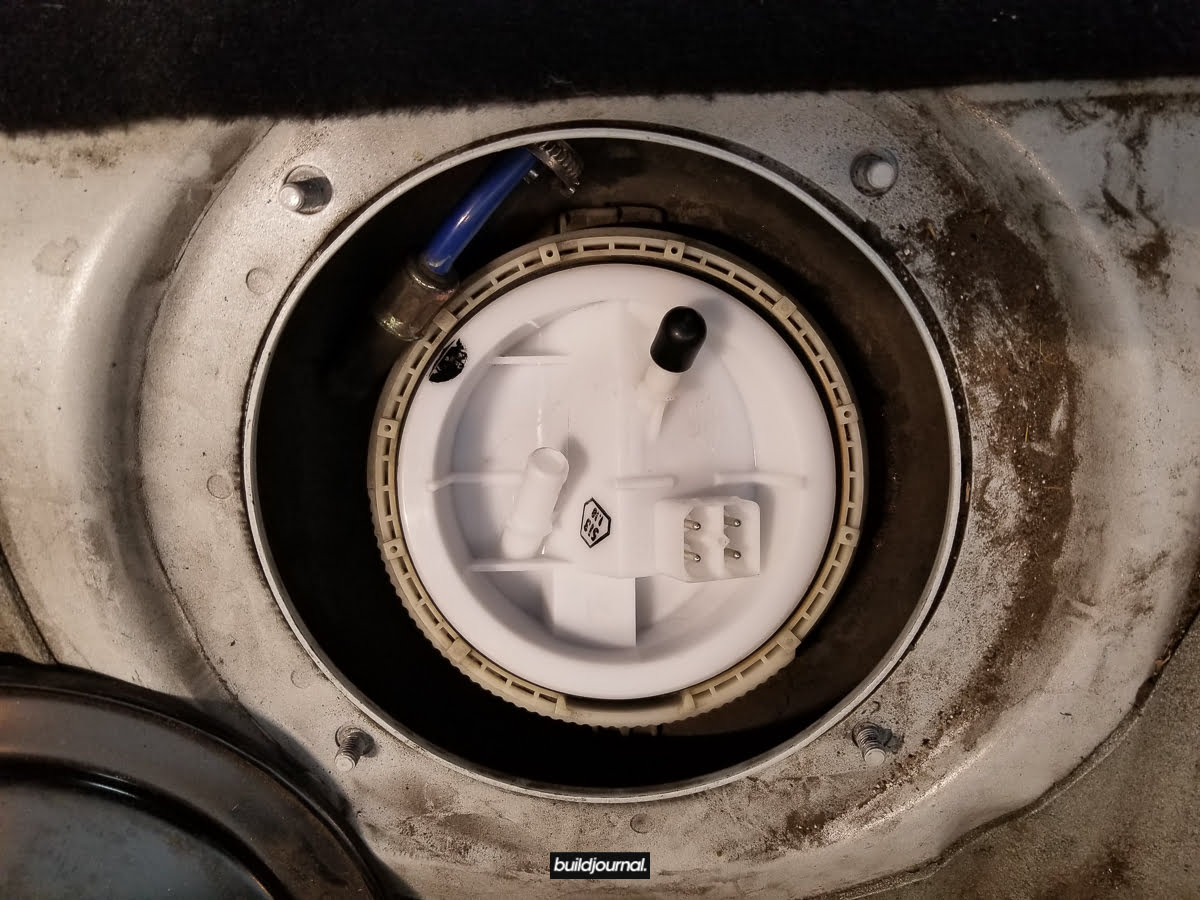
Old sender unit.
3. Install new Bimmerworld pump unit
3.1 Get your new gasket for the sender side and properly seat it around the lip. Improper seal can cause a fuel leak so make sure the gasket is seated properly!
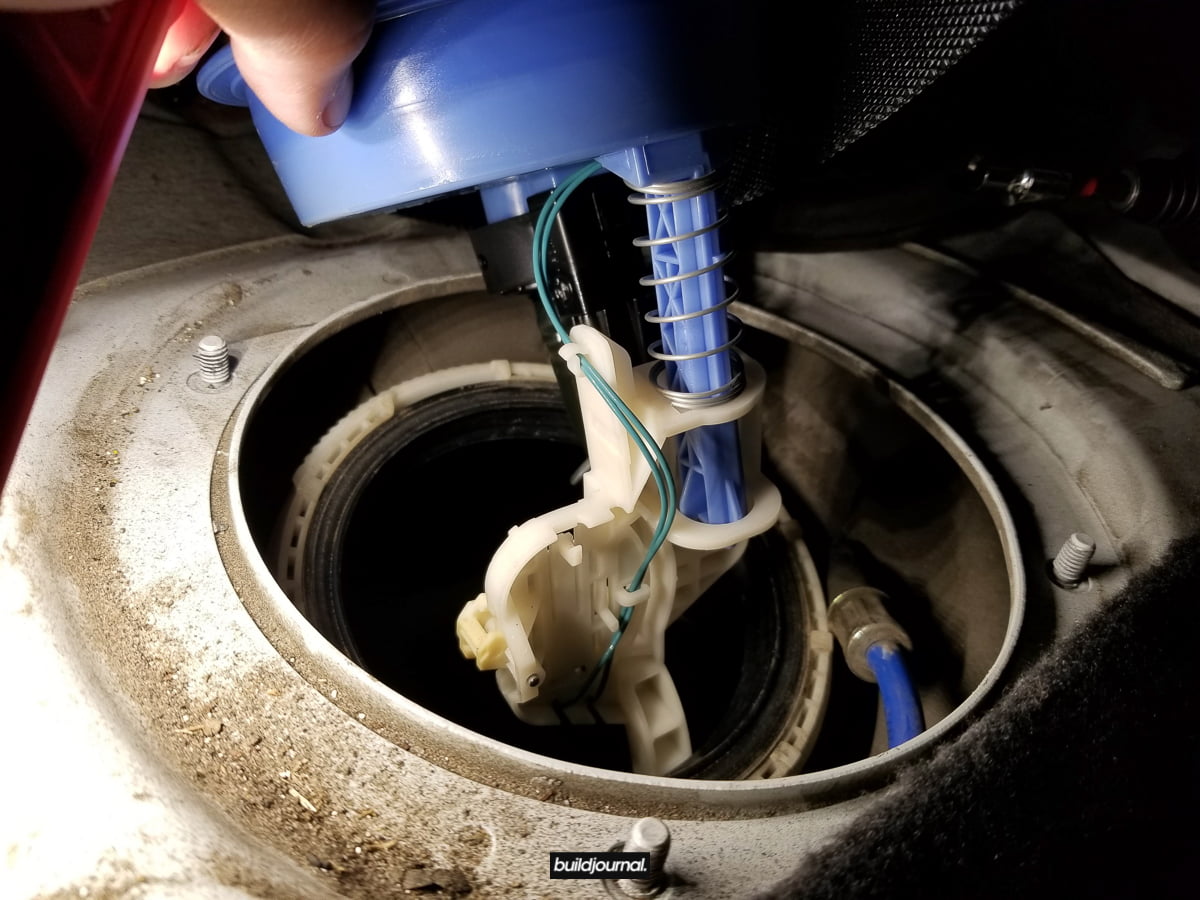
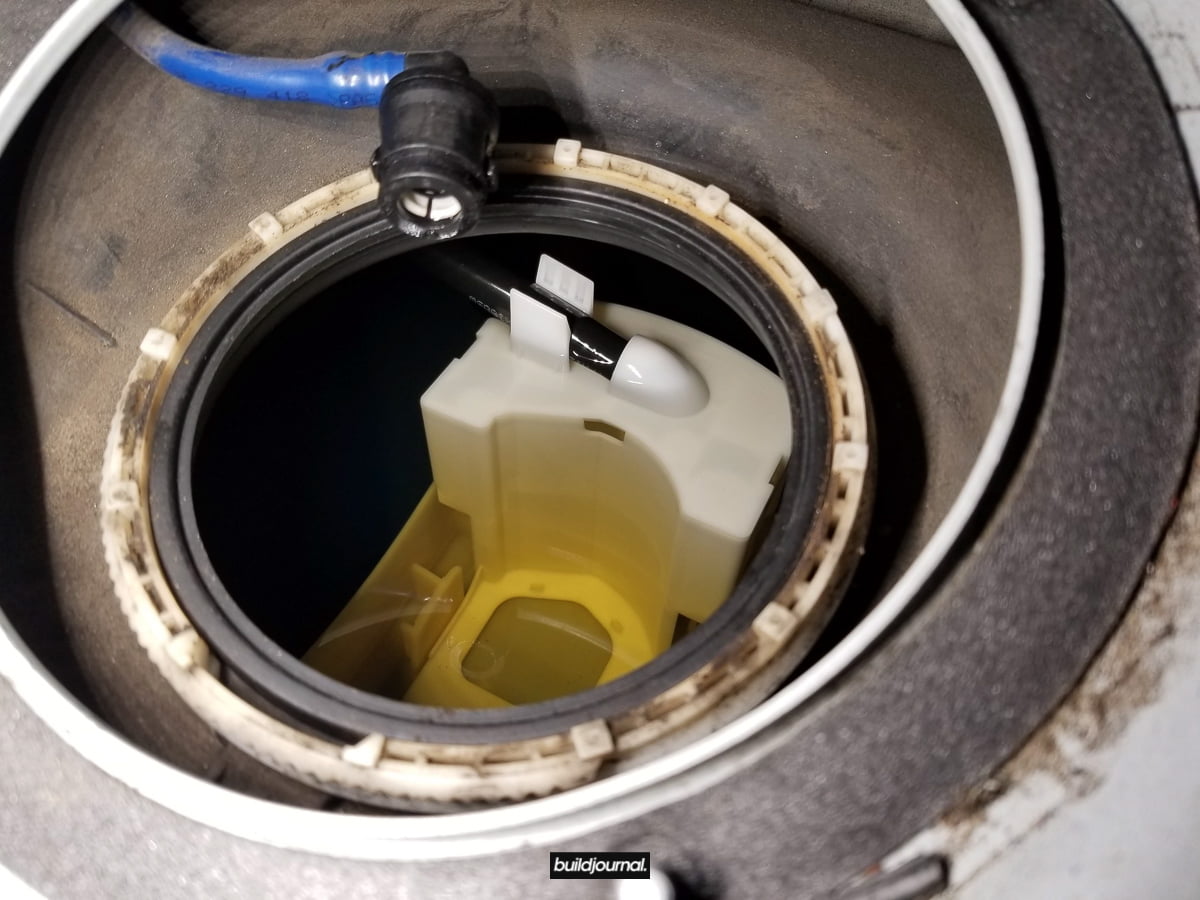
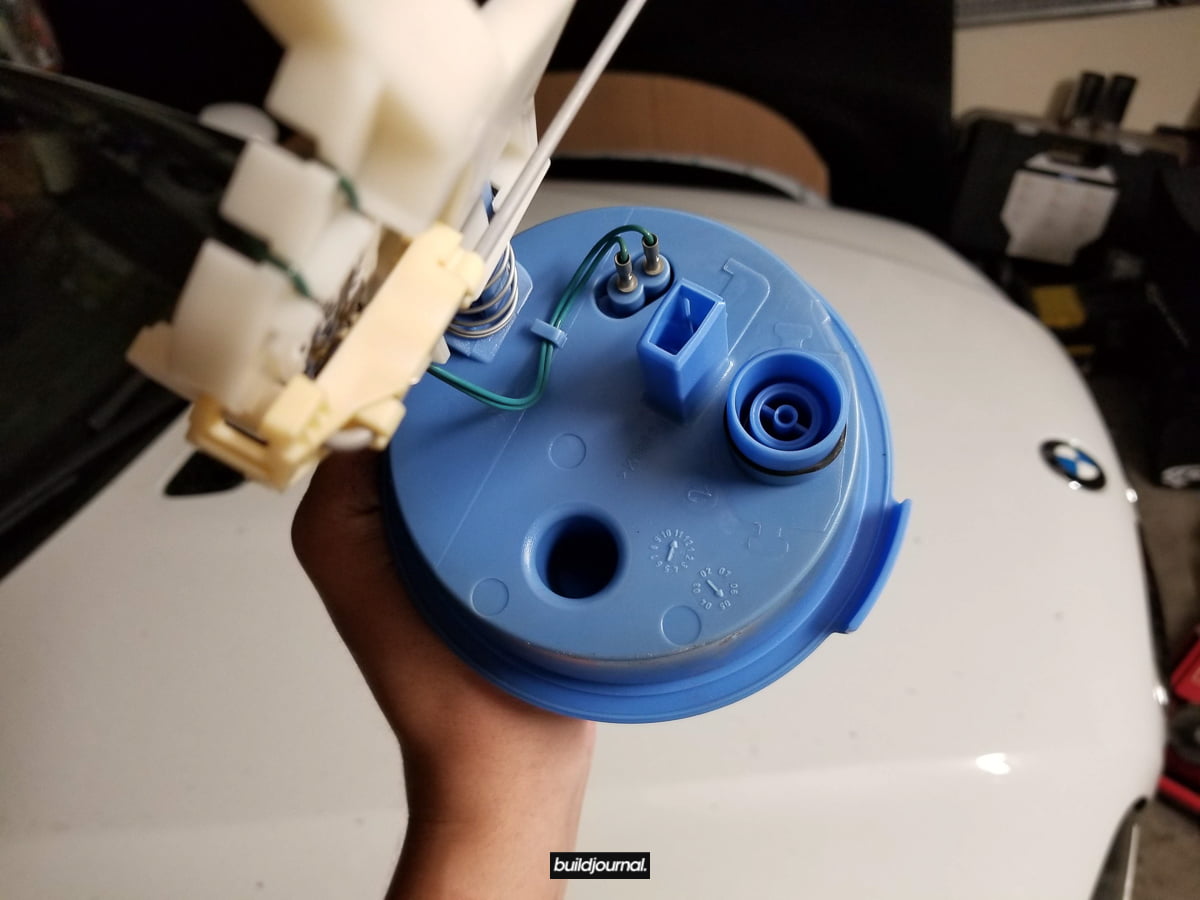
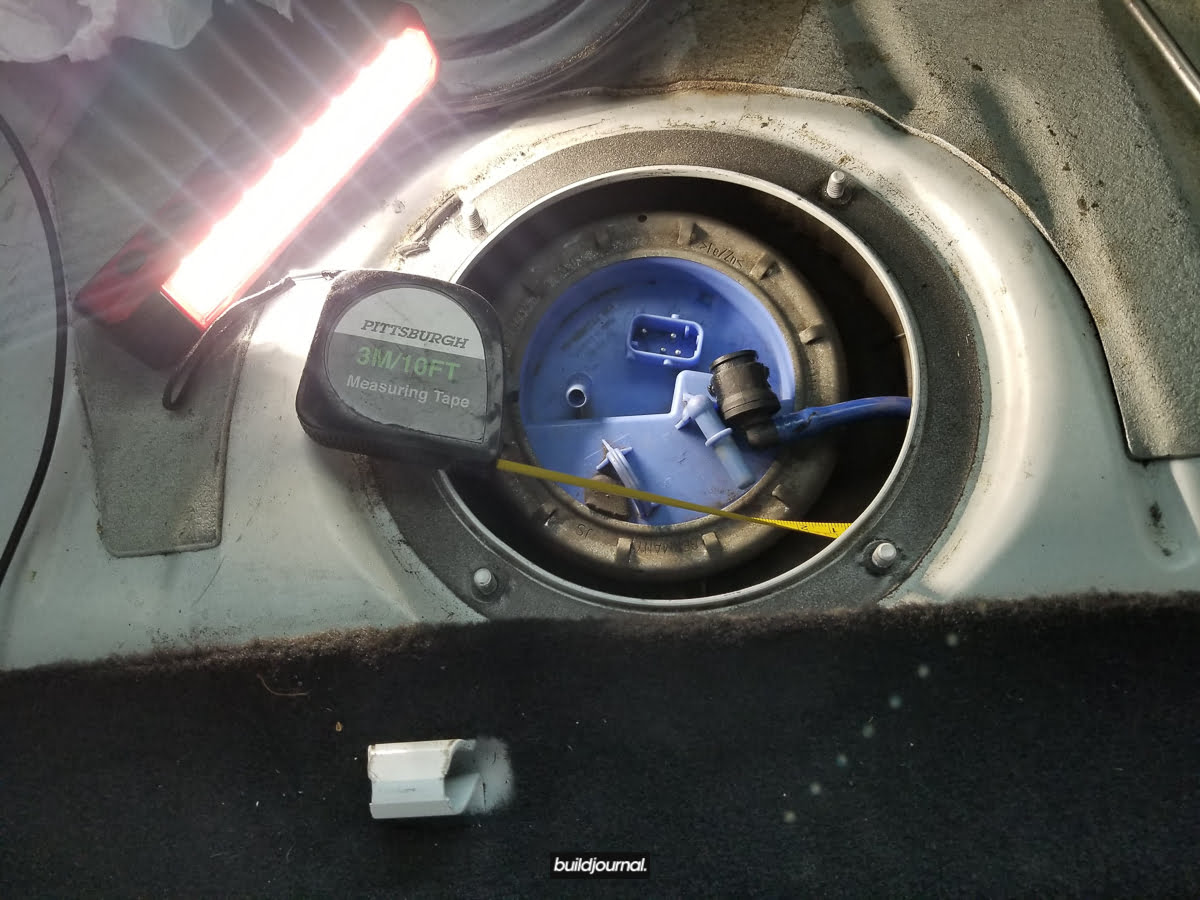
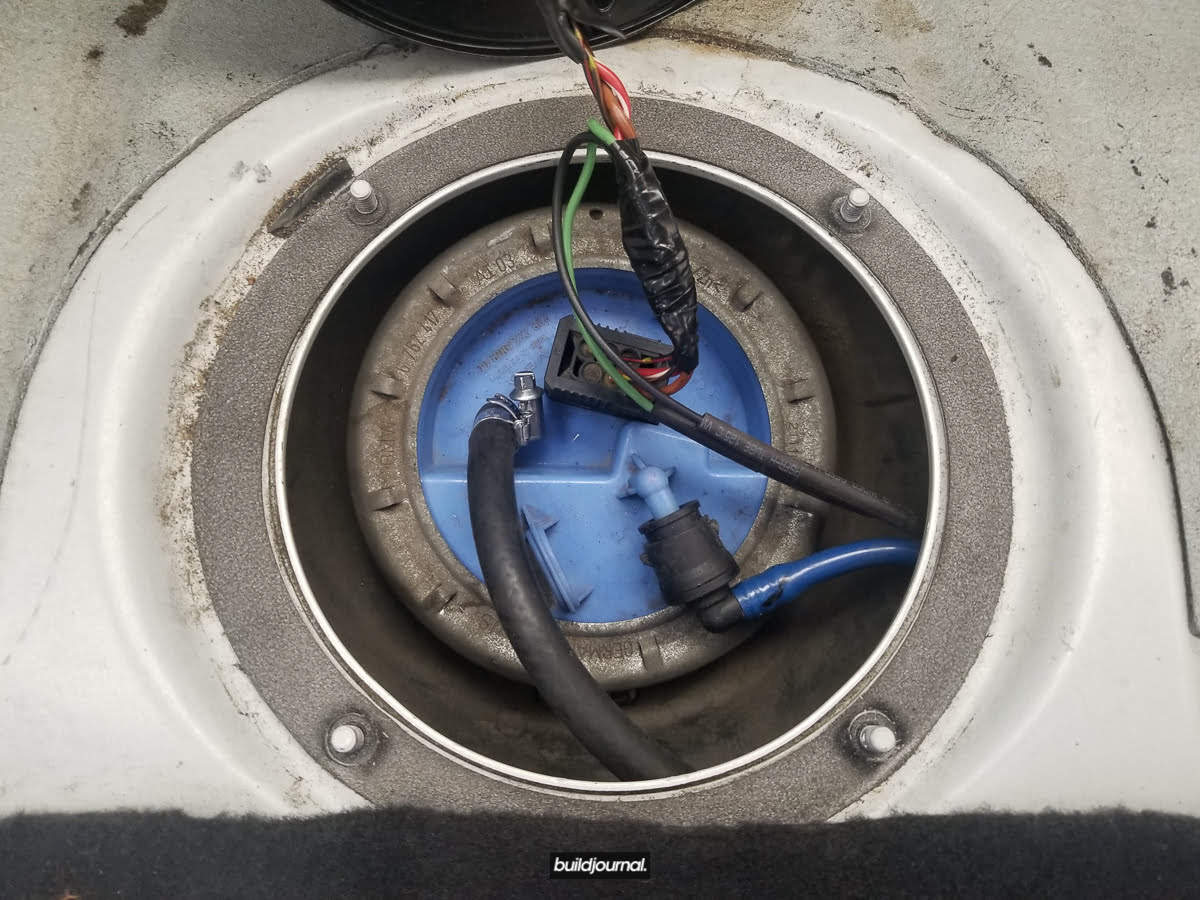
3.2 UPDATE 5/9/19: User Duncan Ross has pointed out that the correct orientation to have the fuel level gauge work properly is to clock the fuel pump about 45° clockwise and the black/white plugs should be facing a stud. The picture below is the incorrect orientation. In the picture below, the top of the picture is facing the rear of the car. If clocked properly, the black/white plugs will be facing the stud on the bottom right corner, in the picture.
3.3 Install 8 mm fuel hose over the 8 mm (small) nipple on the new pump. Use 8-12 mm hose clamp to secure hose in place. In the picture you can see I cut the hose significantly because the hose was too long and wouldn’t fit inside without pinching the hose. You can cut to your preference.
3.4 Install 12 mm fuel hose over large nipple, securing with 12-20 mm hose clamp. I had to trim this hose as well.
3.5 Insert hose size reducer into opposite end of 12 mm fuel hose, securing with additional 12-20 mm hose clamp. Your original fuel line will go into the adapter.

4. Remove fuel pump (passenger side) unit
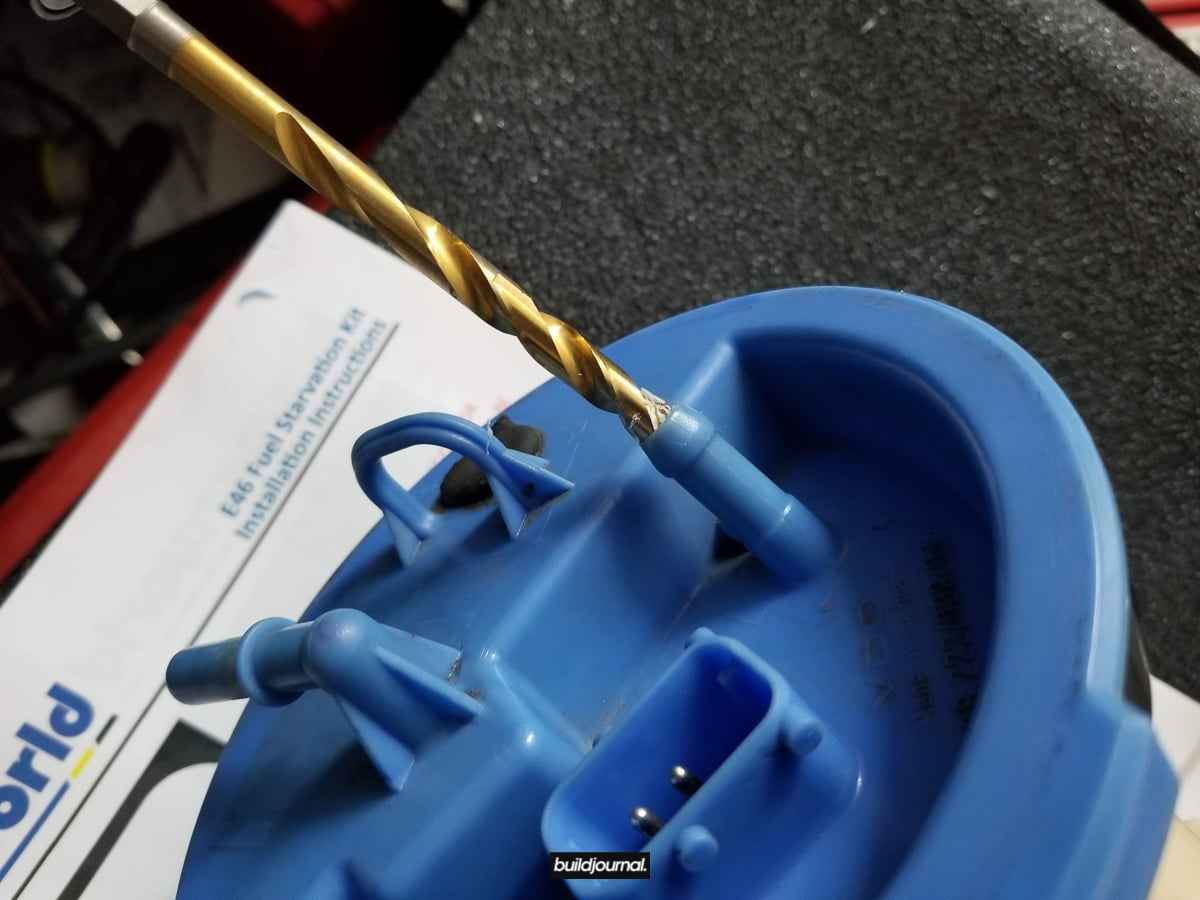
This step may not be necessary for some, but this next step requires drilling through your fuel pump nipple so I did not want to risk getting plastic shaving into my tank.
4.1 Remove the fuel line by pressing the 2 black tabs. Slide in then out. A little bit of fuel may leak so be prepared with some towels.
4.2 Remove the wiring harness plug.
4.3 Unscrew the metal ring and remove the fuel pump assembly.
4.4 Drill hole into un-used nipple using a drill bit. I believe I used a 1/4″ bit. Recommended to start with a smaller drill bit to mark the center so you center the drill for the larger one.
4.5 Seat the fuel pump gasket around the lip and re-install fuel pump. Re-insert fuel line, wiring harness and metal lock ring.
5. Route remaining fuel lines
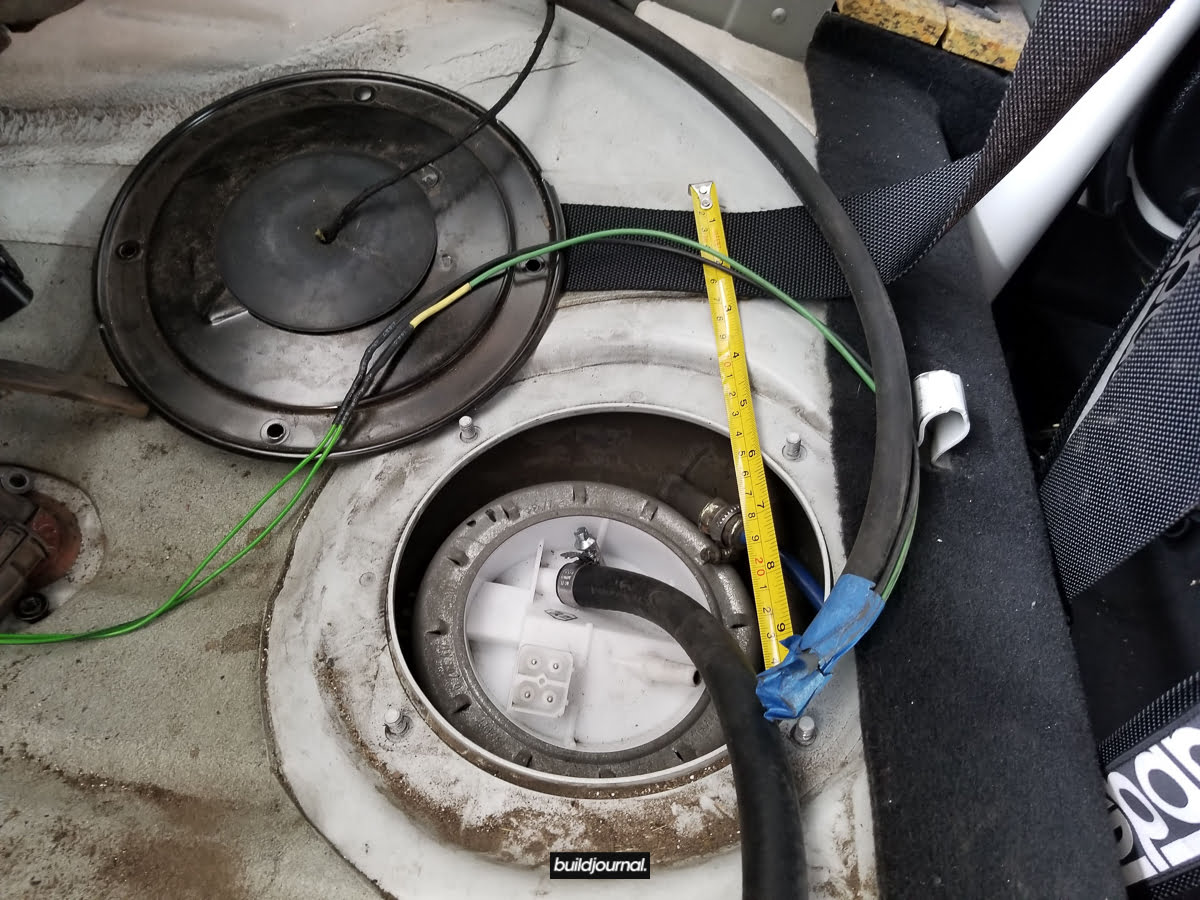
5.1 Route 8 mm fuel line installed from new pump to existing fuel pump by fishing line underneath the sheet metal of the seat. A little trick I did was to fish a tape ruler from one side to the other and then taped both the 8 mm hose and 36″ wiring harness to the ruler to fish it out. Although we’re not ready to wire yet, you need to fish the wiring harness again so might as well do it at once.

5.2 Insert 8 mm hose into the newly created nipple on the fuel pump then secure with 8-12 mm hose clamp.
6. Wiring the new unit
6.1 Insert 18″ wiring harness (white connector) into driver’s side connection on new fuel pump unit.
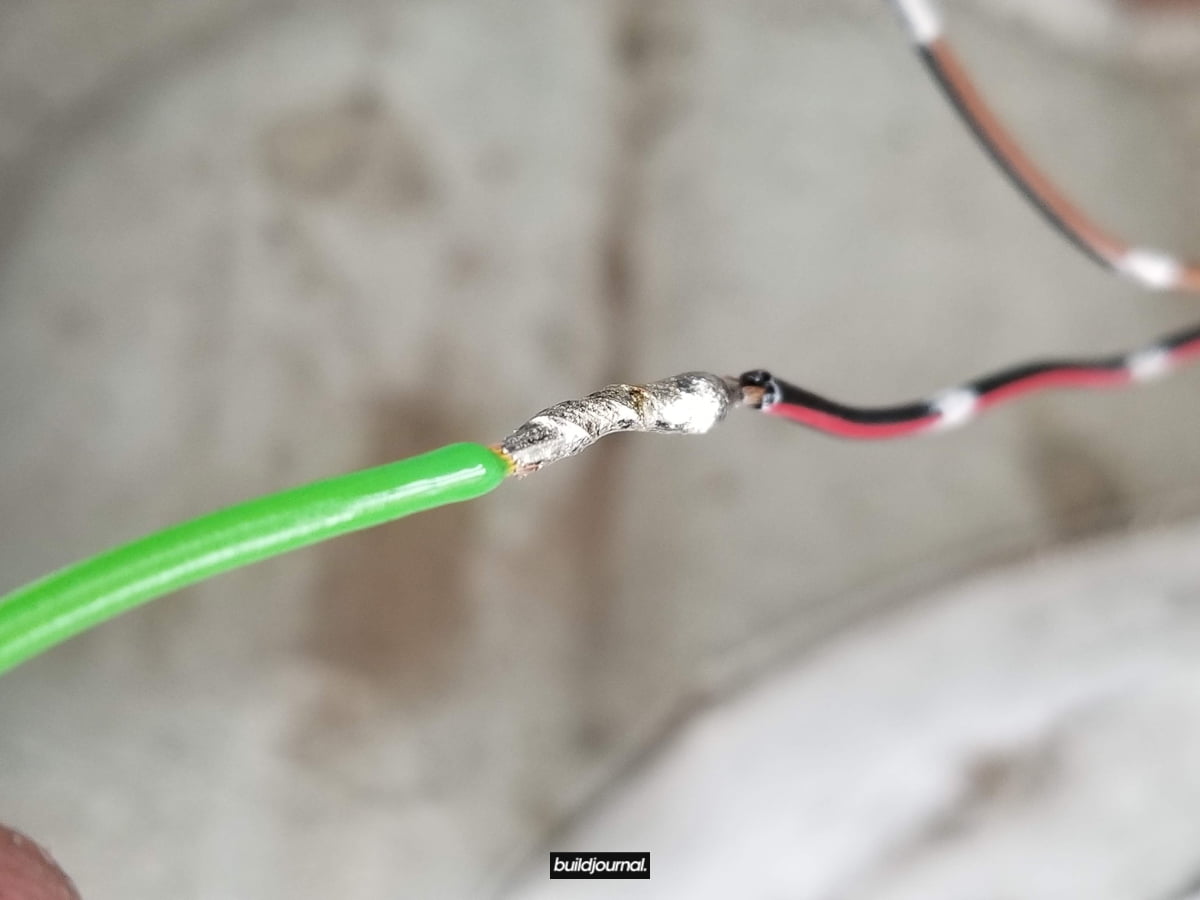
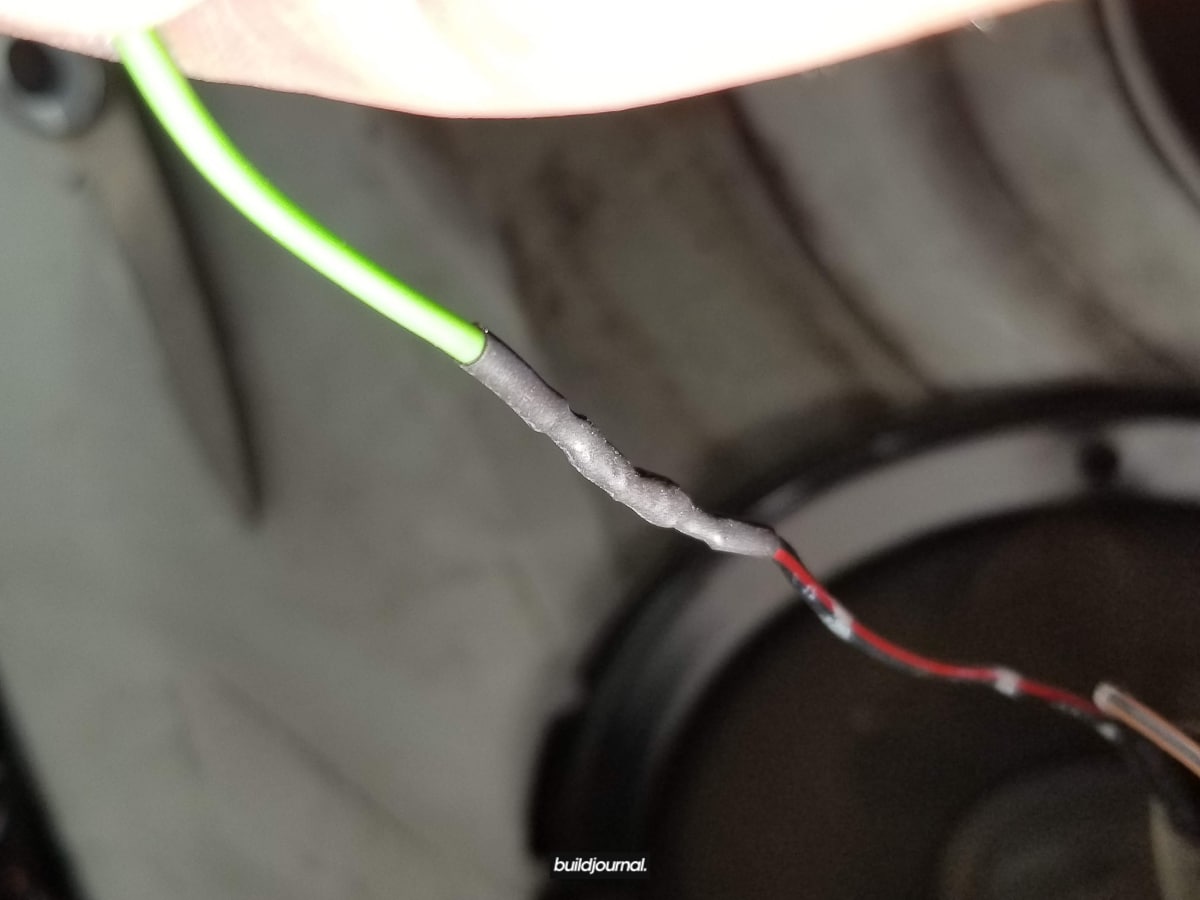
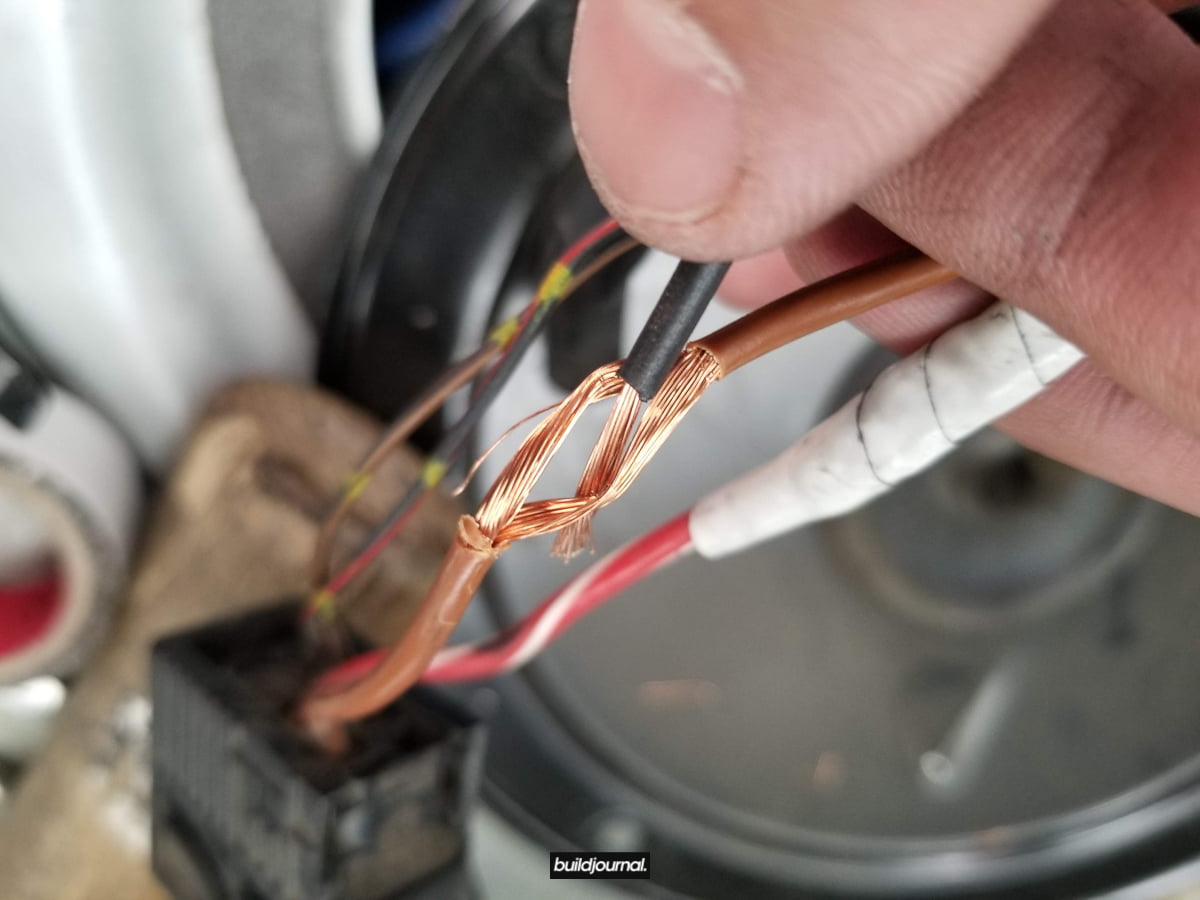
6.2 Solder solid green wire into black/red wire. Use heat shrink to protect the wire from the elements.
6.3 Splice green/black wire on harness into brown/black wire. This re-connects the fuel level sensor.
6.4 Connect 36″ wiring harness (black connector) to other connector on new fuel pump. Your wires should already be re-routed underneath the car from step 5.1.
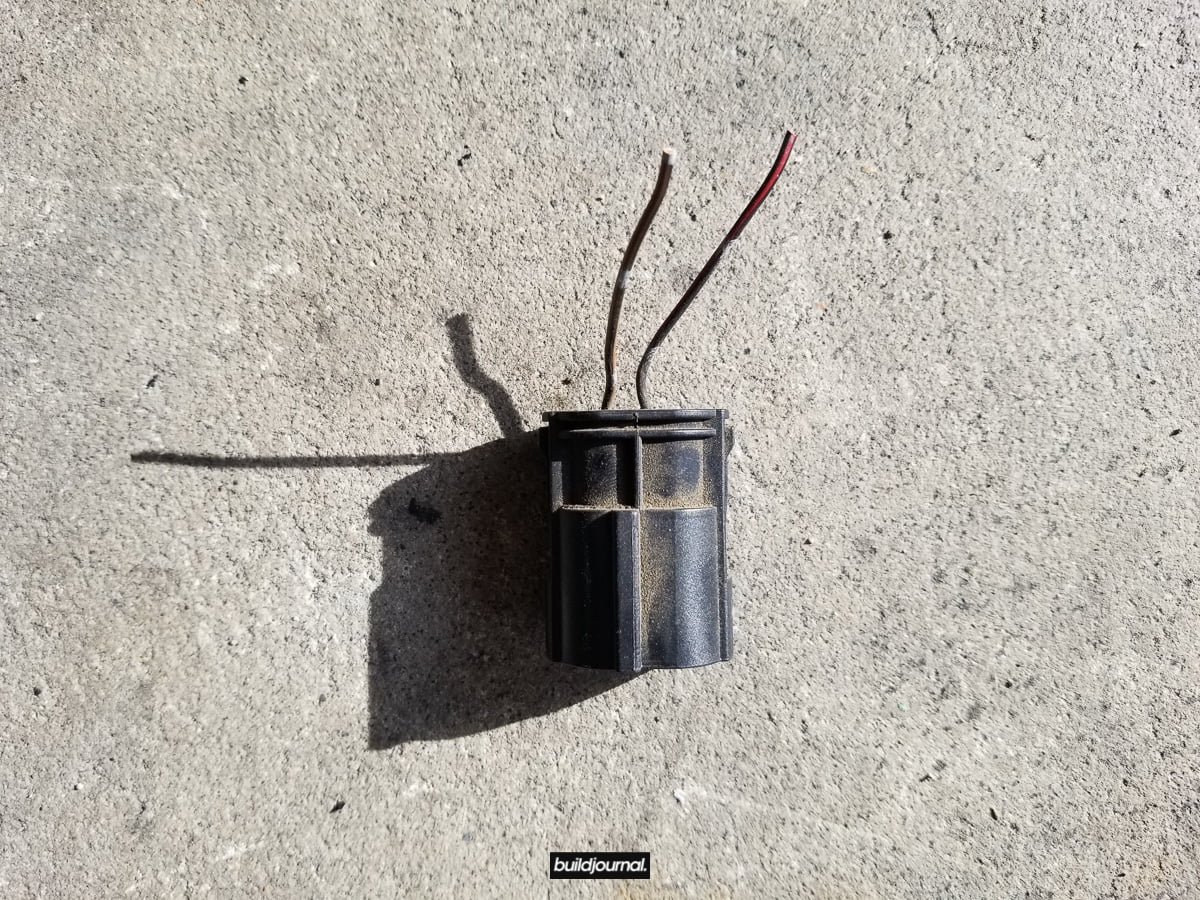
6.5 Cut power supply wires going to existing pump about 3 inches from top surface of old fuel pump.
6.6 Connect dark green harness wire to red/white (or blue/white on non-M E46) power using soldered y-splice. Seal with heat shrink tube.
6.7 Connect black harness wire to brown ground also using soldered y-splice. Seal with heat shrink tube.
6.8 Bundle wires together and wrap with electrical tape.
6.9 Re-install cover plate and seats. Installation is complete.
Testing at the Track
UPDATE 3/22/19 – The “Check Filler Cap” warning has not appeared ever since I wrote this article. It may have been a coincidence. However I noticed the fuel gauge does not show 100% even after topping off at the gas pump. Bimmerworld claims it the fuel gauge shows 100% on their install car.
I tested this on track after the installation and I ran down the car to half a tank and experienced zero fuel cut from fuel starvation. I ended up running the car all the way until a quarter tank and I still did not experience fuel cut. The only weird things I experienced was a “Check Filler Cap” warning and the gas pump nozzle auto-stops prematurely when I’m filling up. I’ve reached out to Bimmerworld to see what’s going on so I’ll update once I do, but I’m super pumped that this kit works! Oh yeah and the fuel gauge meter seems to be pretty accurate. The only way I can fully test the accuracy is to manually calculate the fuel usage or just drive and give it time. I will report back. Below is a video of my PB run at Chuckwalla with a little less than half a tank. Notice the sweeping right handers especially the ones I pull 1.5 G’s on.

Holiday Sale! Take 20% off B-Spec Tune
Now is your chance to get more power for your E46 M3. For a limited time only we are offering a holiday sale for 20% off the E46 M3 B-Spec Tune. Offer is valid until 12/28/2018 at 11:59 PM PST.

WIN a Pair of Stance x Period Correct Socks via Sweepstakes
To celebrate our upcoming launch of our apparel division, we are happy to do a sweepstakes for your chance to win a pair of Stance x Period Correct EVO or LTW socks! All you have to do is one of the following:
- Instagram - Follow us @buildjournal and Tag one (1) friend that has a BMW on the sweepstakes post.
- Facebook - Like our page on @buildjournal and Tag one (1) friend that has a BMW on the sweepstakes post.
Ends 12/11 @ 11:59 PM PST. Winner will be announced on 12/12. Enter now! Official sweepstakes rules here: https://thebuildjournal.com/stance-x-period-correct-socks-sweepstakes-official-rules/


Black Friday 2018
It's PB weather and what other way to treat your S54 than to give it a nice little bump in power. Stay tuned as we set to release our sale.

HARD Motorsport Lightweight Door Panel DIY & Review for E46 M3
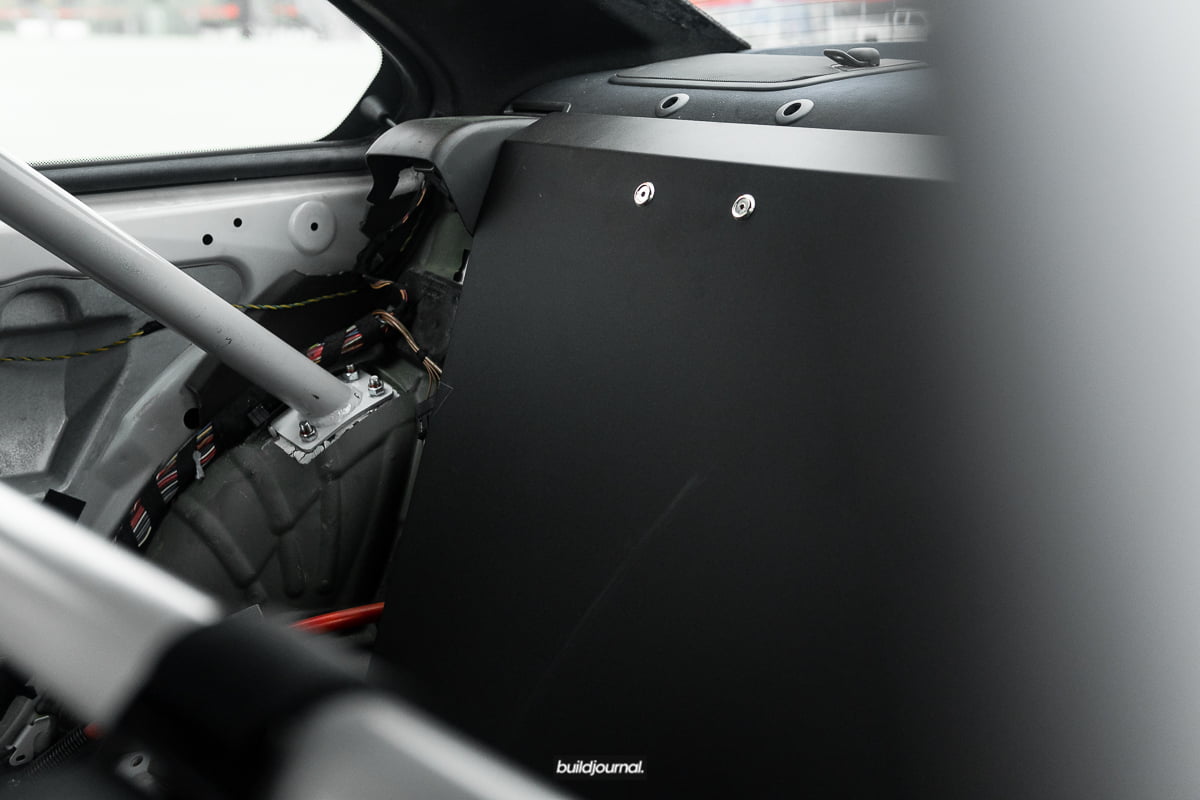
If you're serious about track performance, you should be serious about weight savings. The Lightweight Door Panel Set offered by Hard Motorsport is a great way to shave some significant weight on your E46 M3. I convinced myself to get rid of the cup holders so I can get the CSL console. Now I convinced myself to get rid of the radio so I can reduce weight! That's what track life does to you. Here's a little DIY and review on the door panels.
Tools Needed
[one_half]
[/one_half]
[one_half_last]
- Rivet nut gun
- Screwdriver
- Drill gun
- 5/16" drill bit
- T20 torx
- Allen keys
- Dremel
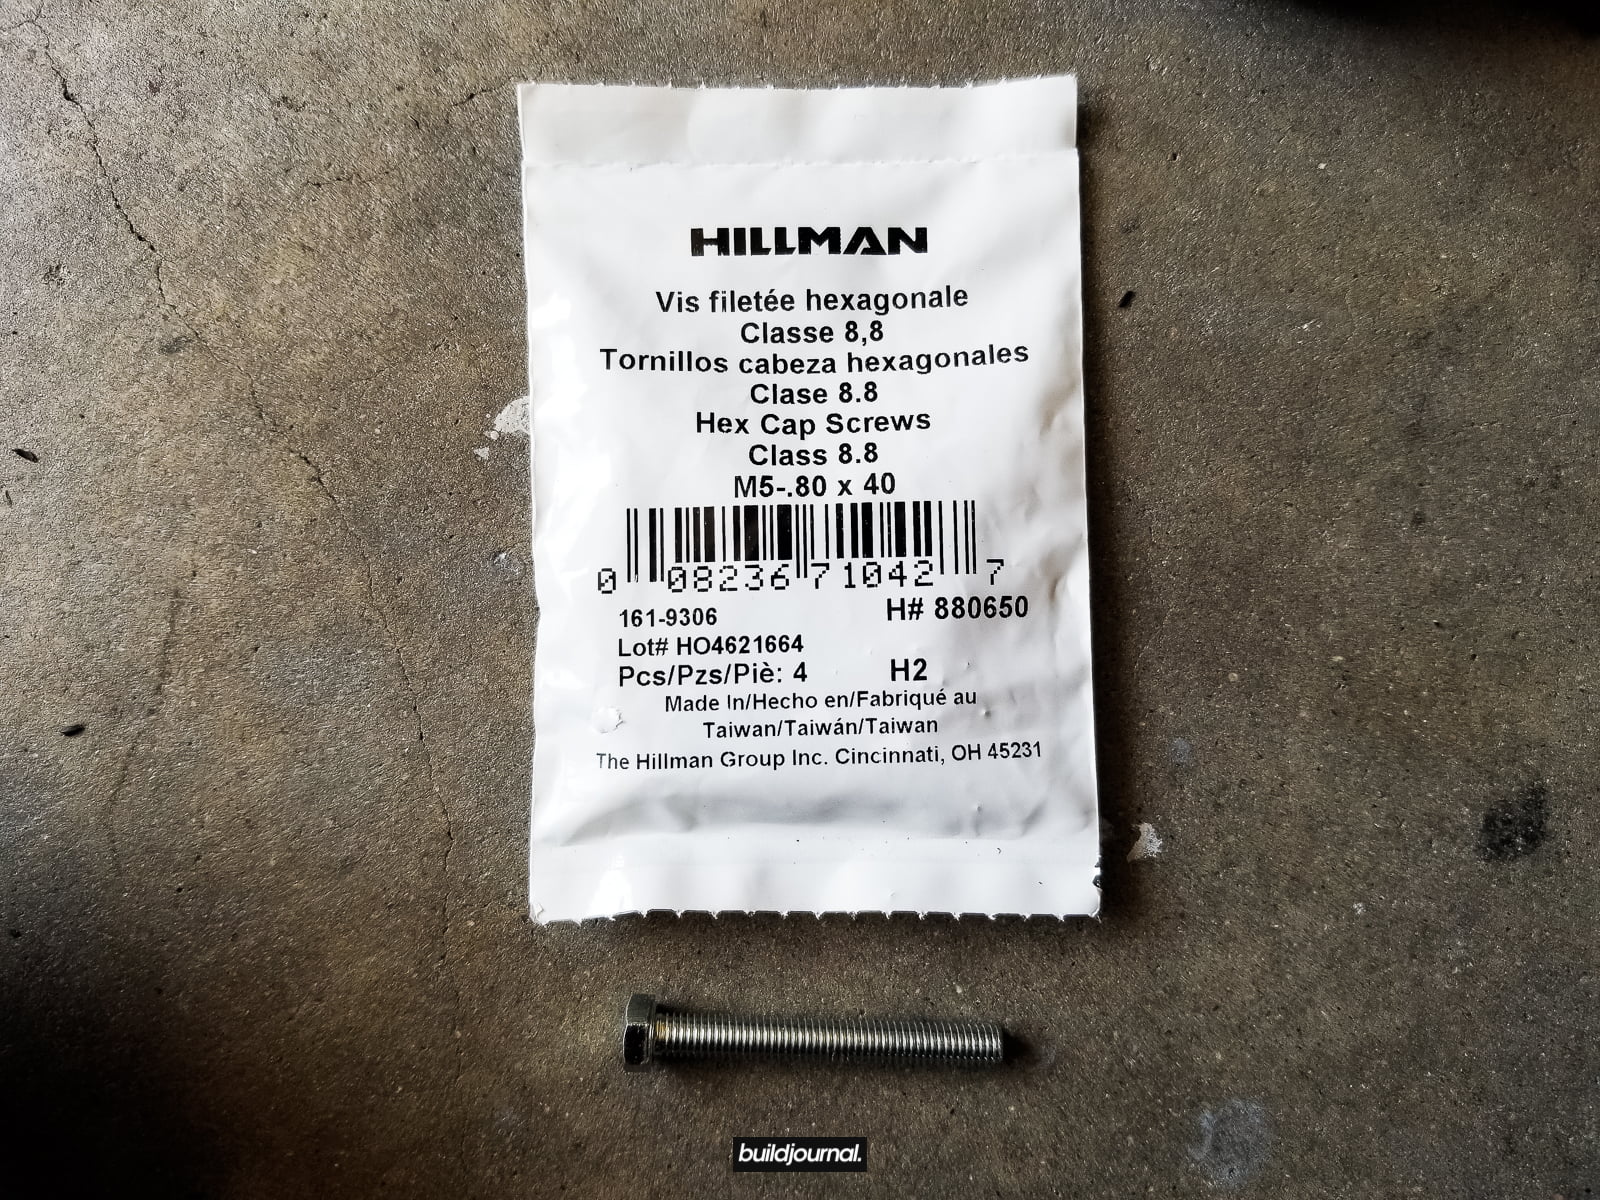
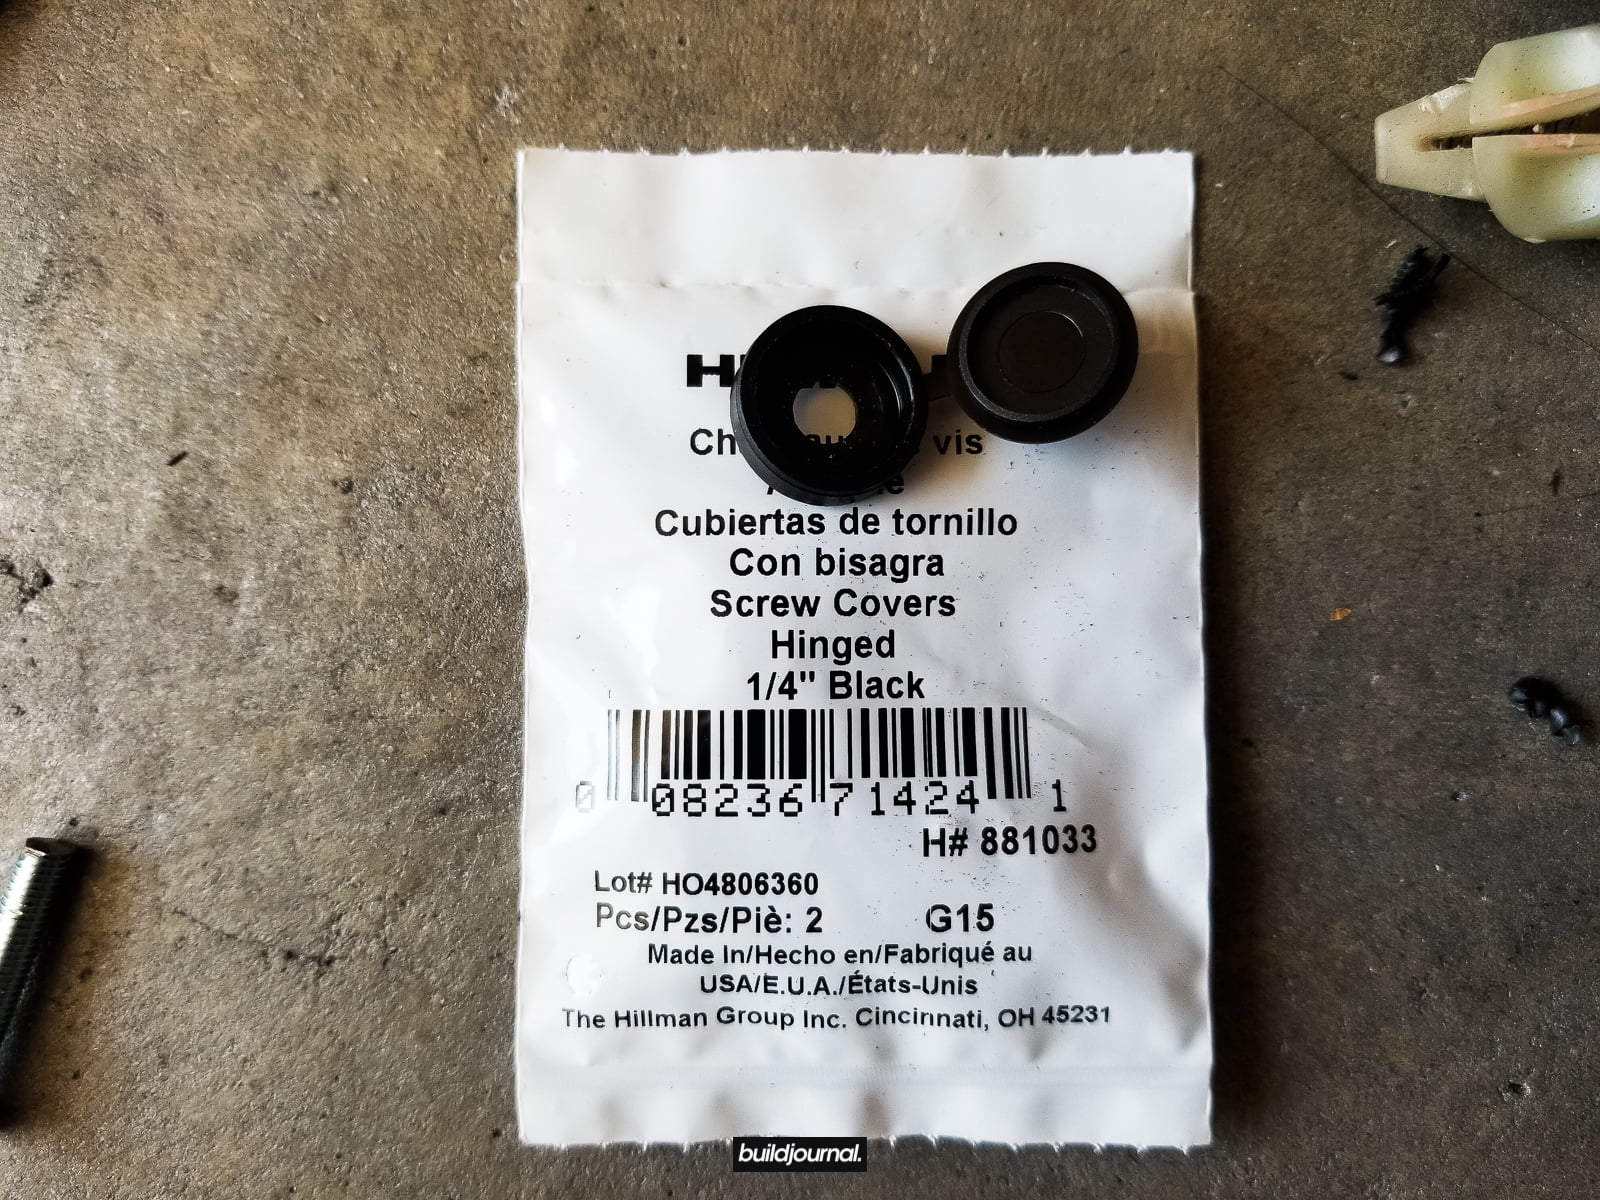
- Optional: M5-0.8 x 40mm bolts and screw covers
Support this site by buying from the links below. :)
[/one_half_last]
Install Directions
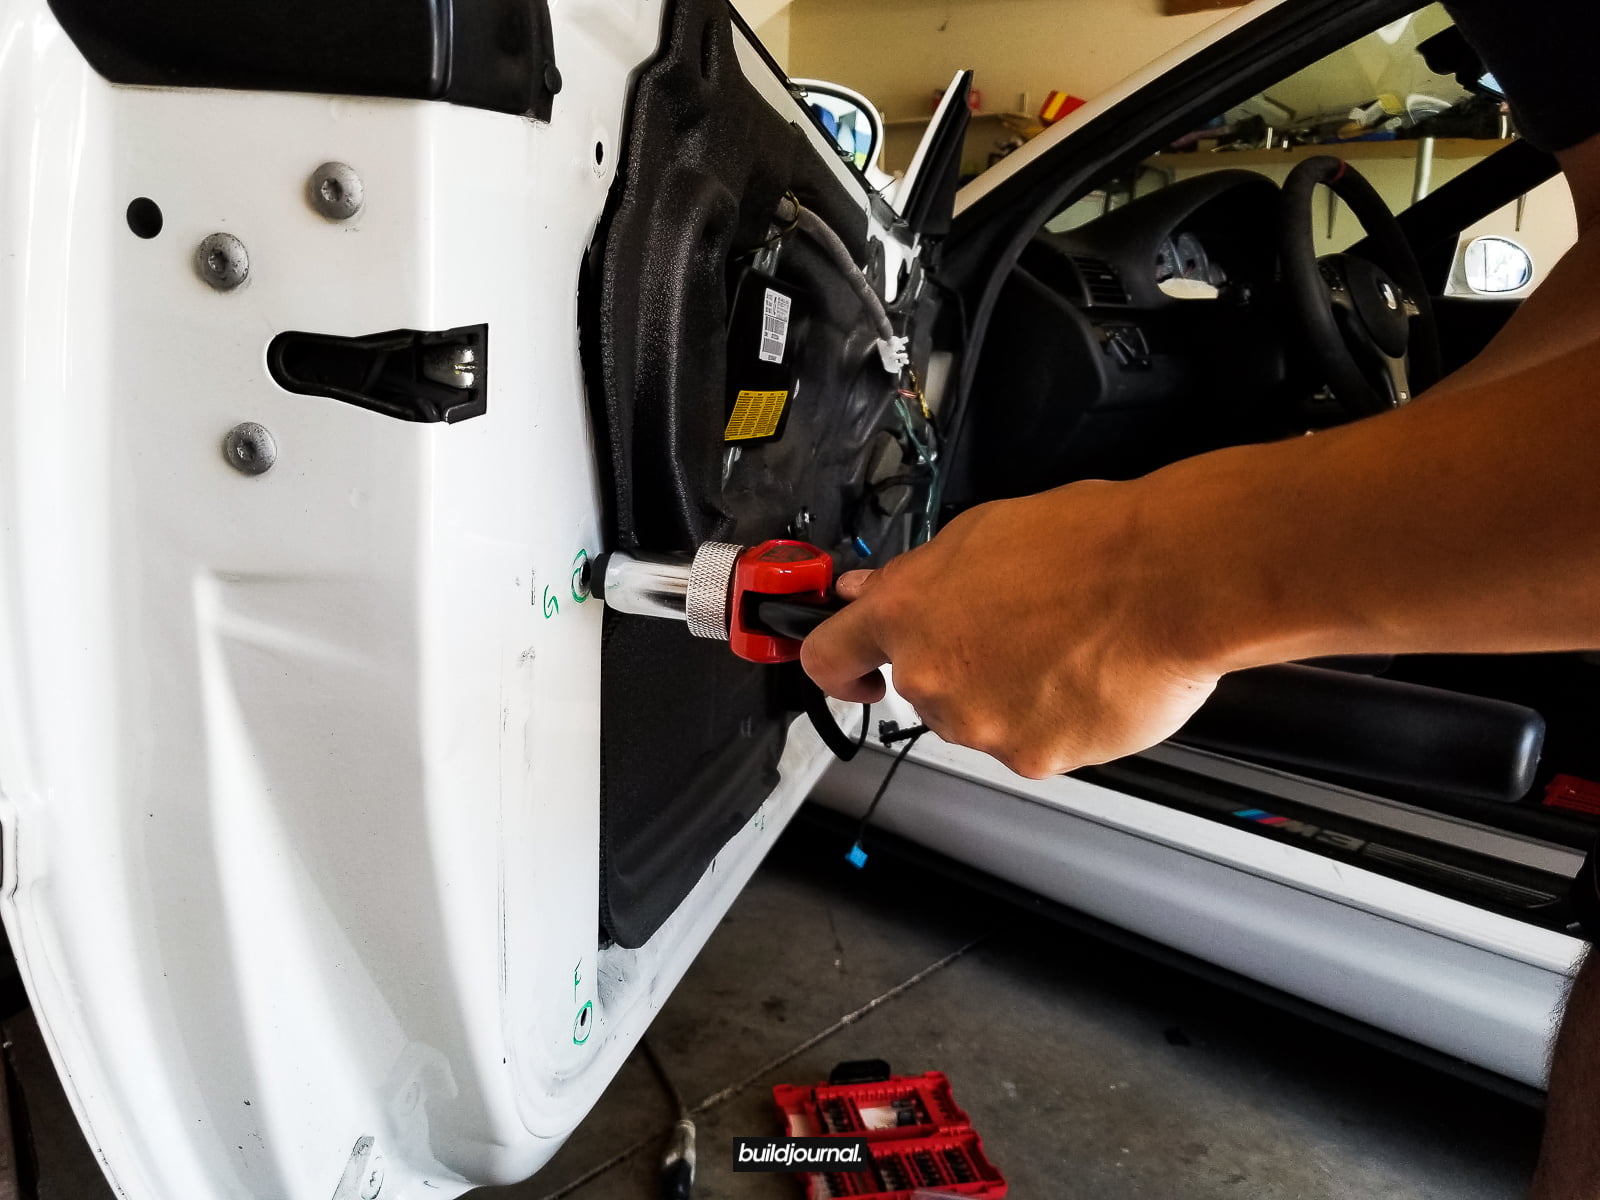
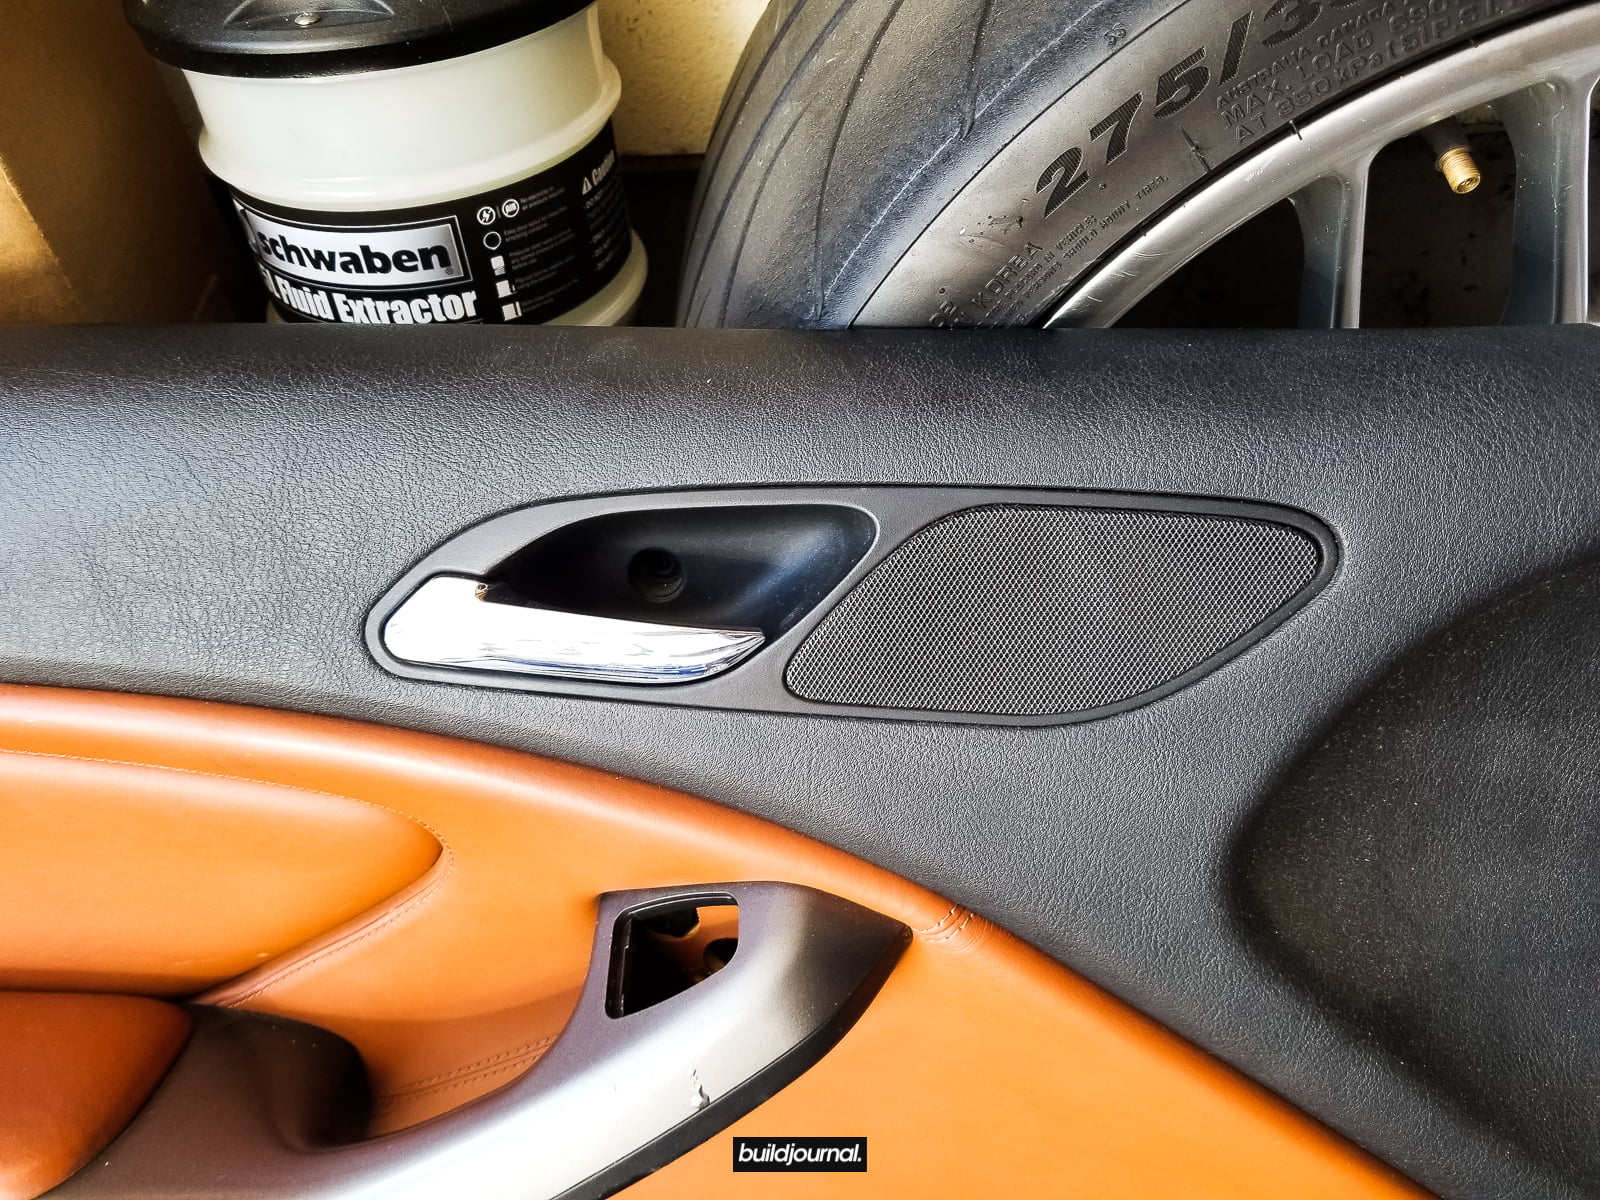
1. Remove stock door panel.
1.1 - There are a total of 5 bolts you need to remove using a T20 torx bit. Two are hidden. One is behind the airbag cap and the other is behind the door handle.
1.2 - Once all 5 bolts are removed, you can slowly pry the door card using a plastic pry tool. I started from the bottom and worked my way to the top. The door card is held in by multiple plastic clips. There may be adhesive around the edges so be careful.
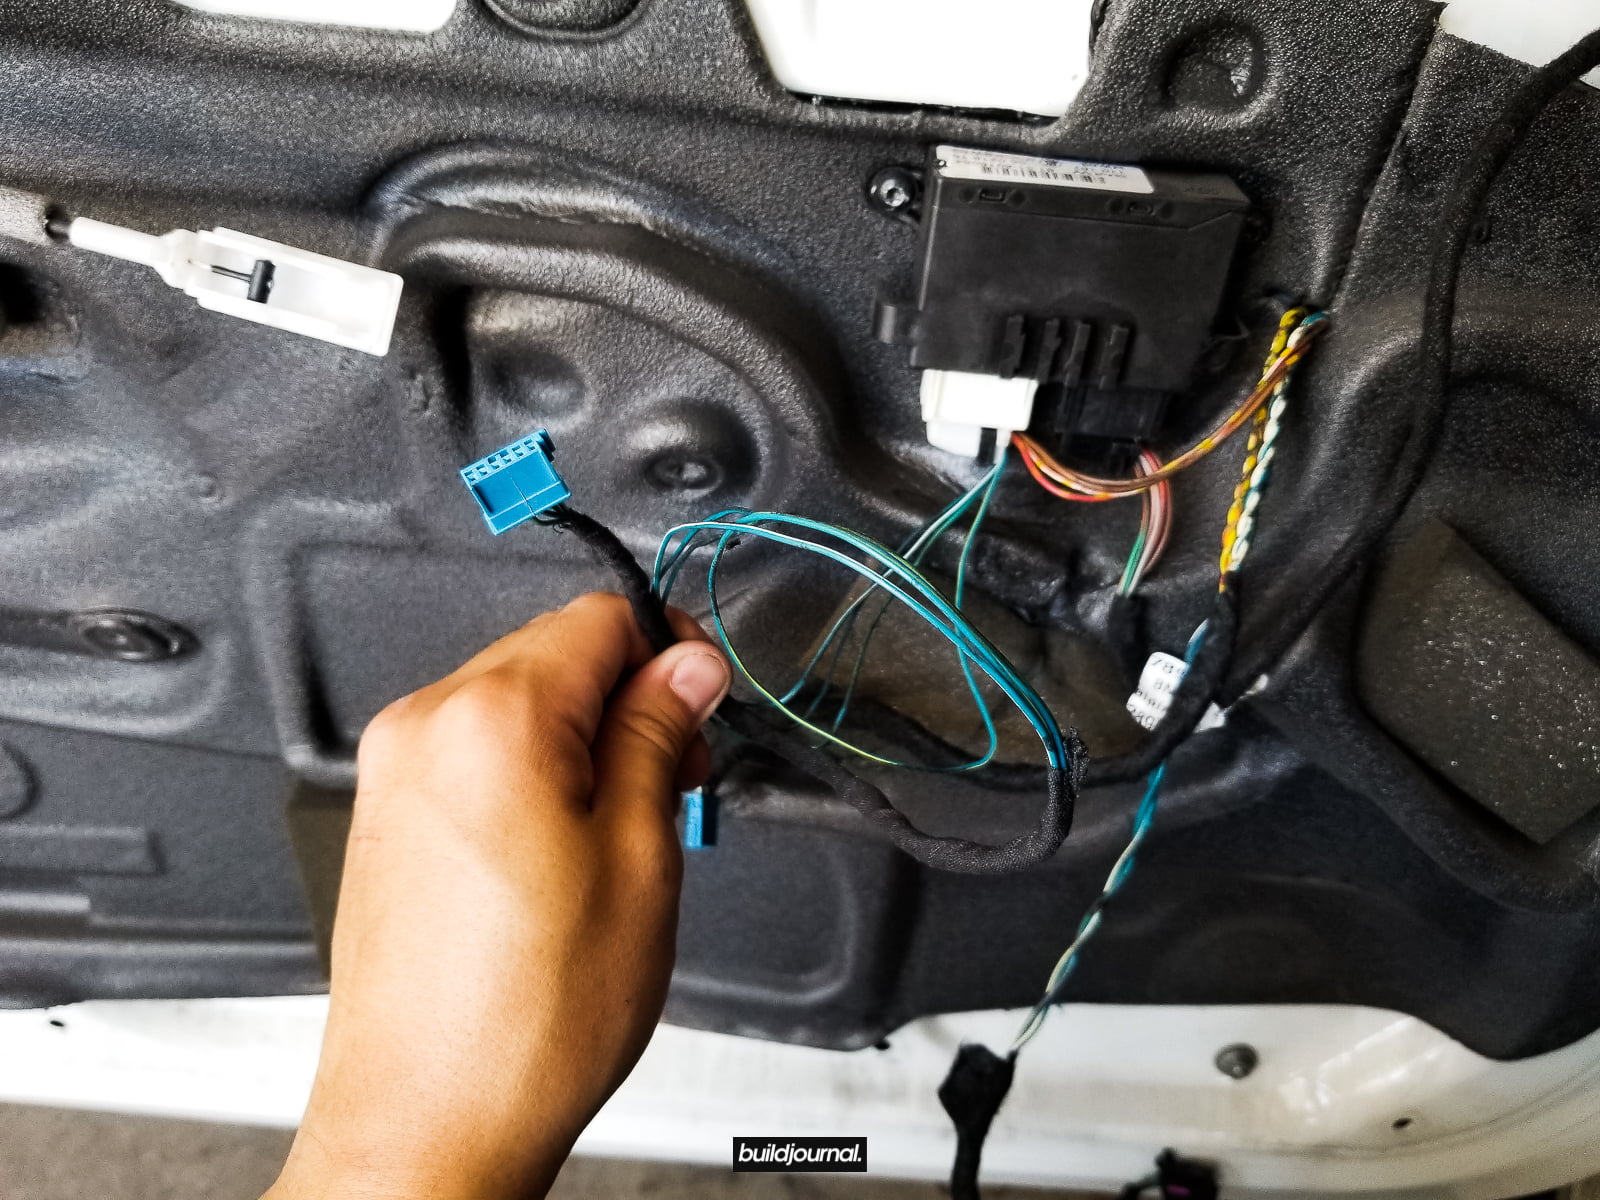
⚠️ There are wires connected to the back of the door card so do not pull directly!
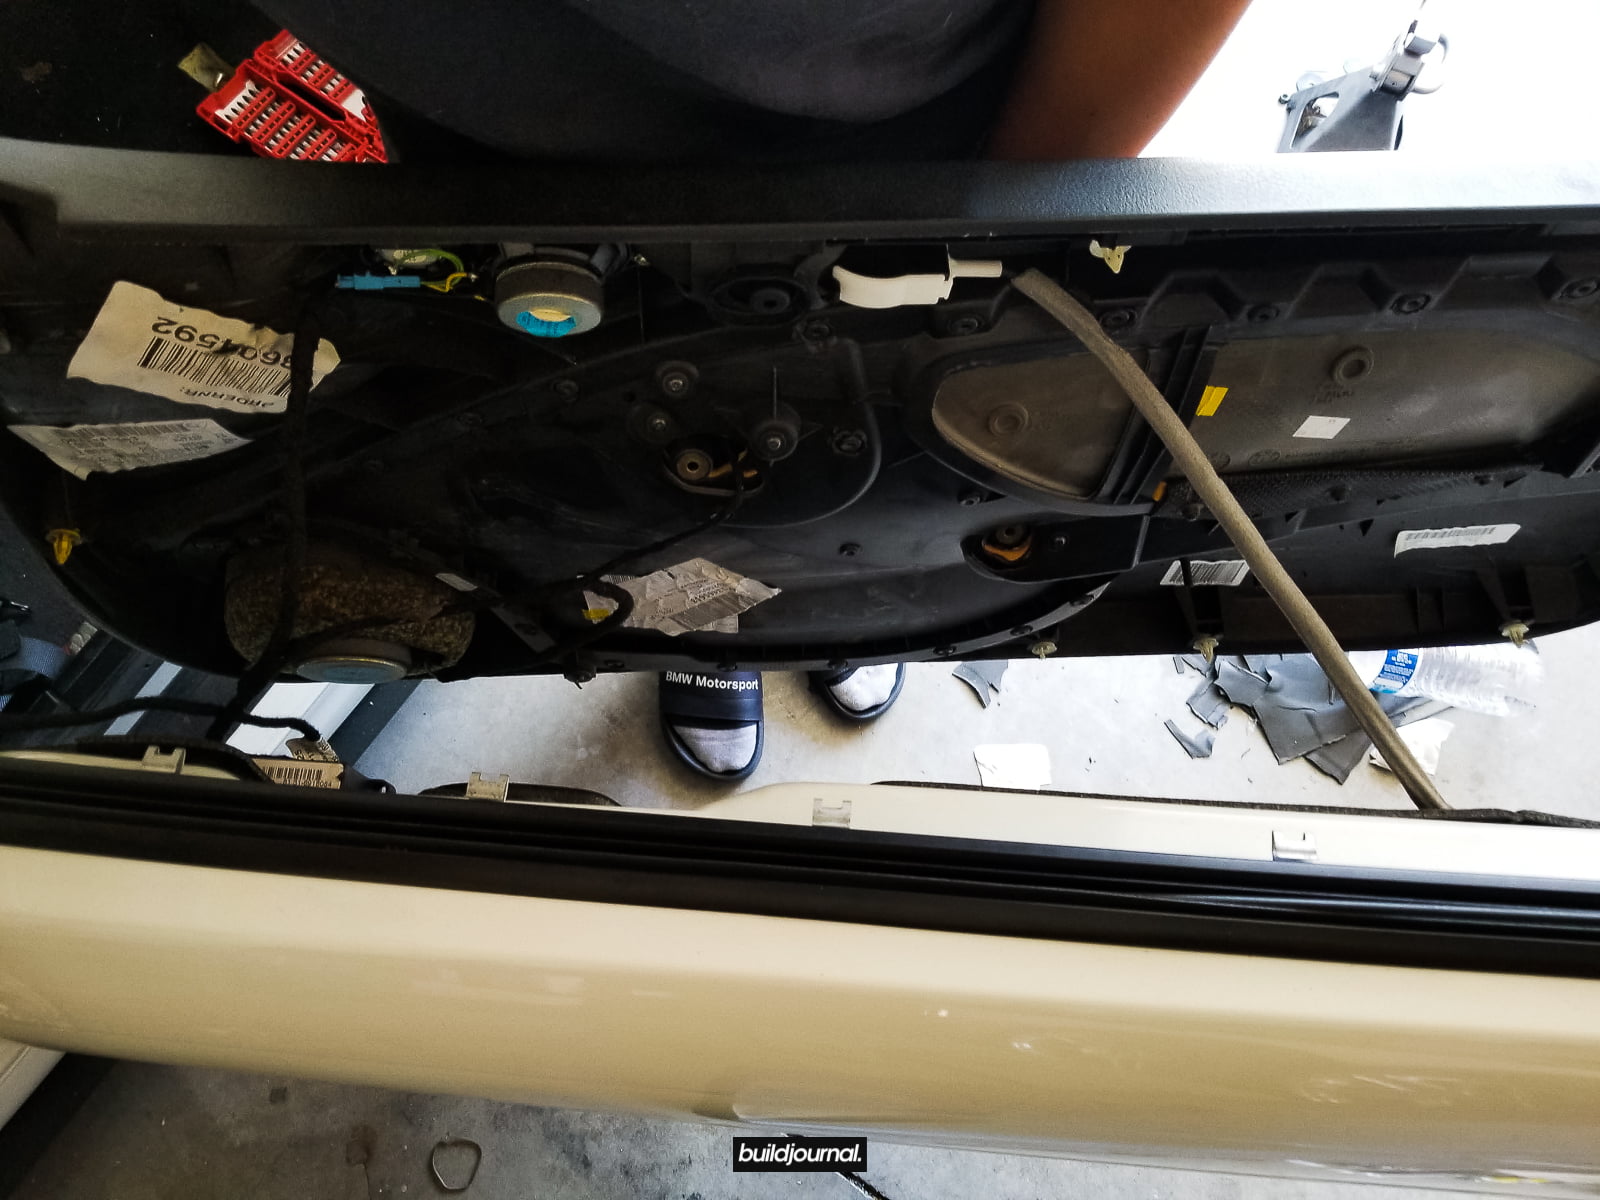
1.3 - Disconnect the speaker cable and remove the door latch wire that is connected to the handle. There are a total of 3 plugs and 1 door latch wire.
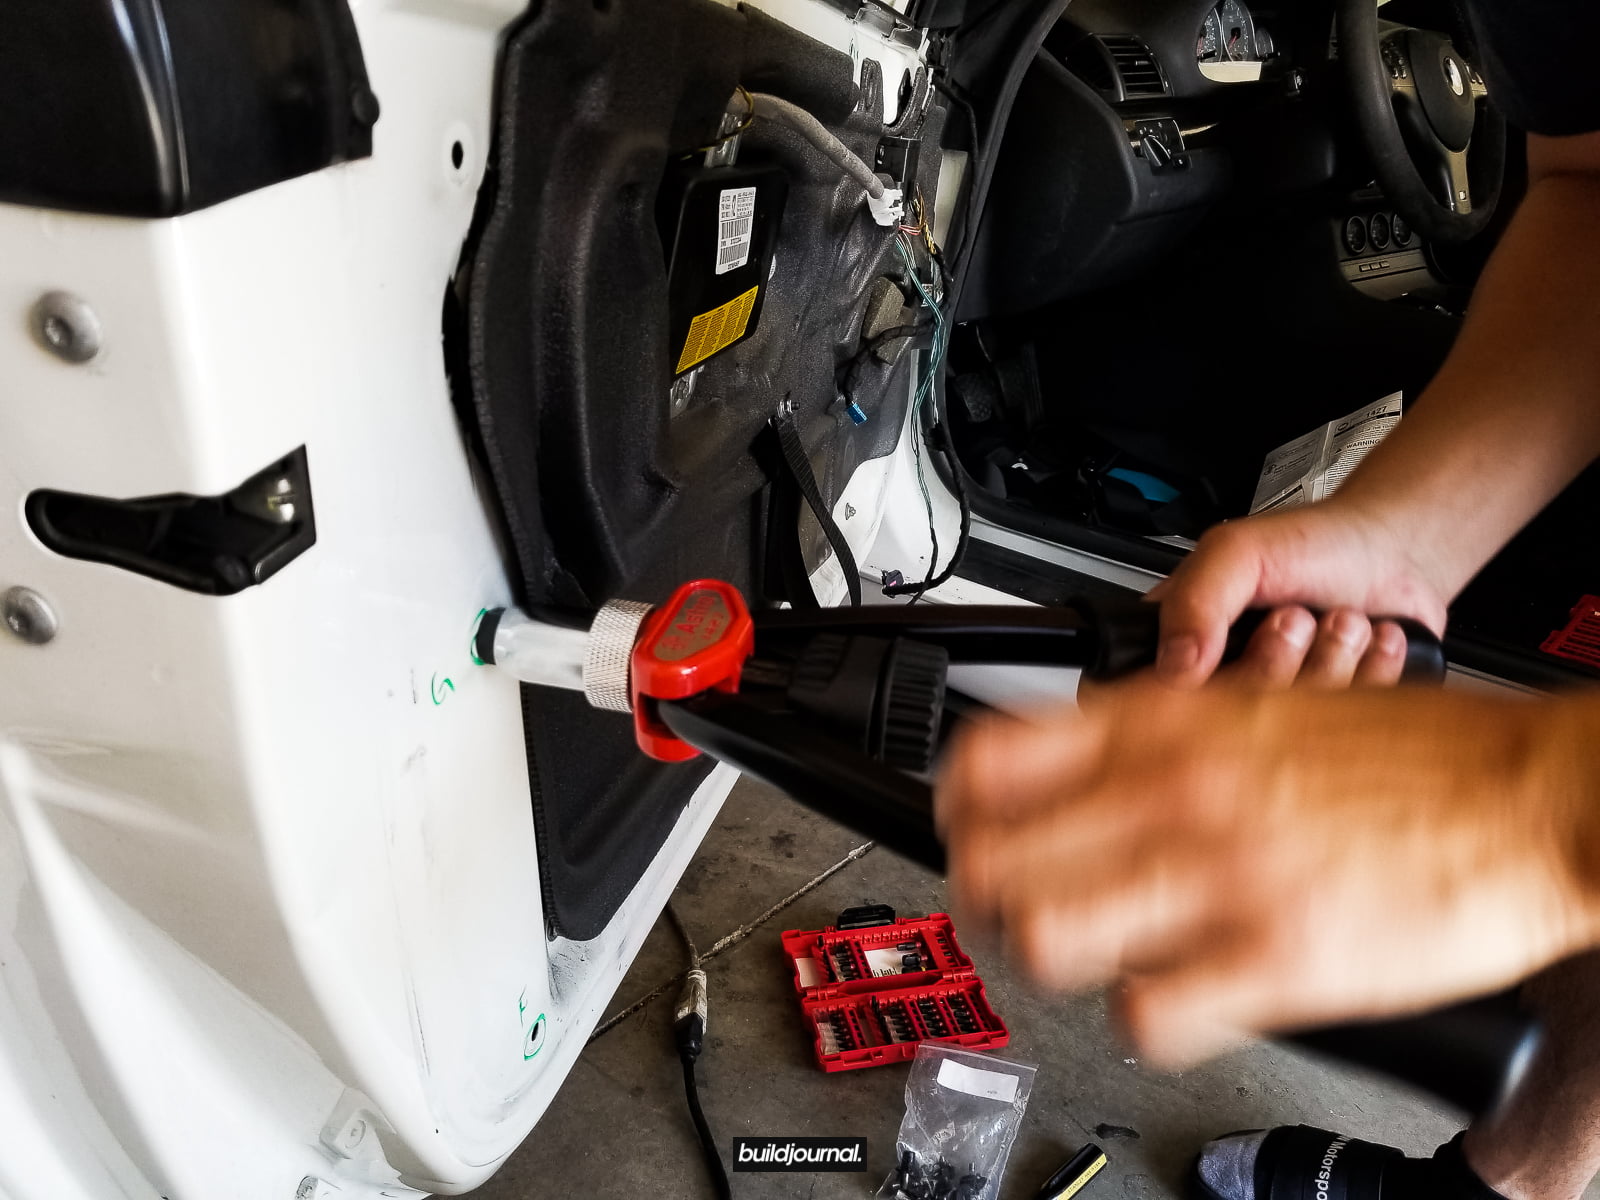
2. Insert thread-sert and stand off.
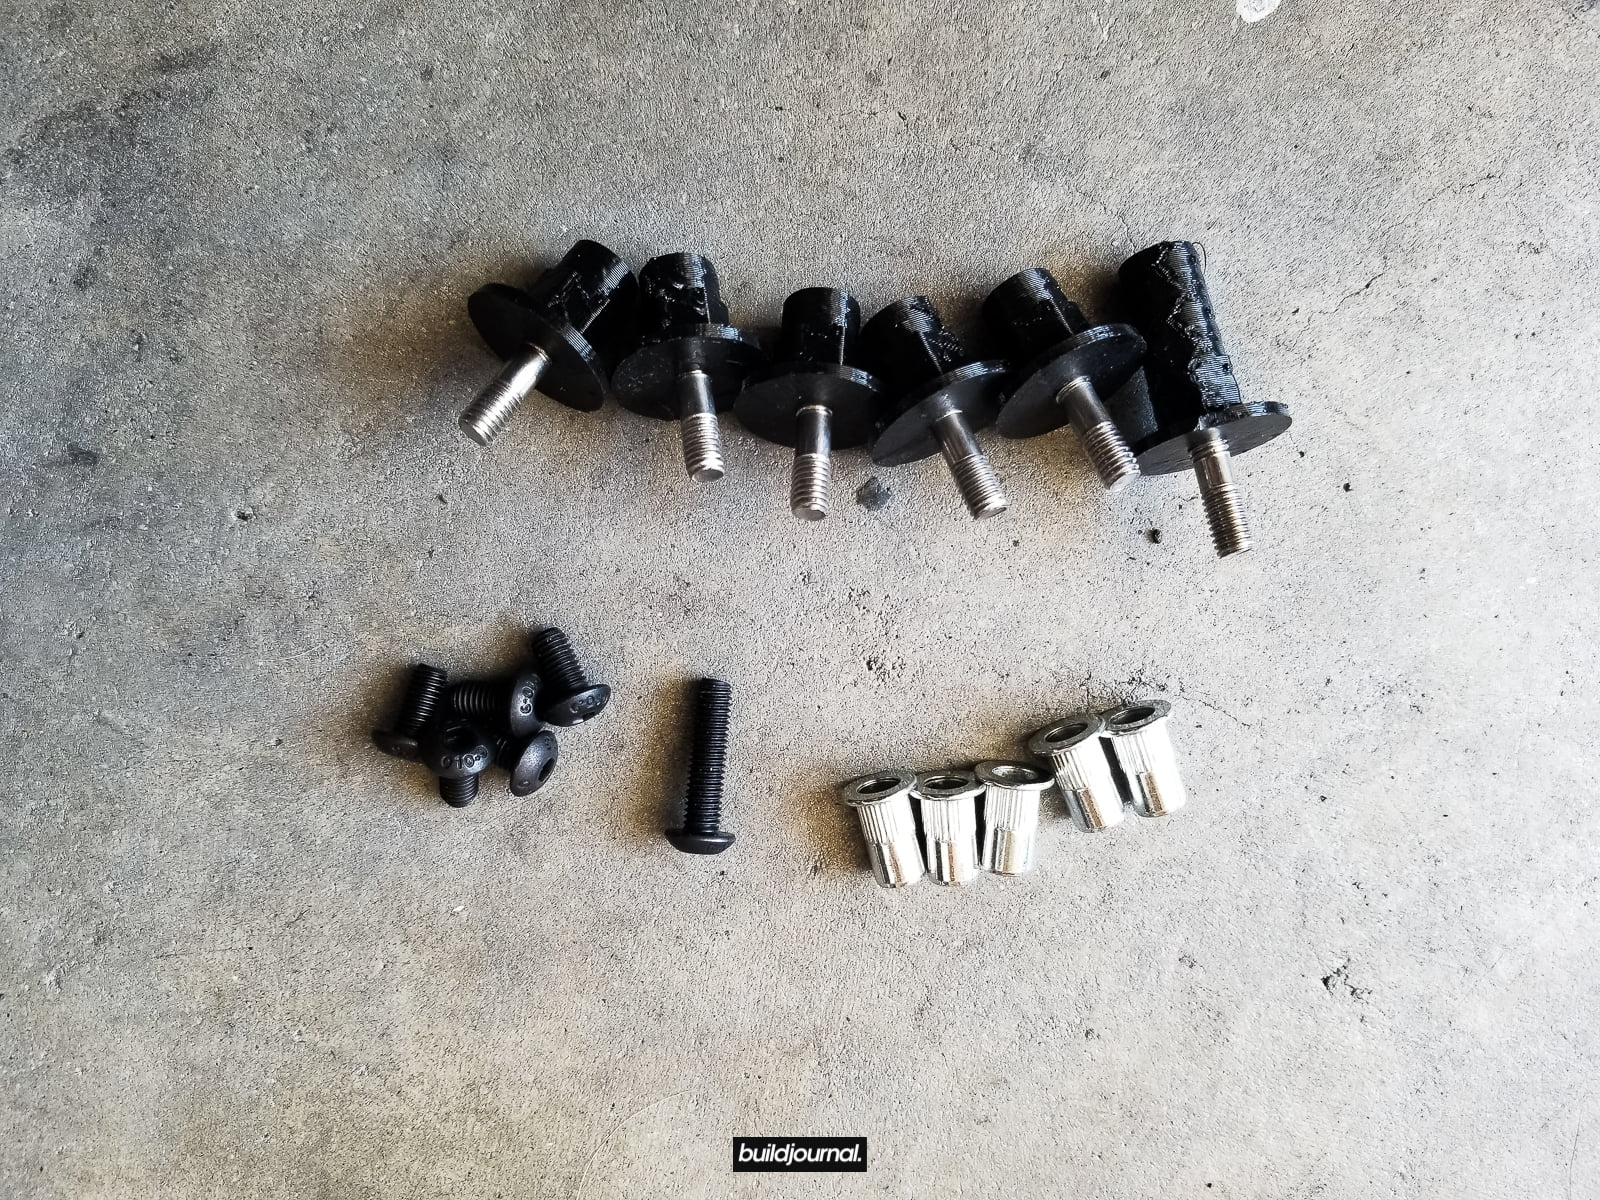
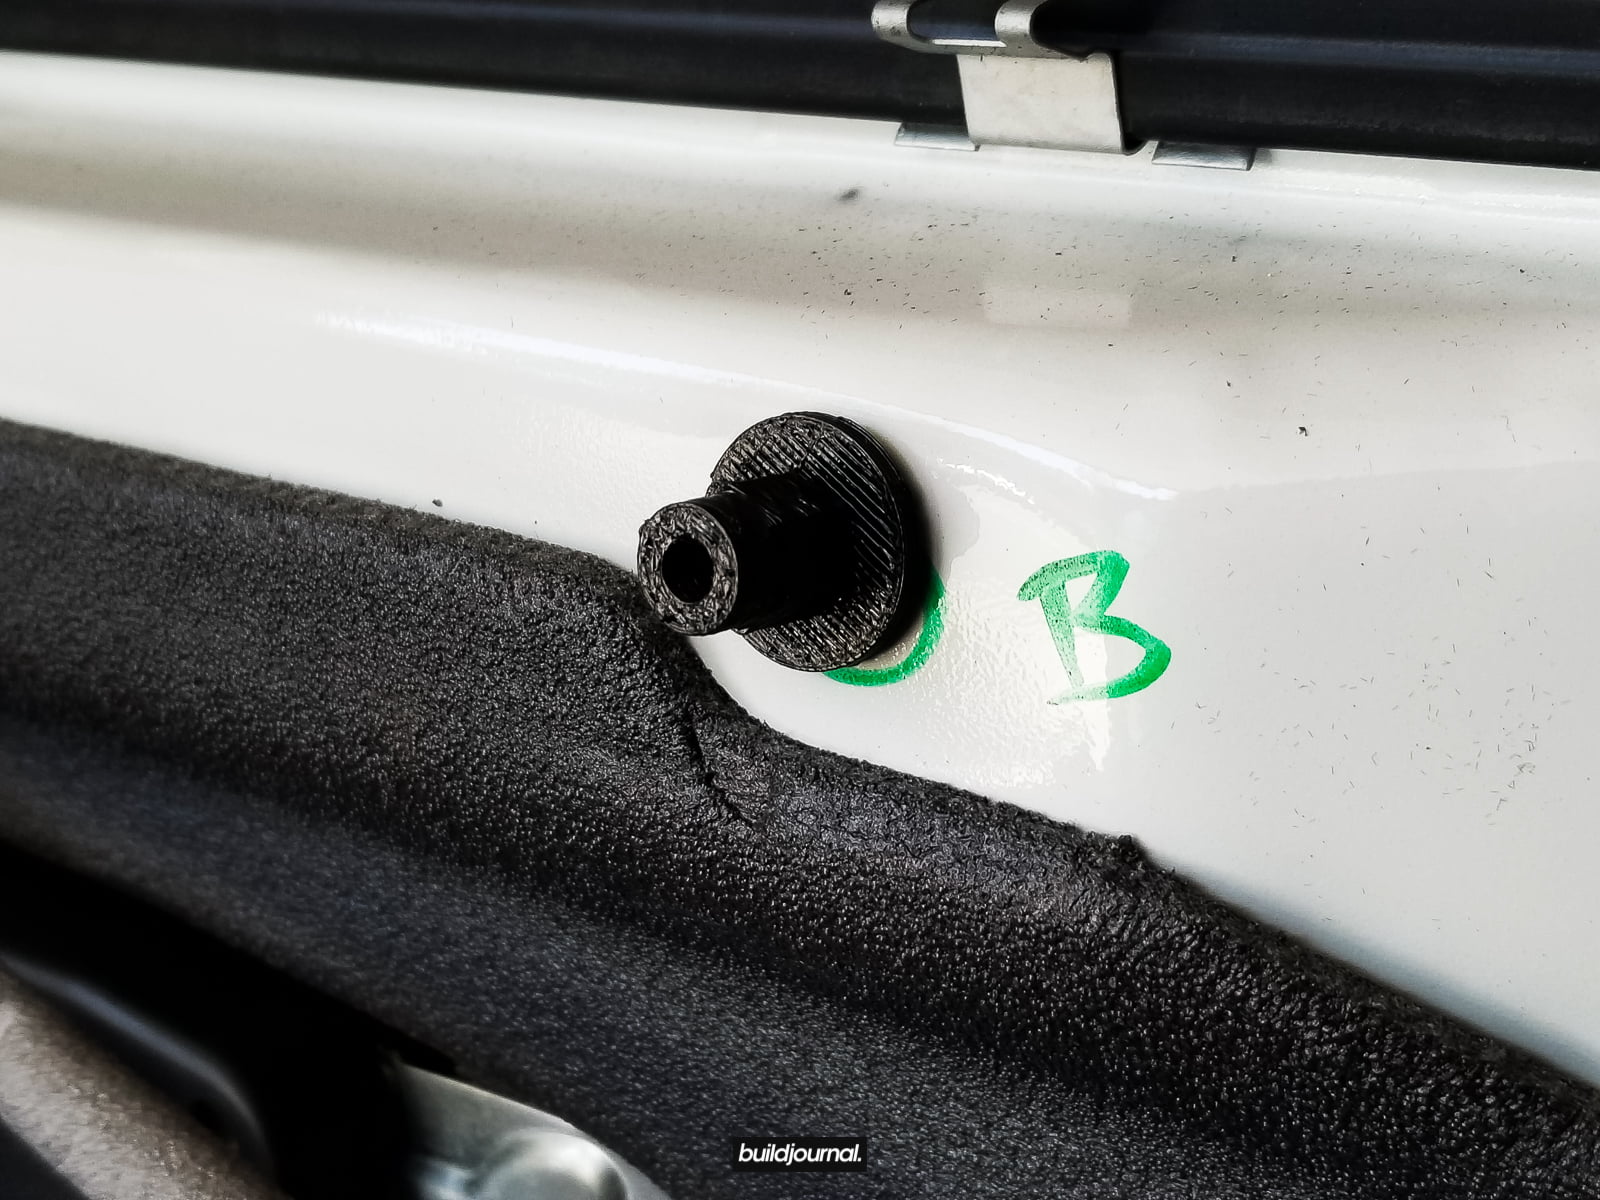
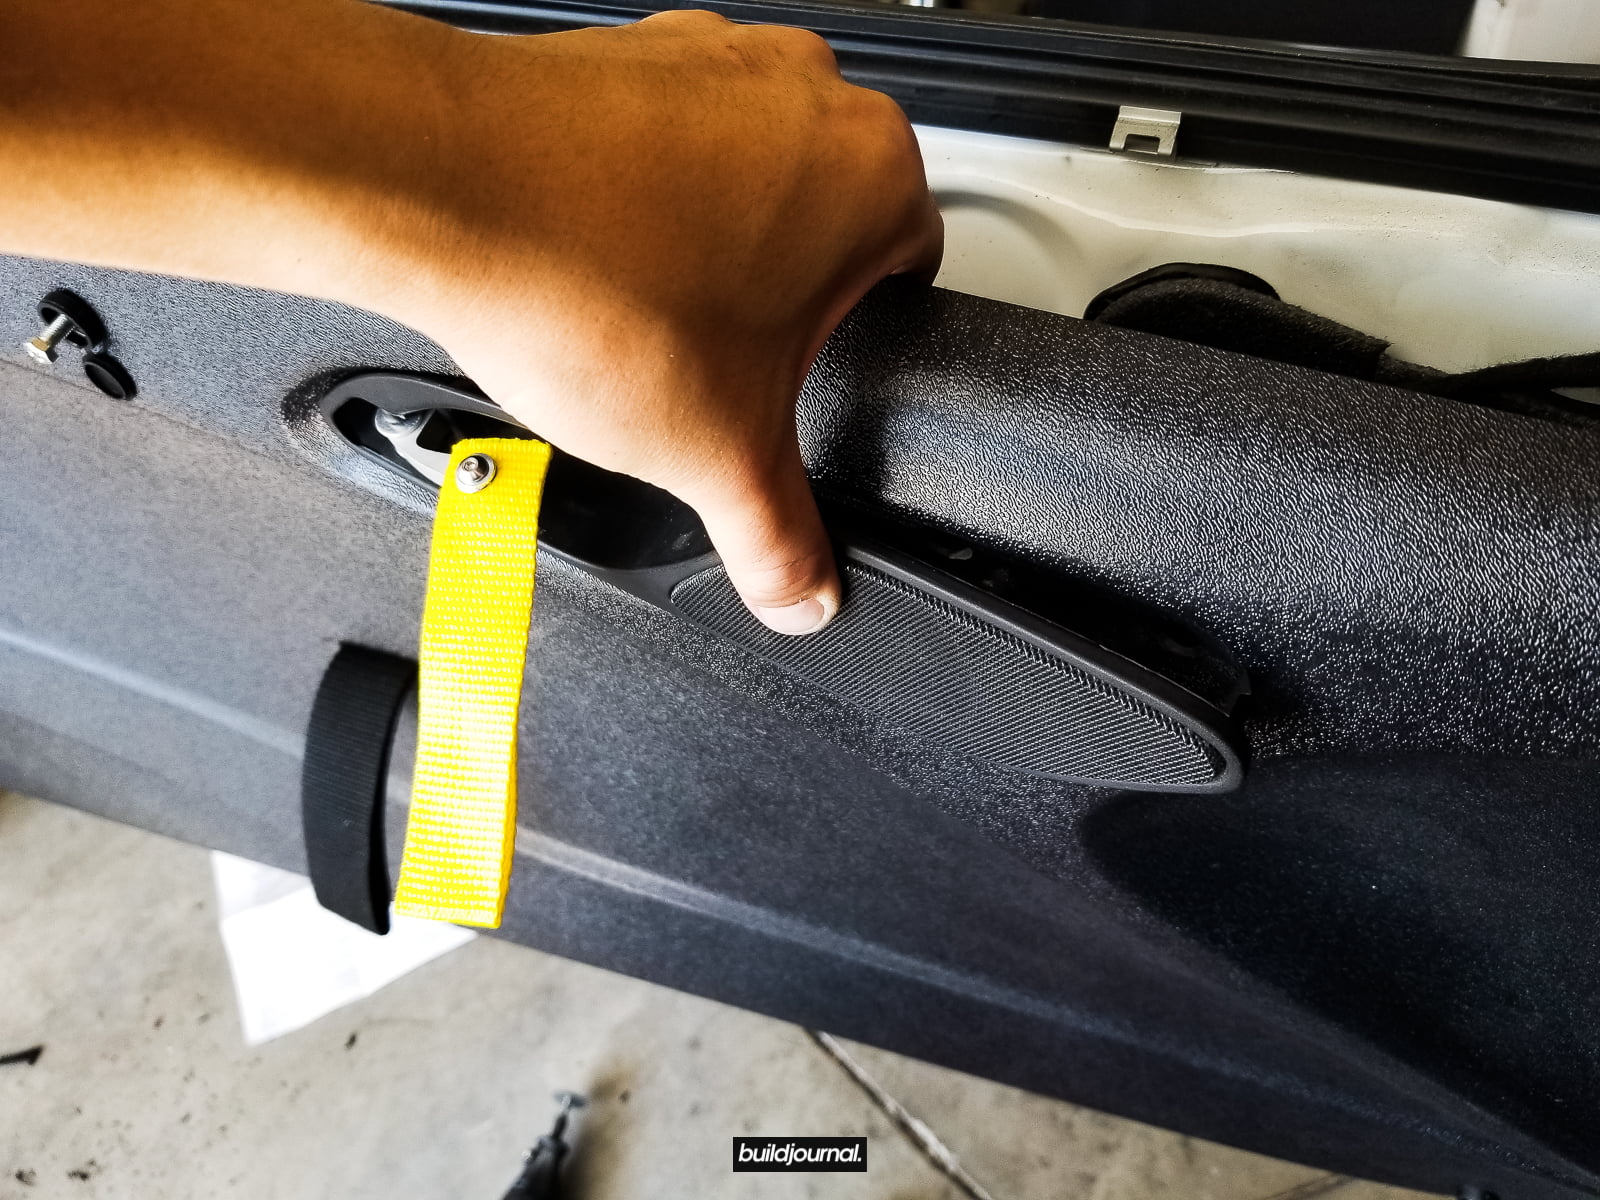
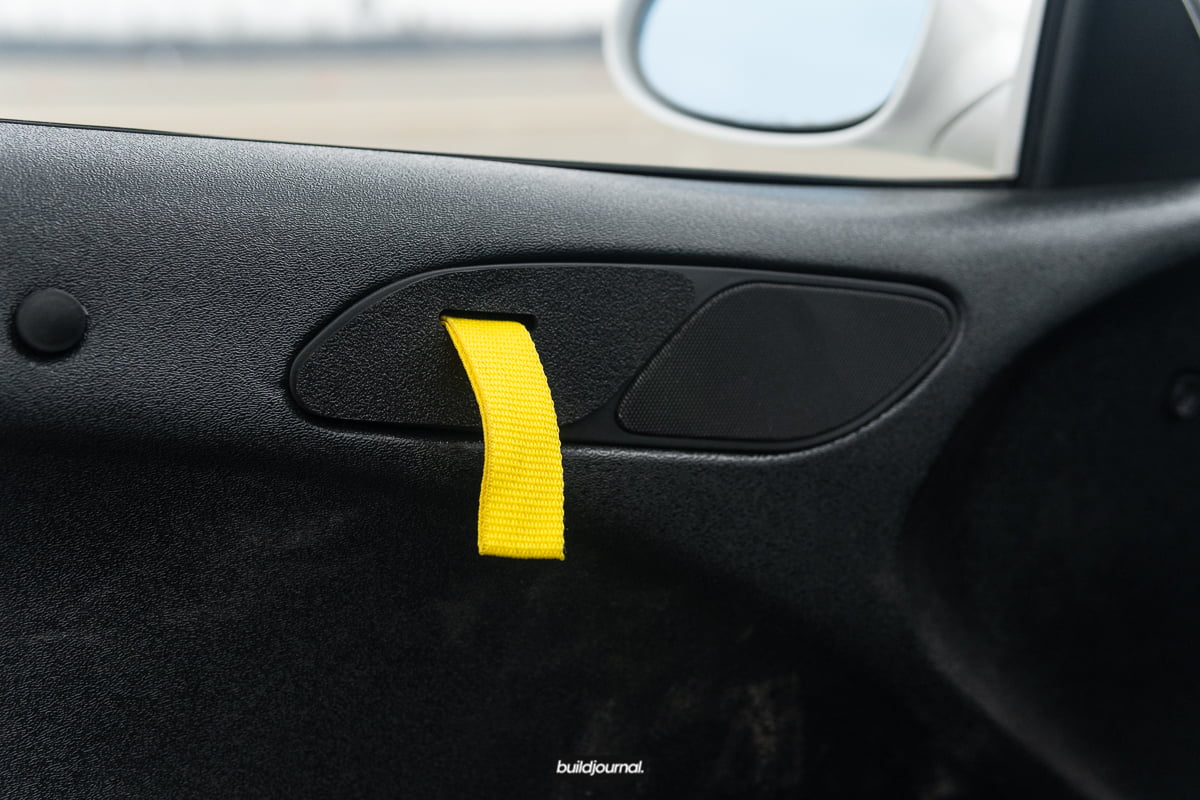
2.1 - Using the provided parts, use a hand rivet nut gun to insert the thread-sert into the existing door panel clip holes. There are a total of 7 each door. Below you can see each one labeled A-F. Now is a good time to install the pull strap for the door. You can see it below, it's the strap in the middle of the door.
⚠️ Take note section A is a different from the others.

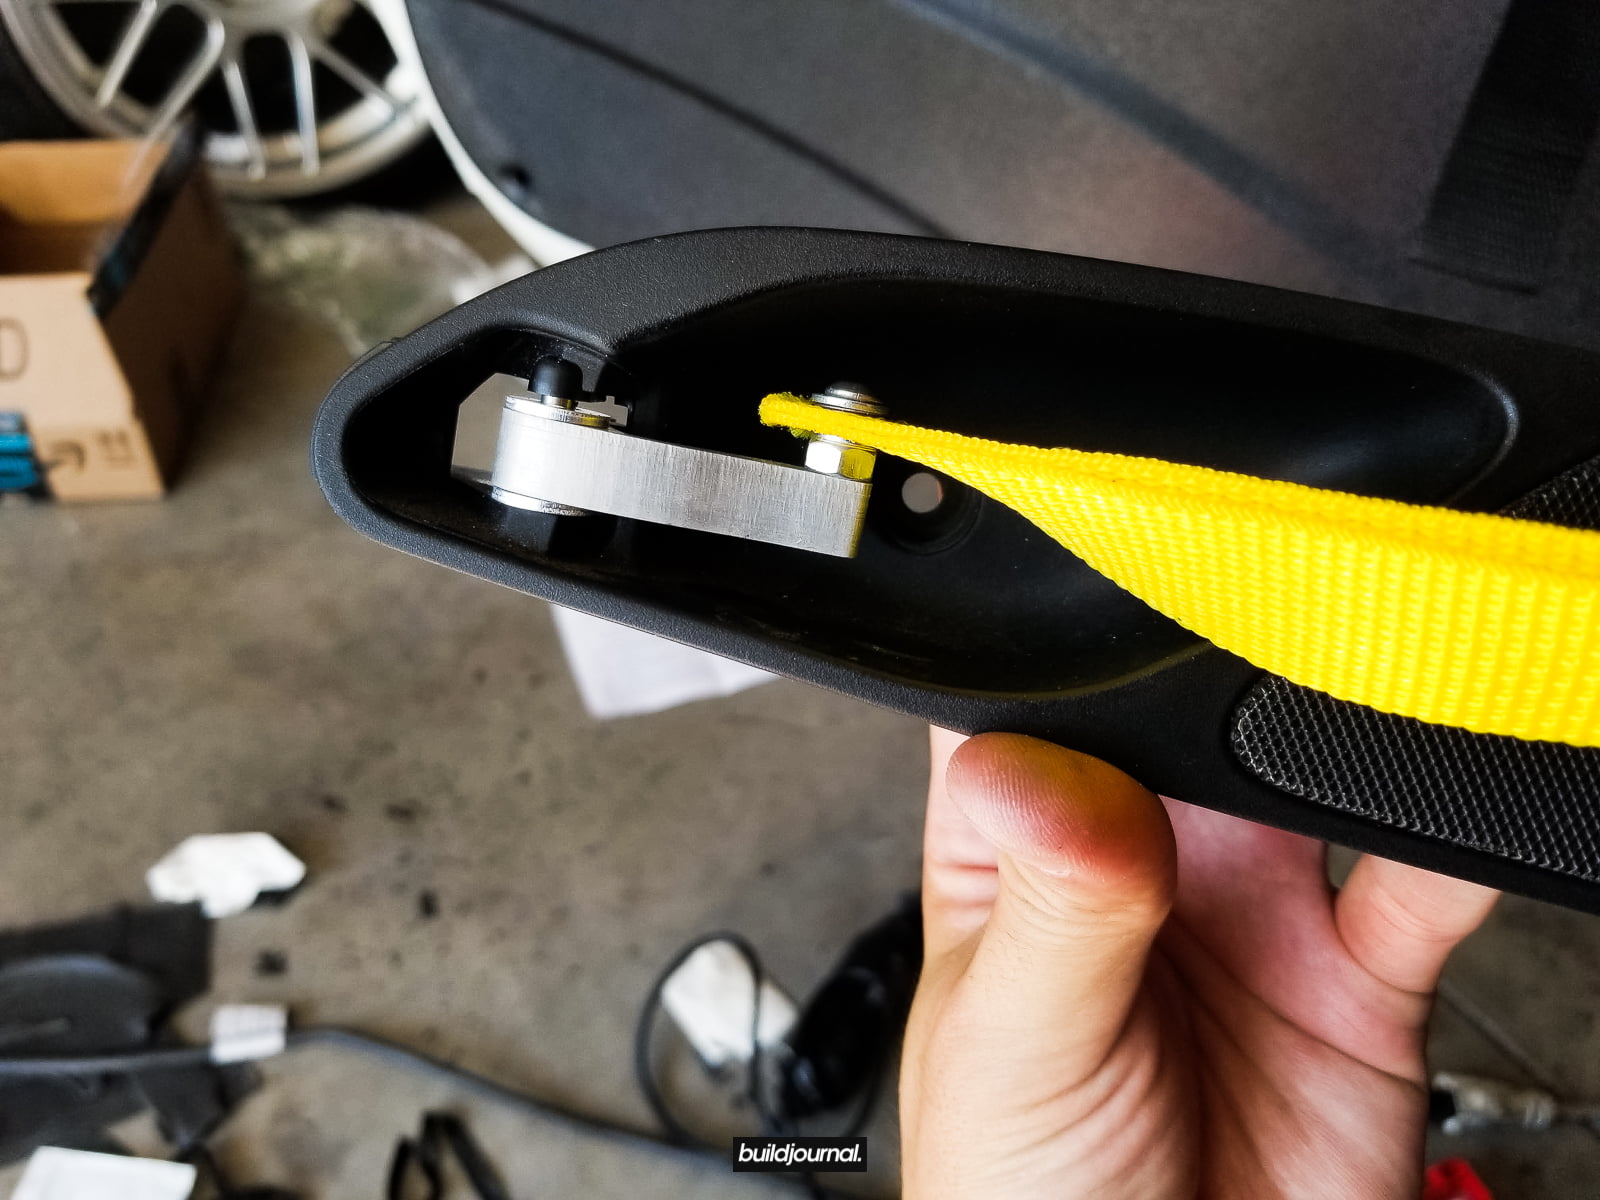
3. Install door latch pull strap.
3.1 - I ordered the HARD Motorsport Door Latch Pull Strap as well to compliment the lightweight door panels. You will re-use your stock speaker/handle housing from your OEM door card.
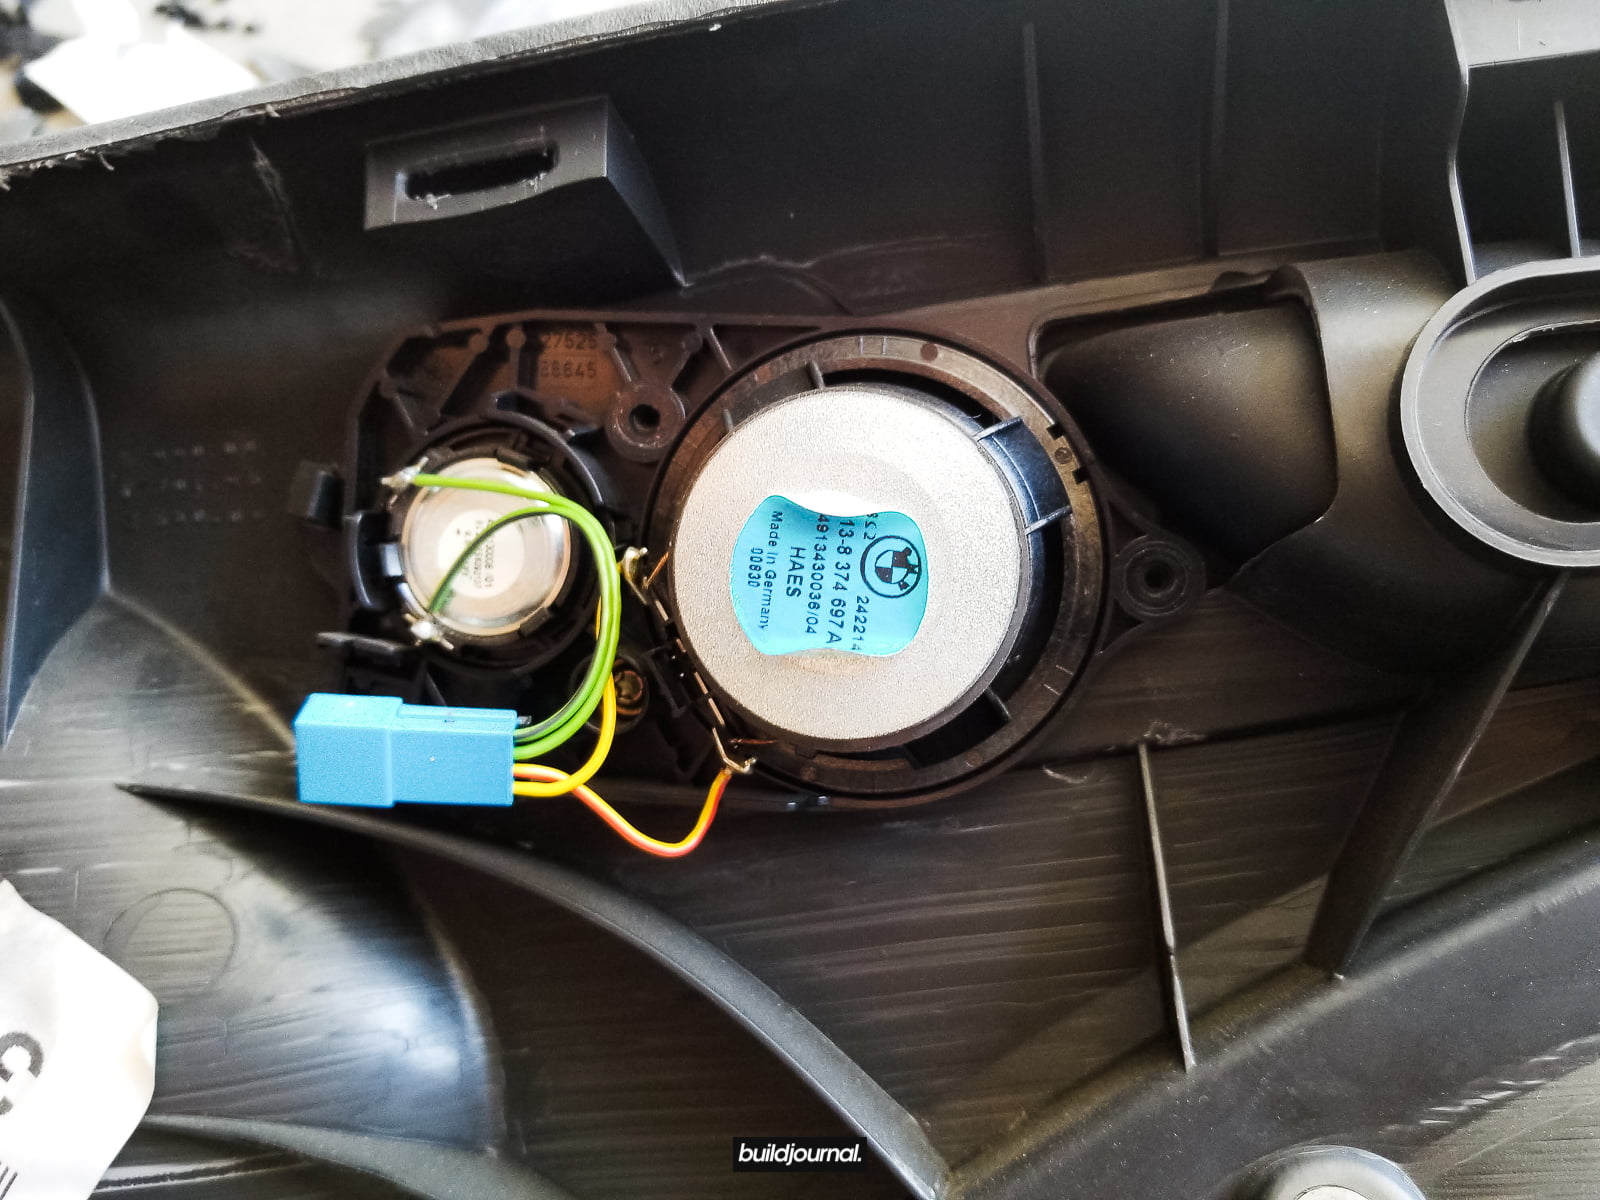
3.2 - Remove the 3 torx screws holding the tweeter. (I forget which size this is)
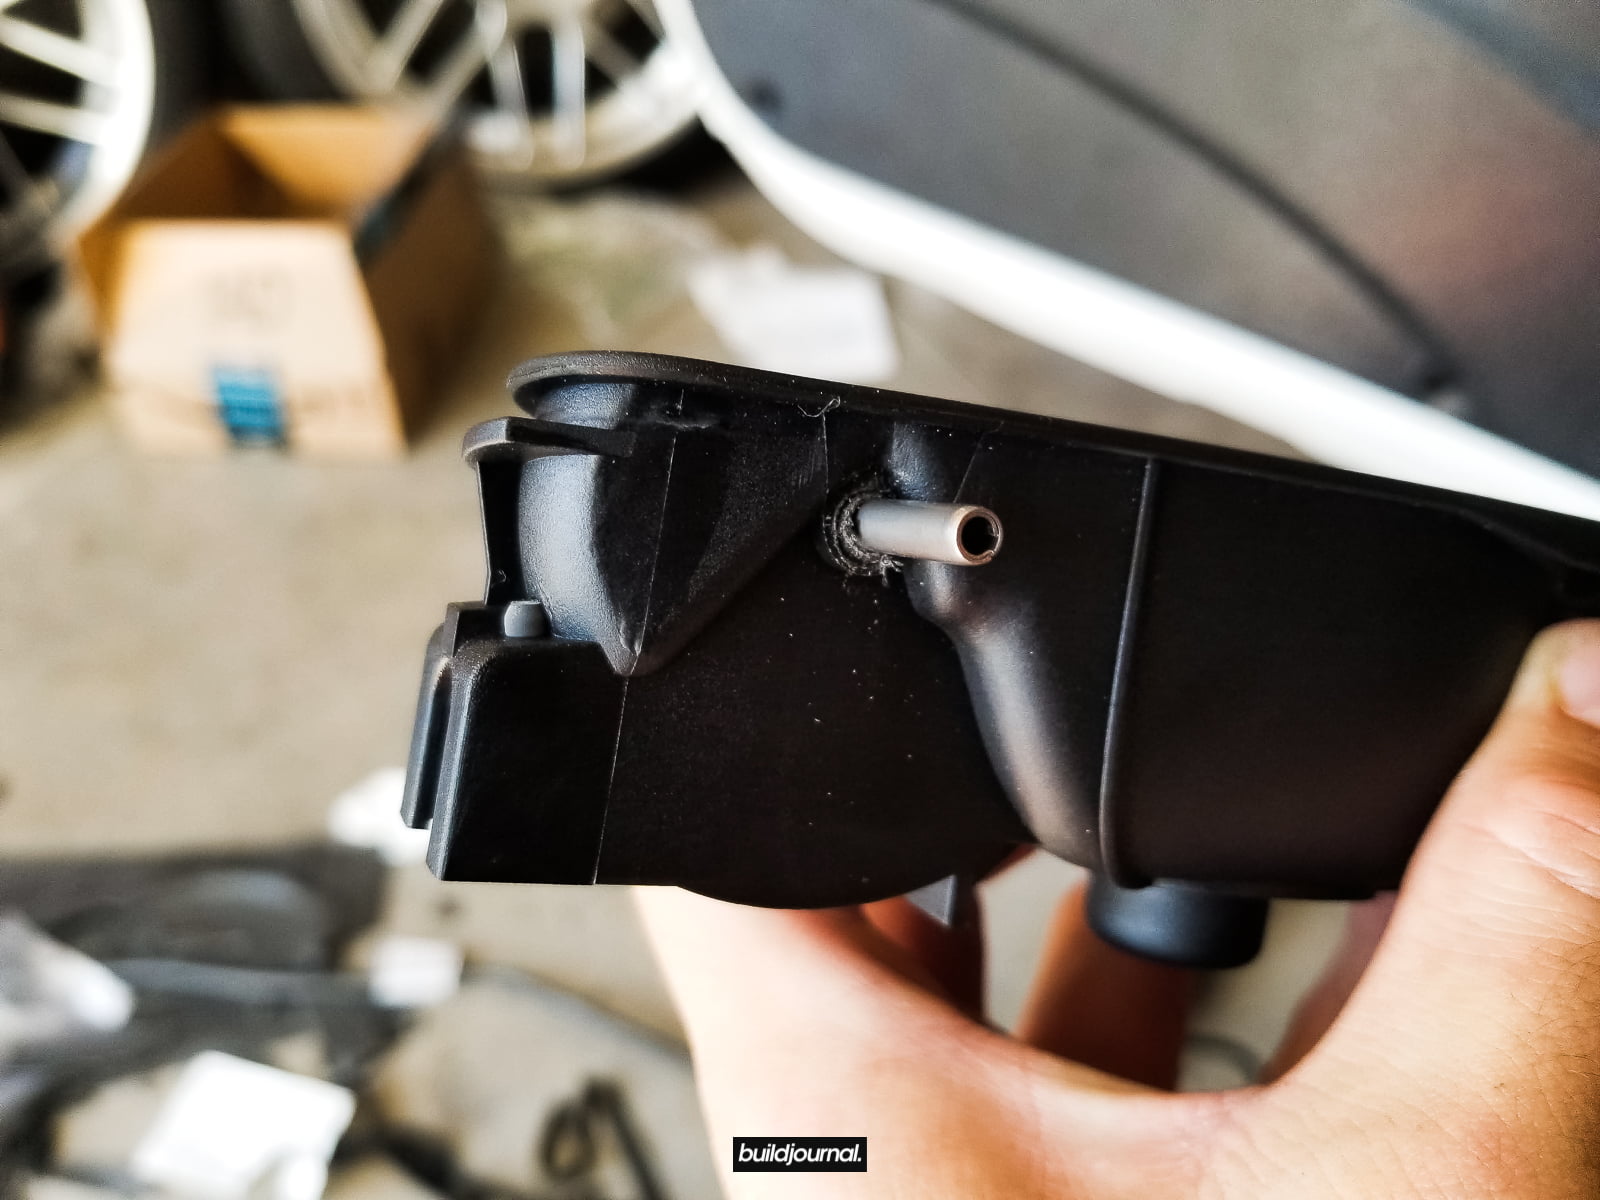
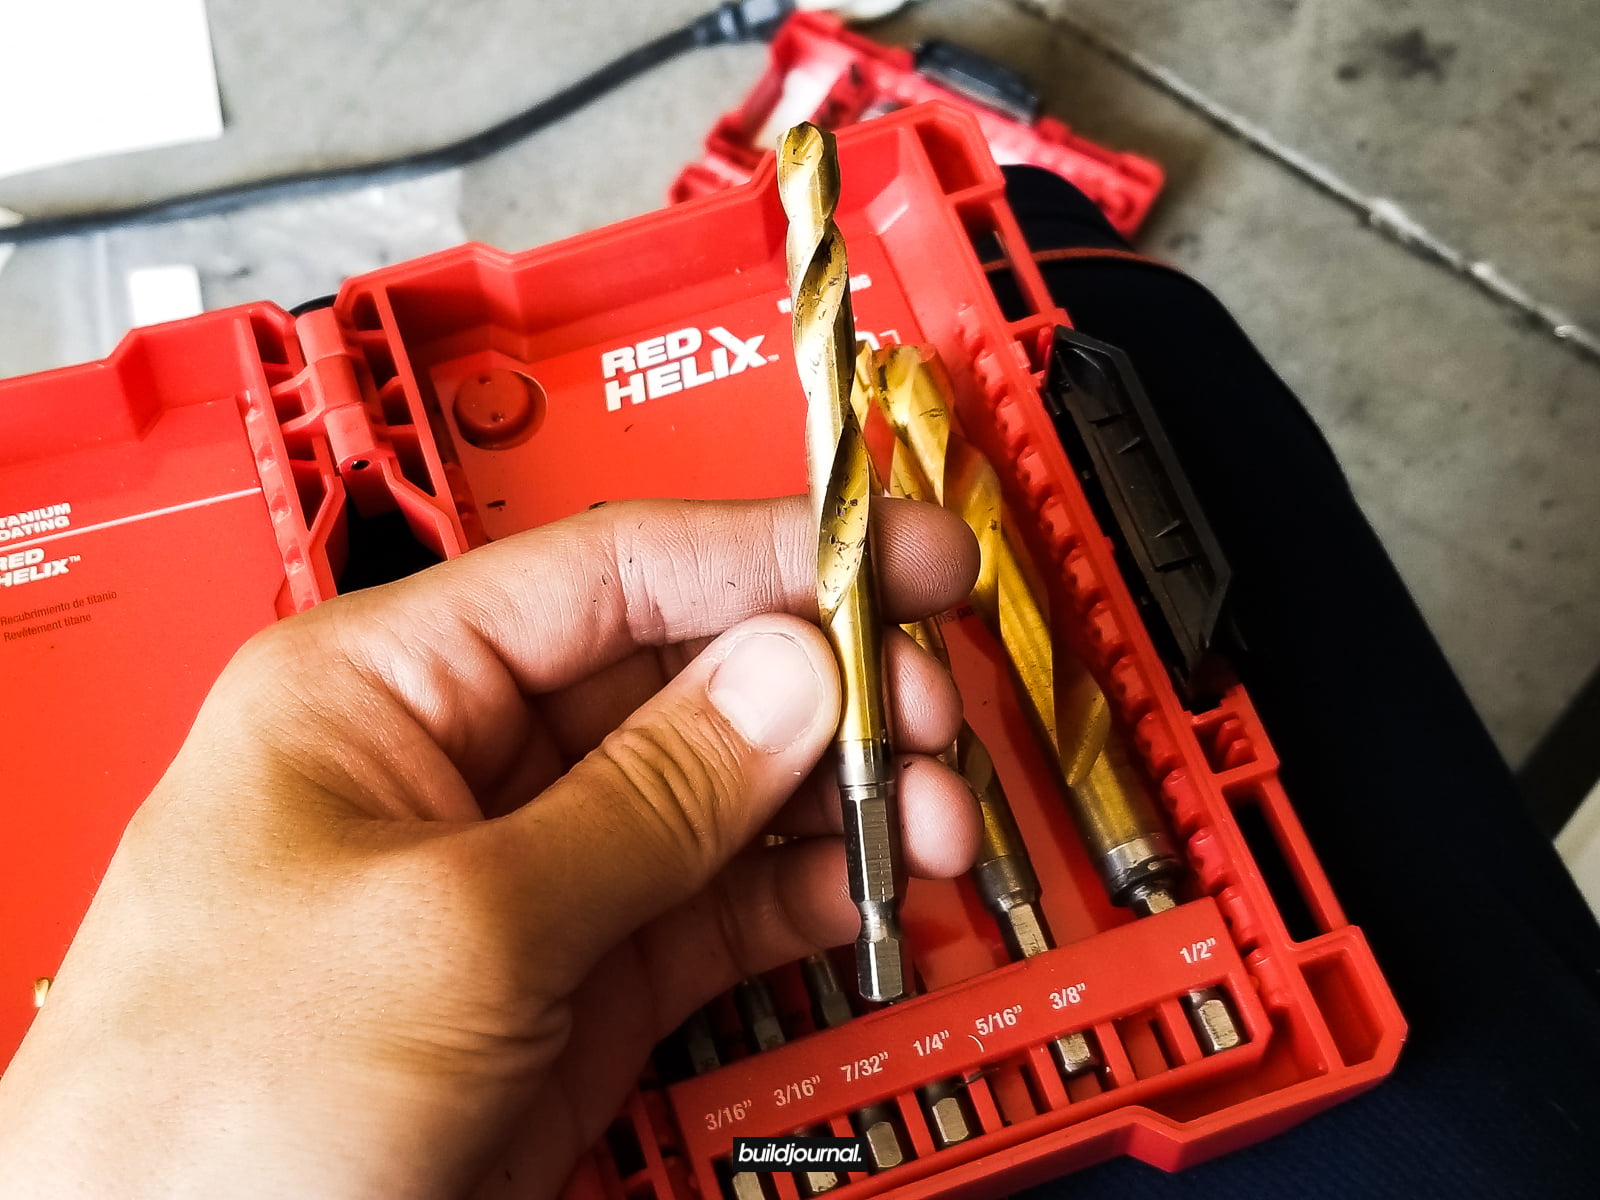
3.3 - Here's a little tricky part. You need to remove the metal swivel rod that holds the handle and the plastic housing. In order to do so, you must drill (bit size included with directions) through the bottom end of the metal rod to enlarge and bust open the rod. Then tweak the drill bit inside the rod to "catch" the rod with the edges and then pull out.
3.4 - Install the new door latch pull strap. After this is done, set this aside and work on the door panels.
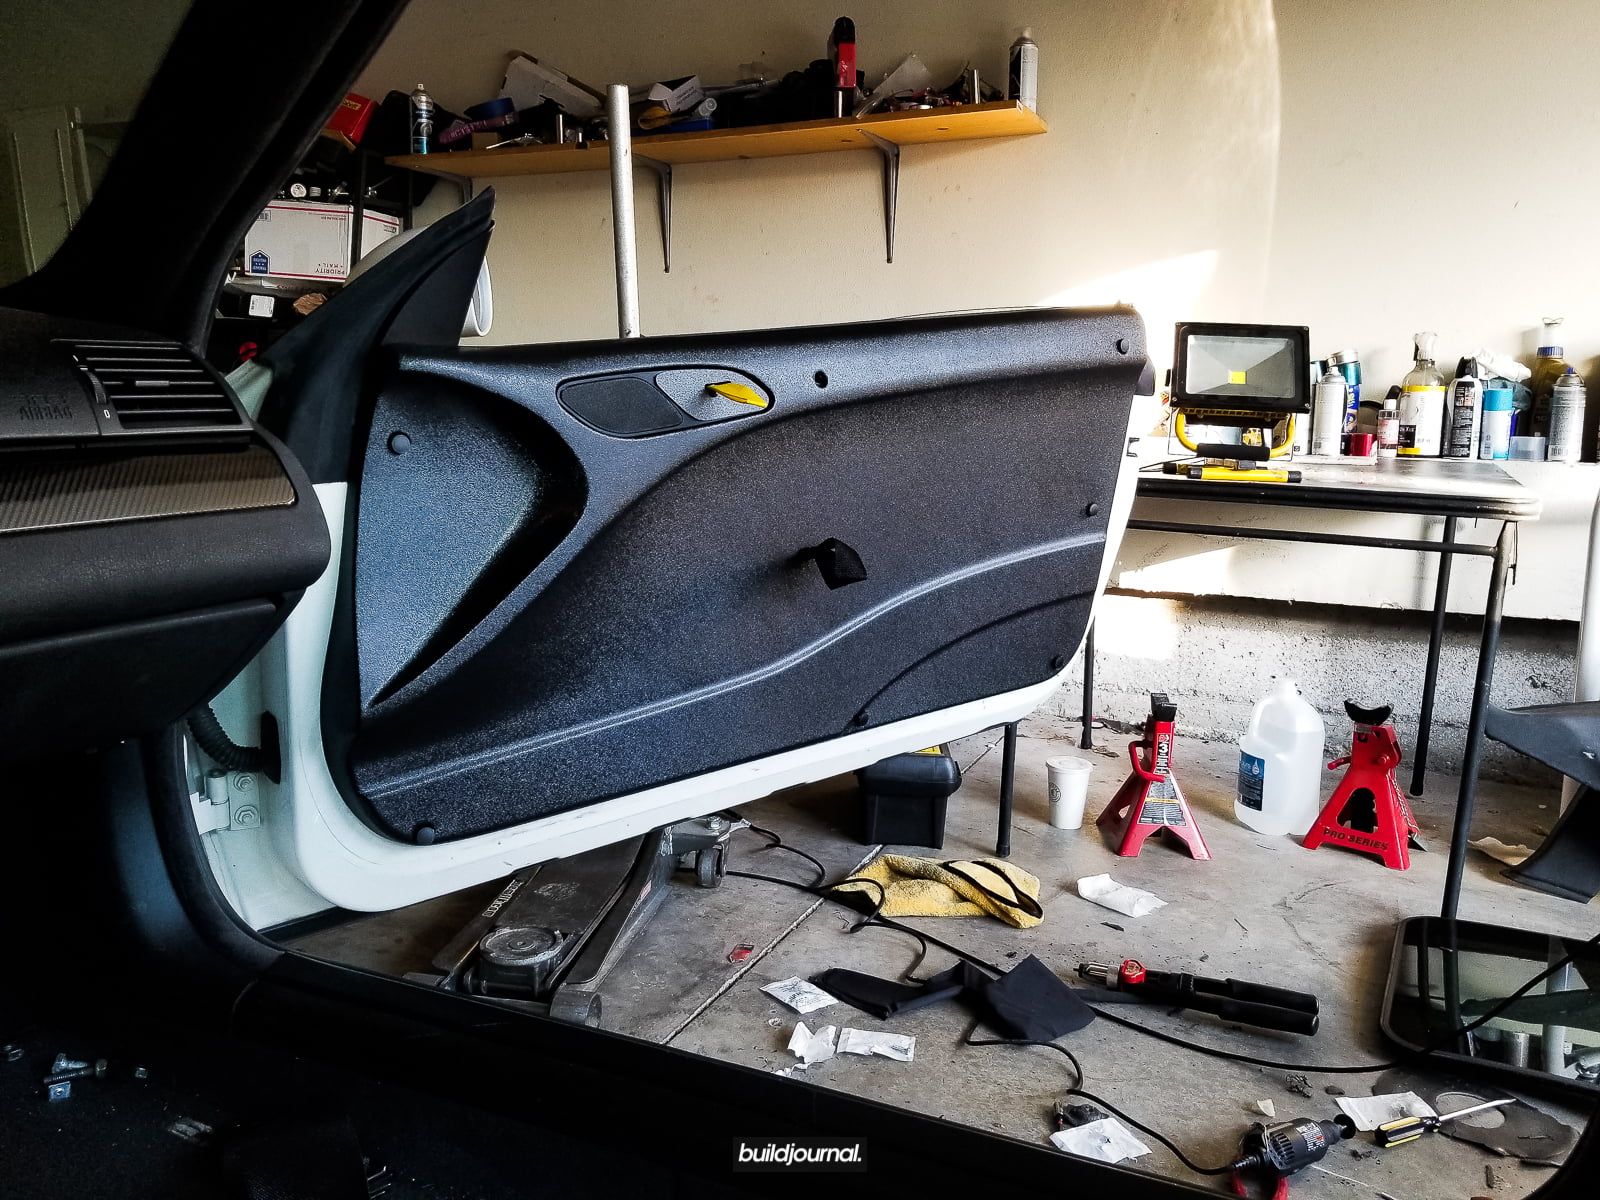
4. Install the HARD Motorsport lightweight door card.
4.1 - Test fit the door card first and see if you can insert the door speaker/handle housing in the cut area. Mine required a bit of trimming to fit one side.
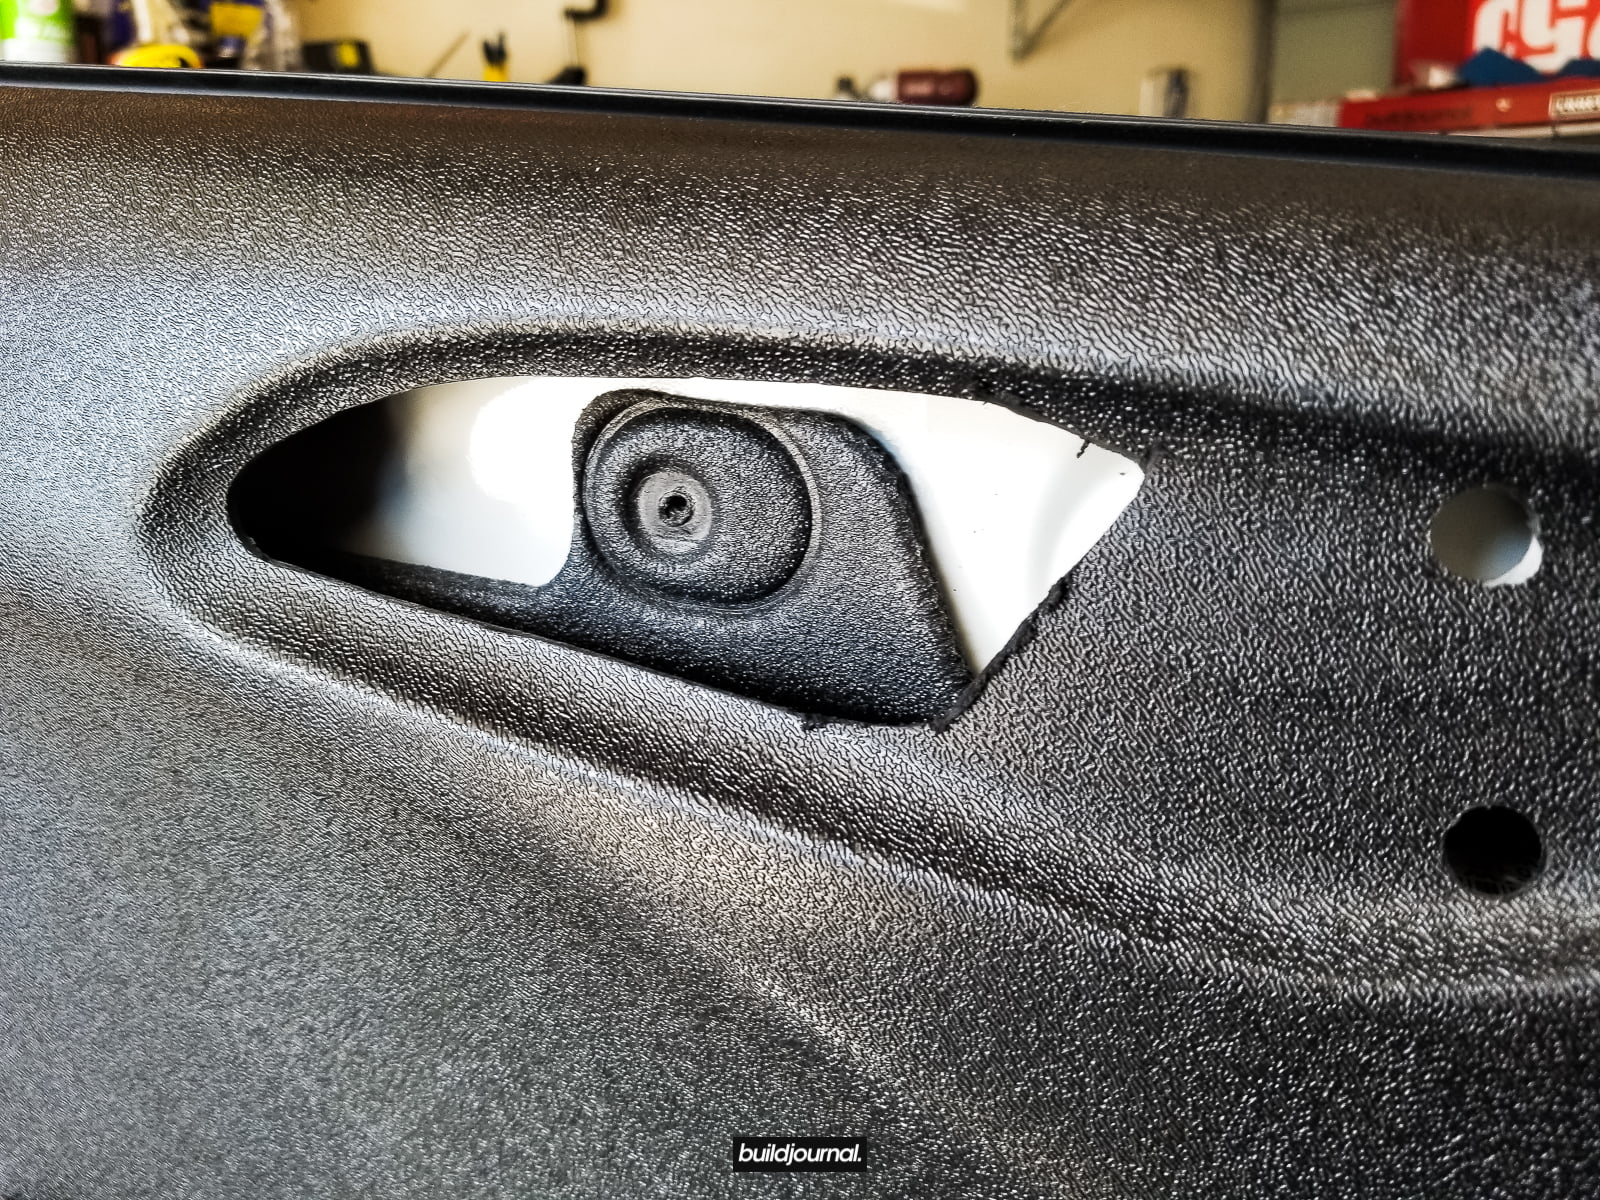
4.2 - Using a 5/16" drill bit, create holes in the indentation areas of the door cards.
⚠️ Due to the nature of the stand offs, the drill location must be very precise or else your alignment may be throw off. In my case, I could not line up the holes correctly and ended up drilling several times in the same spot creating a larger hole so I decided to use my own hardware. I used the thread-serts, but removed the stand offs. See below for parts.
4.3 - Install the speaker/handle housing back into the door card and secure with the 3 torx bolts. Plug the speaker plug (optional) back in. The side mirror adjustment knob can no longer be installed so I left the wire for that near the edge of the door panel so I can easily connect it if I need to make adjustments.
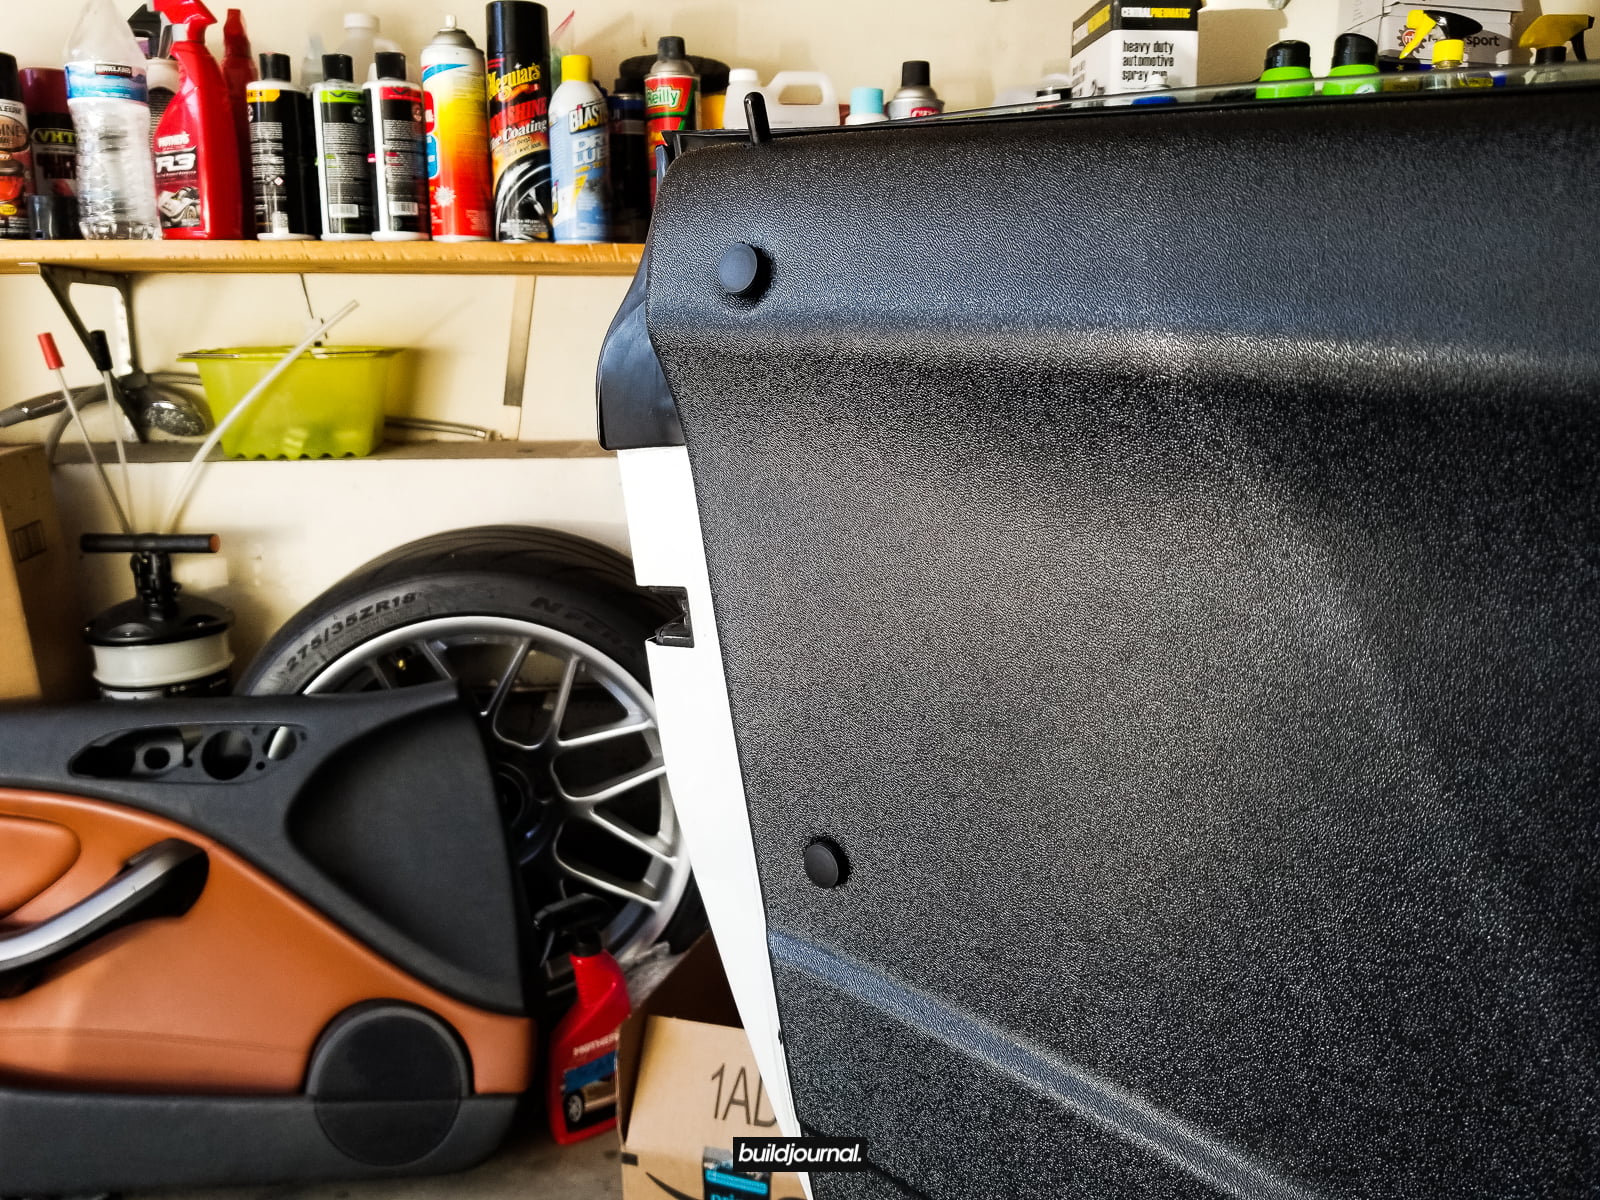
4.4 - Install the hardware and you're done!

E46 M3 Buttonwillow CW13 - 2:01.013
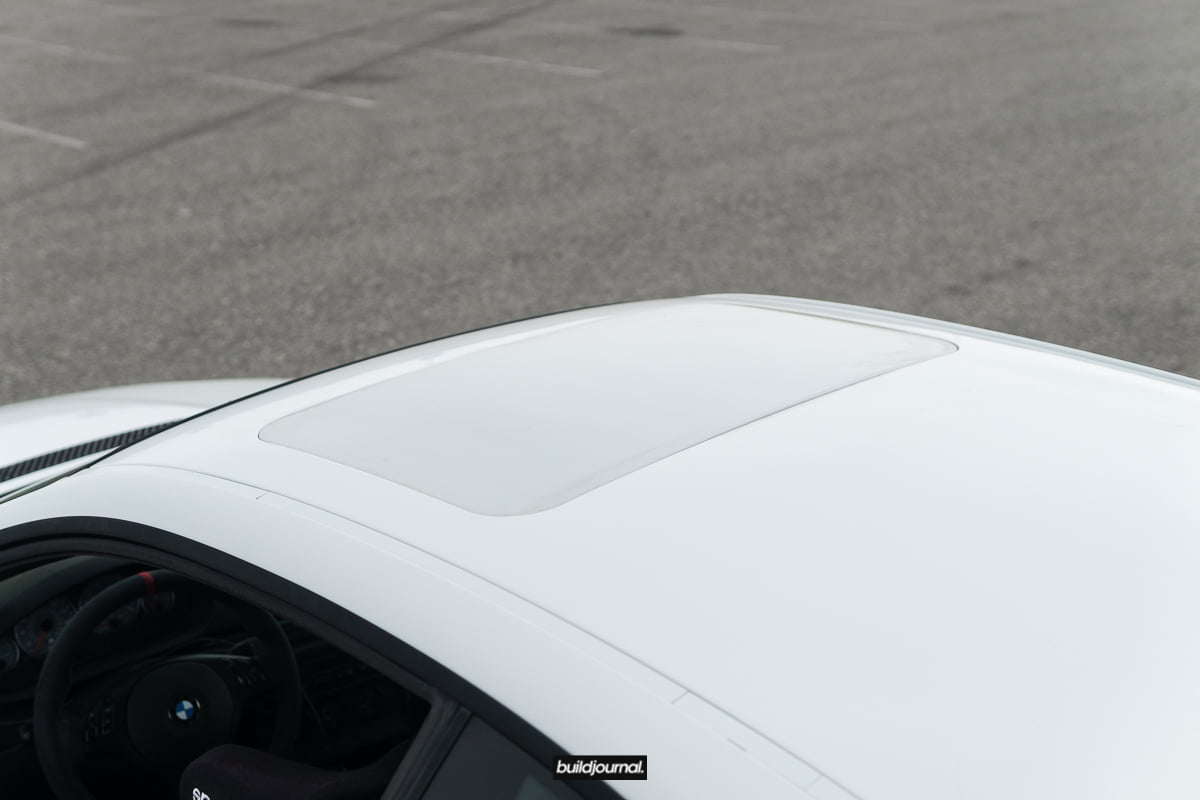
Went out to another Buttonwillow CW13 track day with some track friends and was determined to set a new personal best with the addition of the Proflex Commander E85 Flex Fuel kit and a sunroof delete. Unfortunately I did not go sub-2 minutes as I hoped for, but I did set a new PB on my Nitto NT01.

Buildjournal V2.1 Update: Bimmerworld, HARD Motorsport, AST Coilovers and More!
I did a Buildjournal V2.0 gallery a while back when I had the blue Volk ZE40s on and now I'm doing another update to show the latest mods. It has changed quite a bit. And I'd like to continue documenting the different phases and transformation this car goes through. So here is V2.1! You'll see in the photos everything looks dusty. Well that's because I'm coming fresh from a spin at Chuckwalla less than 24 hours ago from when I took the photos. I was about to clean the car, but thought it would be nice to take photos of a dirty track car.
Engine
- Buildjournal B-Spec Tune
- Eventuri carbon fiber intake
- Evosport stepped headers
- Status Gruppe section 2 w/ QTP 3" cutout
- Supersprint Race exhaust
- Turner Motorsports power 2-pulley kit
- Walbro 255lph & Radium Sleeve
Suspension/Wheels
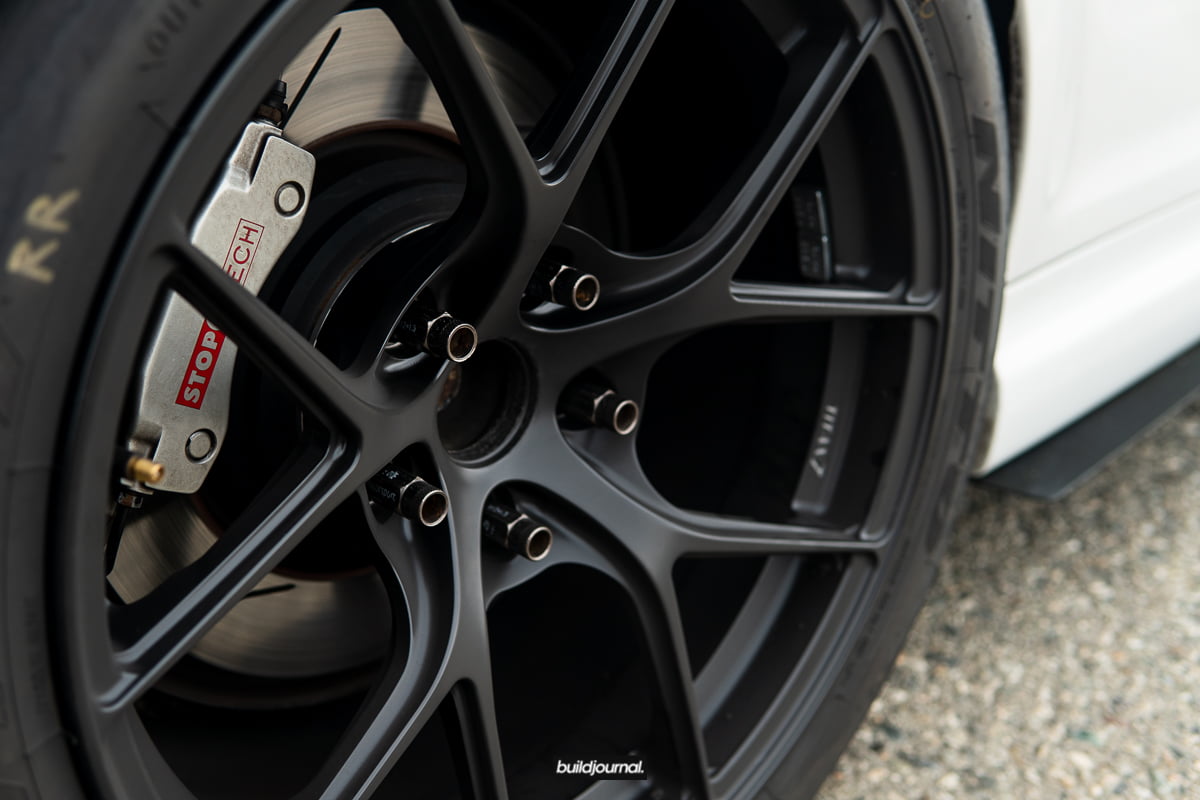
- Titan7 T-S5 18x9.5 ET22 wheels
- Nitto NT01 275/35/18
- AST 5200 2-way coilovers
- Whiteline front sway bar
- Ground Control rear shock mounts
- Stoptech ST-40 front / Brembo 996 rear calipers
- Carbotech XP-10 / XP-8 pads
- Stoptech stainless steel lines front
- Rallyroad stainless steel lines rear
- HPF rear subframe reinforcement kit
- AKG front control arm bushings
- AKG rear shock mount reinforcement plates
- AKG rear trail arm bushings
- AKG differential mount
- AKG subframe bushings
- AKG front sway bar links
- Garagistic upper strut reinforcement plates
- Motorsport Hardware stud kit
Exterior
- Status Gruppe CSL front bumper with 1-piece lip
- Status Gruppe CSL trunk
- Aeroflow Dynamics front splitter
- Aeroflow Dynamics side splitter
- Aeroflow Dynamics rear diffuser
- G5-R project retrofit with Philips CBB bulbs
- N15 Design Lower Fender Duct
- S2R Tuning sunroof delete
Interior
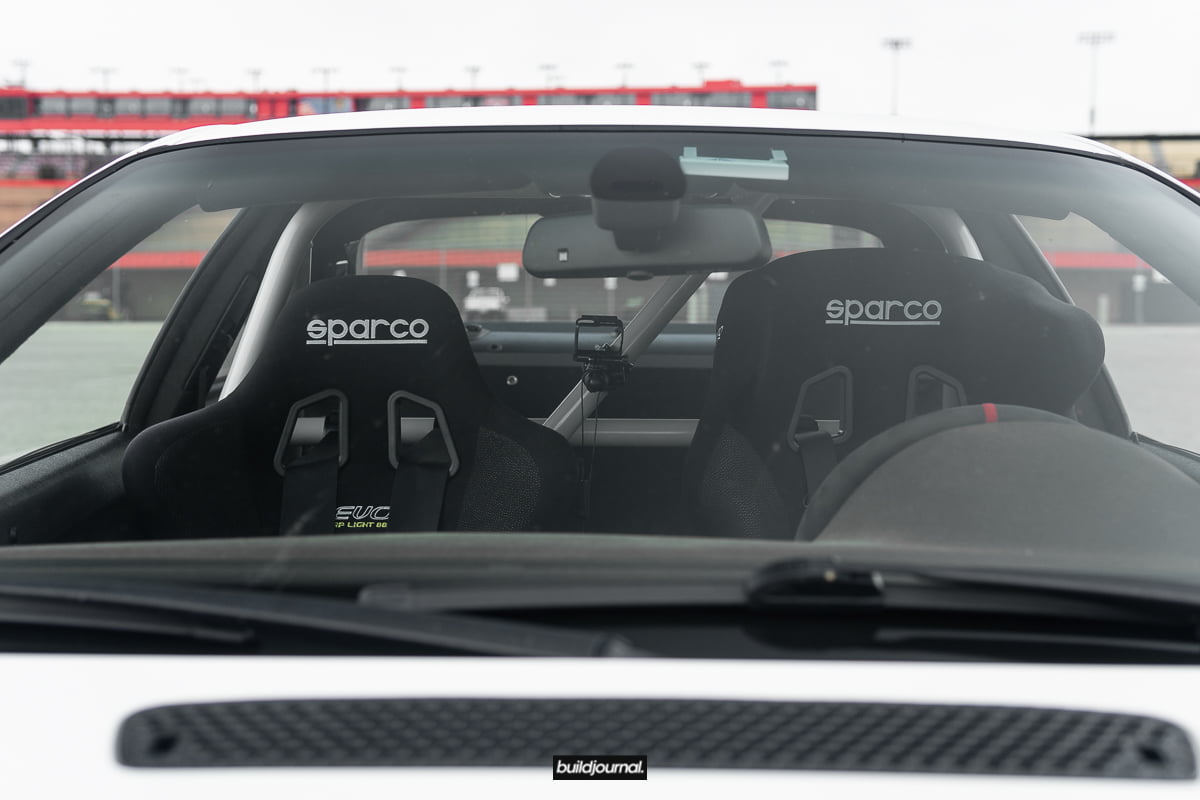
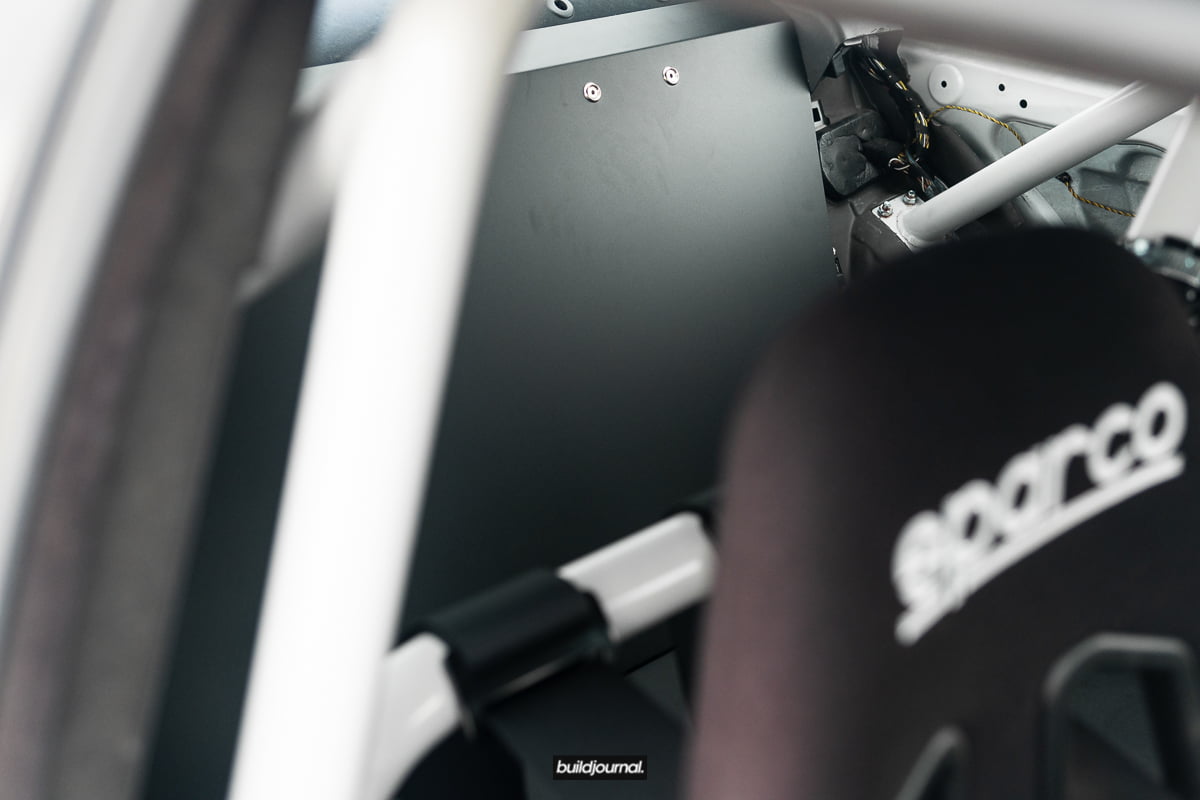
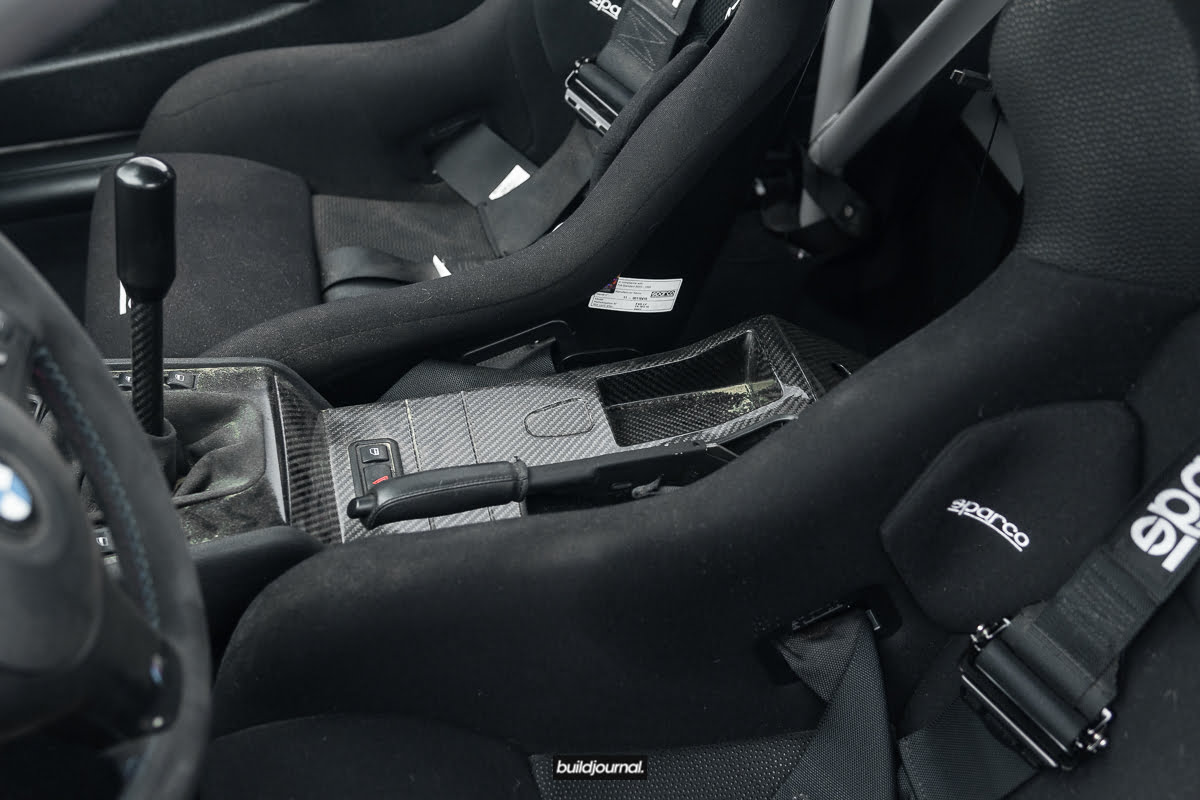
- Sparco Circuit seat
- Sparco EVO seat
- Sparco 6-point aluminum harness
- Sparco side mounts and sliders
- Street Faction rear seat delete
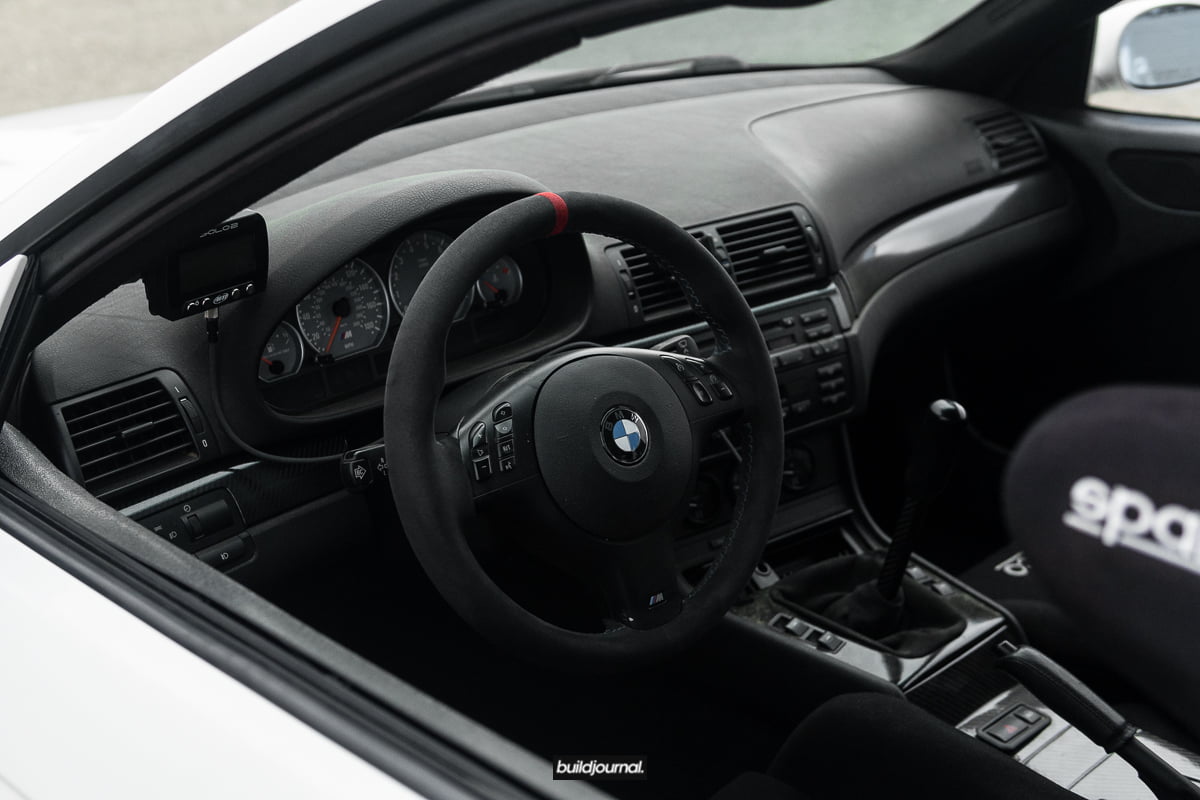
- Coby alcantara tri-stitch steering wheel
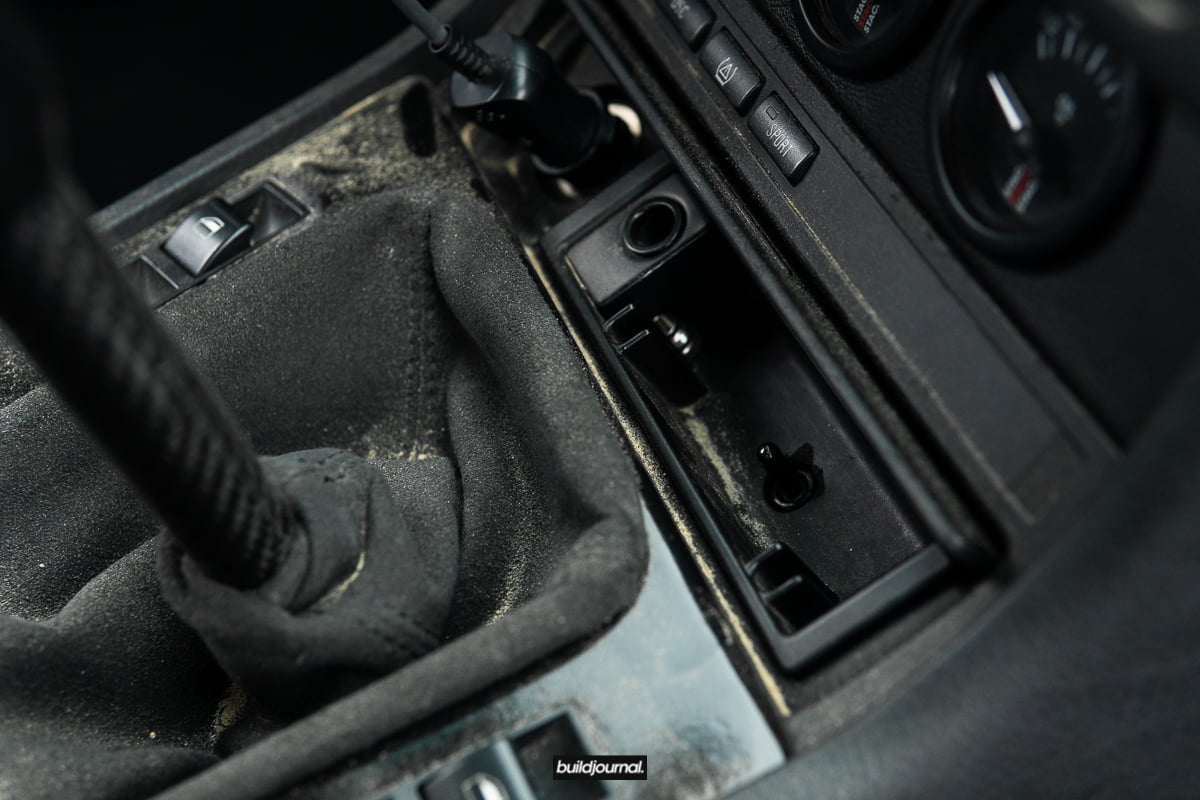
- RTD V4 shifter
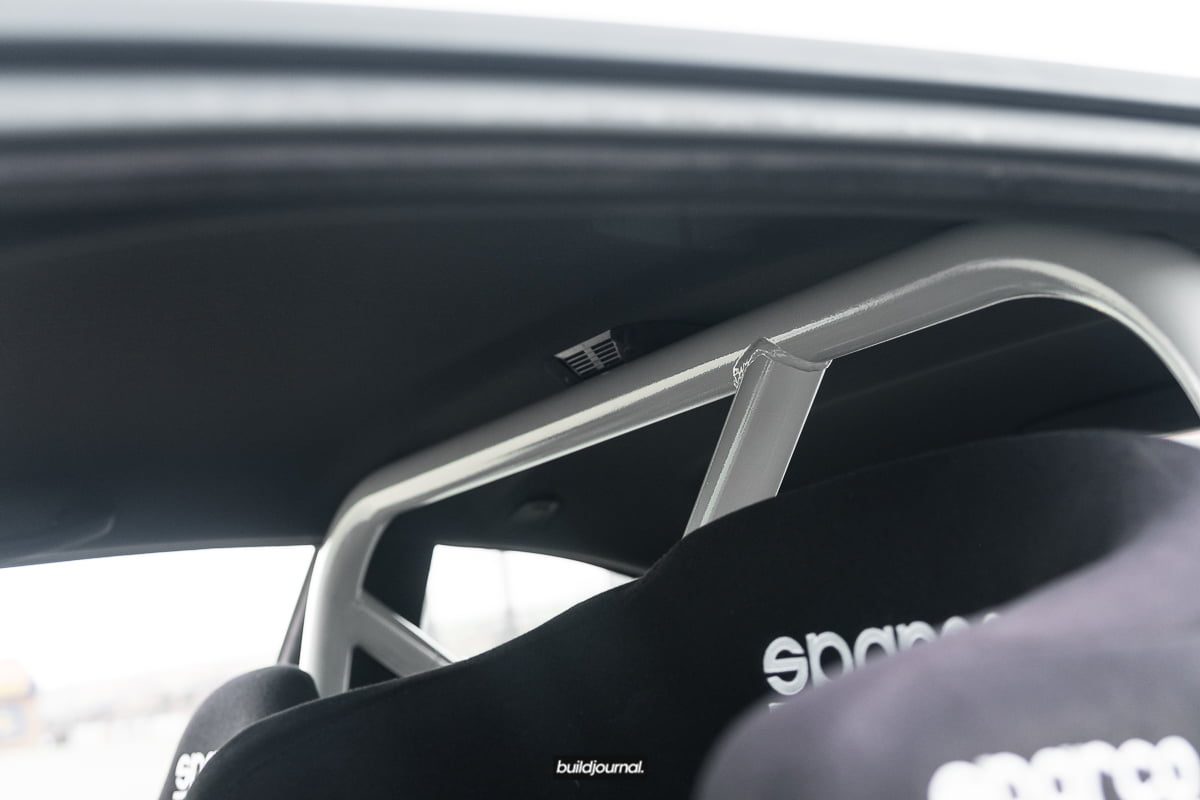
- Autopower Race Roll Bar
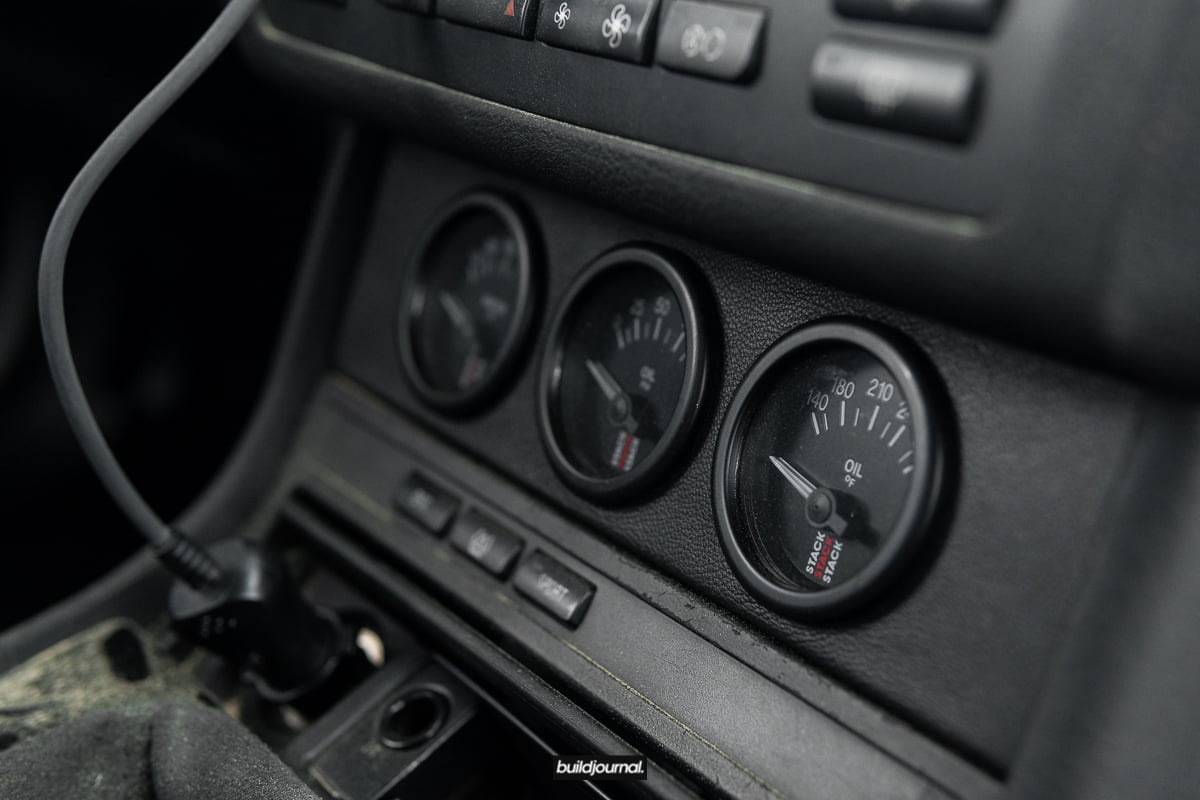
- VAC gauge panel
- Stack gauge kit
- HARD Motorsport Lightweight Door Panels
- HARD Motorsport RS Style Door Latch Pull Strap
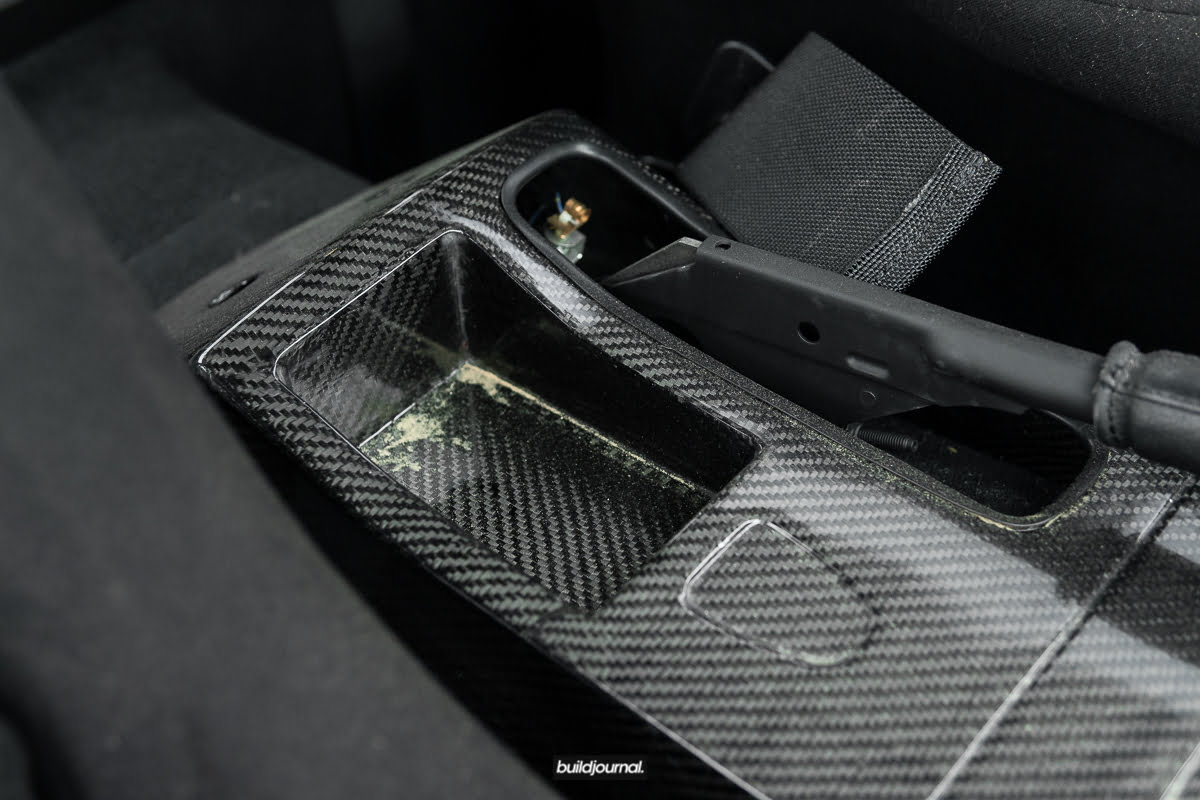
- CSL center console
- CSL headliner


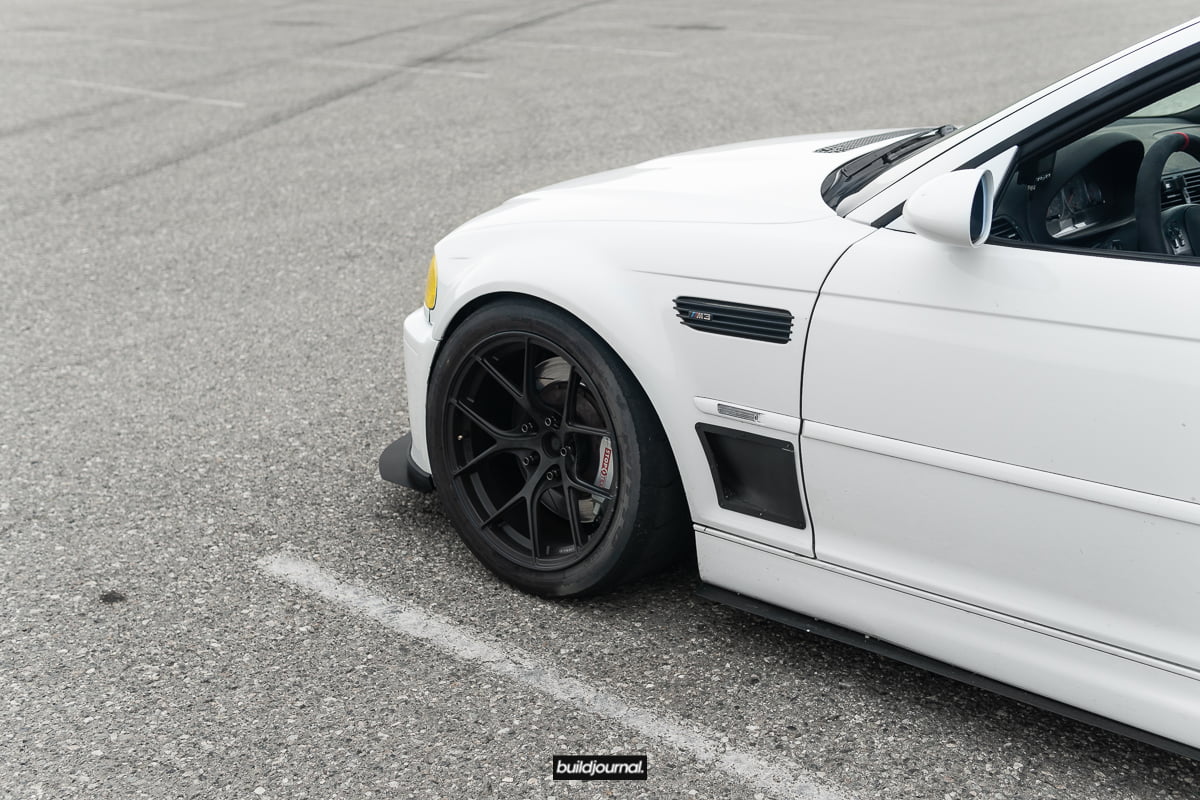


N15 Design E46 M3 Lower Fender Duct Install DIY
There are a few options for fender ducts but to be frank, I don't really like most of them. I love the functionality aspect, but if it doesn't look good I don't want it. I came across the N15 Design E46 M3 Lower Fender Duct and I liked the fact that it didn't look like fish gills. It's not obnoxious looking and it doesn't go on top of the fenders so it's pretty subtle. I decided to try them so here is my review and DIY on the ducts.
Tools Needed
[one_half]
[/one_half]
[one_half_last]
- Drill and 1/8" bit
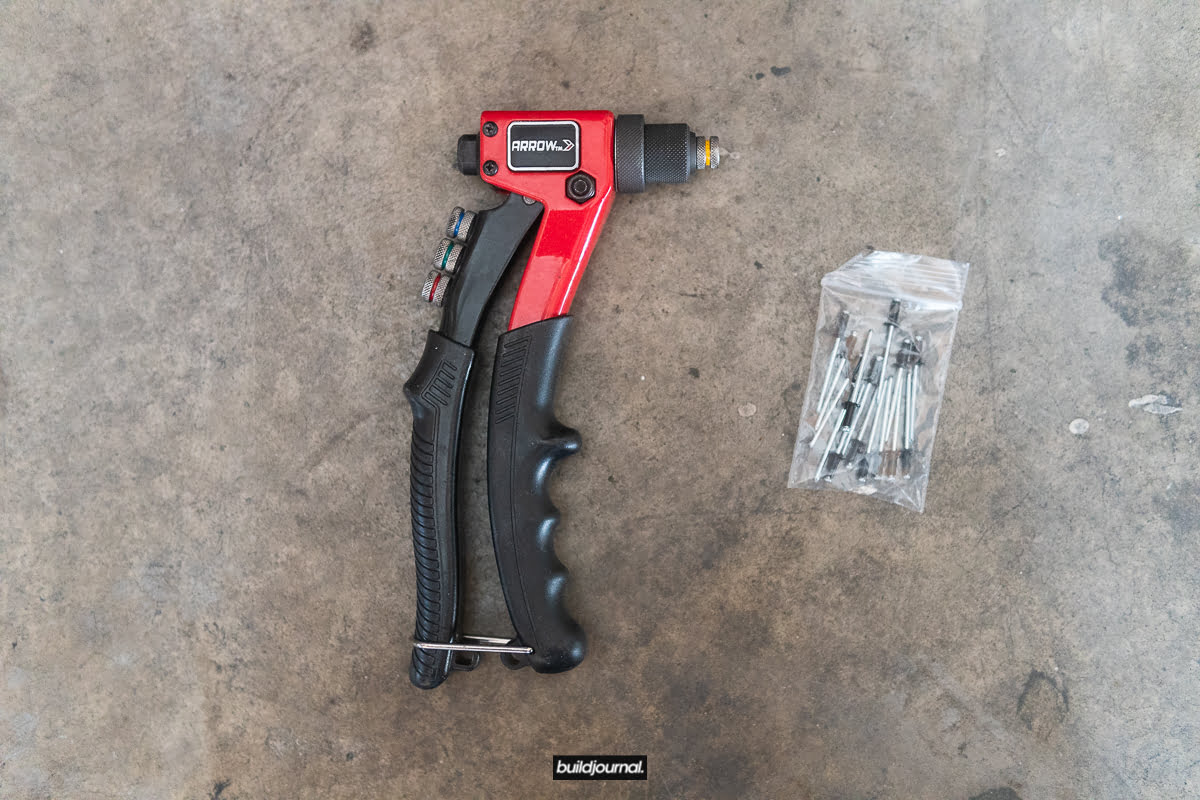
- Rivet gun
- Measuring tape
- Sandpaper
- Painter's tape
- Dremel with reinforced cut-off wheels
- Anti-rust spray/primer
Support this site by buying from the links below. :)
[/one_half_last]
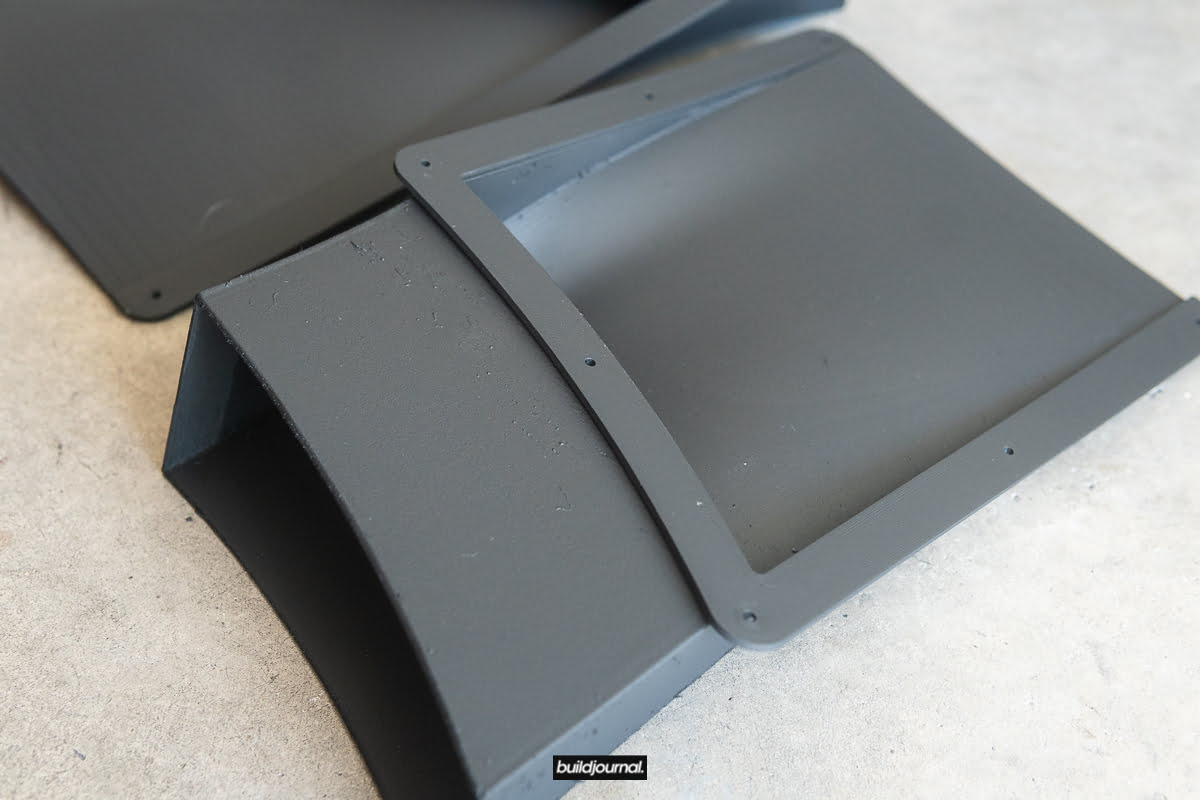
What's in the kit?
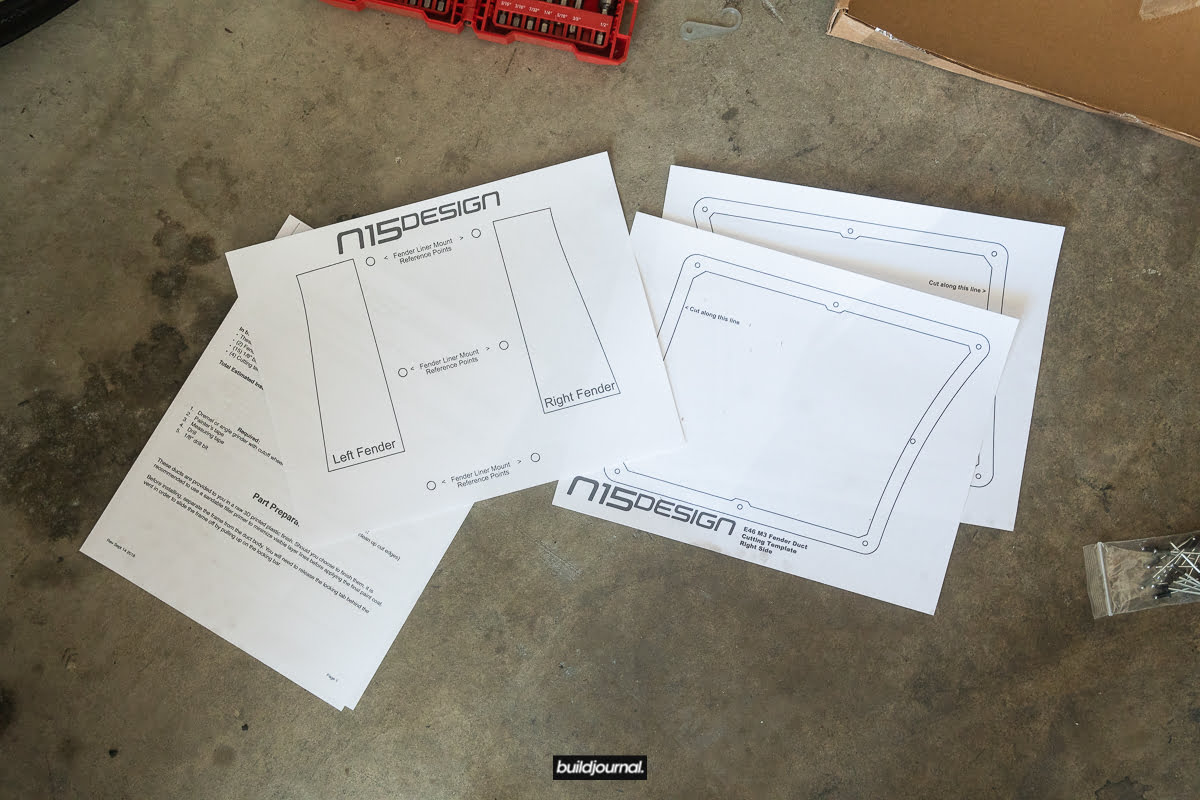
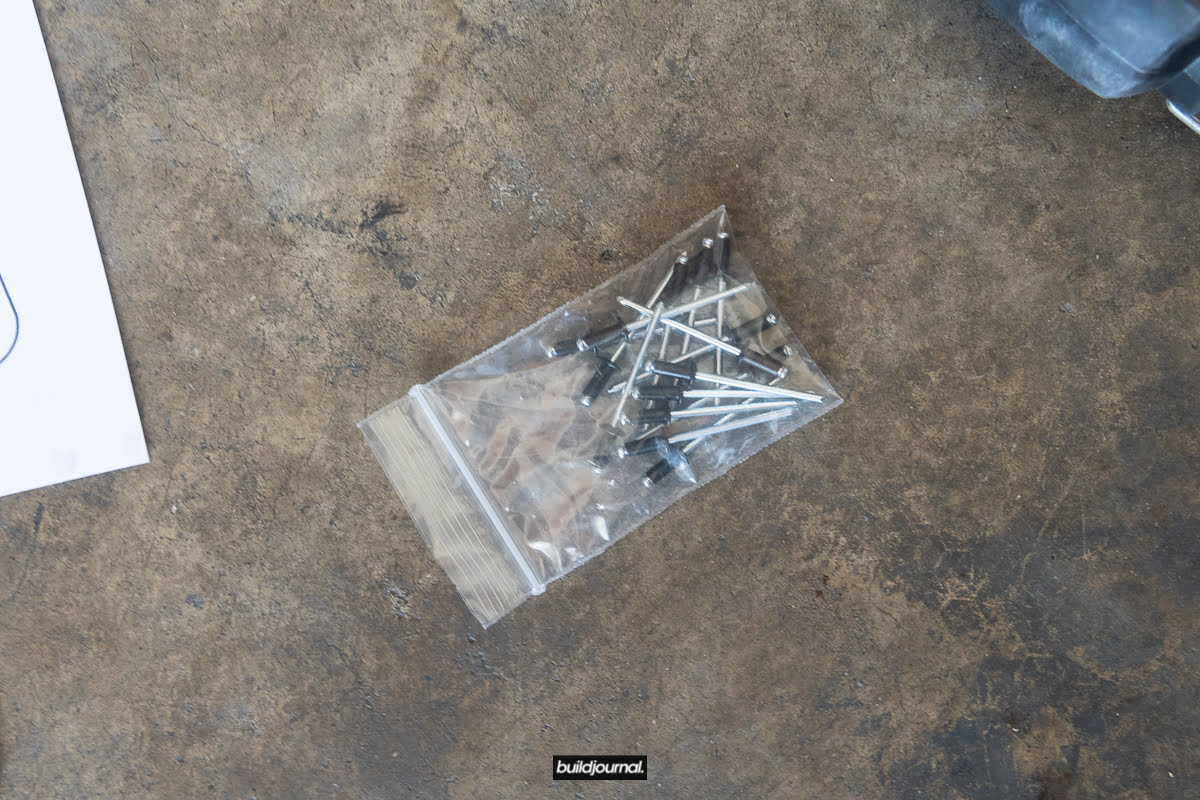
The kit comes with 2 fender vents, a set of cutting templates, rivets and some decals. In order to insert the rivets, you need a rivet gun so make sure you get one.
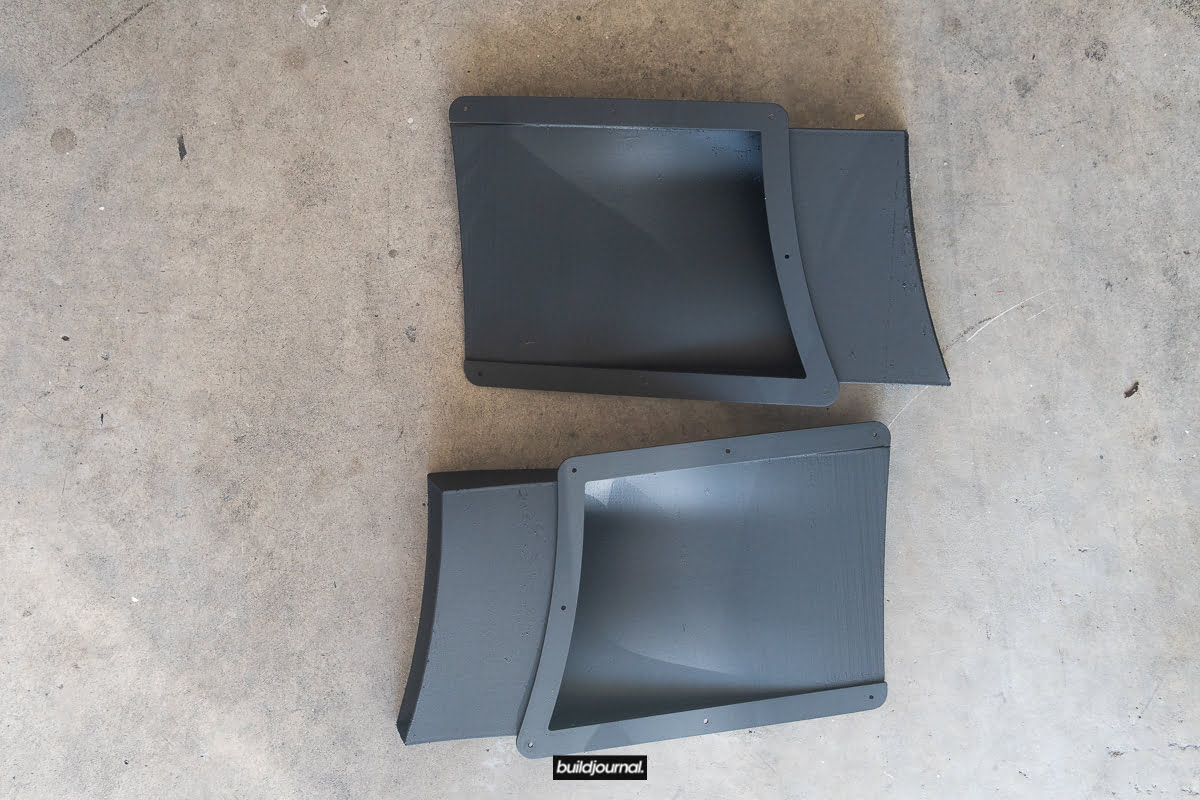
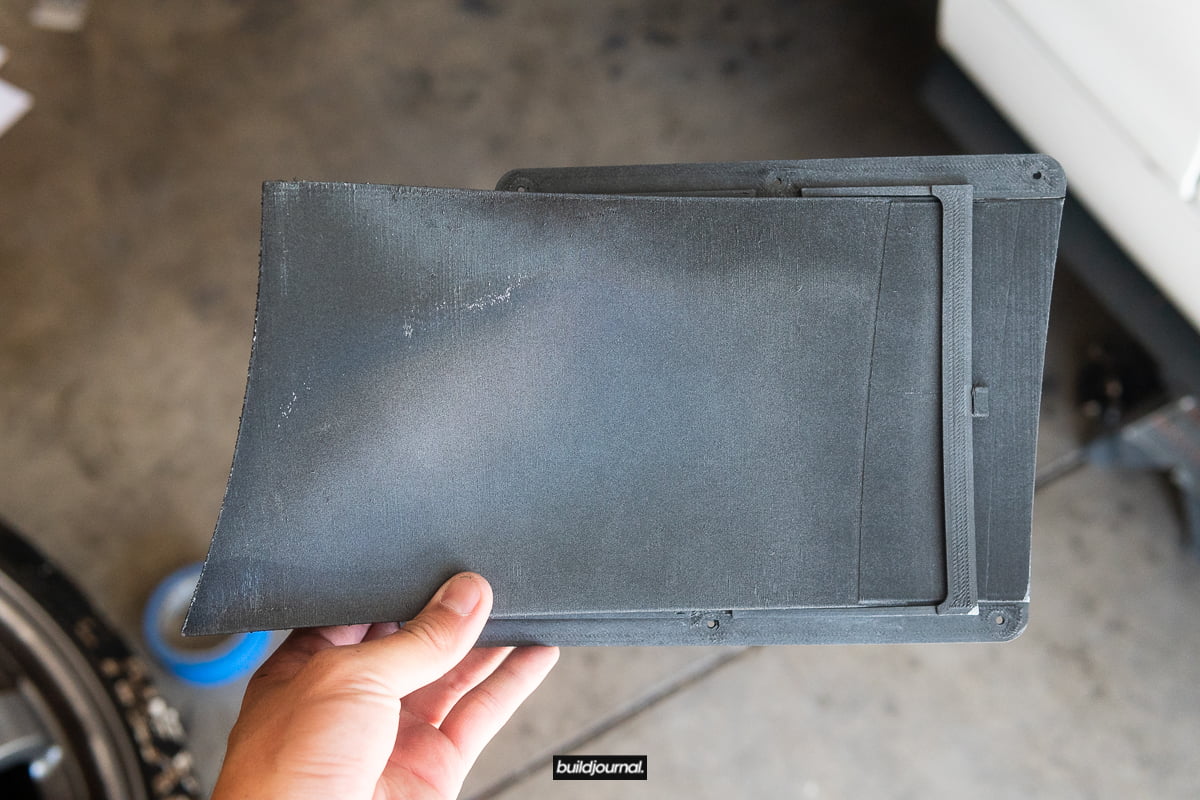
The ducts are 3D printed with ABS plastic and you can see some of the printed texture on the vent. N15 recommends to sand down the surface and refinish with primer and a layer of base coat. Now this is a "race" product so some people may not care about the look. In my case, I chose to refinish the surface. Below are the pictures after sanding with 400, 800, 1,500 sandpaper and then primer + paint.

Install Directions
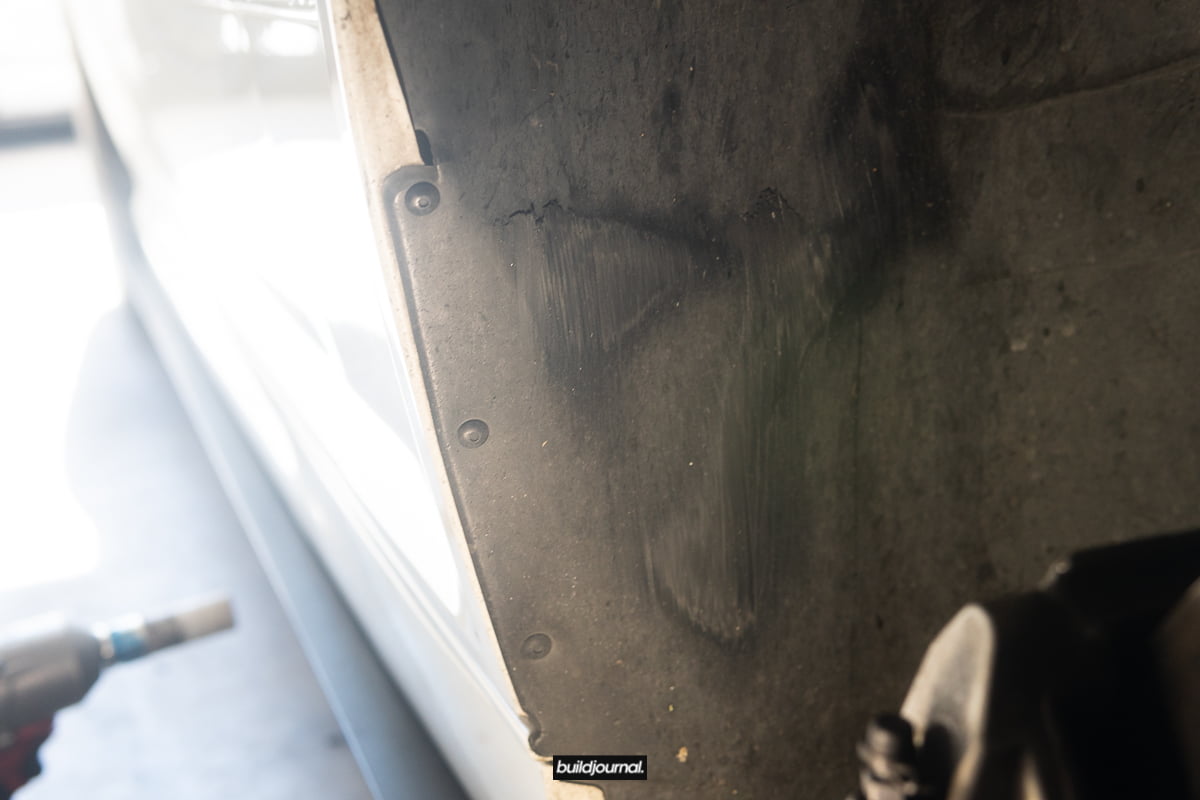
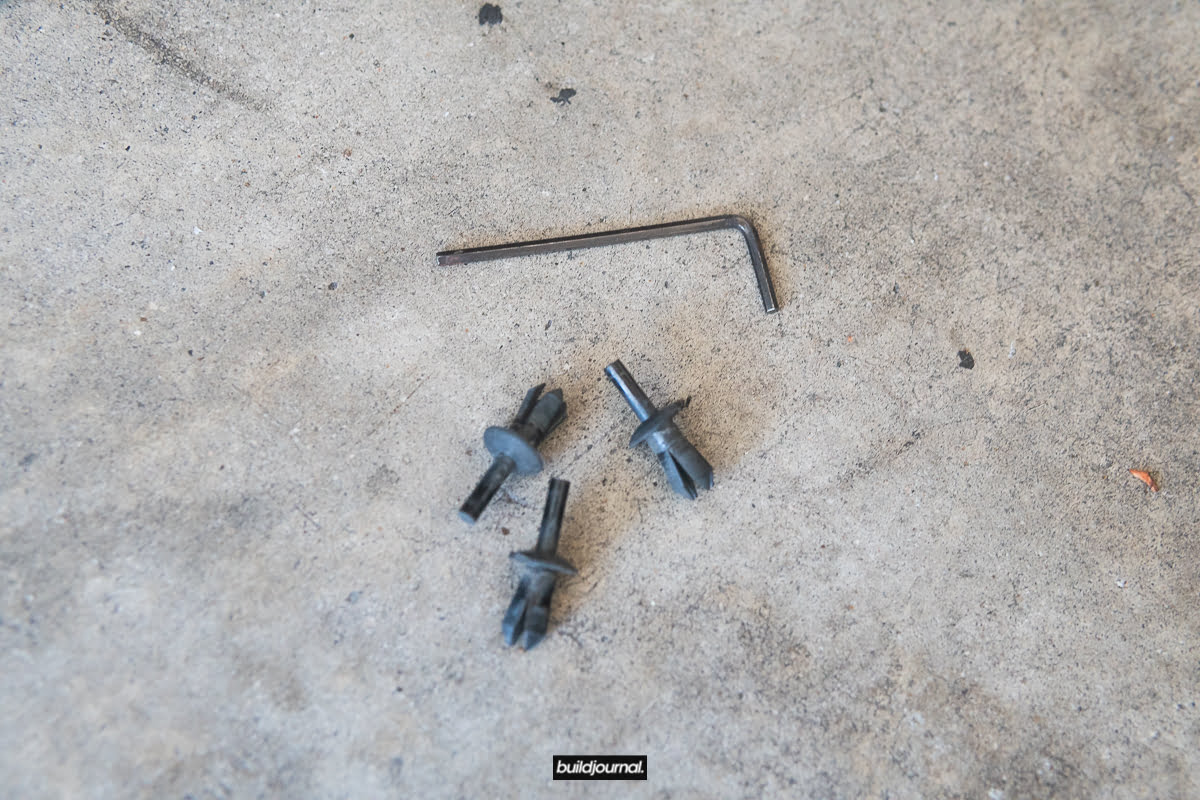
1. Remove front fender liner
1.1 There are 3 little pop it clip looking things. I got a small allen wrench and poked the middle hole pushing it through.
2. Cut plastic fender liner using provided templates
2.1 The template is pretty self explanatory. Line up the 3 liner mounting points and cut around the template. Templates are left and right specific so make sure you don't goof it up.

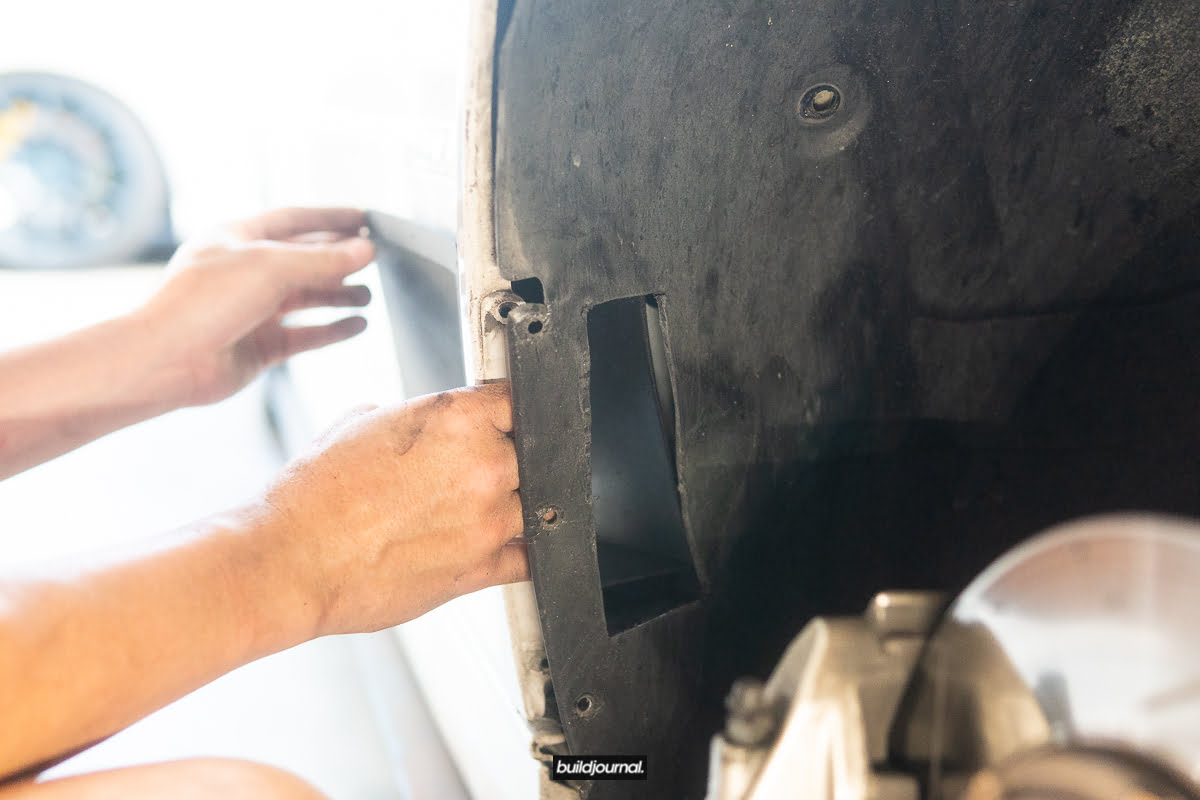
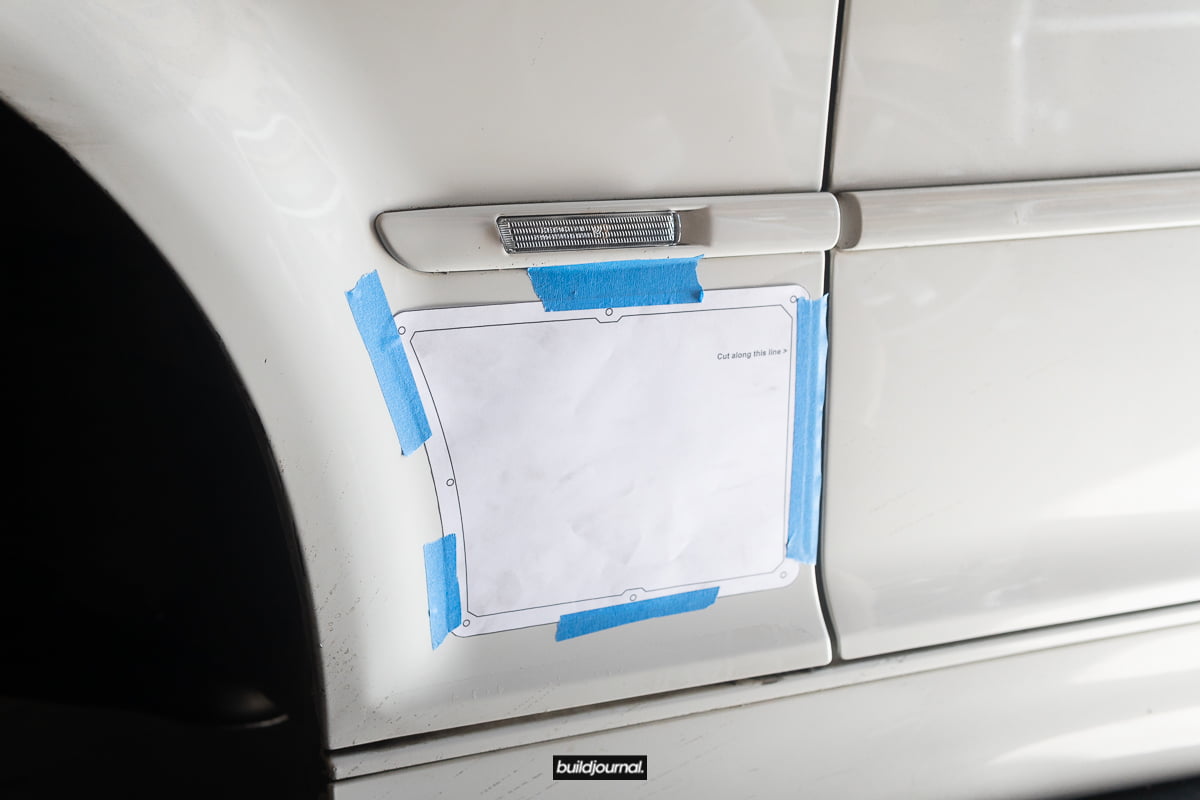
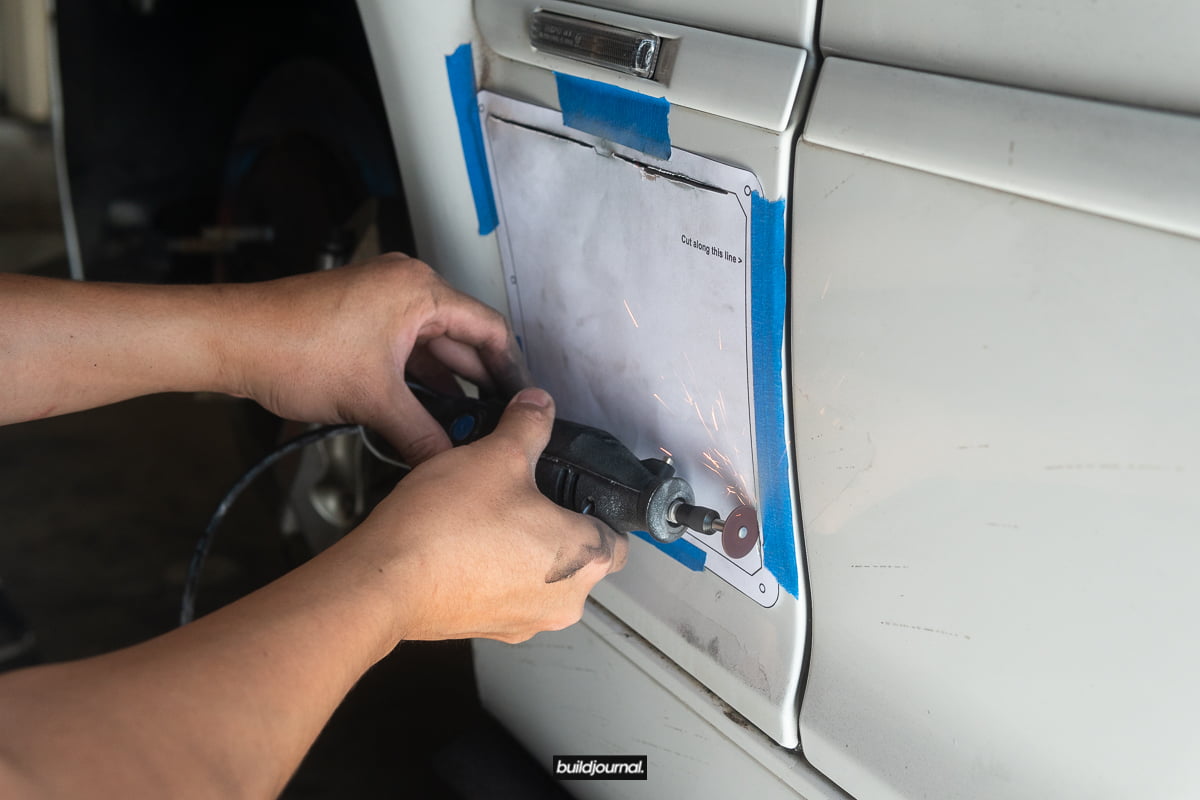
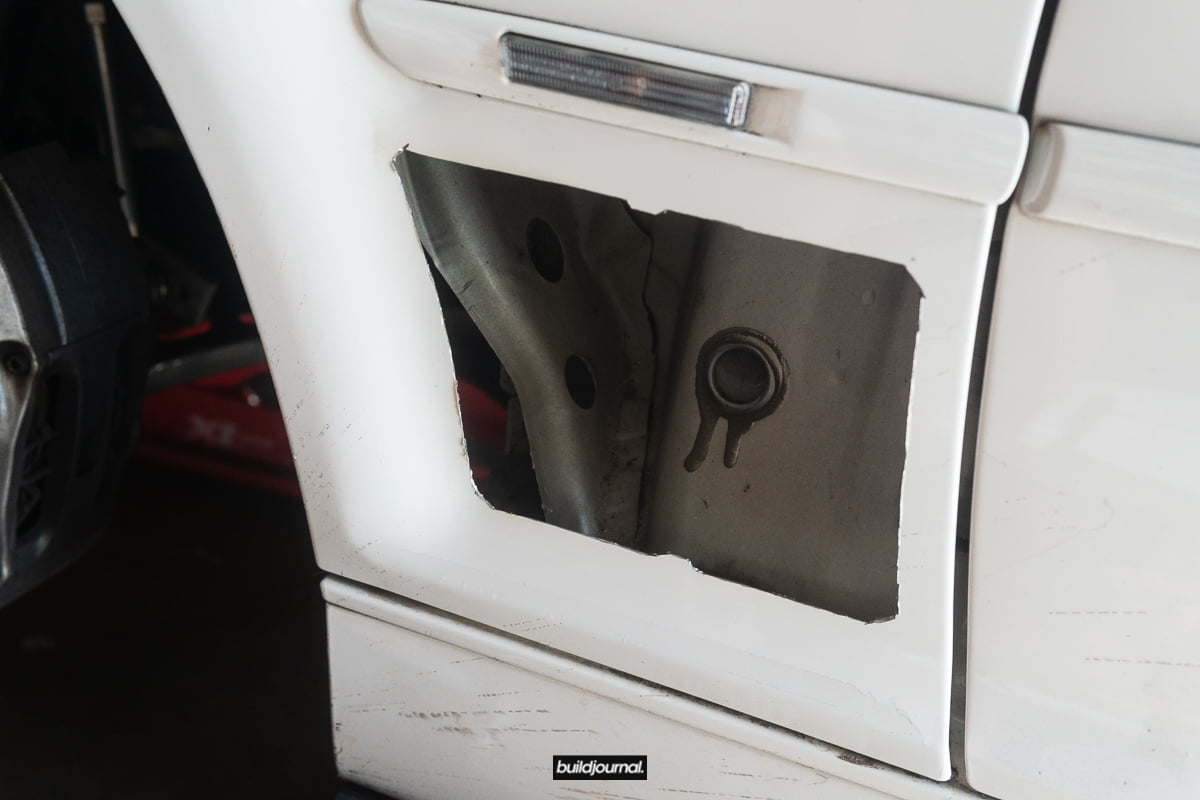
3. Cut the fender using provided templates
3.1 Okay so here's the most important part of the install - cutting fenders. I cut the paper template out first and then taped it to the side of the fender so I can focus on cutting. The directions will provide exact measurements to put the template in place, however in my case I adjusted the position a little differently. The vents have a curvature to it and it was designed to clear the inner structure as there may be obstruction if you don't place it right. Double and triple check the alignment before you cut. Look at how it lines up with the fender bulge. Take notice of the general distance from the side marker and door line.
Make sure you use a reinforced wheel to cut the metal.
Ouch. What have I done?
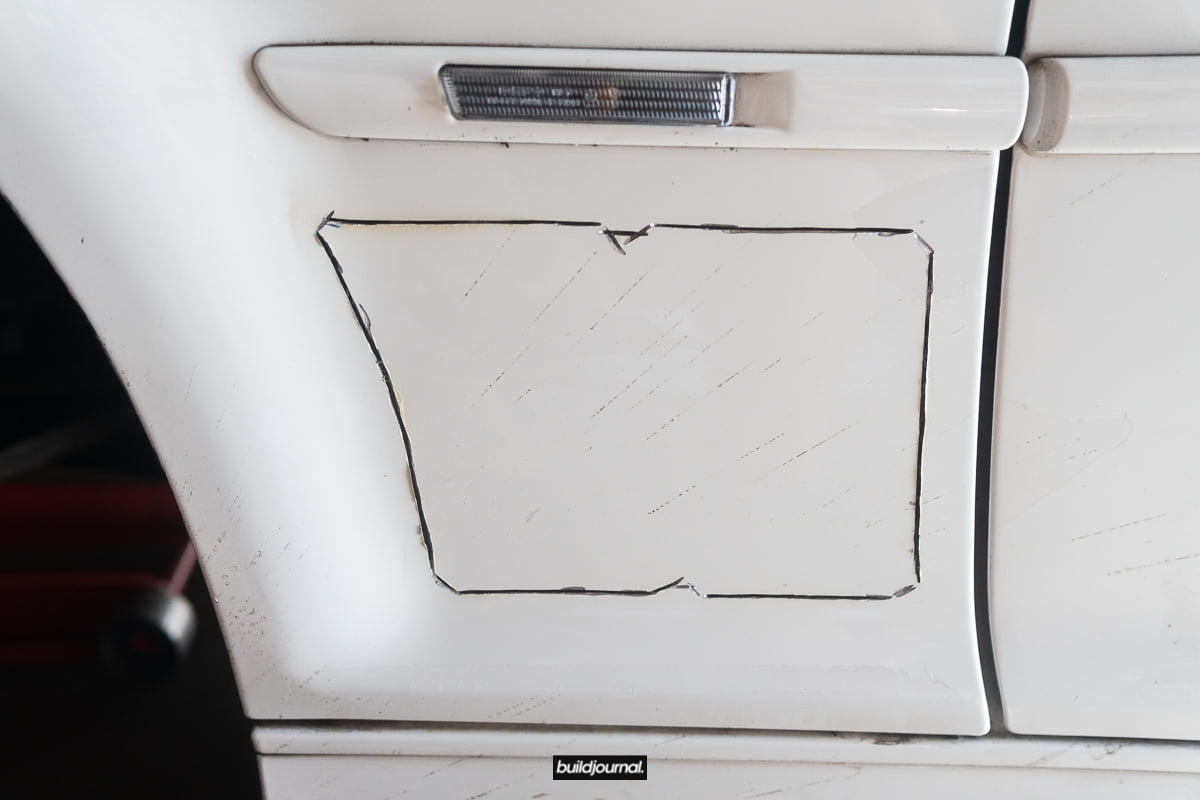
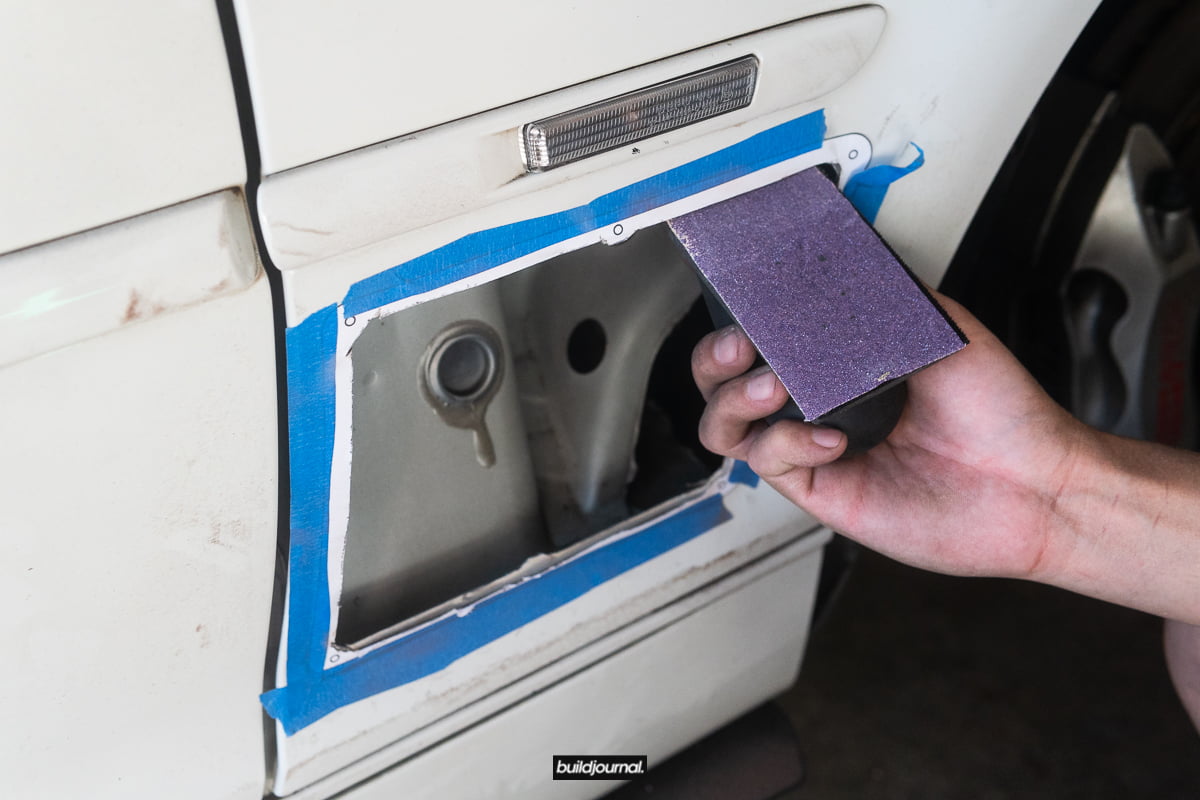
Deburr the edges with sandpaper. Get it nice and smooth on the inside to be able to slide the vent in smoothly.
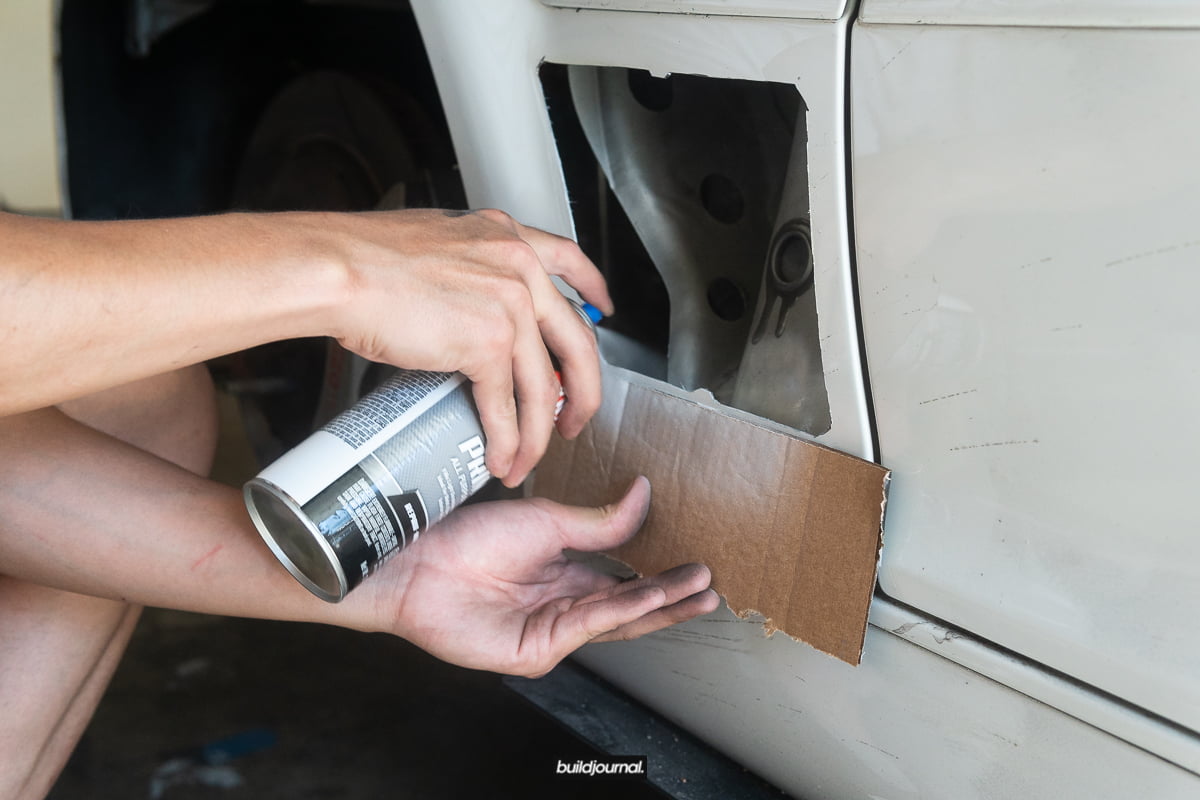
4. Cover exposed metal with anti-rust sealant
5. Slide the 2-piece vents into the fender
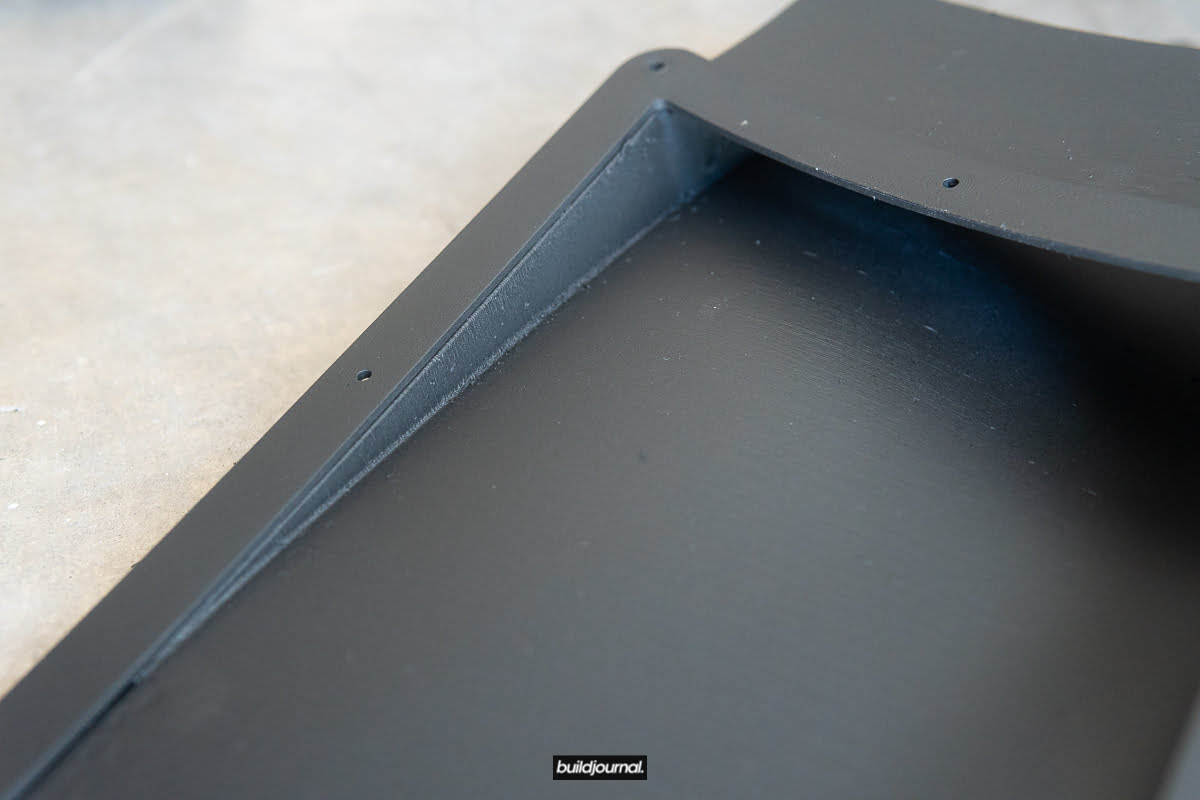
5.1 Here is the backside. It's a simple 2-piece design but very clever how it's constructed. Before you install, you will need to unlock the back locking tab to release the 2 pieces. I'm going to call the outside part the frame and the actual vent, the vent.
5.2 Take the frame and insert it into the cut. Make sure it sits flush first. Make necessary adjustments if it doesn't sit nice.
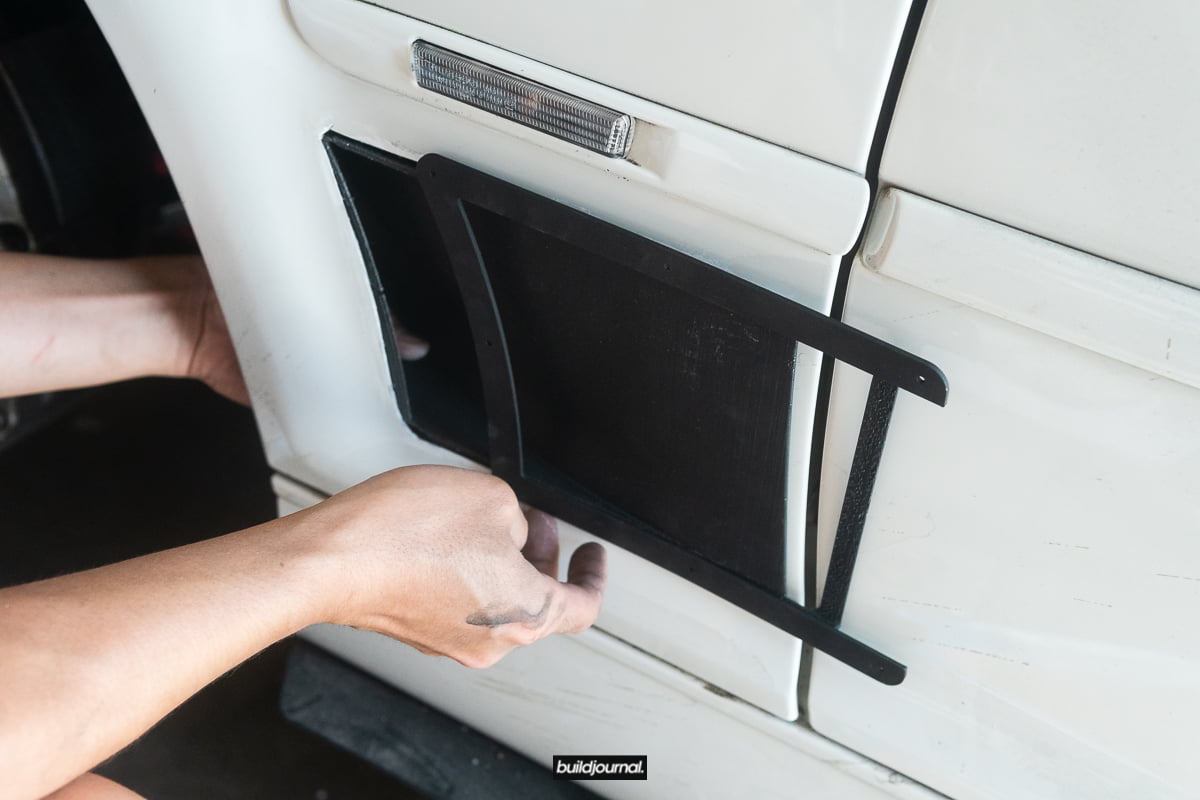
5.3 While holding the frame in place, simultaneously take the vent piece and slide it through the frame. Make sure you inspect the tabs beforehand so you know how it slides in place.


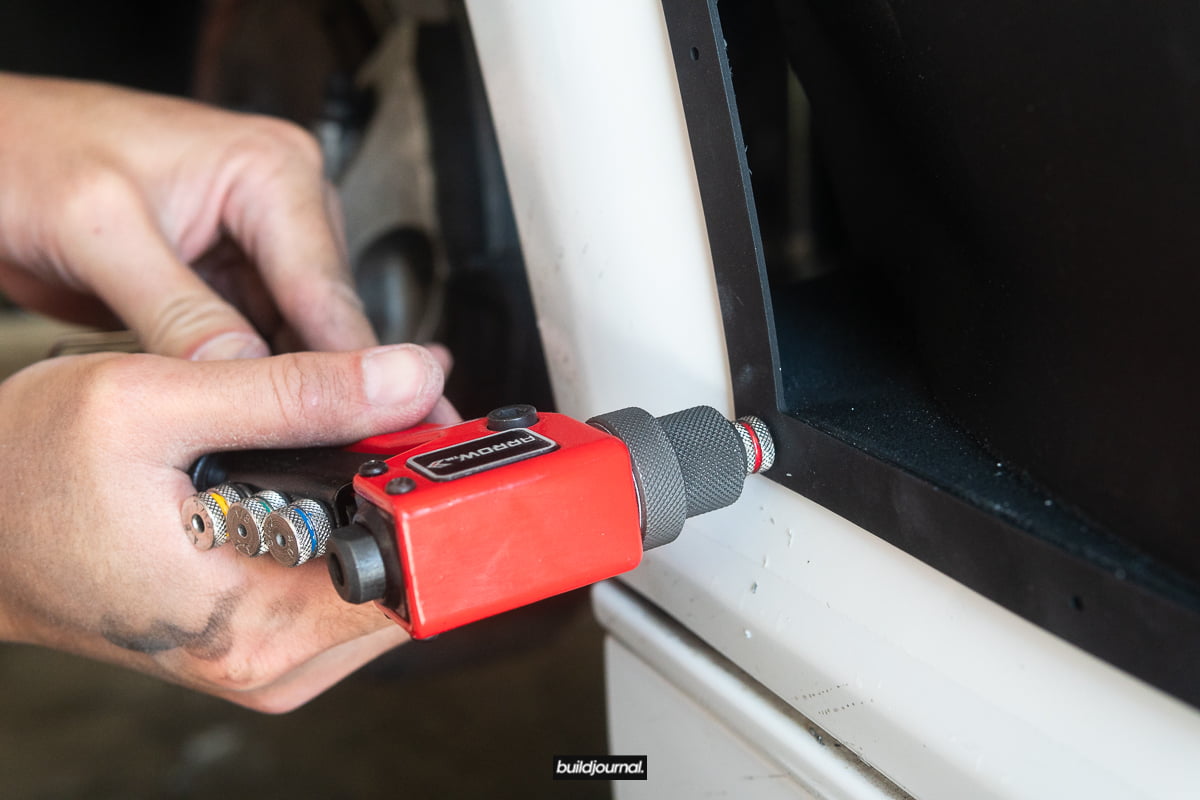
6. Drill holes for the rivets
6.1 Make sure the vent sits nice and even before you drill holes.
6.2 With the entire vent in place, use a 1/8" drill bit to make holes. I drilled a single hole first and riveted to make sure everything is in place when I drill the others.
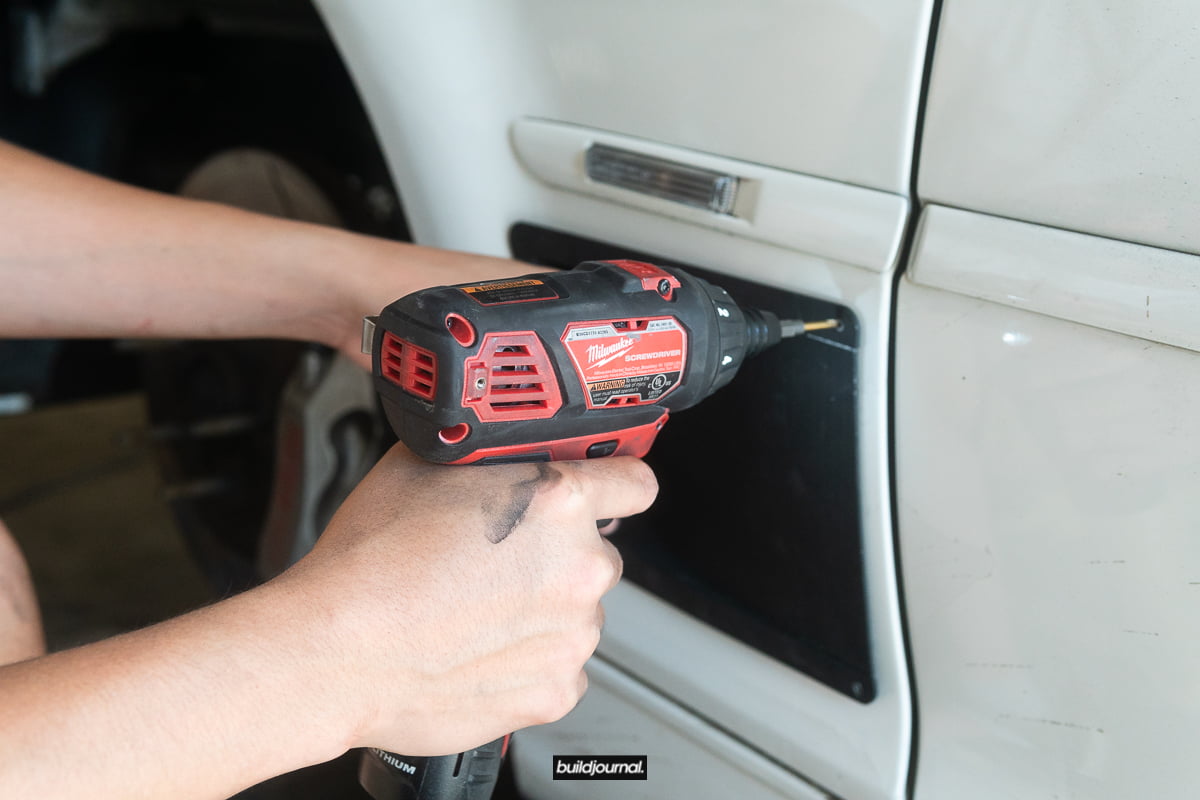
6.3 Use the rivet gun to install the remaining rivets. Then you're done!
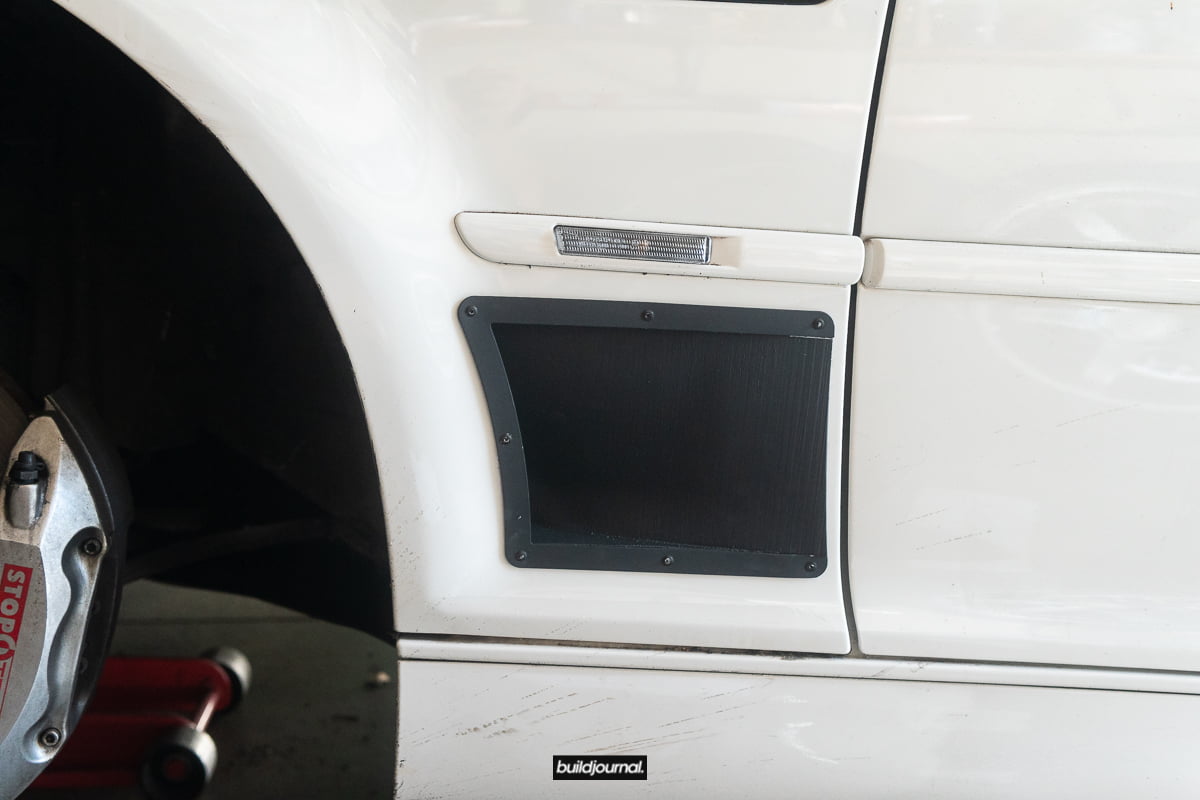
Here is just a sneak peak of the pictures installed. I will have more photos to come!


E46 M3 Chuckwalla CW - 2:05.932
This was my first day on track after installing my brand new AST 5200 2-way coilovers running a true rear coilover. My previous PB here was 2:08.925 and I beat it by 3 seconds! Although I do have the Proflex Commander E85 kit and sunroof delete. But hey! I set the PB on lap 3 so fast forward if you want to skip. Oh yeah and shout out to Nitto / Driving Line for throwing this awesome free track event.
View this post on Instagram
Super clean track machine at our @nittotire #Driverbattle track day. #E46 #M3 @buildjournal