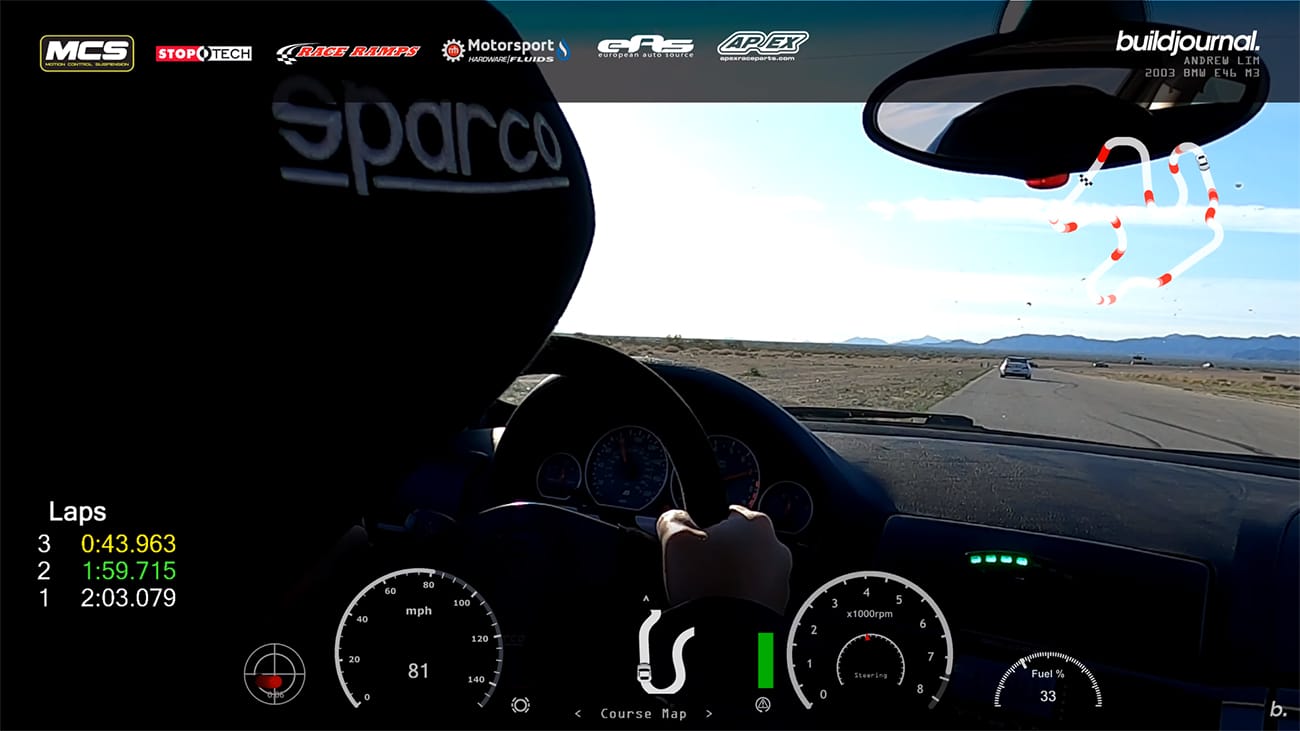
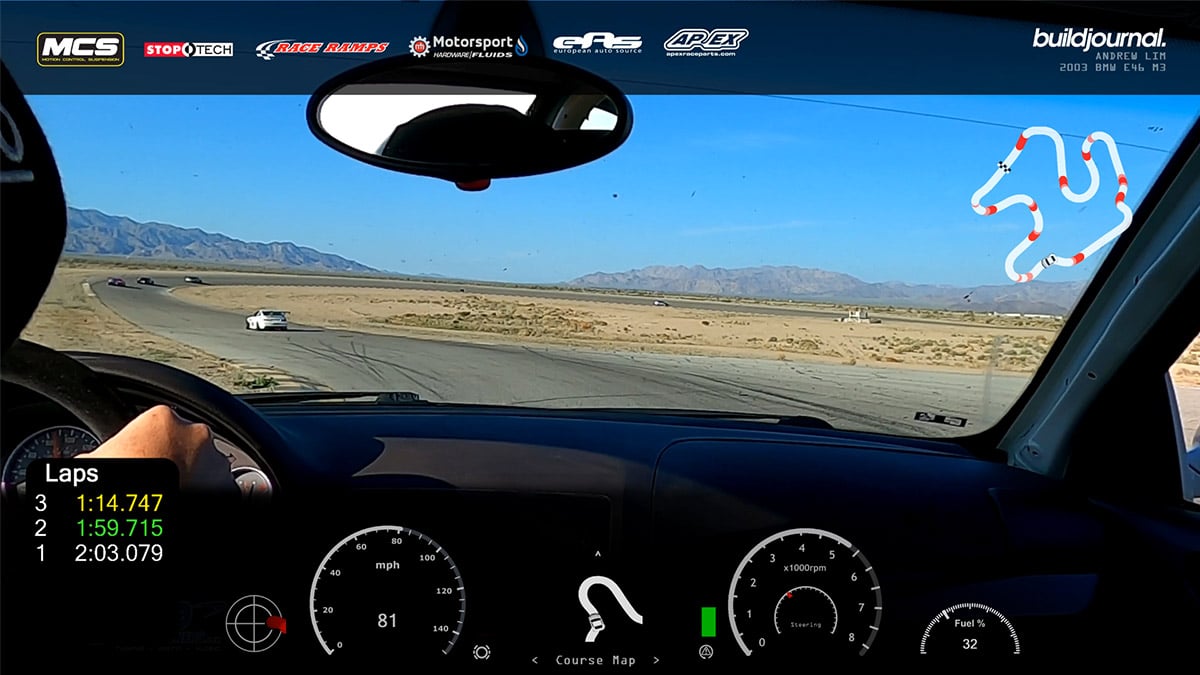
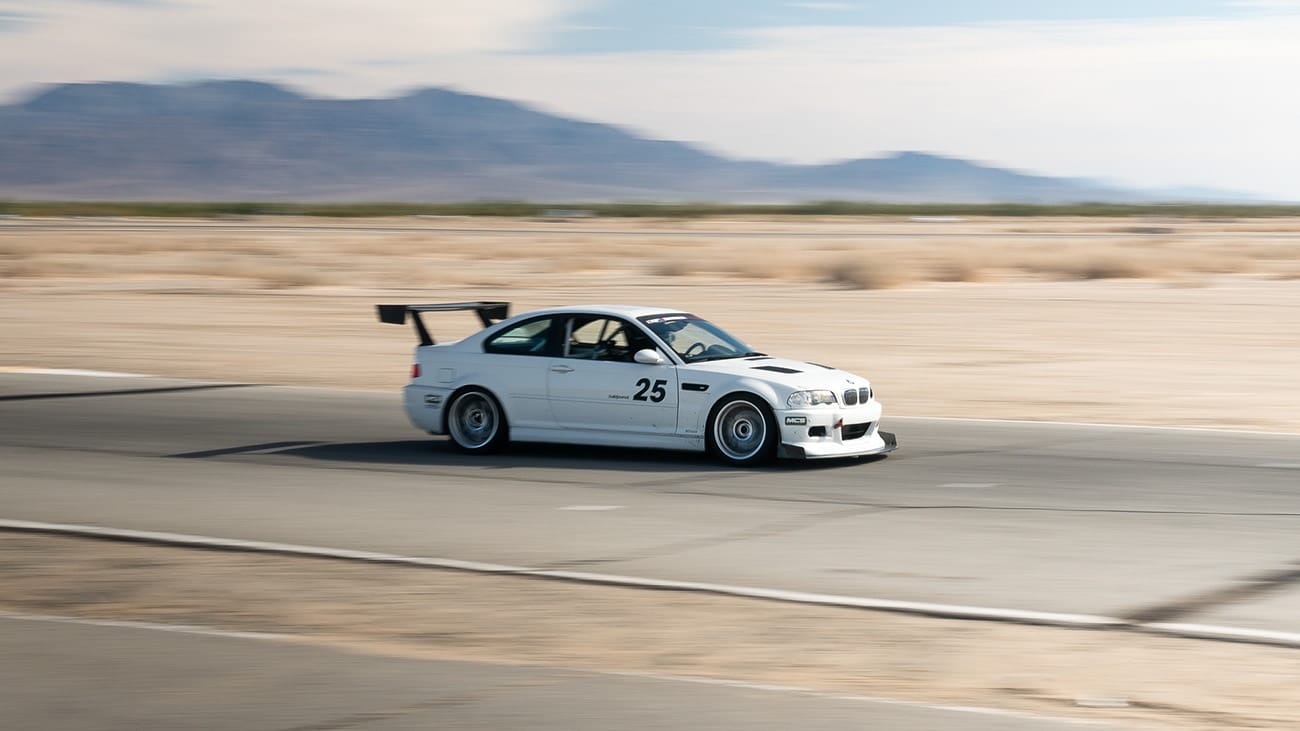
BMW E46 M3 Chuckwalla CW - 1:58.366
BIMMER CHALLENGE Round 1 at Chuckwalla running the CW configuration went smooth and I ended up with 2nd place in B2. I ended up removing another 150 lbs or so and got down to about 2,900 lbs with half tank and no driver. I also added new splitter diffusers in the front to help with additional downforce. I was starting the 9th heat cycle on the A052 so the tires gave out after the 2nd session. Although my driving felt better as the day went on, the tires fell off significantly. I was over a second slower during the 3rd session.

BMW E92 M3 with BBS E88 #slicerspec
Exemplar engineering meets modern design
The BBS E88 is such an iconic wheel and arguable the most sought our wheel for a lot of European car models across all generations. It’s a timeless piece and an engineering mastery featuring the recognizable mesh face with an eye-catching lip. I had to get a set for the E92.
Along with the E88 I added the PSM Dynamics rear wing made for the F8X platform. I took a gamble, but the lines flow so much better than the GT4 wing that is most common for the E9X. Here’s a small photoshoot I did with this setup. Shout out to Slicer for this custom #slicerspec set.
Specifications
- 18x10 ET12 w/ Pirelli Trofeo R 265/35/18
- 18x11 ET24 w/ Pirelli Trofeo R 295/30/18
- 8mm spacer in rear
- -2 camber front
- -2 camber rear


BMW E46 M3 Chuckwalla CW - 1:58.366
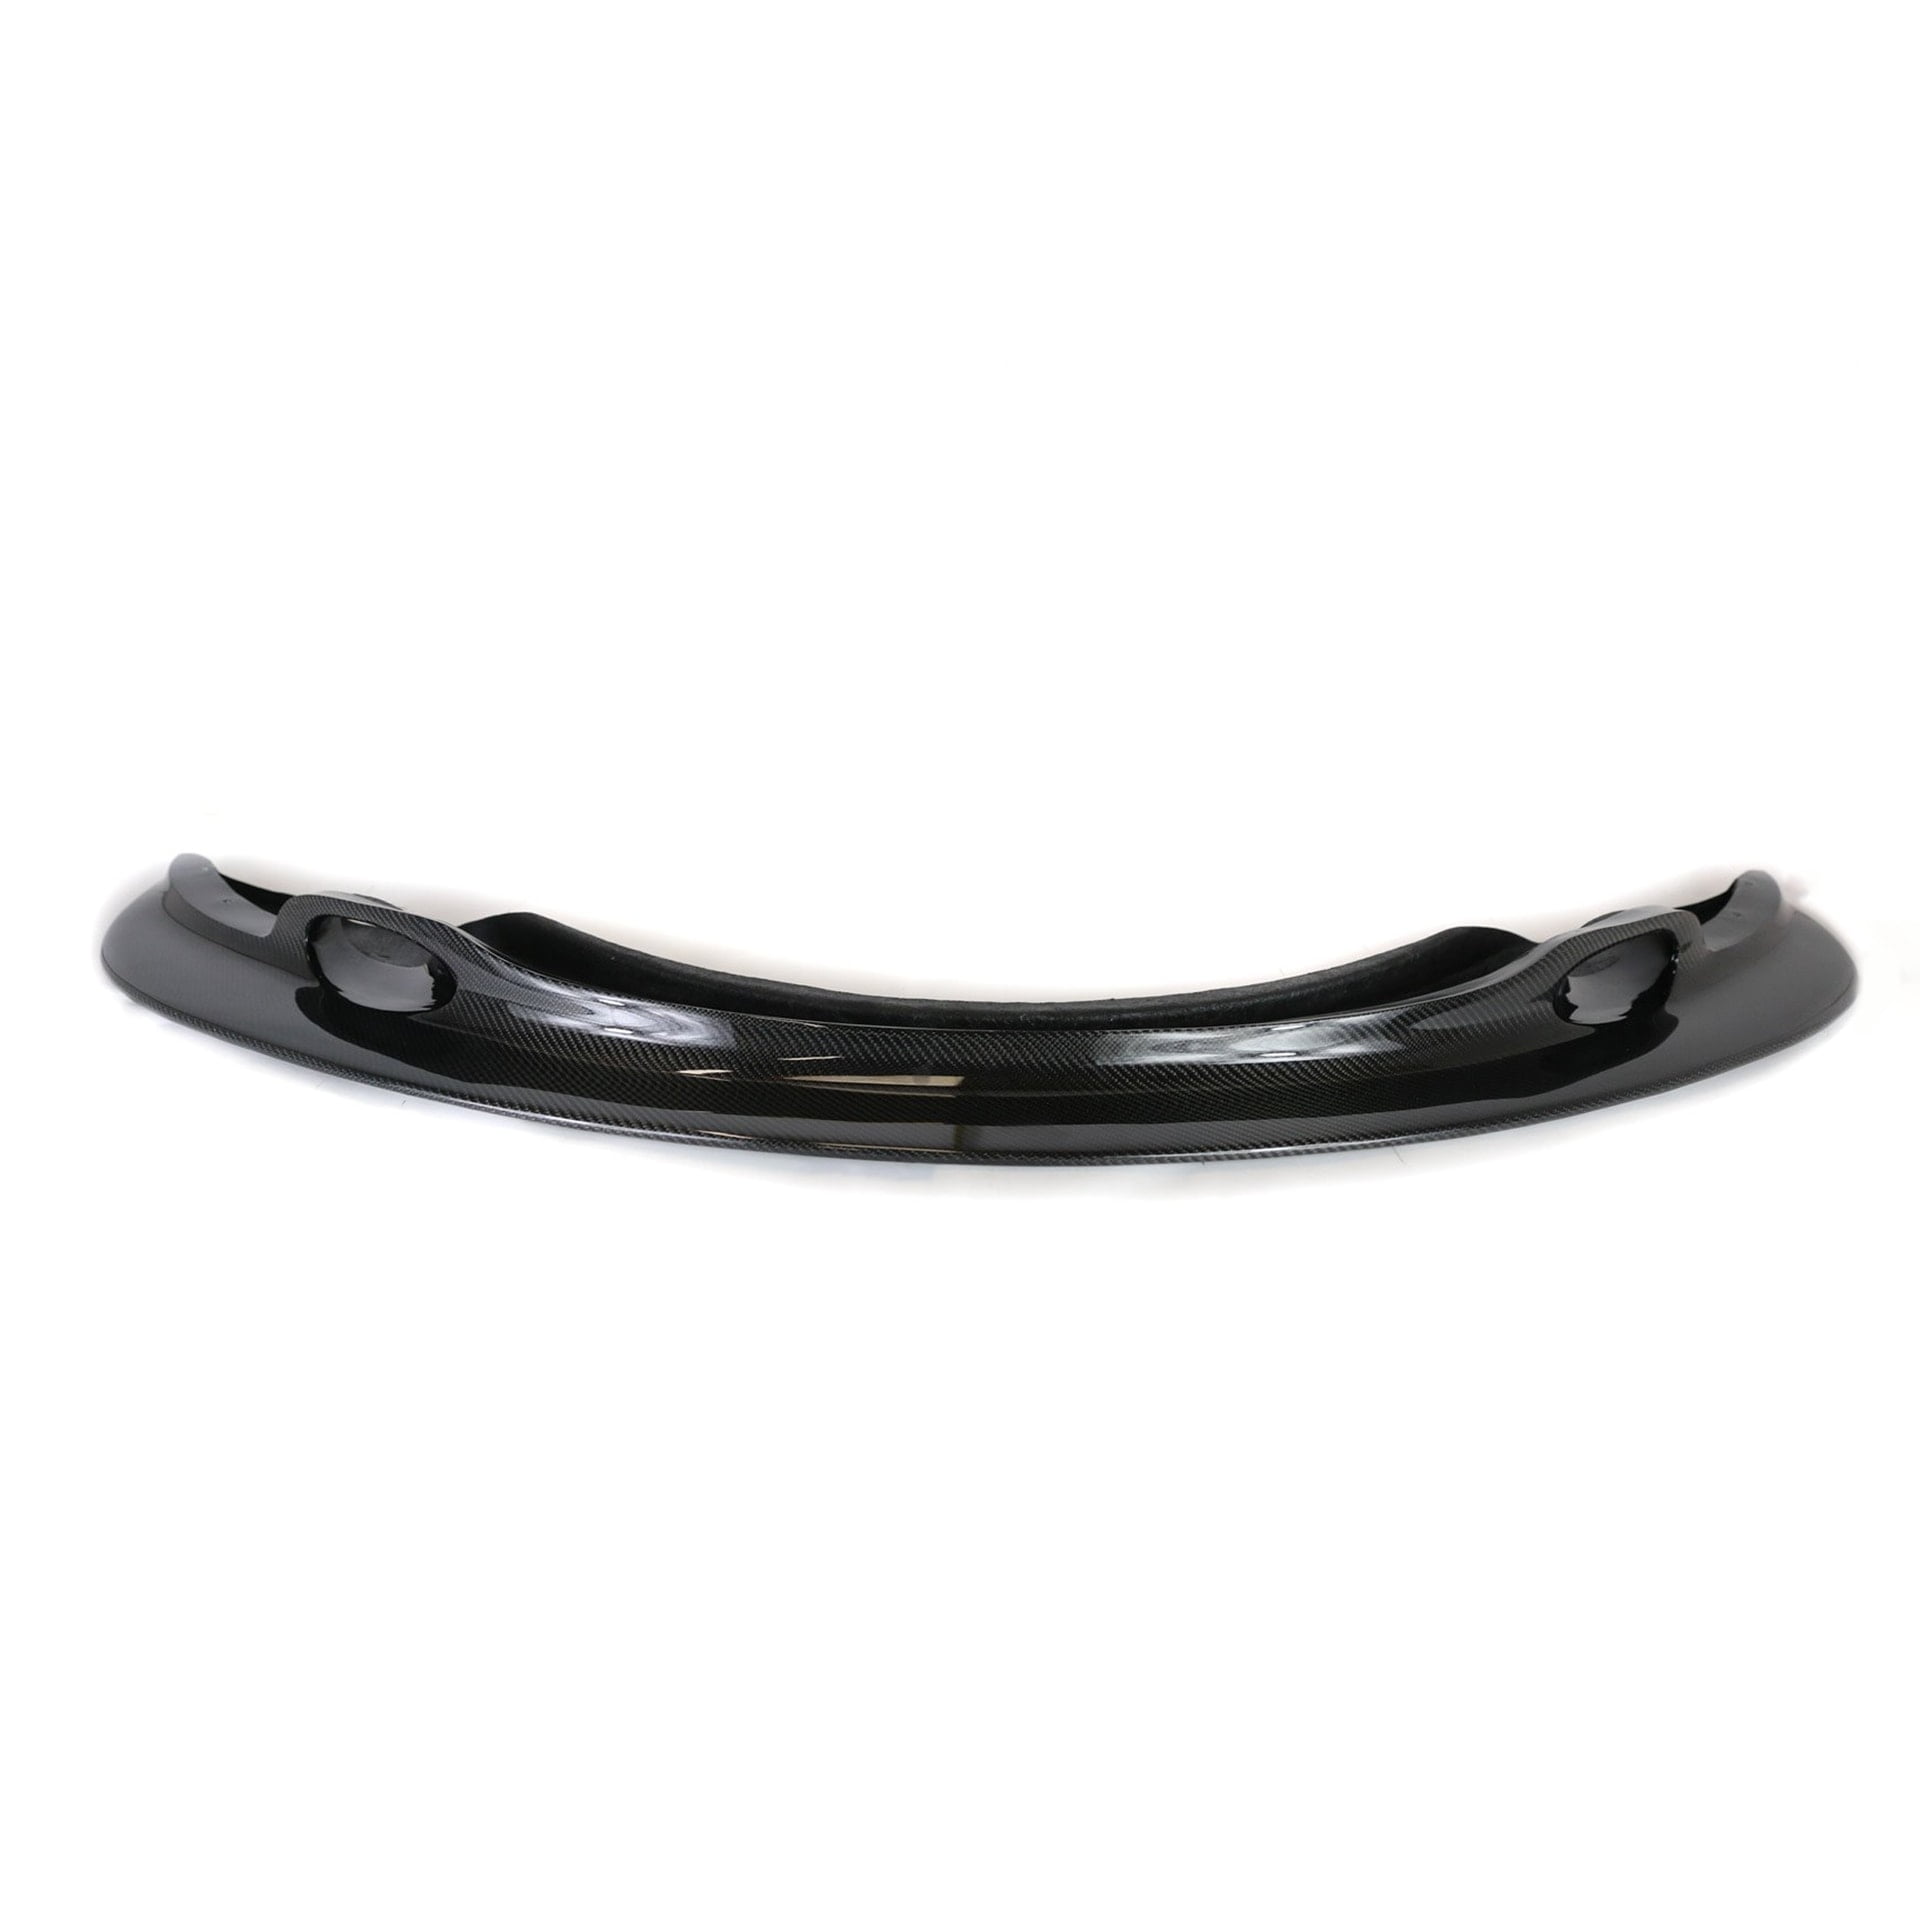
Round 1 of Bimmer Challenge 2020 season opener at Chuckwalla Valley Raceway. I made a lot of changes to the car over the past few months – specifically weight reduction. Car should weigh in around 2,900 lbs with no driver and half tank of gas. I also added some RS Future front splitter diffusers to help with the front downforce. Last time I came here to run the CW configuration was when I had no aero and pretty much full interior so I didn’t really know what to expect, but today was good enough for a 4 sec faster PB.
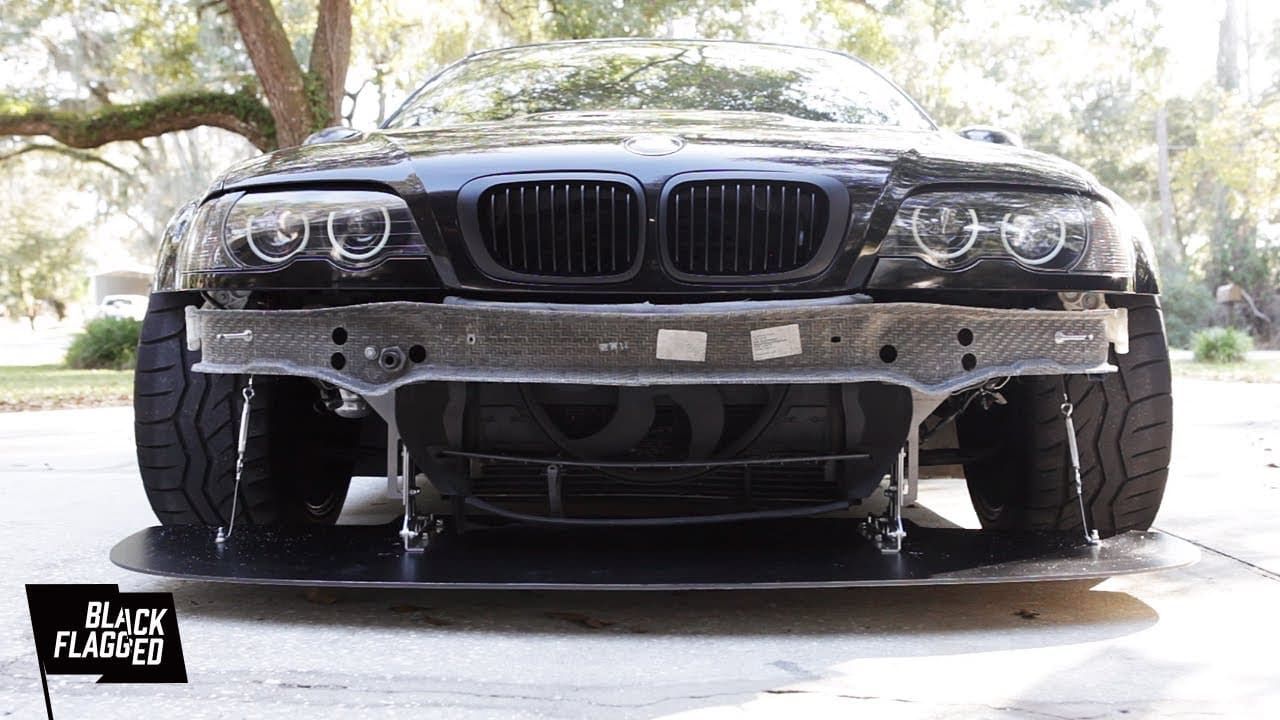
Black Flagged Installs Our Splitter Brackets
Black Flagged made a super cool video to show our Buildjournal Quick-Release Splitter Brackets and Adjustable Cable Rods, and Pop Latch Quick-Release on his E46 M3 track car. It’s super convenient to have everything quick-release because you never know when you’ll have to make adjustments on the track and remove the bumper or just simply loading your car on the trailer. Or most commonly just getting up your driveway if your apron is super angled.
If you don’t know Black Flagged, you should give him a follow and check out his YouTube page. He’s one of the few (good) content creators for the E46 M3 and we really respect his dedication to his car!
Instagram: @getblackflagged
YouTube: Black Flagged
BMW E46 M3 Buttonwillow CW13 - 1:53.938
Solid day to close out the 2019 Bimmer Challenge series at Buttonwillow Raceway Park running the CW13 configuration. I removed about 150 lbs worth of interior pieces and threw on some A052 tires, while staying in B2 class. Had a major slip correction at Sweeper and took away a low 1:53 lap but always a good feeling to PB – especially at BW CW13.
- Yokohama ADVAN A052 265/35/18
- Apex ARC-8 18x10 ET25
- Buildjournal B-Spec Tune
- Buildjournal front splitter
- RSFuture LM Wing
- RSFuture front splitter end plates / tire spats
- MCS 1WNR w/ Eibach ERS 900# / 500# (true)
- 2,970 lbs with 3/4 gas (no driver)

Magnetic Oil Drain Plug, Does It Work?
Should I get a magnetic oil drain plug?
I always replaced my oil drain plug and the crush washer for every oil change, but it seems a bit overkill to buy a new screw. In addition, I started doing most of my oil changes with the Schwaben Fluid Extractor so I don’t even need to mess with the drain plug. Essentially I can just do an easy oil change without having to jack up the car and as an added benefit have the magnetic drain plug collect the debris that will otherwise be drained via the traditional draining method. There’s a lot of people documenting what their magnetic drain plug collected, so I wanted to experience it myself.
From Dimple Motor Oil Magnets:
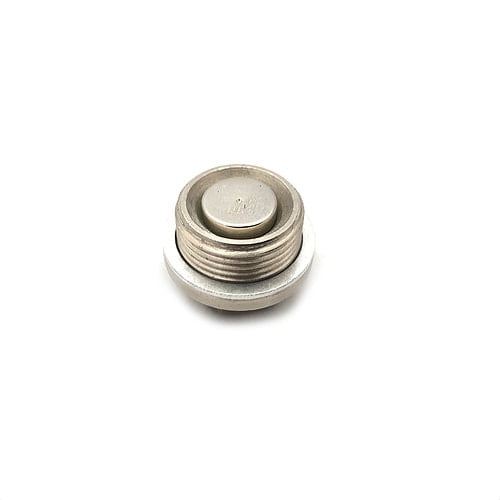


Testing Parameters
- Oil: Ravenol 10W-60
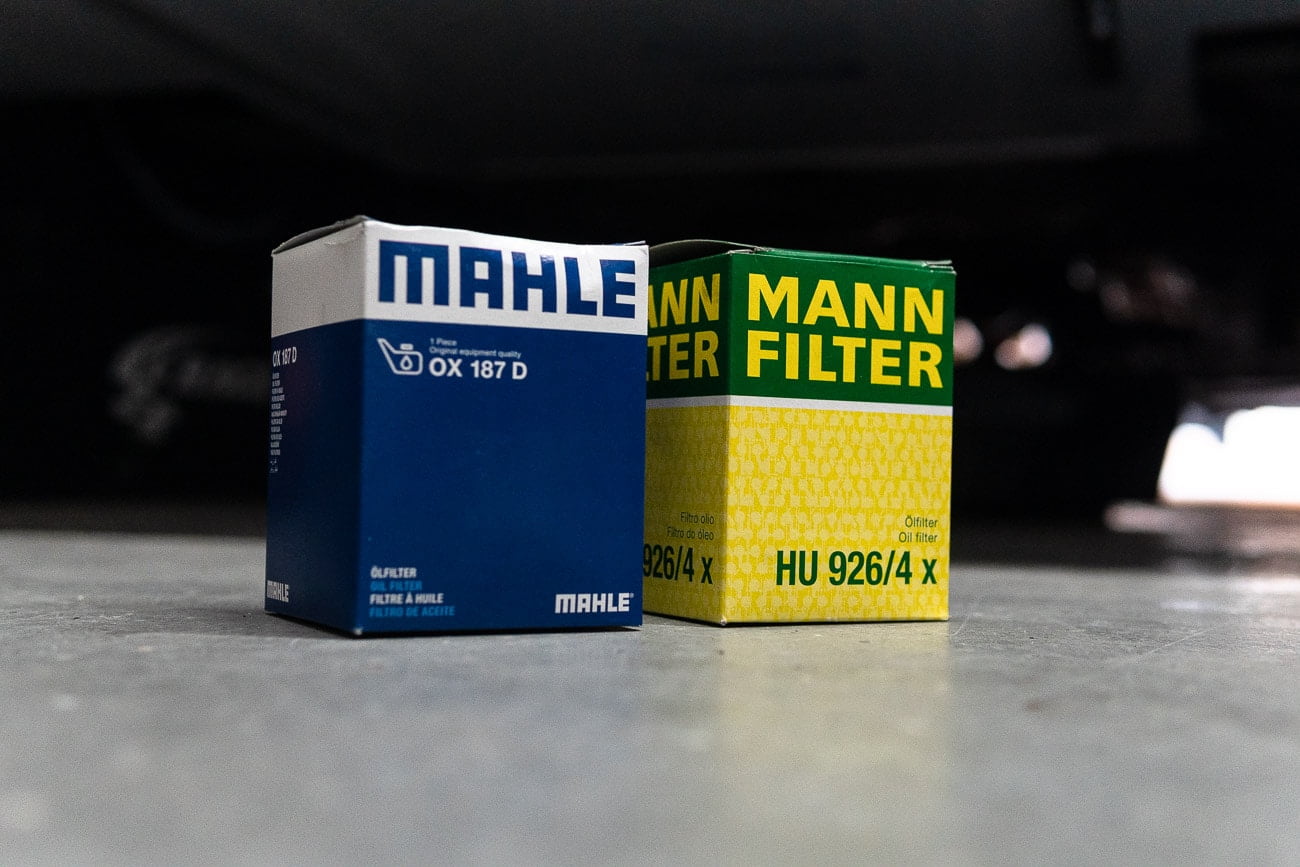
- Oil Filter: Mahle OX 187D
- Additives: LIQUI MOLY Cera Tec, LIQUI MOLY Engine Flush
- Time: About 6 track days and 3 oil changes

What should I be looking for?
Well off the bat, a lot of people are probably wondering if the shavings from the rod bearings can be collected via the magnet to use as an indicator for wear, but unfortunately the rod bearings are lead-copper based and is not magnetic.
So the shavings that get collected from the magnet are just metallic engine internal shavings and it’s not just one component. What you don’t want to see are large metal debris that shows premature wear. Small shavings are okay and that’s what I got.
So what's the verdict? Is it worth it?
For my experience, it didn’t really tell me much other than my engine is not spitting out pieces of metal debris. However it gives me peace of mind that my engine is running normal. In addition, I’m continuing to use my Schwaben Fluid Extractor so I don’t have to worry as much about all the debris, that would be evacuated with a traditional oil change, just sitting on the bottom of the oil pan. At least the magnetic drain plug is doing its job collecting the debris. Regardless of how you extract the oil, the drain plug does work. So why not give it a shot? The price of the magnetic drain plug already paid for itself, opposed to buying a new OEM drain plug every oil change for a year.
If you are considering purchasing a magnetic drain plug, I high recommend you DO NOT get one from eBay as the magnetic block as the cheaper alternatives may fall off – thus sending a large chunk of metal into your oil pan. We do sell the Dimple magnetic products, via RACE GERMAN, which is a trusted brand for magnetic drain plugs.

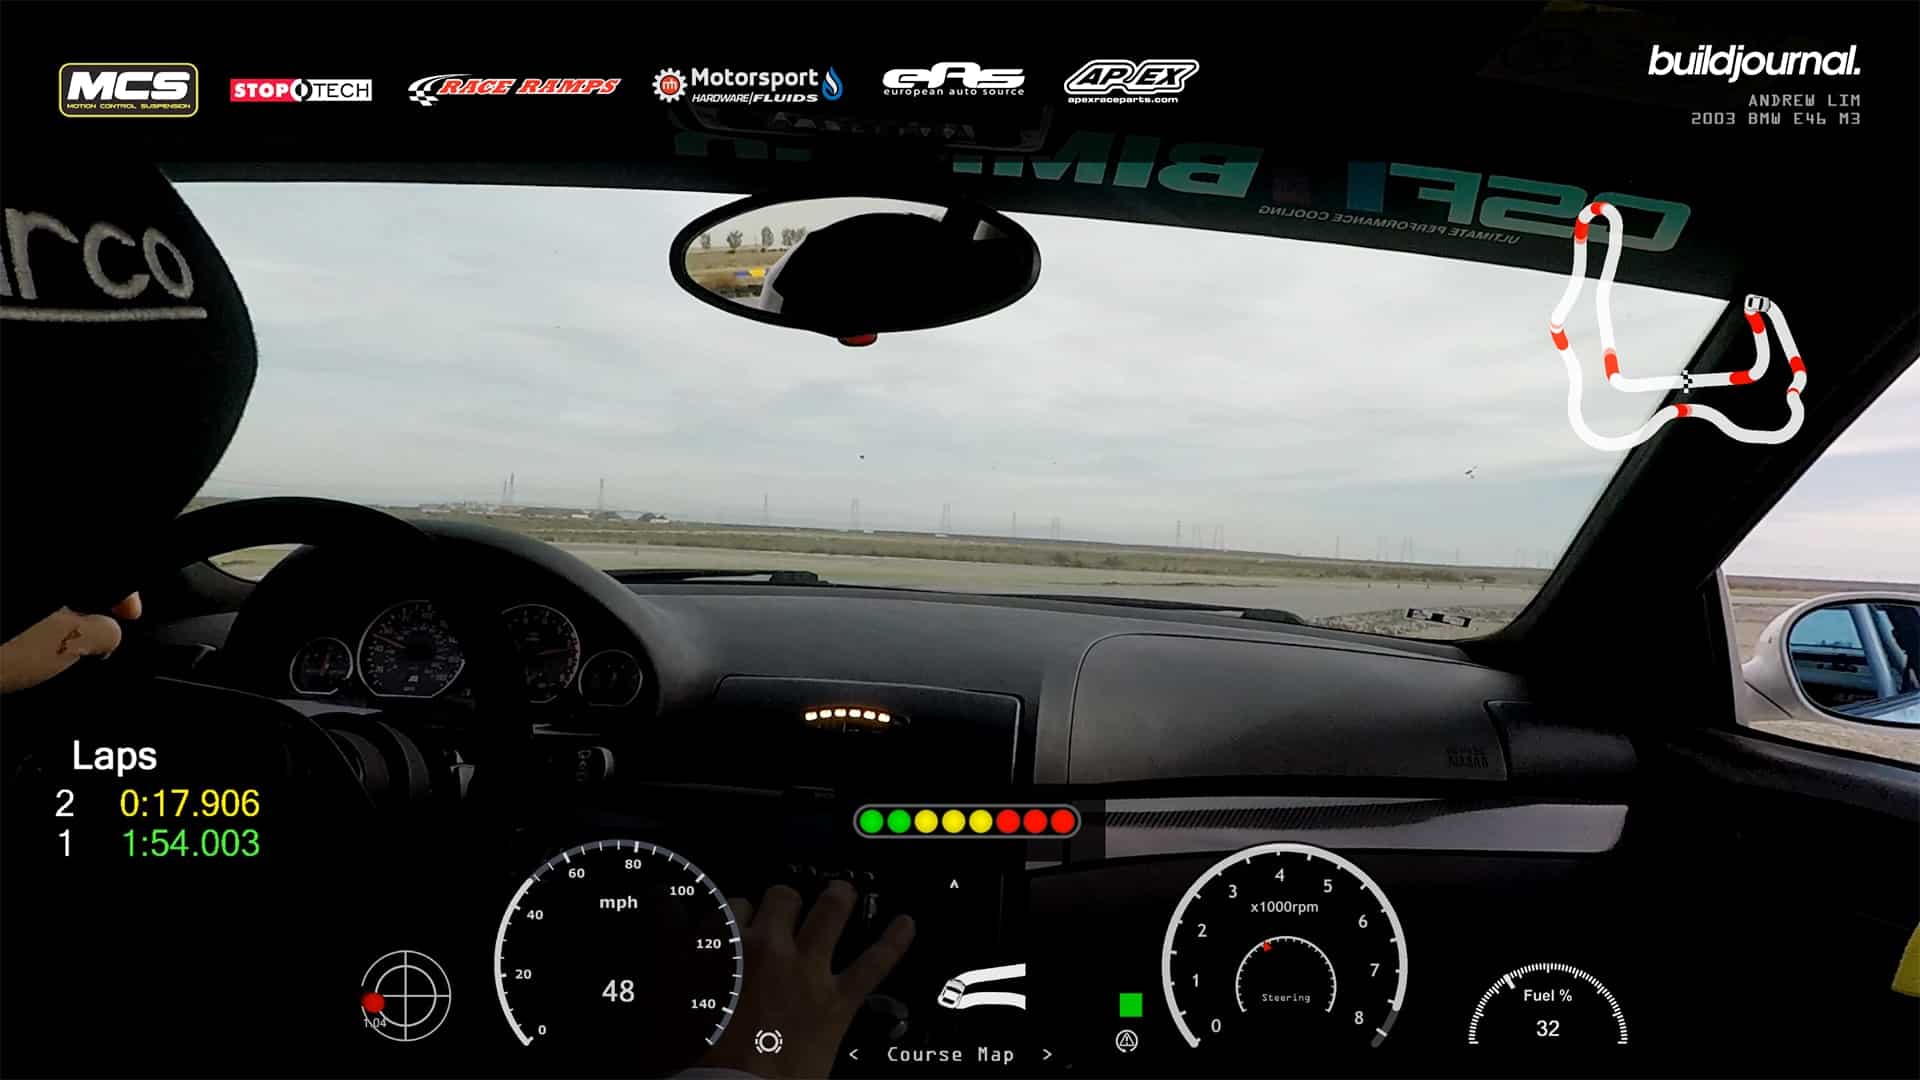
BMW E46 M3 Chuckwalla CCW - 1:59.653
A new PB, during the second session, at Chuckwalla CCW during Round 9 of Bimmer Challenge. The Pirelli DH tires fell off very quickly after the first session. I was bummed I didn’t get to put in a clean lap in the first morning session, but still happy with shaving over 3 seconds from my previous street tire (Nexen SUR4) + no aero CW PB.
- Pirelli DH scrubs 265/645/18 (7th heat cycle in second session)
- Apex ARC-8 18x10 ET25
- RSFuture LM Wing
- Buildjournal front splitter
- MCS 1WNR w/ Eibach ERS 900# / 450# (true)

BMW E46 M3 Oil Change DIY
Change Your Engine Oil and Keep Your Engine Running Healthy
We’ve documented the oil change frequency on our Ultimate E46 M3 Maintenance Guide and now we’re going to tell you how to change the oil yourself. It’s especially important to change your oil based on the Inspection I or Inspection II schedule because the viscosity of the oil protects your S54 rod bearings, which already is a sensitive wear and tear item. This article will go through the entire oil change process including step-by-step directions and high quality photos to explain the DIY as easy as possible.
Tools Required
- 6mm Hex Socket
- 13mm Socket
- Socket Wrench
- Torque wrench
- Oil Drain Pan
- Shop towels or rags
- Small pick
- Funnel (optional)
Parts Required
- 6 Liters of engine oil
- Oil drain plug (optional)
- Oil drain plug crush washer (included with most kits)
- Oil filter
Recommended Parts
Oil Change Instructions
1. Run the engine for 3-5 minutes (if on a cold start) to get oil temperature up. This will help the oil flow out better when you extract it.
2. Jack up the car’s front end to access the drain plug. Access the engine bay.

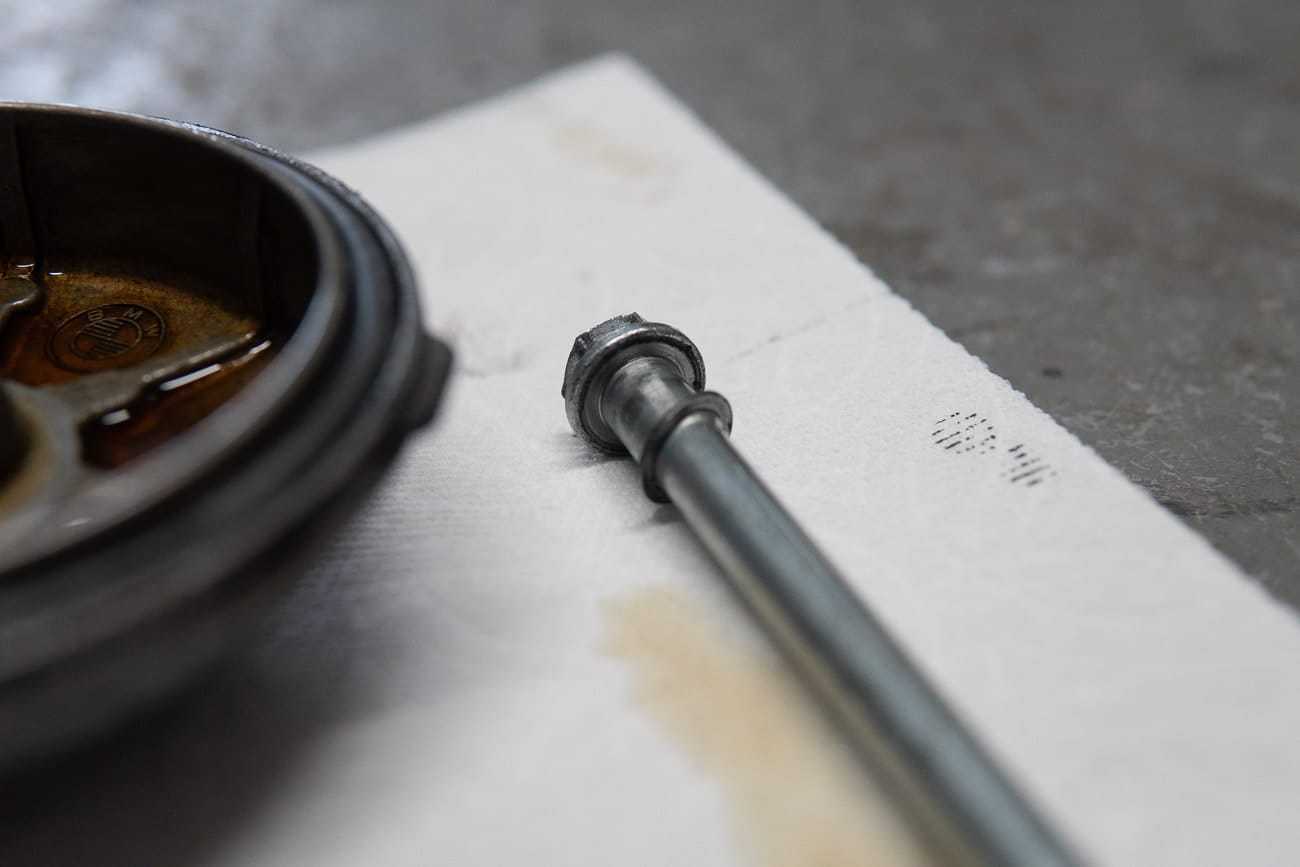
3. Locate the drain plug underneath the car and loosen the 6mm hex bolt.
3.1 Unscrew the last few turns by hand and let the engine oil drain into a drain pan. Discard the old crush washer.
4. Locate the oil filter housing (OFH) and throttle position sensor (TPS) which is right above the OFH. Perform this while the oil continues to drain.
4.1 Unplug the TPS sensor by pushing down on the metal tab.
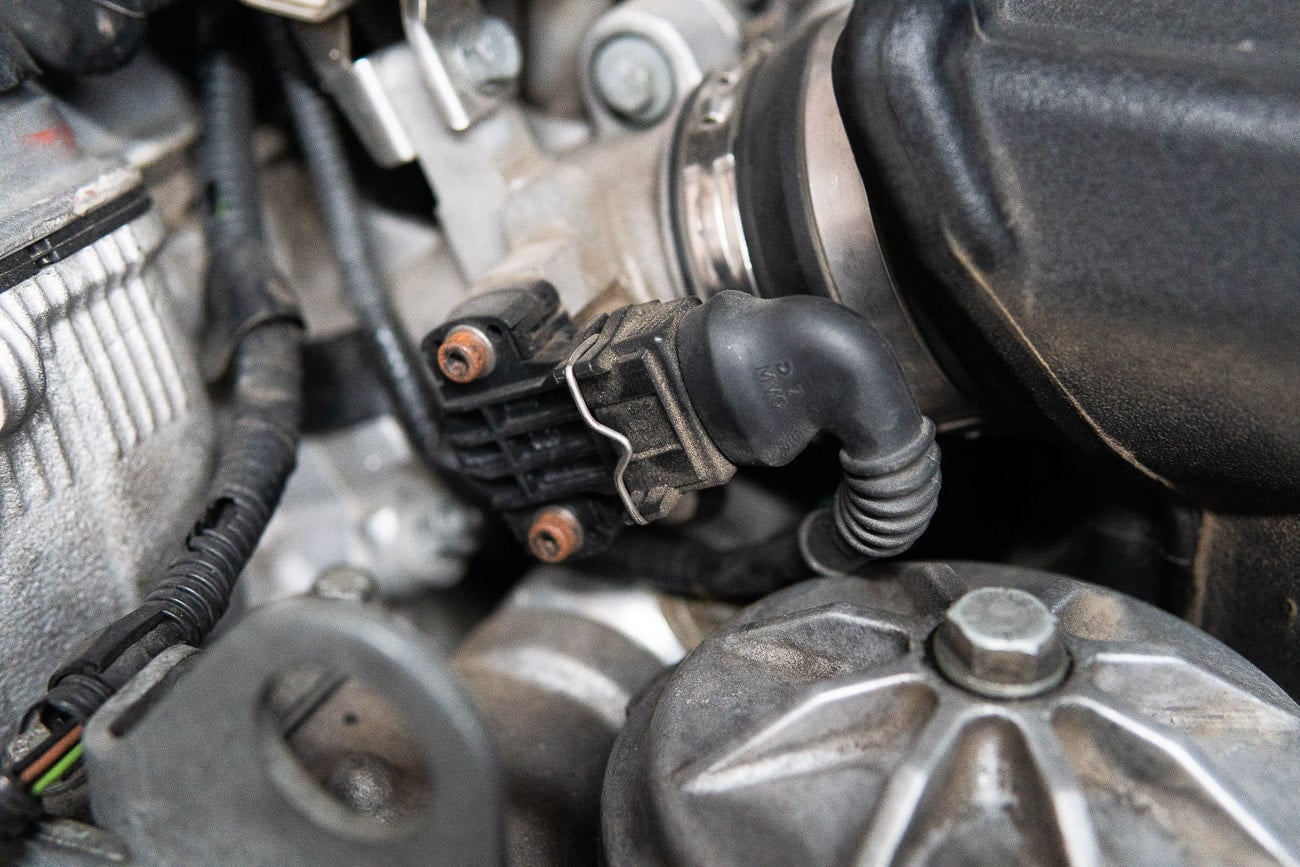
5. Remove the OFH cap using a 13mm socket.
5.1 Remove and discard the old oil filter.

6. By now the engine oil should be drained. If the oil is extracting in a constant stream give it a few minutes until you see it drip.
6.1 Install the drain plug along with a new crush washer. Torque to 18 ft-lbs.

7. Clean out the OFH.
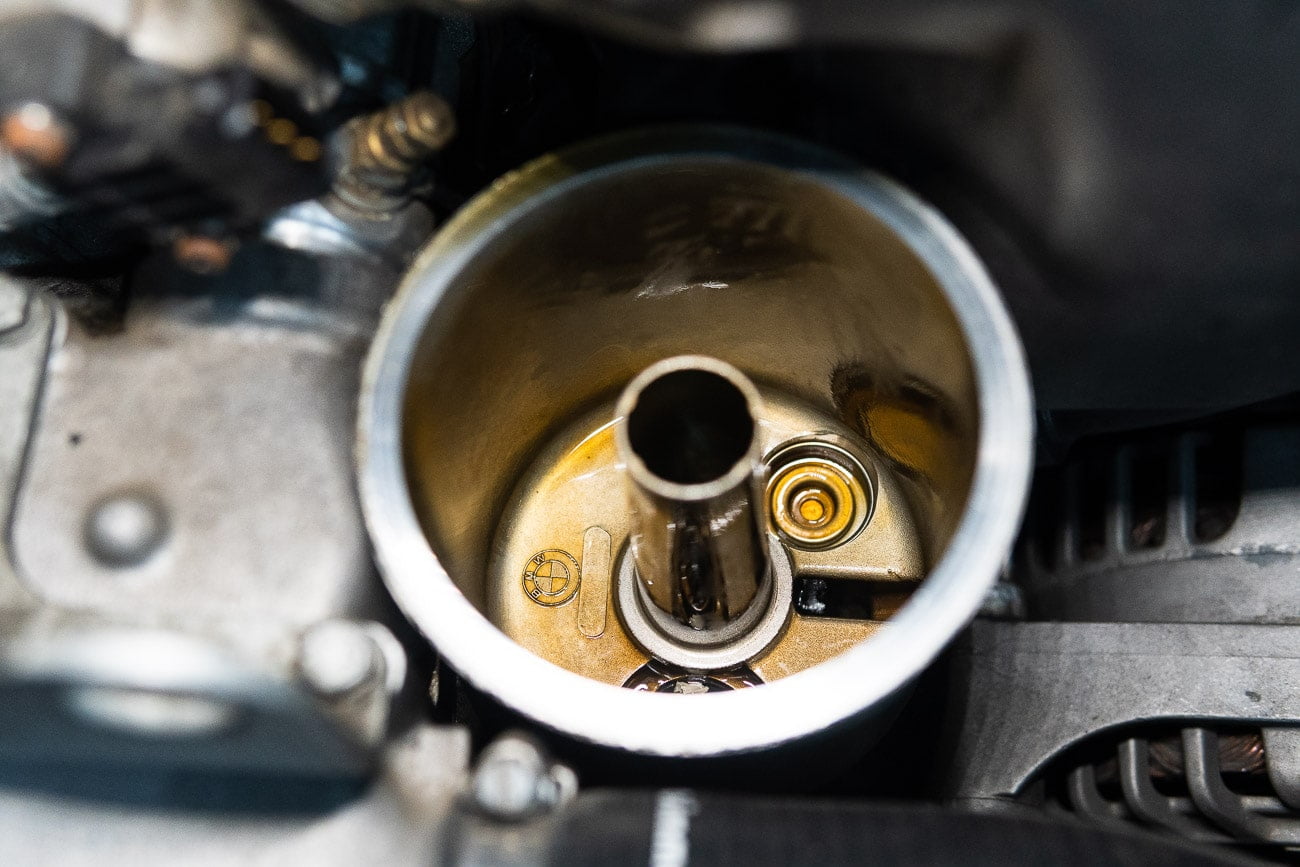
8. Open the contents of your oil change kit. You should have: (2) o-rings and (2) washers including the one you already used (copper) for your oil drain plug.

9. Remove the old o-ring on the OFH with a pick and replace with new o-ring.

10. Replace the crush washer on the OFH bolt.
10.1 Replace the smaller o-ring on the bottom of the OFH bolt by using a small pick.
11. Install new oil filter.
11.1 Pour 0.75 liters of engine oil in the OFH while saturating the new oil filter. This prevents having a dry start-up after the oil change.
12. Install the OFH cap and install the 13mm bolt. Torque to 24 ft-lbs.
12.1 Plug the TPS back in.

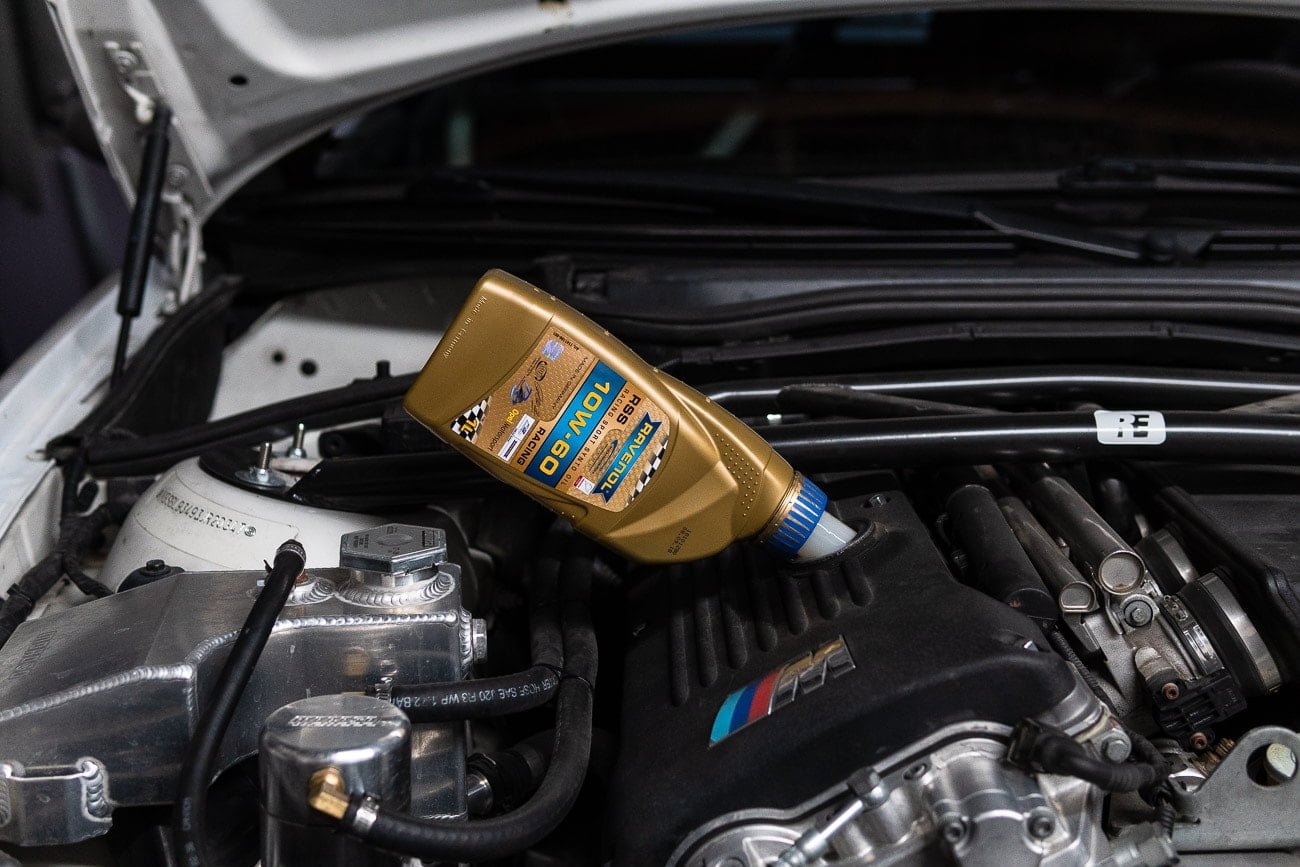
13. Locate the oil cap and pour remaining engine oil into the engine.
13.1 The S54 calls for 5.5 liters (5.8 quarts) of engine oil.
13.2 Tighten oil cap after filling with oil.
14. After the oil change, run your car and get the oil to operating temperature.
14.1 Let the car idle for 3-5 minutes.
14.2 Check the oil level on the dip stick. The BMW recommended oil level (5.5 L) is right in the middle of the two marks. For reference, the bottom mark is 5 L and the top is 6 L.
14.3 Fill or extract if necessary.


Race German Seat Belt Harness Collar Review
Secure Your Seat Belt Harness Shoulder Straps
I’ve been running a DIY strap-style harness collar on my roll cage to prevent the shoulder straps from moving around and finally I decided to get the Race German Harness Collars to secure it even more firm.
If you’re running a seat belt harness with shoulder straps attached to the roll bar it is highly recommend to secure your straps to ensure it does not move around. This is especially important for those running 2″ or 3″ shoulder harness with a HANS device. If you find yourself constantly adjusting your shoulder harness, you’re putting yourself in danger.

Product Features
- Heavy-Duty Harness Collars
- Prevent Shoulder Harnesses From Moving
- Split Collar Design
- Black Oxide Coated
- 8mm Hex Head Bolts
- 5 Minute Installation
Sizing
The collars come in 1 1/2″ or 1 3/4″ diameter so you’ll need to determine your roll bar outside diameter (OD). Most bolt-in cages are 1.75″ OD so for my Auto Power bolt-in roll cage I got 1.75″ collars. If you need to measure, get a digital caliper gauge or something similar.
Installation
It took me less than 5 minutes to install all 4 harness collars. The 8mm hex bolts and Split Collar Design allows for super easy on and off if you have to. Keep in mind you need 2 collars for each shoulder strap so most likely you need a total of four collars for one driver or passenger side harness kit.
Quality
The collars are made out of light weight steel with black oxide coating to prevent rust. The 8mm hex bolts ensure a super secure installation so once they’re installed they won’t be going anywhere.


E90 E92 E93 M3 Coilover Install DIY
Coilover Suspension Installation Guide for Your E9X M3
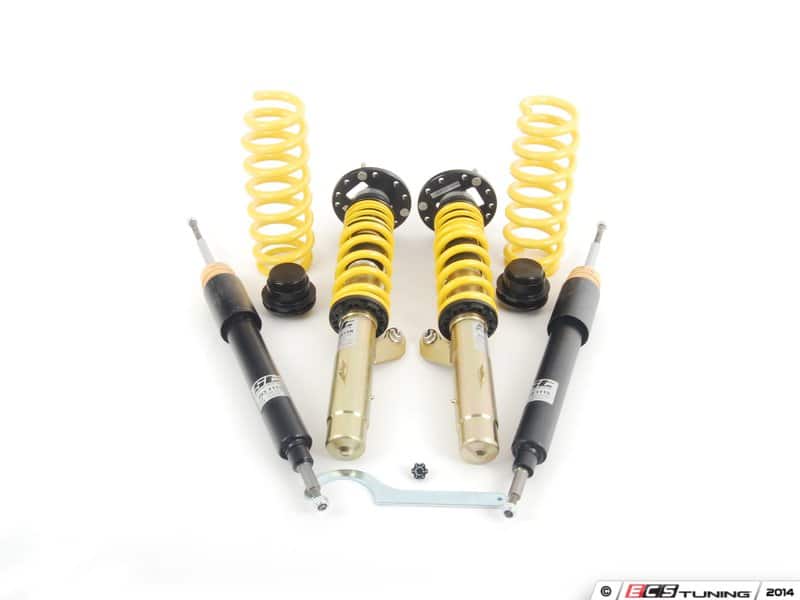
The BMW E90 E92 E93 M3 suspension can be upgraded to coilover style shocks and springs to improve performance. Although the ride is usually firmer with coilovers, a good quality set of coilovers can drastically improve the handling characteristics while retaining ride comfort. For this DIY, I will be installing the ST XTA Performance Coilover System featuring adjustable dampening to control suspension rebound.
The installation process takes about 3-4 hours for first timers and about 2 hours for installers with previous experience. Installation procedure may differ depending on your coilover model.
Do I have EDC?
Before you purchase your coilover kit, it’s important to figure out which kit you need. There are two main options for the E9X M3: with EDC or without EDC. If you’re confused what this is, you can take a look in your engine bay and look for the Electronic Damper Control modules on top of each shock tower. The EDC module is very visible with a trailing wire that comes out of the shock tower cap/cover.
The only difference between each kit is that the non-EDC rear shock has a 10mm shaft while the EDC version has a 12mm shaft. Technically you can use a non-EDC coilover kit on a EDC car by running 10mm rear shock mounts – and vice versa. Make sure you select the correct shaft diameter hardware for your application! It is recommended to switch out the RSM during the install to ensure your bushing are fresh. Worn out RSM’s can lead to alignment issues and poor handling.
Tools Required
- Rear shock mount (RSM) - ECS Tuning
- Torque wrench
- Breaker bar
- Flat head screwdriver
- Jack + stands
- Spring compressor (for stock suspension)
- 21mm socket
- 18mm socket
- 16mm socket
- 13mm socket
- 10mm socket
- 8mm socket
- 6mm socket
- 21mm wrench
- 16mm wrench
- 19mm wrench
- 10mm wrench

Coilover Installation Instructions
1. Prepare for Suspension Removal
1.1 Jack up the car. I started with the fronts first, but you can work on the rear if you choose to. Jack up the car using the center jack point and place jack stands to support the car.
1.2 Disconnect the headlight auto-level sensor located on the driver’s side control arm using a 10mm socket and wrench. This is an optional step however be careful not to droop your control arm all the way down if you plan to leave connected.
1.3 Remove wheels.
1.4 Disconnect brake line, ABS sensor and other wiring located on the inside of your shock.

2. Remove Suspension (Front)
I’ll be removing KW V3 coilovers, but if you have a non-coilover style suspension system (including stock) you will need to use a spring compressor to remove the strut assembly.
2.1 Remove end links. The stock end links can be removed with a 16mm socket and a 16mm open-ended wrench.


2.2 Remove the 3 M8 nuts on the top of each strut tower using a 13mm socket. Provide support from underneath while you remove these nuts so the control arm does not fall.

3. Install New Suspension (Front)
3.1 Once the old strut is out, you can install the new strut. My ST comes with a sleeve that needs to be inserted first. Line up the sleeve, in accordance to the spindle gap, and insert the new ST shock with the metal nub sliding down the spindle gap.

3.2 The best thing about the ST kit is that it comes with camber plates. After the sleeve and strut is inserted, use a jack from underneath to slowly raise it towards the shock tower.
3.3 Tighten the 3 shock tower nuts firm, but not torqued yet. We will torque once the car is loaded.

3.4 Install your new end links. Stock end link M10 bolt calls for 42.7 ft-lbs.
3.5 Install brake lines, ABS sensor wiring, and bracket to strut housing.
3.6 Install headlight auto-level sensor if removed. Torque to 6 ft-lbs.
3.7 Load the front suspension by lowering the car back to the ground and then torque the three M8 strut tower bolts to 25 ft-lbs.

4. Remove Suspension (Rear)
4.1 Jack up the rear of the car.
4.2 Remove the inner trunk liner on both sides of the trunk to expose the rear strut tower.
4.3 Remove the top strut mount by using an open ended 16mm wrench and a hex socket to hold the spinning strut in place.
4.4 Remove the headlight auto-level sensor on the driver side rear using a 10mm socket and wrench.

4.5 Support the bottom control arm with a jack and remove the 18mm and 21mm bolts. The 21mm bolt will require a 21mm wrench to hold the other side which spins.

5. Install Suspension (Rear)
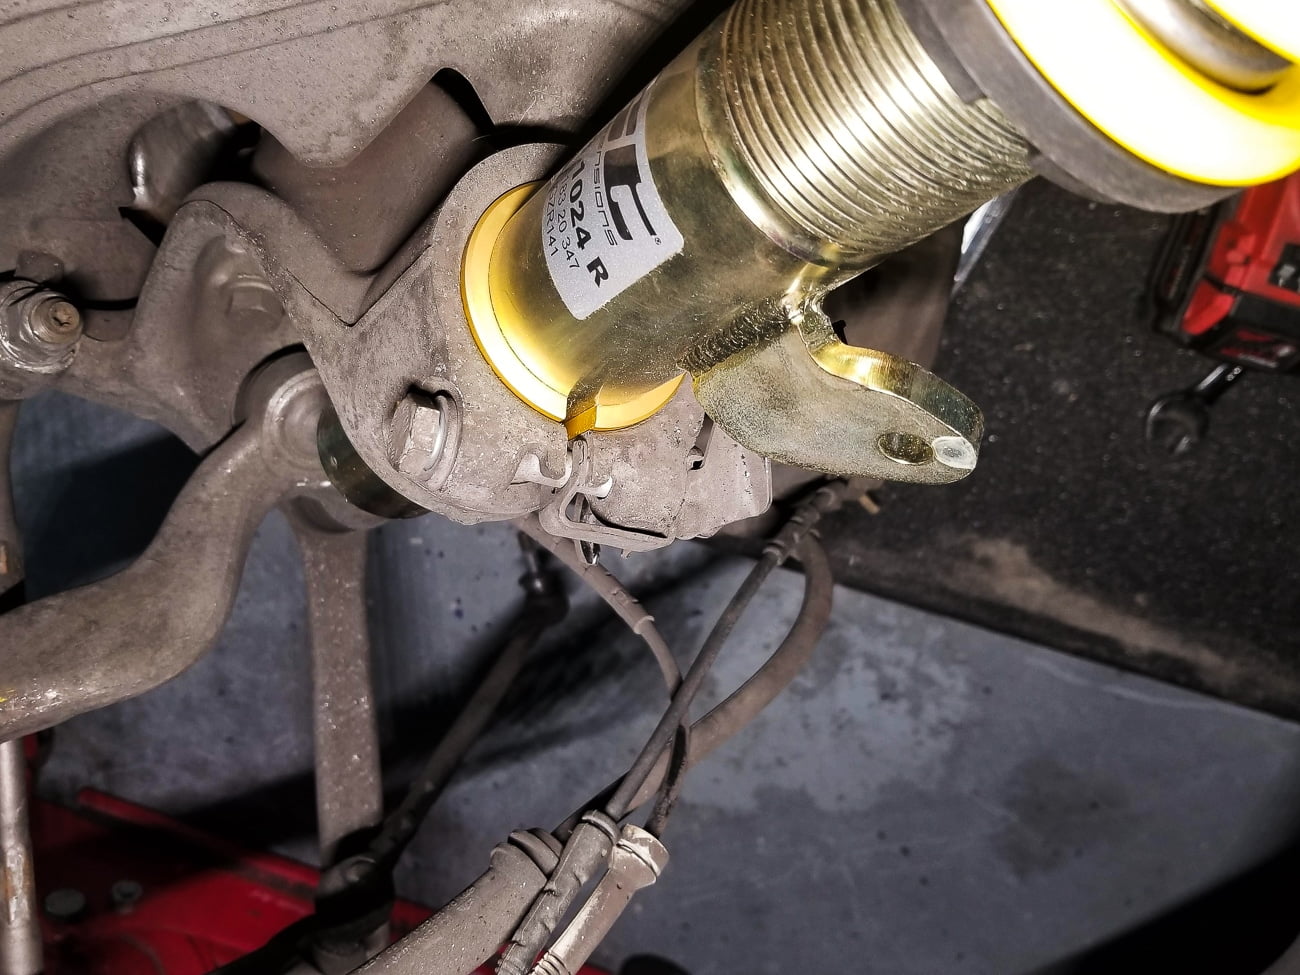
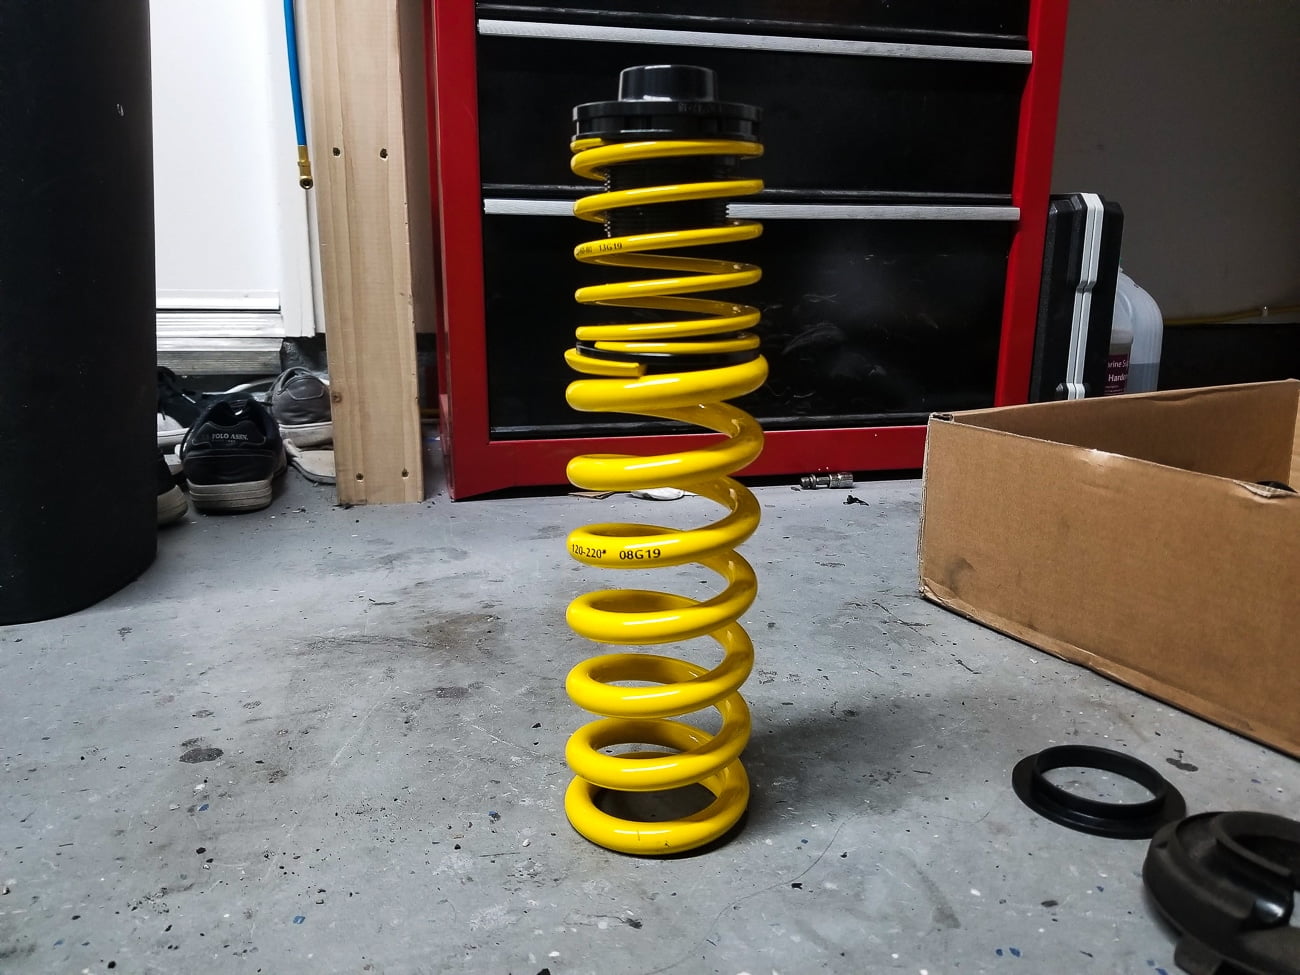
5.1 Prepare your rear spring for installation. My ST kit came with a helper spring which I added to the top half. You may need to re-use your spring pad for the bottom of the spring which sits on the spring perch. ST advises not to, but others may vary. I actually decided to re-use the pad on mine. On some coilover kits, you may have to re-use the upper spring perch as well. For my ST I did not.

5.2 Prepare your new rear shocks for installation by inserting the lower half of the rear shock mount (RSM).

5.3 Place the new shock into the rear shock tower.
5.4 Simultaneously insert the new spring setup into location.


5.5 Once the rear spring and shock is in place, line up the lower control arm and lower shock hole. This part can get a little tricky because the knuckle needs to slide in between the control arm, however the knuckle bushing may flex instead of sliding into place.
5.6 After everything is lined up, reinstall the 18mm first then 21mm bolts. Torque the 18mm M12 bolt to 74 ft-lbs and the 21mm M14 bolt to 122 ft-lbs. Once the car is loaded and back on the ground, re-torque these values. It’s important that the car is loaded when final torque is applied.

5.7 Go back up to the upper strut mount and install the other upper half of the rear shock mount. Tighten the 16mm nut to 27 ft-lbs.


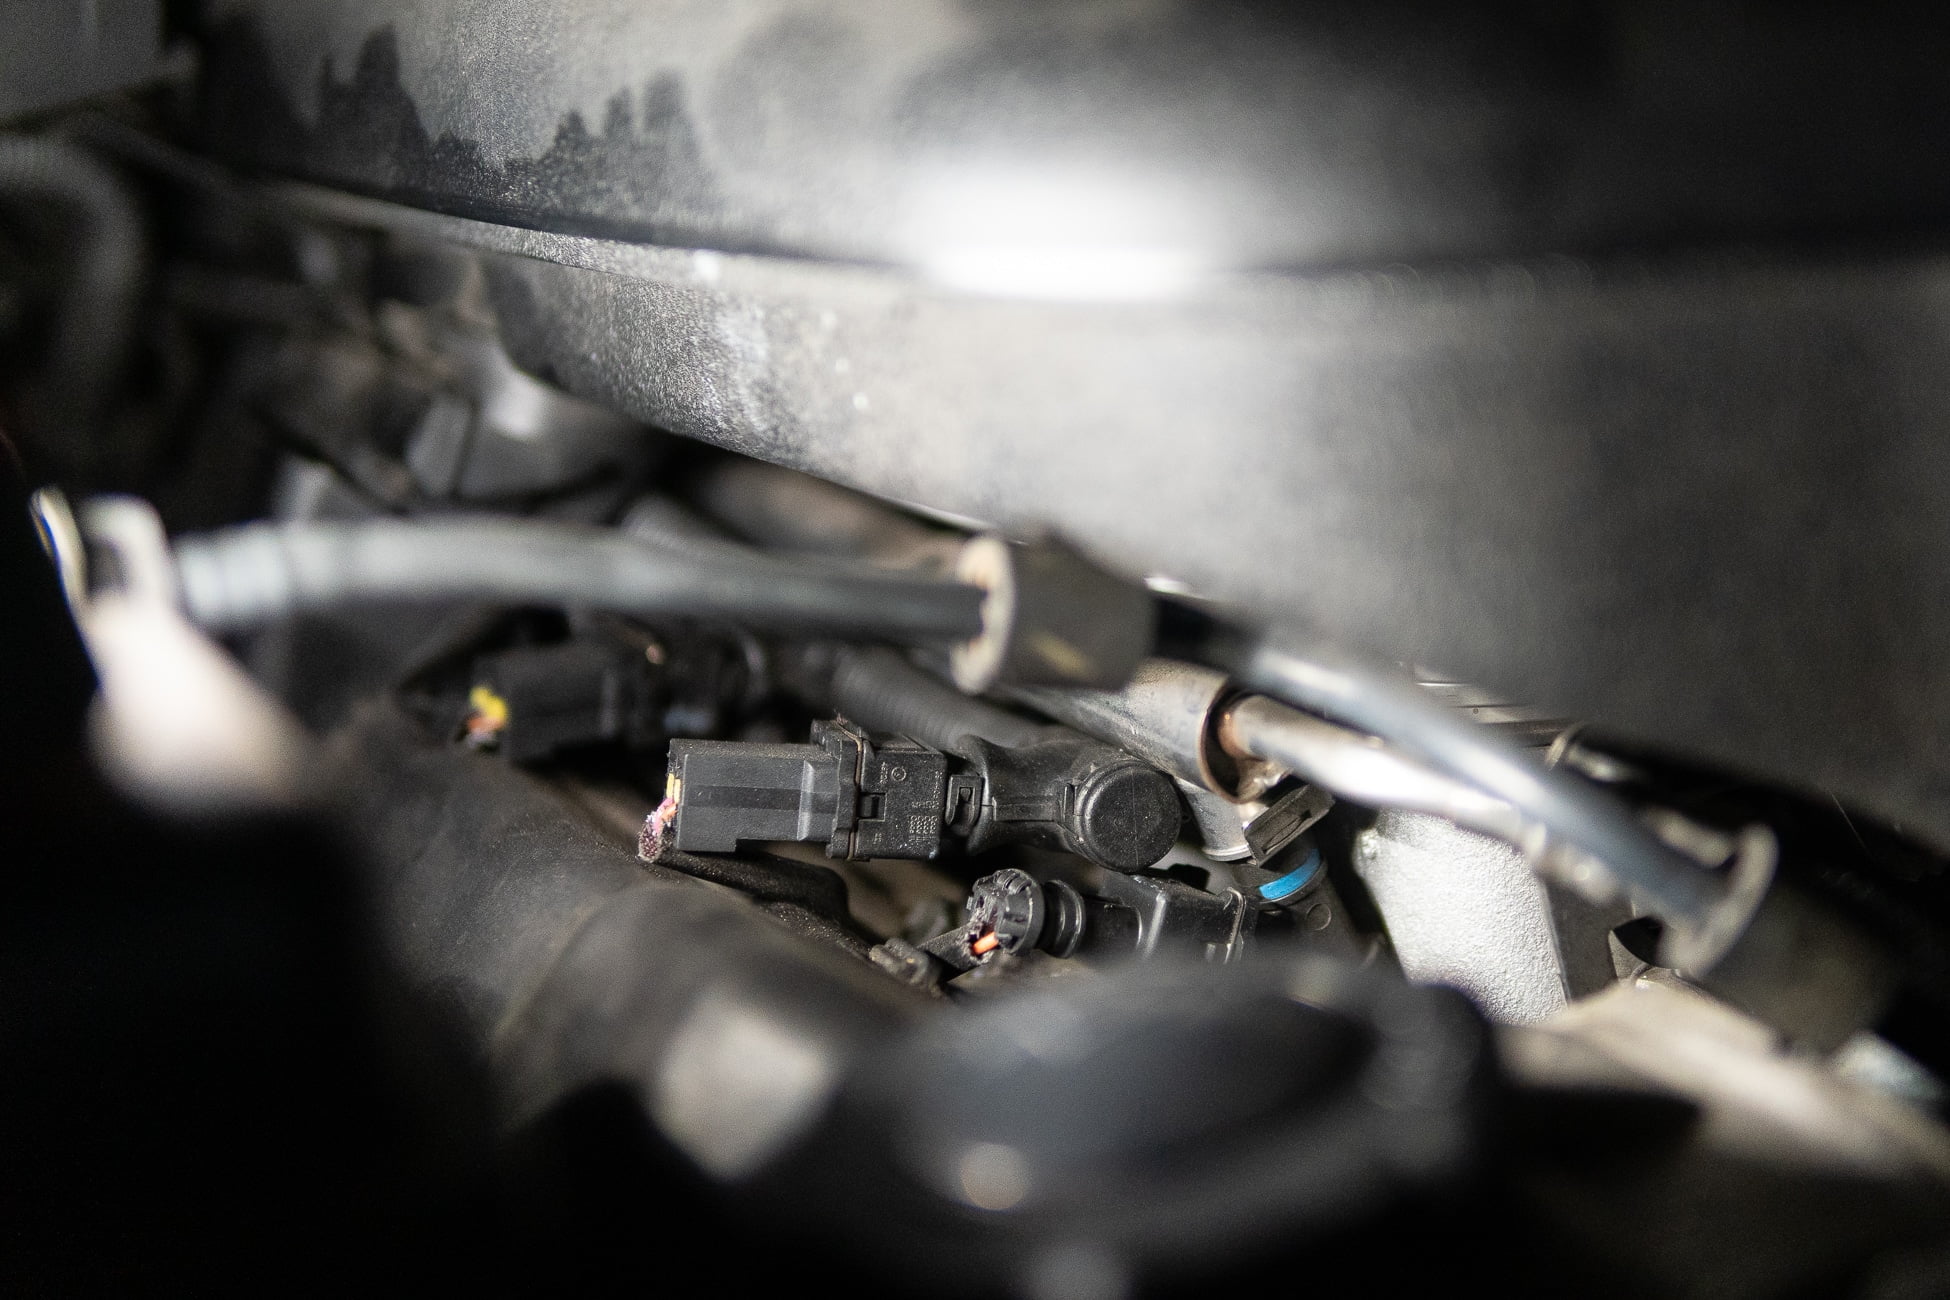
APE X85 (E85) Flex Fuel Kit Install DIY - E90 E92 E93 M3
The Alternative Performance Engineering (APE) X85 Flex Fuel Kit is a great way to increase horsepower and torque on your BMW S65 engine (E90, E91, E92, E93 M3) while having the flexibility of running a variable concentration of ethanol. Ethanol tuning once used to be a high-involvement solution to increase power because it required a dedicated tune and the engine was 100% reliant on running a fixed ethanol concentration that it was tuned for. That has changed with the aftermarket Flex Fuel solution, however the market is still in the “early adopter” stage of the product. Those of you that run or have run a Flex Fuel solution, you know how convenient it is to not be 100% reliant on a fixed amount of ethanol while still making substantial power.
We’ve done numerous reviews for the E46 M3 and now we are proud to have tested the same APE flex fuel kit for the V8 S65 engine. Below is a guide to do the install. It’s pretty straight forward.
APE X85 Flex Fuel Kit Installation
1. Remove fuse #70 (fuel pump) and start the car. Let the engine stall. This will remove excess fuel in the lines to help reduce the amount of fuel leaking out of the lines when you disconnect it in the later steps.
2. Disconnect battery harness to reduce any chances of electrical issues during the install.
3. Remove upper intake cover.

4. Remove lower half of intake box.

5. Locate the fuel line towards the back of the engine bay closest to the driver side firewall.

6. Locate the fuel line towards the back of the engine bay closest to the driver side firewall.
7. Disconnect main fuel line.

8. Assemble the flex fuel sensor unit and install in place of the original fuel line.

9. Grab the main wiring harness loop for the injectors and feed through each side of the engine. It’s going to get really tight and you may need to remove the top intake plenum to gain more clearance. In my case, I did not have to.

10. Start disconnecting all 8 Bosch EV1 connectors by pulling the metal tab up. This is going to be tricky and you will need a small pick to get to the metal tabs. Be careful not to pull out too much because you will dislodge the metal tab and may drop inside the engine bay.


On the driver side, disconnect the intake return inlet hose to make clearance.

11. Once all 8 connectors are plugged in, tuck in the wiring as best as you can. I used several zip ties to keep the wires together.
12. Mount the main module to a “cooler” area on the car. I decided to mount mine next to the passenger side firewall. Try to avoid mounting it close to the headers or anywhere that may get really hot.
Identify the passcode on the back of the module before you install as you will need that to access additional tuning features.

13. Connect the ground coming from the harness. There is a ground point right next to the washer fluid fill cap.

14. Reconnect the battery and start the car up. Run the engine for a bit and check for fuel leaks.
15. Once everything is good, re-install your intake.
16. Finally, download the APE ape from the app store and connect via Bluetooth.

Related Products


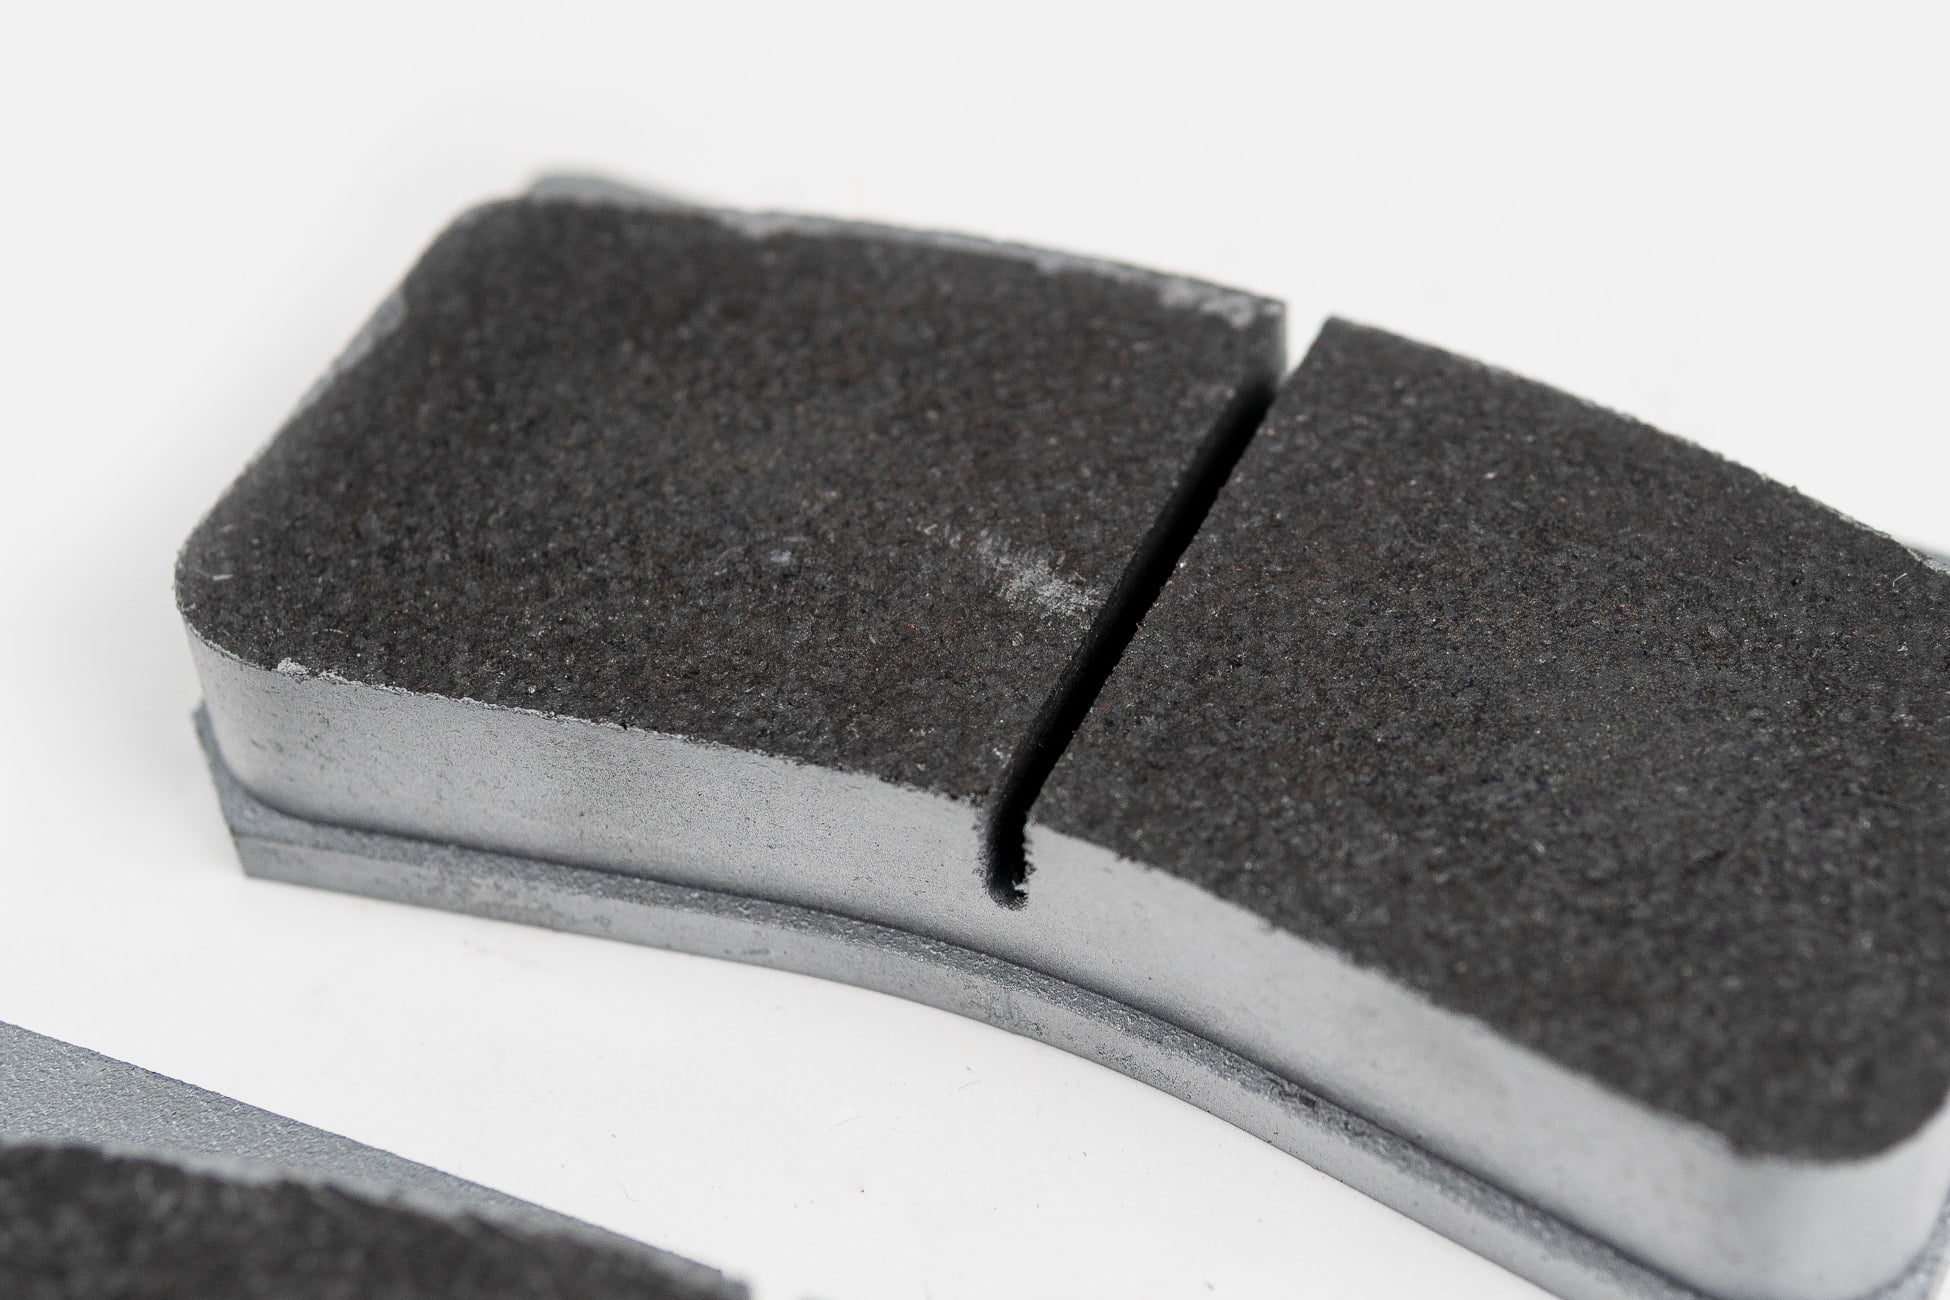
CSG Spec C2 Brake Pads Review
CSG Spec C2 Brake Pad Summary
- Overall peak braking performance felt very good with Pirelli DH slicks
- Pedal depress is firm, however lacks initial bite
- Braking felt very controllable for trail braking into corners
- Did not experience any brake fade throughout 10-12 consecutive hot laps
- Low brake dust

A Quick Summary About Me
Before I dive into this, I want to take a little bit of time to quickly explain my background. I’m not a professional driver by any means and my review is strictly based on driver observations comparing my setups in the past.
I probably followed the same path as many other HPDE drivers to get to where I’m at today. I started out as just a normal car enthusiast with my 420 whp 07 Subaru Legacy GT slammed on BC coilovers and ended up slowly making way over to the track side of the world after purchasing my current E46 M3.
In 2013 on my 2nd track day, I got into a pretty bad accident at ACS and ended up crashing my car into a barrier going about 45 mph head on. My car was destroyed and I was not able to track anymore because I was in a lot of pain from the accident. I dealt with rehab for about a year and had no desire to get back on the track. I still wanted to be around cars though, so that’s when I focused more on posting photos on Instagram and started this website, Buildjournal.
Fast forward to just early last year, my friends and girlfriend convinced me to get back on track. So I did. In less than 2 years, I’ve done 25 track events and my car turned into an absolute track day beast. I’ve shattered my own personal best lap times by seconds every track day. Buildjournal now has 400+ B-Spec Tune customers and growing. I couldn’t have predicted where I’d be in just a few years. Life is short, so make it happen fast.
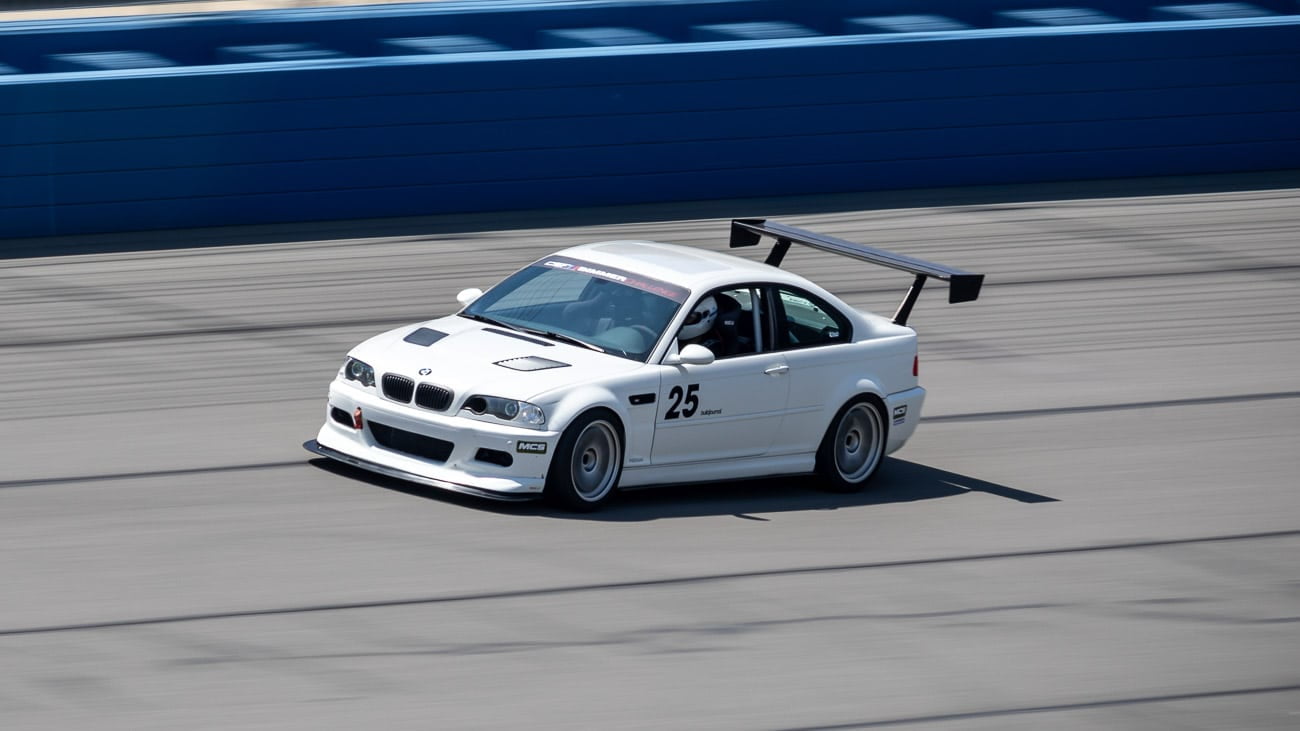
My Car Setup
- Buildjournal B-Spec Tune
- Macht Schnell intake elbow
- Eventuri carbon fiber intake
- Evosport stepped headers
- Bimmerworld 3.5" Race Exhaust
- Turner Motorsports power 2-pulley kit
- Walbro 255lph & Radium Sleeve
- Apex ARC-8 18x10 ET25
- Pirelli DH 265/645/18
- MCS 1WNR with Eibach ERS springs
- Eibach front sway bar
- Vorshlag camber plates
- Stoptech C43 CBK front / Brembo 996 rear calipers
- Stoptech stainless steel lines front
- Rallyroad stainless steel lines rear
- CSG Spec C2 brake pad
- HPF rear subframe reinforcement kit
- Turner Motorsport front control arm bushings
- AKG rear trail arm bushings
- AKG differential mount
- AKG subframe bushings
- Generic front sway bar links
- Garagistic upper strut reinforcement plates
- Motorsport Hardware stud kit
- Motorsport MH Titan lug nuts
- Motorsport Hardware spacers
- RS Future LM Wing
- Bimmerworld Race Diffuser
- Buildjournal front splitter
- Buildjournal side splitter
- Buildjournal ACS lip
- Trackspec hood vents
- PSDesigns fender
- PSDesigns headlight duct kit
- S2R moonroof delete
- CSL headliner
- G5-R project retrofit with Philips CBI bulbs
- Sparco Circuit seat
- Sparco side mounts
- Sparco steering wheel w/ quick release
- Sparco 6-point harness
- RTD V4 shifter
- HARD Motorsport vent block off kit
- HARD Motorsport door panel inserts
- HARD Motorsport RS pull straps
- Auto Power bolt-in roll cage
- Street Faction rear seat delete
Calipers for Test - Stoptech C43 CBK

Okay. Now let’s dive in to the review…
Peak Brake Performance
I really enjoy comparing braking performance at Streets of Willow CCW because the configuration has an easy way to compare stopping performance – apples to apples. Listen to what I’m about to say because if you are running this track you will know how to analyze your setup rather easily.
You have about 430 ft from the start/finish line to the start of T1. What does that mean? You don’t have much room to be on the brake pedal after the start/finish especially if you’re in a high horsepower car.

In my car I reach a top speed of 115 mph on the downhill front straight and I’m on the gas all the way to the start/finish. I lift off the gas right after I cross the start/finish and I’m left with only a few hundred feed to slow down to mid 30 mph for the T1 skid pad. This means the braking point is very consistent every time and if I overshoot T1 or don’t slow down enough, I can make that observation rather easily.
In this video below, you can see how it looks when I have caliper knock back going into T1. Luckily I didn’t crash into my friend.
Every single time I went into T1, I felt like I could delay the braking point just a little bit than my usual and it gave me confidence to stop in time. As soon as you build up heat on the rotors and pads, the car just grips more and more as it gets hotter. It felt really good.
Brake Pressure & Trail Braking
I honestly felt that the previous setup on the Endless ME20 felt better in terms of initial bite. Keep in mind however, this is the first time out on track and I may need to do a few more days before I can make a 100% assessment on the bite. However, the brake pedal feels very linear and allows me to apply the desired amount of brake pressure every time.
Because the brake pedal pressure was consistent, I felt pretty comfortable trail braking through T1, T6 (bowl) and T8. You can see this in my video at the very bottom.

Brake Fade
It wasn’t a scorcher, but the day was pretty hot at around 91° and I was intentionally running 12 consecutive hot laps at times to test the brake fade. I really tried to burn the pads up with what the flow of traffic allowed. Streets of Willow is pretty demanding on the brakes because it is a very technical track with lots of tight turns and braking points. During the hottest session of the day, I did not feel any brake fade.