E46 M3 For Sale Market Price Tracker
How much are E46 M3's going for?
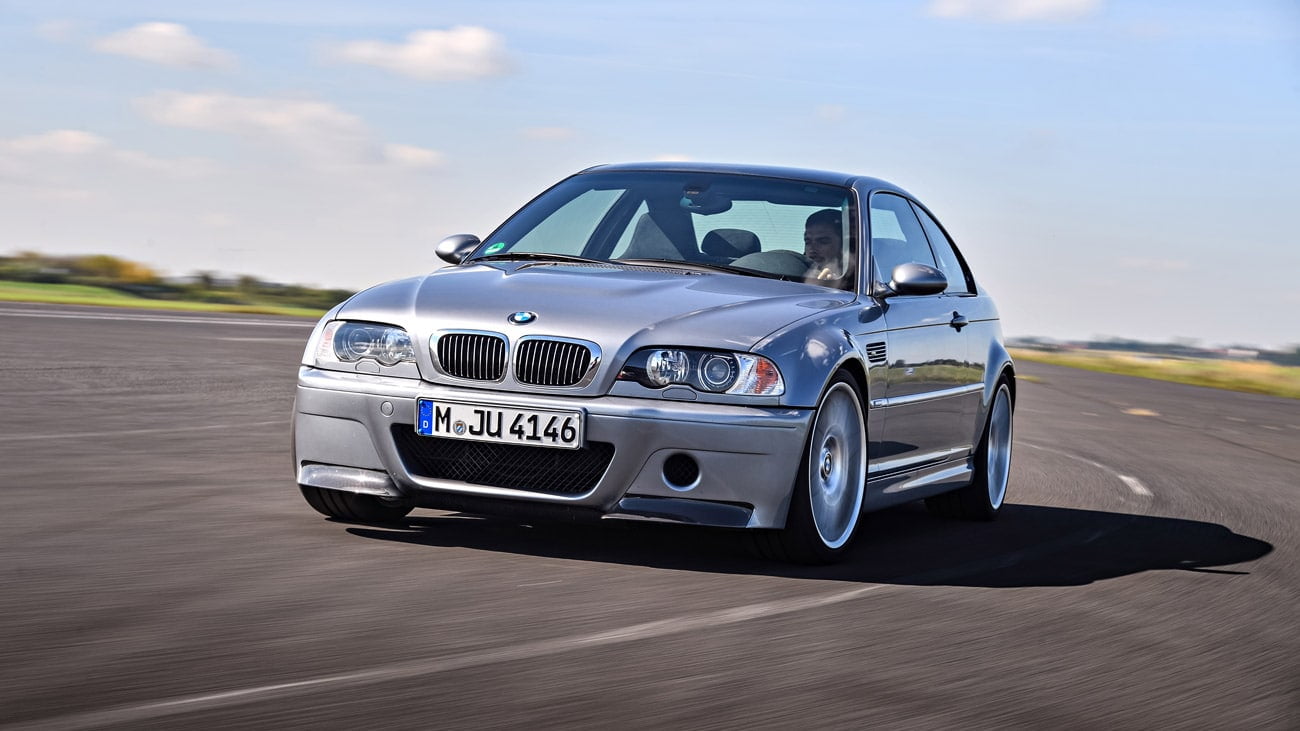
Are you looking for an E46 M3 for sale? Or are you just curious to see how much your E46 M3 is worth? Even just a few years ago we’d see 100k mile E46 M3’s going for around $15k on the used marketplace and it seems like nowadays those are hard to find. Even 100k+ mile E46 M3’s are going for $20k+. It makes you wonder, are we really going to see an uptrend in market value? We’ve done a little research into the actual sales values of E46 M3’s and put together a visualization of what’s going on in the market for the past few years.
Methodology: We built a database with sales records from multiple resources including eBay, Bring a Trailer, forums, etc. Our database contains sales values from confirmed listings.
E46 M3 for Sale (Actual Sales Data)
E46 M3 - Sales by Mileage
E46 M3 - Average Sales Price by Year Sold
We can definitely say there is an uptrend with E46 M3 for sales values. These are completed listings. So all of the incomplete bids, auctions or listings are omitted. Even with mileage going up on these cars sold, the price is still going up. If you have a mint condition, low mileage E46 M3 maybe you should garage it more. For more information on how to take care of your car check out our Ultimate E46 M3 Maintenance Guide.
Chase Bays E46 M3 Power Steering Kit Install DIY
Upgrade your power steering
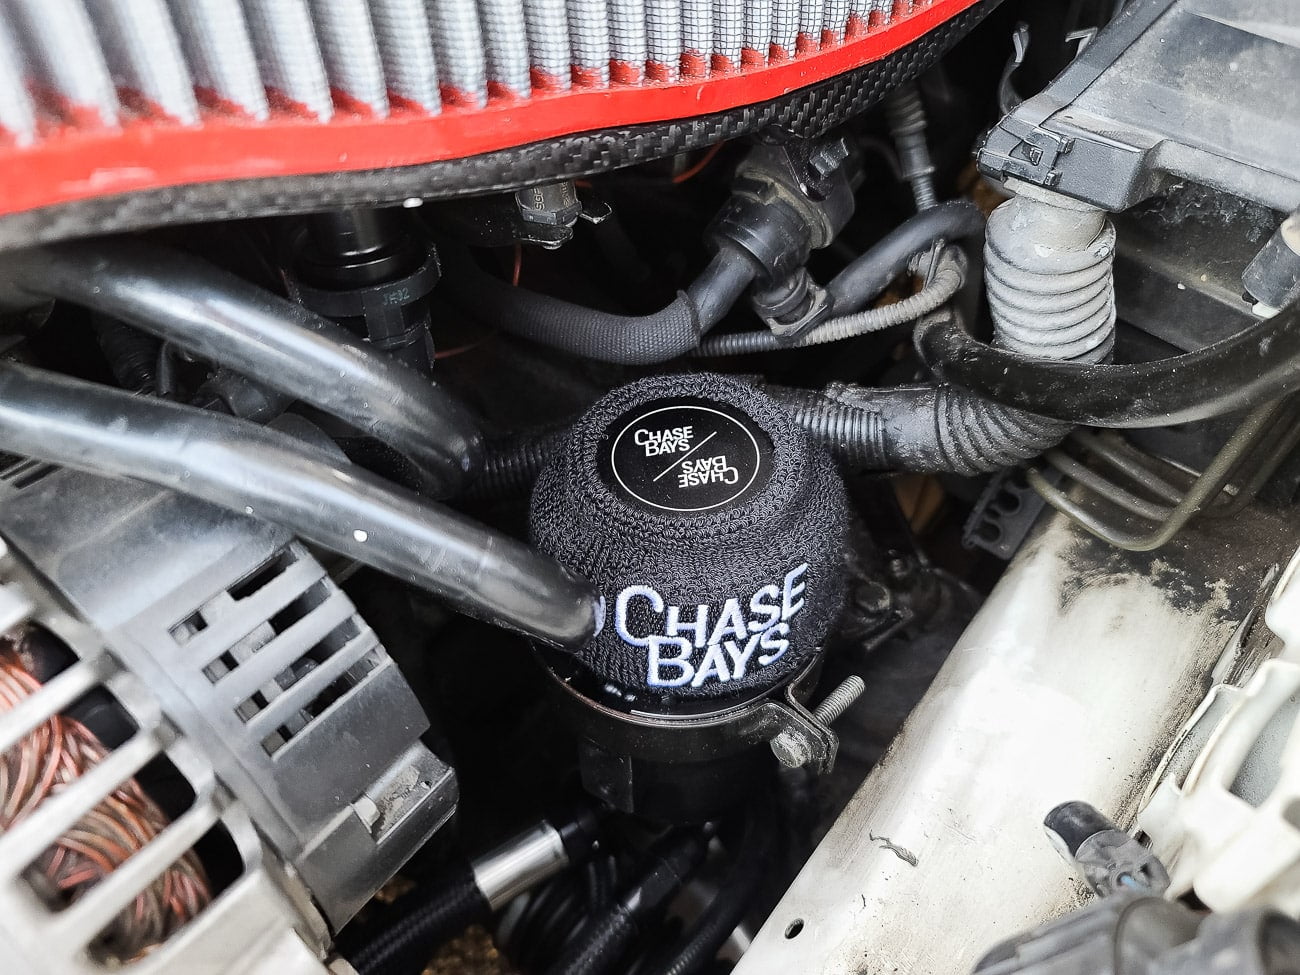
I got the revised version of the Chase Bays Power Steering Kit for the E46 M3 (S54) because I was tired of my OEM hoses seeping with fluid. I had to replace my power steering expansion hose twice already and my OEM reservoir twice as well because of leaks and cracks. Well, it was leaking somewhere again and most of my hoses were soiled so I decided to get stainless steel lines with AN fittings.
I said revised version because I’ve been talking to Ryan from Chase Bays to improve the power steering kit. They’ve made some changes to the fittings to optimize delivery of the fluid. This includes a check valve on the rack and a smaller AN fitting on the reservoir side to replicate OEM fluid movement. I’ve been testing the changes at the track under hard conditions and I just came back from testing the setup a few days ago and there were no issues. I will continue to test and give feedback to the team at CB if any.
Is there something wrong with OEM? Not really. The OEM unit can last for a long time and it’s not a super common thing for these power steering pumps to fail either. However it is highly likely that your stock reservoir is going to crack sometime. When that happens, you might want to think about replacing the system to not have cracking issues ever again.
Chase Bays E46 M3 Power Steering Kit
Parts List
- Triple Baffled Power Steering Reservoir w/ Bracket
- Heatsink Cooler
- Cooler Brackets
- -6AN stainless steel high-pressure hose
- -6AN stainless steel reservoir to cooler hose
- -6AN stainless steel cooler to rack hose
- -10AN stainless steel reservoir to pump
- Various AN fittings

Tools Required
- 10mm socket
- 12mm socket
- Shorty wrenches or AN wrenches
- Wobbles
- Extensions
- Jack + stands
- 1L ATF fluid
- Funnel
6
Hours
2/5
Difficulty
Chase Bays Power Steering Install
Remove Intake Plenum
1.1 Remove 4 nuts holding front strut bar.
1.2 Remove 4 torx screws holding cabin filter housing, remove filter.

1.3 Remove intake including the nut for the oil dipstick.

1.4 Remove crankcase vent hose.

1.5 Remove vent hose grommet to give some more slack in the line when you take out the airbox.

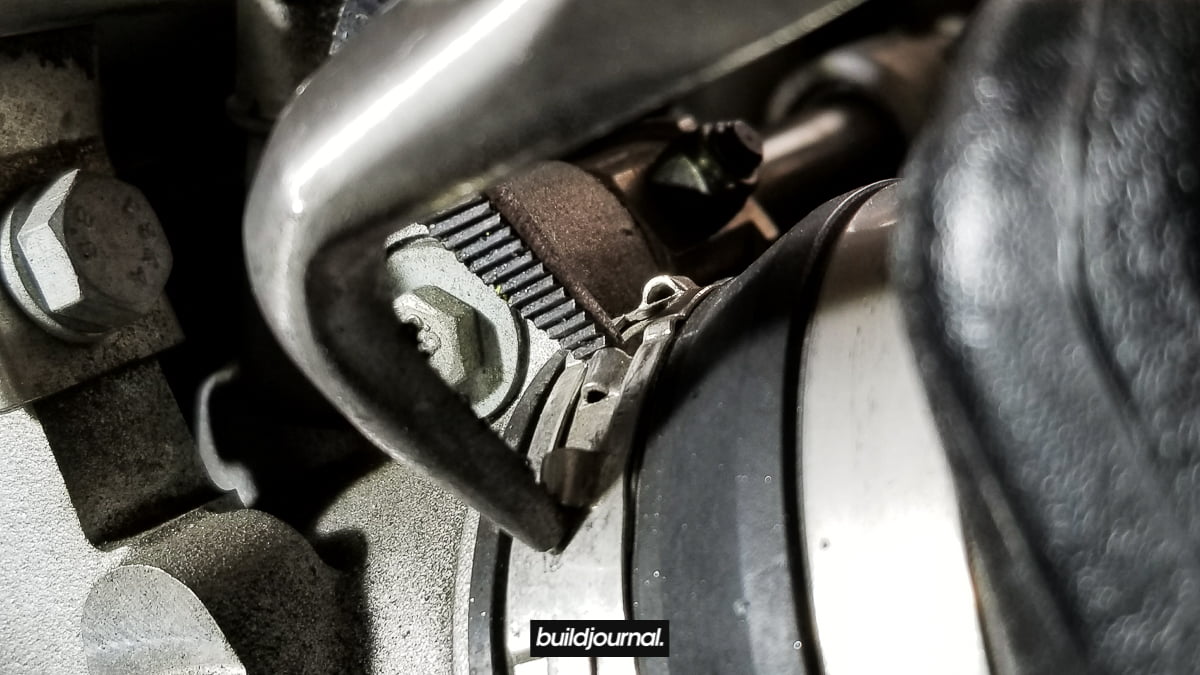
1.6 Remove the throttle body hose clamps. There’s not much grip and clearance so I had to use angled needle-nose pliers and locking pliers to squeeze the rivets together and with a flat head pry out the clamp simultaneously. Basically in the bottom picture below, I pry the two rivets together to alleviate clamping force and then used a small flat head to pry out the end of the clamp pictured on top.


1.7 Remove the (2) two nuts holding the bottom of the intake box. Detach plug grommet between the two nuts.

1.10 This part is a little tricky (any is the part everyone talks about breaking) so pay attention! Before the airbox comes out, you have to unclick the (small) vent hose below the intake box, but because the clearance is so small you have to wiggle the box out a little to slide your hand in. Be gentle because this part is fragile and if you break this hose, it’s going to be an annoying trip to the dealership.
The best thing to do is slightly pull the airbox halfway out and then unclip the (small) vent hose.
Here is a picture showing the underside of the airbox.


1.8 Unclip the (large) vent hose on the bottom of the intake box. Here is a better view of the (large) lower vent hose and the 2 nuts holding the airbox.


1.9 Unclip the holder for the smaller vent hose on the side of the intake box – the small highlighted tab has to be pressed down and the plastic holder will slide up. (not away from box)


2. Drain Power Steering Fluid
2.1 Locate the power steering hose that runs from the reservoir to the power steering pump.
2.2 Remove the hose OEM hose clamp using a flat head and drain the fluid into a disposable container.

3. Remove OEM Power Steering
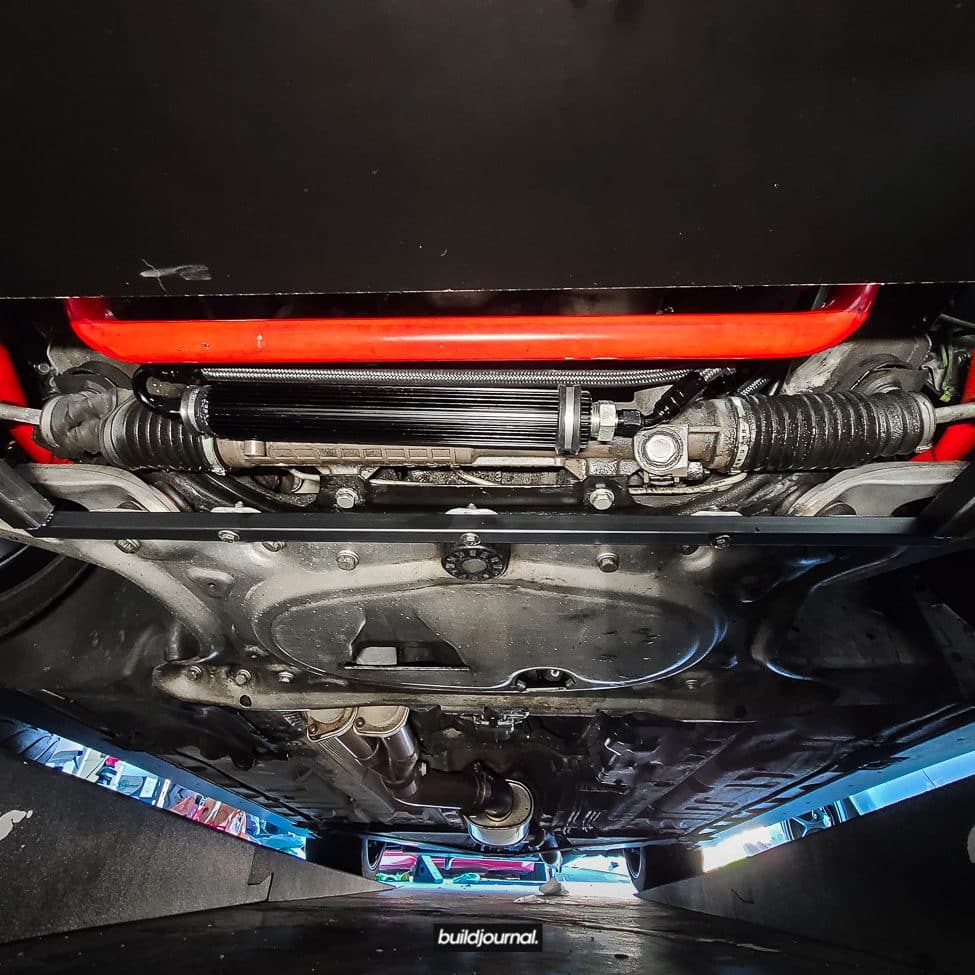
3.1 Remove the high pressure power steering hose underneath the car by the front sway bar. The hose is secured to a 10mm hex head bolt holding the bracket in. Remove the entire bracket from the steering rack.

3.2 There are two ends coming from the high pressure hose. One is connected to the steering rack (upper) with a M14 banjo bolt.

3.3 The other is a M16 banjo bolt on the pump.

3.4 Disconnect the two hose from the stock cooling coil. One is coming from steering rack (lower) and the other is coming from the reservoir. Push in the white plastic tab first and then pull down. I decided to entirely remove my cooling coil as it won’t be needed since I have the CB cooler.

3.5 Loosen the 10mm hex bolt on the clamp holding down the reservoir. You can now pull the entire reservoir out from the top.

4. Install Chase Bays Power Steering Kit
4.1 Get familiar with the hose diagram. The install is actually really easy. The only challenge is tightening down the AN fittings because the clearance is not much for large wrenches. Shorty wrenches FTW. Or get proper AN wrenches.

4.2 Install CB cooler using the supplied rubber clamps. The shorter clamp goes on the passenger side of the cooler. I have a ZCP (Yellow Tag) steering rack and it has 2 M6 mounting locations pre-threaded. OEM should as well.


I actually had some new bolts laying around. If you want new bolts, they are M6 10mm bolts.

4.4 Install the cooler hose from the passenger end to the CB reservoir. You can leave the CB reservoir sitting in the clamp, but loose since it’s a bit of a struggle to tighten it down in there.

4.4 Install the other end of the CB cooler hose into the steering rack (lower). Make sure your banjo bolts have crush washers on both sides of the banjo bolt!


4.5 Now install the high pressure line going from the pump to the steering rack (upper). Use the supplied male-male AN fitting on the pump, then fit the female AN. You do not need to use Teflon or sealant for any of the AN fittings.

4.6 Install the other end of the high pressure hose into the steering rack (upper). Again, make sure you have 2 washers sandwiching the banjo bolt. Make sure the hard lines are not touching any of the suspension components.

4.7 Your last hose is the reservoir to pump. The pump end attaches with the supplied hose clamp.

4.8 Tidy up your lines and secure the fittings on the CB reservoir. Now you can tighten the reservoir clamp down using the supplied bracket.

5. Fill Fluid and Test for Leaks
5.1 Follow the directions as stated by Chase Bays to properly bleed the power steering system. You can use any ATF fluid. I used 1L of Pentosin ATF 1.
- With the the car jacked up, fill the Chase Bays Reservoir to halfway full.
- Turn the wheel back and forth to lock five times with the car off. This will allow some fluid to get into the Rack and Pump while the car is off so the system doesn't start completely dry. Add fluid if needed to keep it at half way full.
- With the car still in the air, start it up. Let it idle for 3-5 minutes while checking for leaks at all the connections. If there are no leaks turn the wheel back and forth to lock five times.
- Put it on the ground and start it up. Turn the wheel back and forth to lock five times. Now take it for a test drive. Drive around for 15-20 minutes and take note of how it sounds/feels in the beginning compared to the end. We have seen great results from this install process, combined with letting the car sit for an hour after the initial drive.
- Check for leaks one last time, if everything is good you're ready to rock!

Quick-Release Splitter DIY Install Guide - E46 / M3
How To Mount Splitter Using Quick-Release Splitter Brackets
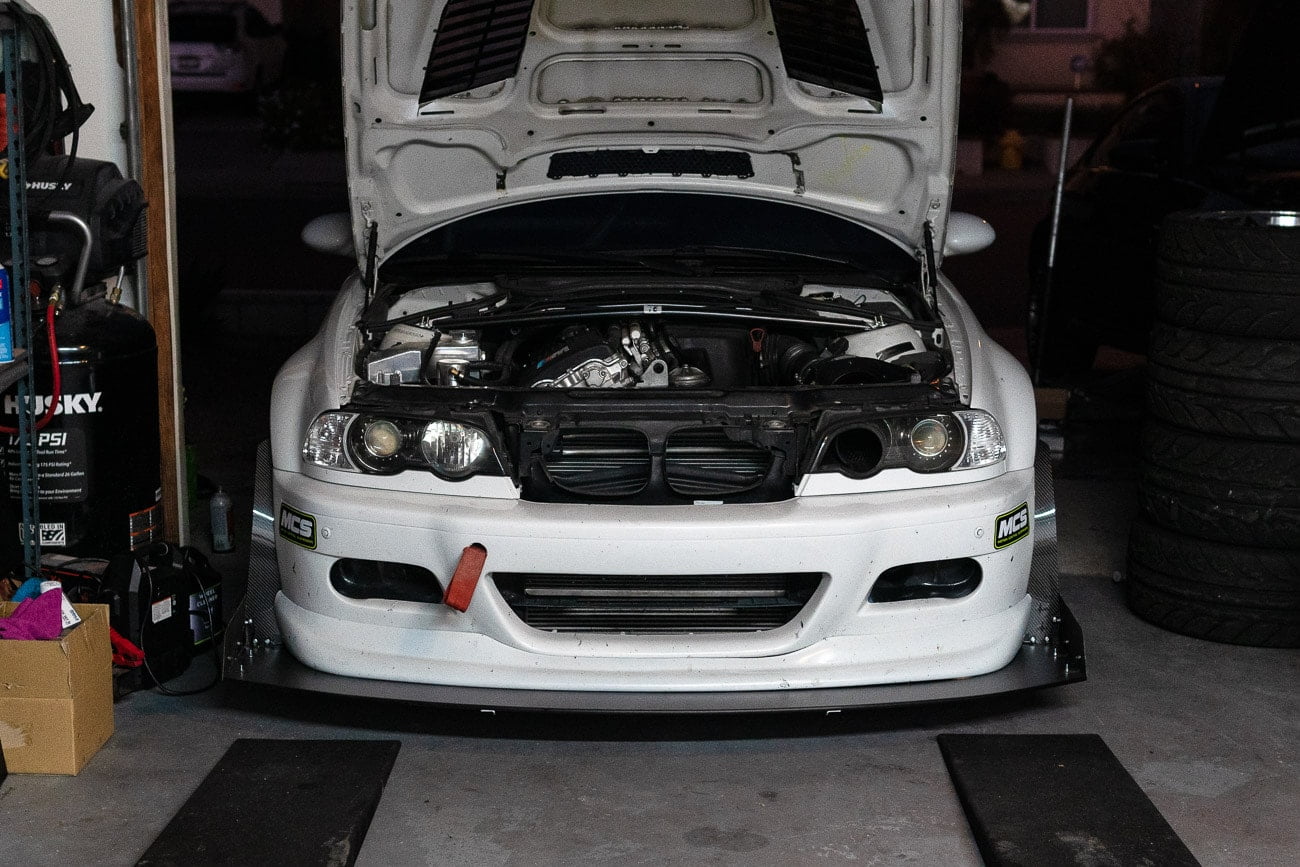
This splitter DIY guide will walk you through the install process using our Buildjournal Quick-Release Splitter Brackets for the E46 / M3. Splitter mounting to your chassis can be difficult, but not anymore. We’ve developed a 100% bolt-on chassis mounted bracket that uses a skeleton frame to support the rear of the splitter, which is new for our latest version enhancement. Quick-release is even quicker now. A huge evolution over our old V1 brackets.
If you have your own rear mounting solution we also offer the front brackets by itself without the skeleton brace. This splitter DIY will cover the installation for the Full Kit with Rear Support.

Tools Required
- 10mm socket
- 10mm wrench
- 5/32 hex drive
- Q-tip
- Permanent marker
- Power drill
- 1/4" drill bit
- Jack + stands

Splitter & Bracket Installation Instructions
1. Install Rear Splitter Bracket
1.1 Jack up the car.
1.2 Remove and discard the OEM plastic undertray.
1.3 Locate the 3 factory holes located on the front reinforcement plate which holds the plastic undertray.

1.4 Using the supplied hardware, mount the rear bracket to the 3 holes on the front reinforcement plate – hex bolt side down. Do not tighten it down just yet. This will help with the splitter alignment in the next steps.


2. Assemble Front Brackets
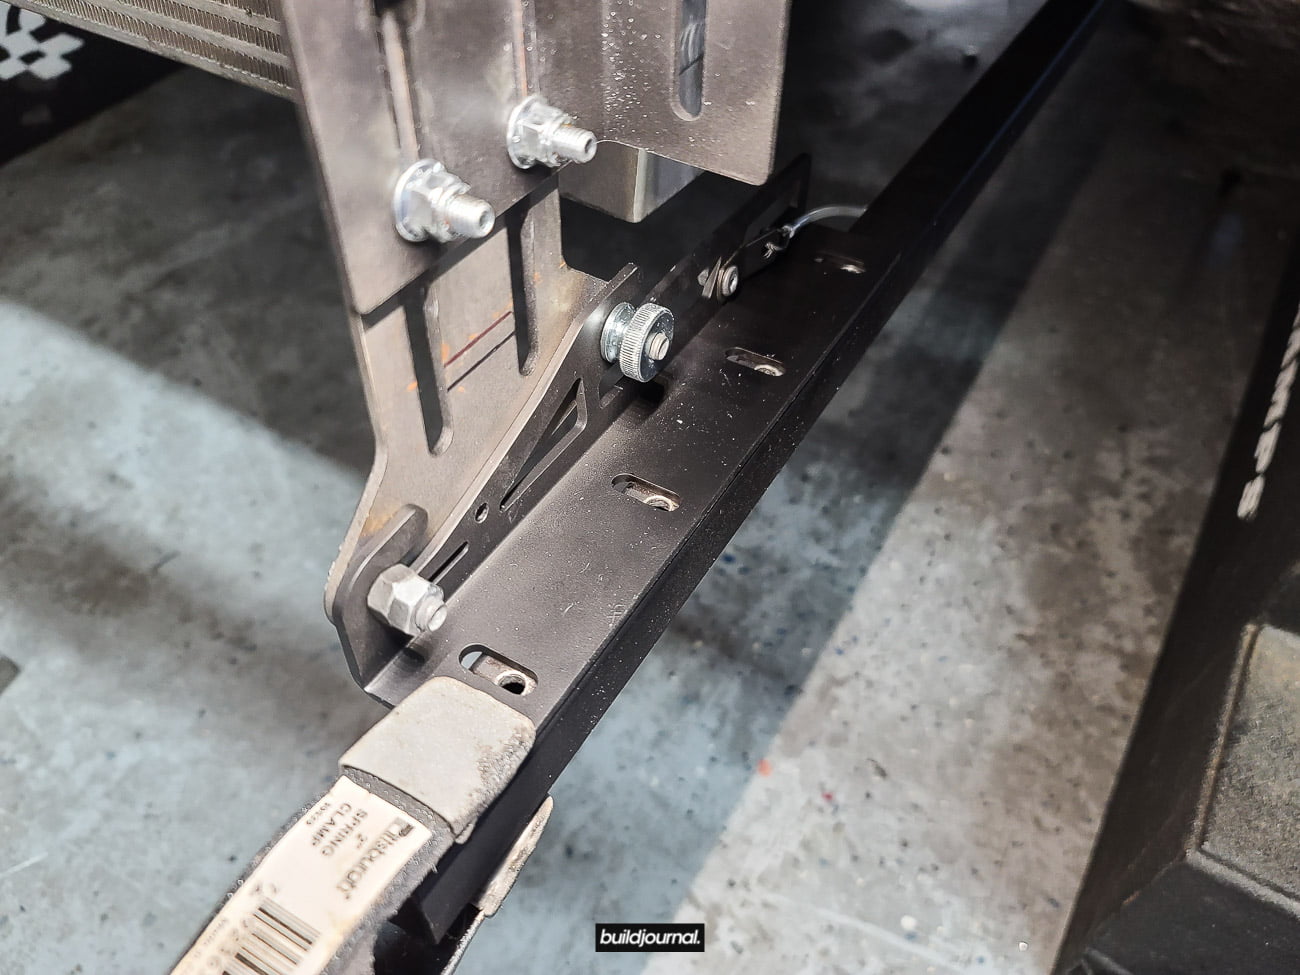
2.1 Use the picture here to assemble the bracket. Each side of the bracket is made with 3 main parts: main bracket, adjustment plate, splitter feet. It’s important the orientation is set correctly otherwise you will have alignment issues with the skeleton brace and rear bracket. Pictured on left is the left/driver side.

3. Install Front Splitter Bracket
3.1 Remove your front bumper and Kevlar/aluminum bumper beam. If you have the aluminum bar, you need to also remove the bumper shocks. For now, leave the bar and bumper off. Notice how the splitter feet lines up with the rear bracket.
3.2 Use the OEM nuts to hold the front brackets in place, but do not tighten all the way down. This will help with the splitter alignment in the next steps.

4. Align Brackets & Set Height
4.1 Insert the quick-release pin into the feet/adjustment plate and tighten down the thumb screws. This is important for the alignment. Your front brackets, adjustment plates and rear bracket should be loose.
4.2 Temporarily install your bumper back on to set the the splitter height.
4.3 Rest the jack on your splitter and jack up to the desired height. Make sure the frame is in place.

4.4 Once the splitter height is set, carefully remove the bumper.
4.5 Tighten the front brackets and adjustment plate. Your front brackets are now set.
4.6 Secure the frame to the feet with the holes aligned and use a clamp to hold it in place while you adjust the rear bracket.
4.7 Make sure the rear bracket and frame are in contact with each other or else you’ll experience some back and forth deflection. Tighten down the rear bracket. Now your frame should be all set. Test for any play and adjust if necessary.
5. Align Splitter
5.1 With the splitter still in position, mount the bumper back on and visually align the splitter to where you want it to mount.
5.2 Remove bumper once splitter position is set.

5.3 With the feet aligned with the frame holes, mark your drill points on the splitter. I put some ink on a Q-tip and marked the holes straight down using the first and last holes on the feet. Splitter mounting requires a minimum 4 mounting points from the feet to the splitter.


5.5 Drill the marked holes using a 1/4″ bit.

6. Install Splitter
6.1 Use the supplied hardware to mount the splitter through the frame and onto the feet.

6.2 If you are using our Splitter Brace, you can install that during this step. This brace adds support for the front of the splitter for those not wanting to run splitter rods outside on the exterior of the car. It also doubles as a splitter skid plate.

6.3 If you are using our Splitter Rods with Shocks, you can install them now.

6.4 Your install is complete. Check for play and adjust if necessary.
Buildjournal Splitter Bracket with Quick-Release
E46 M3

E46 M3 Megane RS Trophy-R Brembo BBK Retrofit Install DIY
Upgrade your E46 M3 brakes
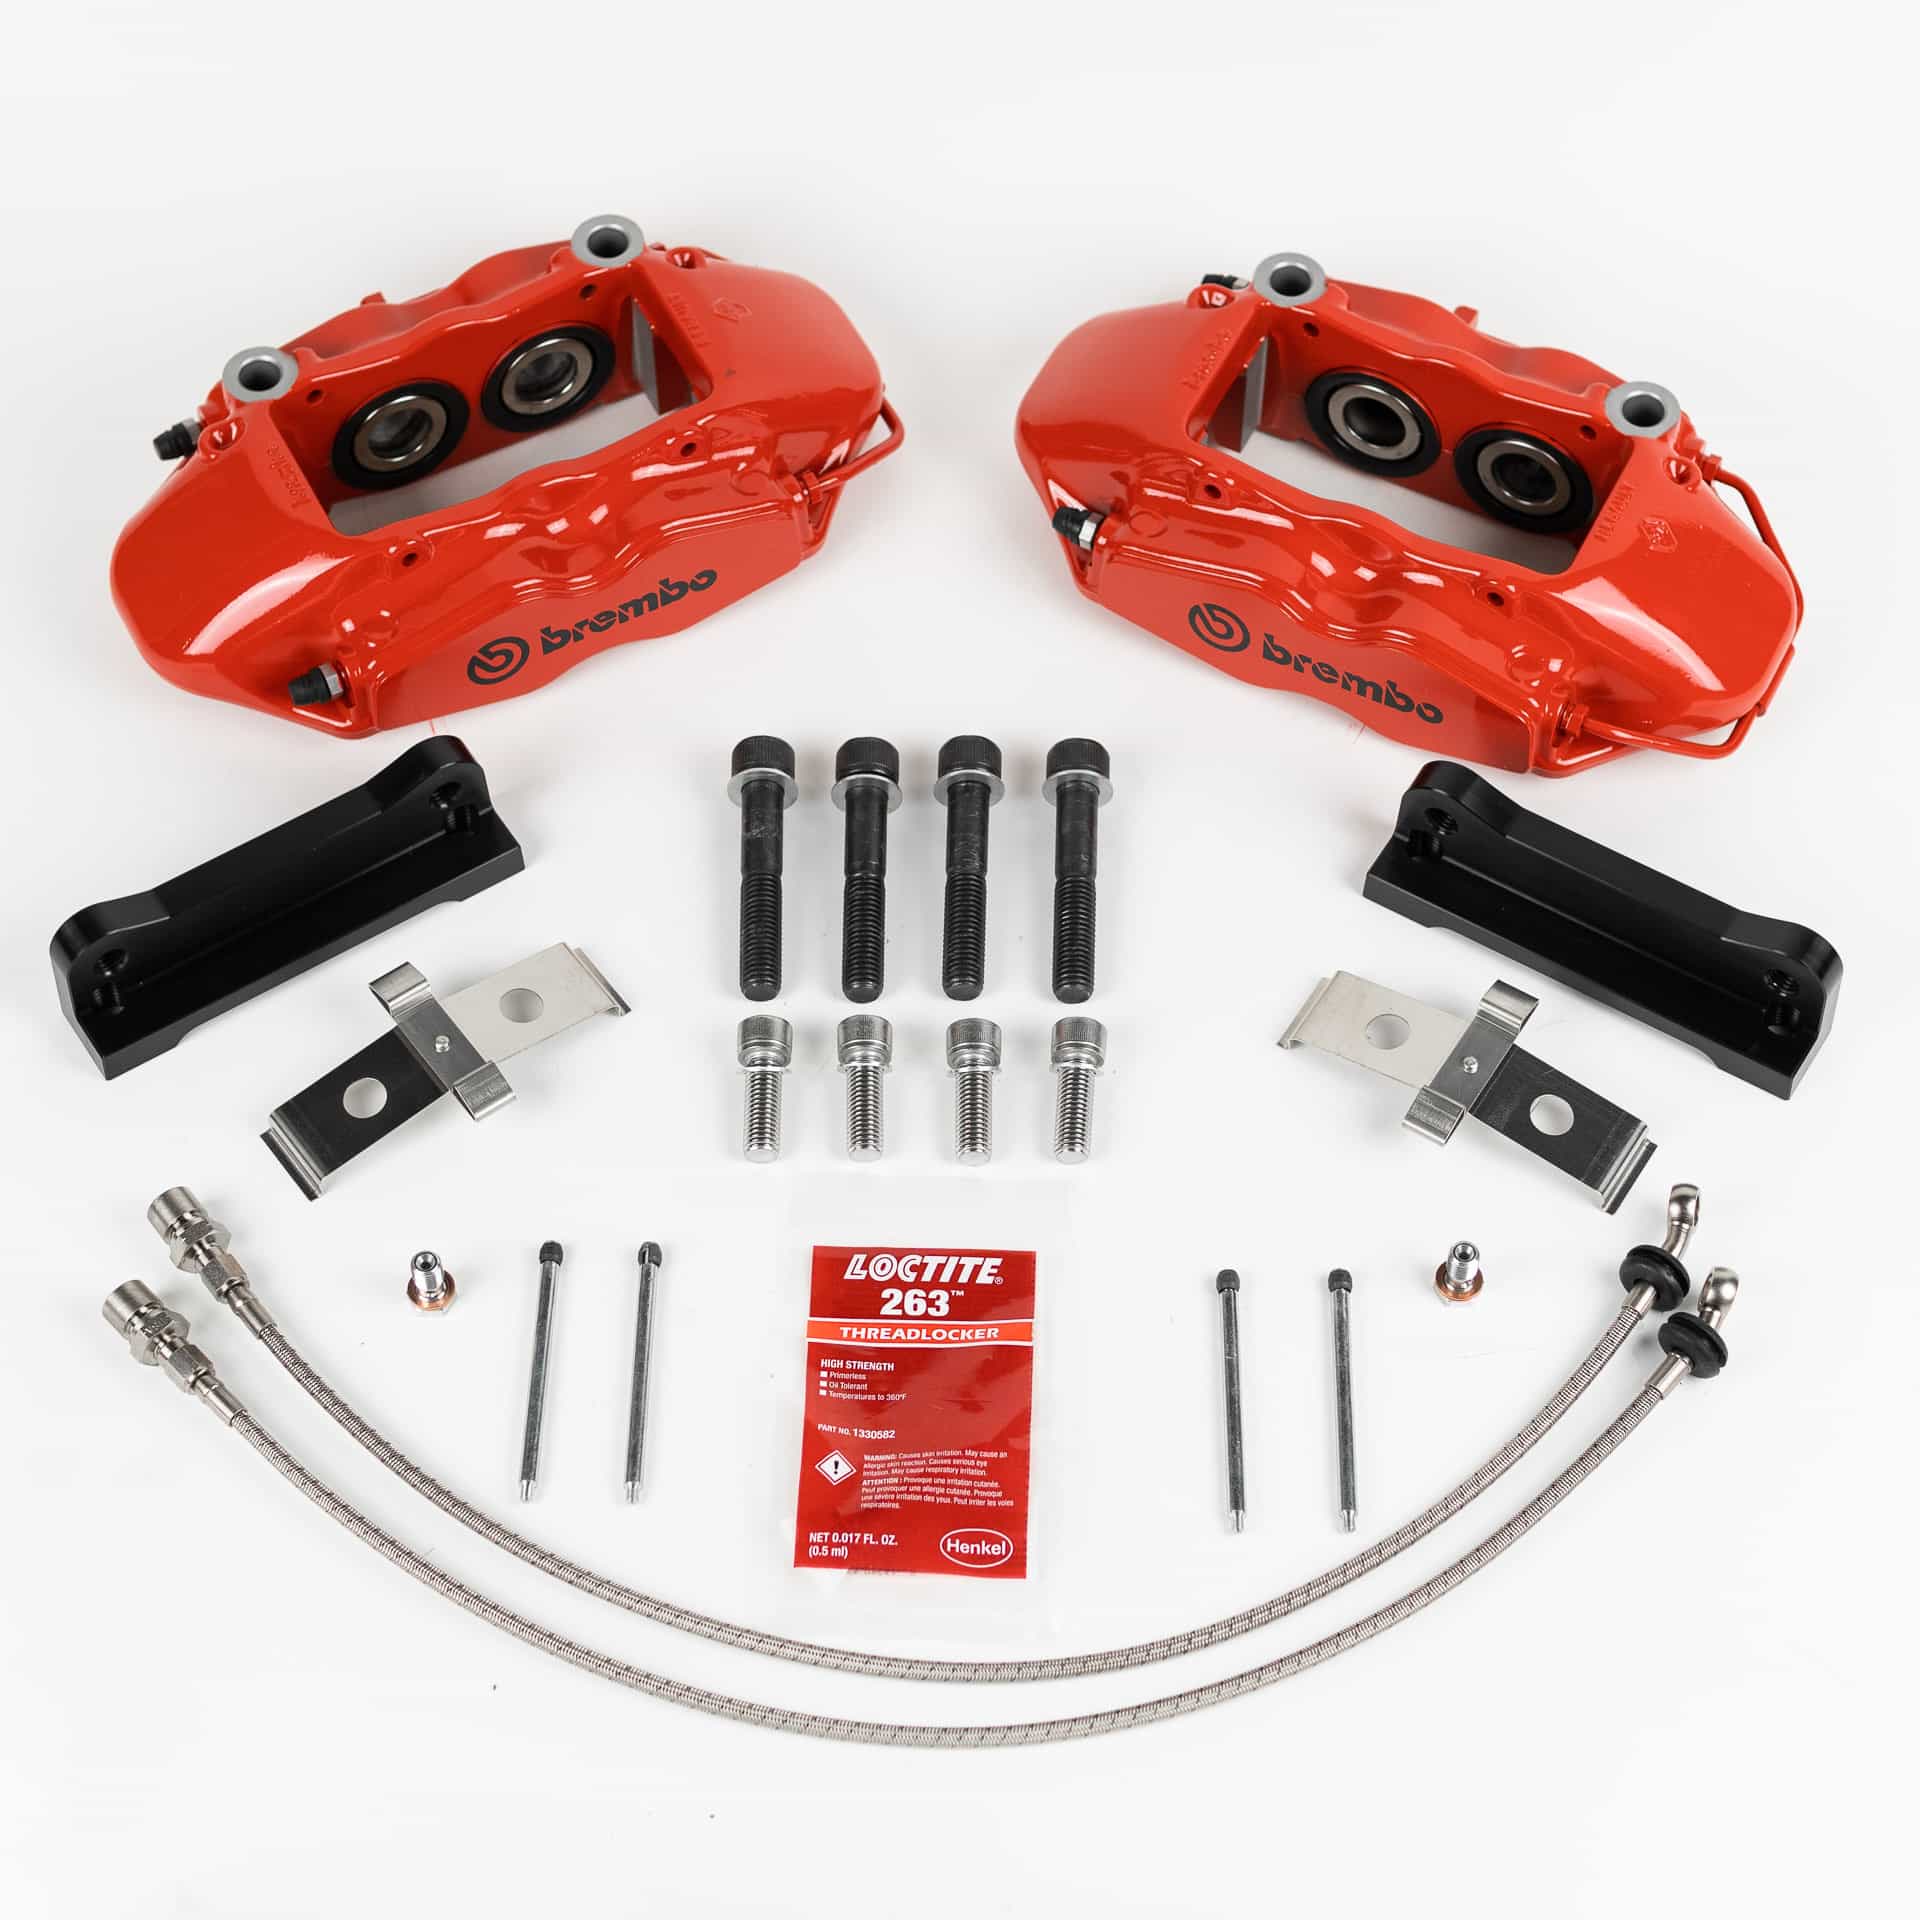
We offer the E46 M3 Megane RS Trophy-R BBK retrofit kit as a brake upgrade for your S54. The kit features large pistons, stainless steel lines, custom caliper bracket, brake pad hardware, and all other hardware necessary for the kit install. The kit uses OEM Competition/CSL/ZCP 345×28 rotors. Rotors and pads are not included with this kit, but they are very common.
If you need help selecting brake fluid, please take a look at our Ultimate Brake Fluid Comparison Guide where we have a table sorted by boiling points. The higher the better.
Megane RS Trophy-R
For E46 M3
Parts List
- (2) Brembo Megane RS Trophy-R Calipers
- (2) Buildjournal Caliper Adapters + Hardware
- (2) Porterfield Custom Stainless Steel Brake Lines
- (2) Brake Pad Hardware
- (1) Loctite 263 Threadlocker
Supporting Parts List
- 345x28mm rotors (Competition/CSL/ZCP) - View Options
- Brake Pad Sets - Same pads as 2017 Subaru WRX STi (FMSI D1001) - View Options
- Brake Fluid - 2 liters - View Options
Tools Required
- 5mm hex
- 10mm hex
- 12mm hex
- 11m wrench (brake line)
- 14mm socket
- 16mm socket
- 17mm socket
- 16mm wrench
- Torque Wrench
- Angle grinder/Dremel
- Safety googles
- Hammer
- Jack + Stands
6
Hours
2/5
Difficulty
BBK Retrofit Install Directions

1. Jack up the fronts and remove your front wheels.

2. Remove OEM calipers
2.1 Remove the brake line rubber grommet and brake line wire sensor. Take note of the factory line/wire routing.
2.2 Remove the two 16mm bolts that attaches the caliper to the spindle.
2.3 Suspend or place the caliper so that there is no tension on the brake line. Do not remove your OEM brake line from the hard line just yet.


3. Remove OEM rotor
3.1 Use a 5mm hex to remove the two caliper retaining bolts. It is highly recommended to use new bolts. They’re super easy to strip and they’re cheap enough. See below for part links.
Tip: It might be easier to remove caliper if you loosen the 5mm hex bolts first before you remove the calipers, step 2.
OEM Rotor Screw – 34111123072
OEM Rotor Screw (Stainless Steel) – ES#2550873

4. Trim OEM heat shield
4.1 Use a dremel or cutter to trim a few inches to make clearance for the caliper bracket and caliper.

5. Install caliper bracket
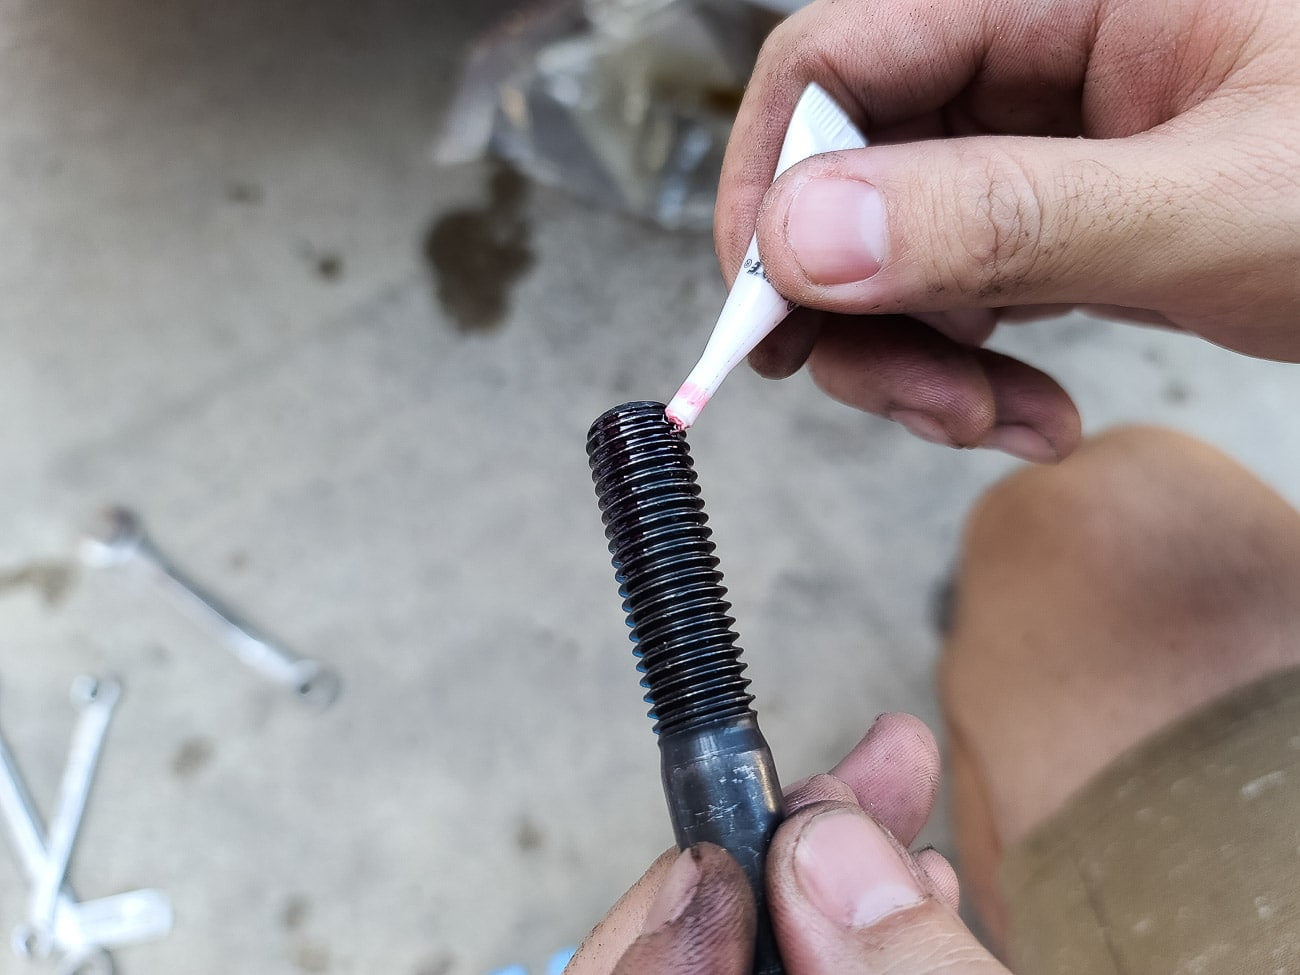
5.1 Apply a small amount of Loctite to the bottom of the (silver) bolt threads and install the caliper bracket to the knuckle. Make sure to use supplied washer.
5.2 Torque to 50 ft lbs using a 10mm hex.


6. Install new rotor
6.1 It is recommend to clean hub with wire brush before putting the new rotor on.
6.2 Install the two 5mm hex bolts to secure rotor to hub.

7. Install brake line on back of caliper
7.1 Make sure you use two crush washers (supplied) on each end of the banjo fitting. Torque to 15 ft lbs using a 14mm socket.

8. Remove OEM brake line using 11mm wrench
8.1 Get ready to swap brake lines with the new stainless steel fitting. Grab a towel to catch the brake fluid from dripping on the ground. Some very important things to note here:
- The new stainless steel lines come with an adapter fitting so you must tighten both.
- Once the new line is installed, make sure the hard line is not touching anything.
- Lastly make sure you're not sandwiching the OEM brake line holder bracket with the fittings.
Optional: If you want to keep the brake line connection factory-style, you can bore out the factory star pattern slot that holds the OEM brake line. You can then slot the new stainless steel line through the bottom side of the factory bracket and use the OEM metal retainer clip to hold the line in place.


9. Install the two (black) bolts to the caliper and bracket
9.1 Use a little bit of Loctite on the bottom of the threads and torque to 50 ft lbs using a 12mm hex. Make sure to use supplied washer. Caliper bleeder nipples should be facing upwards.
9.2 Install new brake line grommet to factory bracket. Follow same brake line routing as factory.

10. Install brake pads
11. Install brake pad retainer clip and pins

12. You’re done! Repeat for other side and check for immediate brake fluid leaks.
12.1 Now you need to bleed your brake system. Please follow proper procedure to bleed calipers. Zeckhausen Racing has a good brake bleed article.
12.2 Follow brake pad break-in procedure if necessary.
12.3 Monitor your brake system for the next few days and check for any leaks, line contact, etc.


Essential E46 M3 Track Day Mods and Guide for Beginners to Advanced Drivers
Are you taking your E46 M3 to the track more? Well good because it’s a great out of the box platform to take to the track. Even bone stock, it’s a very well balanced car. It doesn’t have a ton of horsepower but the car is very forgiving to drive with just enough oversteer to control. Now when you start upgrading, the E46 M3 becomes incredibly capable of producing very fast lap times. And if you haven’t taken it out on the track or autocross course just yet, you should! I’ll go through my experiences from my first time out to where I’m at now competing in a small time attack series.
Whether you are building a serious E46 M3 track car or first time going out, we’ve compiled a track day guide to get you acclimated to the wonderful sport of Motorsports. Check out below for the list of essential E46 M3 track day mods.
First Track Day
1. Maintenance
The first thing for any BMW owner is to make sure the overall health of the vehicle is in good status. And this isn’t just a thing for first timers, but for anyone who is taking their car to the track. We wrote the Ultimate E46 M3 Maintenance Guide which covers the Inspection I and Inspection II protocols. It’s a good starting point to go through this list and make sure all your basic maintenance items are covered. The most important part of track day is safety. All track day organizations have some sort of track day tech inspection sheet which you must fill out and sign in order to participate.
2. Alignment
A good alignment can dramatically change the handling characteristics of your car. We made an E46 M3 Alignment Specs Guide to list setups depending on the driving type e.g. autocross, track, etc. Once you start exploring different tracks you’ll want to change your alignment to dial in for that specific track, but this is a good baseline to start.
3. Tow Hook
It’s pretty much mandatory to run at least one tow hook point on the front or rear and both are highly recommended.
4. Build Track Awareness
The primary goal of your first track day is not to go fast, but to learn how a track day works. You’re going to learn things like spotting the flag towers, memorizing all the different flags, knowing where to enter pits, learning to exit pits, signs for passing other vehicles, learning track lines, learn to hit the apexes, etc.
2-5 Track Days
1. Brake Pads
Now you want to start building confidence mods. Not fast mods. The confidence will make you faster. Brake pads can help you stop when you need to.
2. Stainless Steel Brake Lines
Again, another confidence mod. Stainless steel lines won’t expand as you apply more brake pressure on your pedal. Your stock rubber lines will. SS lines will make the pedal feel more firm and better response.
3. Coilovers
This is a big one. Suspension is very important and changes the entire behavior of your car on-track performance. The more grip you have with the tire and road, the more G’s you can pull. The more G’s you can pull, the better your car will be around corners. This concept is called mechanical grip.
4. Brake Fluid
Brake fluid can boil and add air in your lines. Air is not good because it is compressible meaning if you step on your pedal and pass through air, your pedal will go down, but the pressure won’t be applied to the brakes. We wrote an article on the best racing brake fluids.
5. Tires
Similar to suspension, tires will help increase mechanical grip. Different tires have different compounds. The idea is that the lower the treadwear rating, the sticker it is. Grip vs life is a direct trade off.
6. Wheels
You want the strongest and lightest wheel possible to reduce unsprung weight. Rotating mass requires more momentum to move, meaning there is an exponential effect for every extra pound added on to unsprung weight. Also you might need to get a wider wheel to fit a larger tire for maximum grip.
7. Data Acquisition
If you want to improve as a driver, you need to study your data and results. A proper data acquisition system like the AIM Solo will give you at the minimum – lap time, g-force, MPH. Through graphing and visualizations, you can see where you are fast and where you need to improve.
6-10 Track Days
1. Radiator
You’ve probably done a few super hot days already and realized your cooling isn’t good enough. The OEM radiator has plastic end tanks and are prone to crack. It’s probably a good idea now to replace with an all aluminum tank.
2. Steering Rack
The stock E46 M3 (non ZCP) steering is pretty numb because of the low ratio. You can upgrade your rack with a “yellow tag” E46 ZHP rack found on the 330 and some regular 330’s. The BMW part number is 7852974712. The faster steering ratio feels great on track.
3. Exhaust
Now that you’re becoming familiar with your car, you can start upgrading power. Just be mindful. Driver mod can still shave you more time than what a 5-10 hp increase an exhaust can get you. Learn the car as much as you can and once you feel confident with your driving abilities, get power.
4. Short Shifter
If you’re driving a manual, an upgraded shifter can change your gears faster. Meaning you can increase speed faster resulting in faster lap times. I recommend a good trans mounted shifter like an RTD or CAE.
5. Subframe Bushings
You should know the E46 M3 subframe is prone to cracks. Strengthen up your diff bushings while you take care of the subframe reinforcement by adding in some race poly or solid bushings. Solid bushings will be loud, but removes 99% of the deflection. Race poly is still good if you’re doing street/track duty.
6. Transmission Bushings
Why do you need transmission bushings? The powertrain will see a lot of force on track causing movement which can affect your shifting especially for manual cars. Ever try shifting in high G corners and the selector rod just doesn’t seem to want to get in to gear? You may have bad transmission bushings.
7. Differential Bushings
Soft OEM bushings are designed for comfort, but it’s not the best for track performance. If you get rid of deflection, you can put more of the power and grip down to the ground. Same logic goes for all your bushings.
8. Intake
Probably one of the easiest way to increase horsepower to your car. More air in the engine means more power. Although there is a lot of debate about aftermarket performance intakes, the right one will produce more power over OEM. We recommend Turner CSL or Eventuri.
9. Tune
In addition to an intake, a tune will maximize performance by re-calibrating engine parameters to produce more horsepower. We can help you tune your S54 with our B-Spec Tune.
11-15 Track Days
1. Front Control Arm Bushings (FCAB)
OEM FCABs provide comfort for driving, but allows a lot of deflection in the front wheels. Upgrading to a harder bushing allows for increased “steering precision, turn-in response, and direct braking feedback” which makes the car feel very direct on track. We recommend the Turner Monoball FCAB for heavy track use and there is essentially no increased noise, vibration or harshness (NVH).
2. Rear Trail Arm Bushings (RTAB)
While you’re doing the FCAB upgrade, match the bushings with a similar rear trail arm bushings. RTABs can help with “maintaining alignment settings and minimizing wheel hop” by removing deflection. On RWD platforms, it’s important to get the power down to the ground by getting all the grip you can.
3. Roll Cage
You’re getting faster now and safety is still #1. At the minimum, you want to add in a half cage roll bar to protect incase of a roll over on track. There are a few easy bolt-in solutions e.g. Kirk, Auto Power. Better to be safe.
4. Race Seat
If you’re running a roll bar or cage, it’s very important you run a proper harness/seat belt because in case of an accident, you may hit your head on the roll bar/cage. From time to time, I see drivers running a roll bar in their street car with a street seat. That is not safe. You should be properly strapped into a bucket seat with shoulder straps.
5. Race Harness
We recommend at least a 5-point racing harness. A 5-point includes 2 shoulder straps, 2 side belts and an anti-submarine belt which prevents you from sliding underneath your belts in high G situations. Also another thing to consider is if you’re running a HANS device (neck restraint) there are 2″ to 3″ belts since HANS recommends using a 2″ belt.
6. Steering Wheel
You should not get an aftermarket steering wheel without getting a cage, race seat and and harness. Not a good idea to remove OEM airbags without proper supporting safety equipment. An aftermarket steering wheel can provide weight reduction benefits, quick-release for ease of access and improved ergonomics with a change in diameter.
7. Fire Suppression
Incase of a fire situation, you want to be prepared with a fire suppression system. The easiest thing to do is get a handheld extinguisher with a quick release mount. There are plenty of quick release mounting options on eBay as well.
16-20 Track Days
1. Oil Diverter Valve
Are you seeing high oil temps? You can reduce oil temps by about 30+ degrees with a simple oil diverter kit. The OEM oil filter housing limits the amount of oil flow to warm up the car faster so this kit allows a “full-flow” to cool the oil temps. This is not recommend for street cars unless you add a performance inline thermostat as you won’t each safe operating temps.
2. Big Brake Kit
Are you experiencing brake fade? The stock brake system utilizes a 325mm (345mm for ZCP/CSL) rotor in the front which may overheat on track. A big brake kit can help with cooling and overall braking performance.
3. VANOS High Pressure Oil Line
The factory VANOS high pressure line has a high failure rate for track cars. The metal gets brittle over time and cracks. Failure to the VANOS line can be catastrophic so replacing it with a stainless steel line is the best way to go. This is a mandatory item per our Ultimate Maintenance Guide.
4. Brake Ducts
If you’re still overheating your BBK, then it is time for some brake ducts. Brake ducts will allow air to feed into a backing plate, provided in most kits, which then feeds to the back of the rotors.
20+ Track Days
1. Differential
It’s all about getting the power down to the wheels. The factory M Variable limited slip differential is good, but it doesn’t perform as well as say a 3-clutch diff. The OEM also wears out fast. According to Diffs Online you need to refresh the diff in about 80k miles. If you don’t have a ton of money to shell out on a new diff, a great alternative is to change the R&P to a 3.91 or 4.1 – poor man’s supercharger.
2. Aero
Want more grip? A proper wing, diffuser and front splitter setup can increase downforce significantly providing more grip at speeds. We’ve created our own splitter brackets for the E46 M3 featuring a quick-release to install/remove in seconds. Check out our store for more aero products.
3. Lexan/Poly Windows
Polycarbonate windows can save you some unwanted weight and can also provide some aero/cooling benefits with the use of NACA ducts.
4. Full Cage
Safety is the #1 reason why you should get a full cage, but there are added benefits of going full e.g. tie-in the cage to the front/rear struts for additional chassis rigidity. Also with proper side/door protection, you can remove the OEM doors for a lightweight one. TC Design in Northern California is one of the best fabricators in the USA.
5. Carbon Fiber Trunk
The OEM trunk weighs in at about 45 lbs. A carbon fiber or even fiberglass can save 30+ pounds of weight. You can pickup a CSL style carbon fiber trunk for improved styling as well.
6. ZF 5-Speed Transmission
If you want to save even more weight, you can swap in a ZF 5-speed transmission from an E36 M3. Some drivers say it provides better shifting points on track, but that largely depends on the track itself. The weight difference from a stock E46 M3 transmissions vs the ZF 5-Speed is about 5-10 pounds, but if you’re scraping for weight, it all adds up.
Moroso Oil Catch Can Review - E46 M3
What is a PCV system?
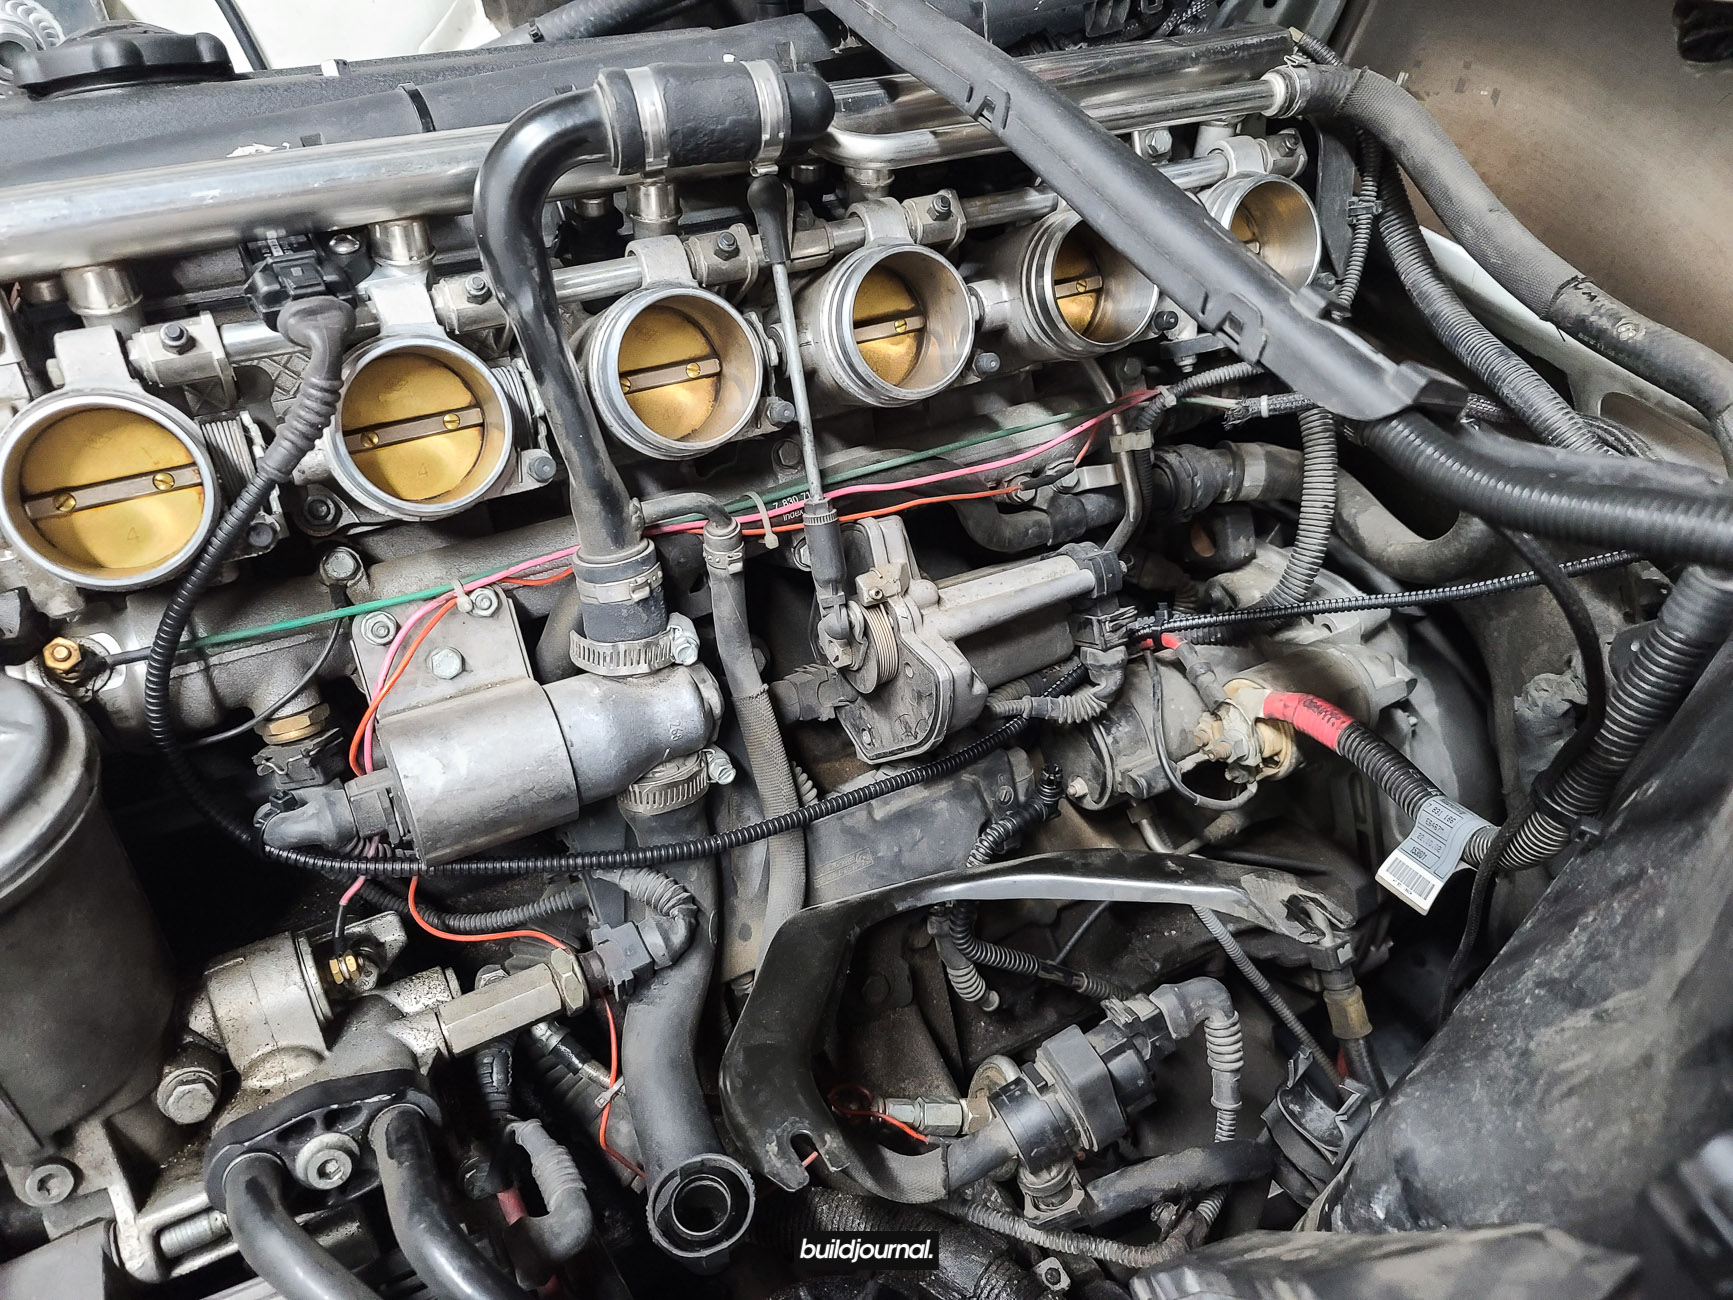
The goal of a positive crankcase ventilation (PCV) system is to limit the amount of residual oil and vapor, that is released from the crankcase, from entering back into the throttle bodies inside the intake plenum. Overtime oil can build up around your throttle bodies, combustion chambers and idle control valve (ICV) valve which can lead to various performance issues such as rough idling.
Although most cars have some sort of PCV system, it’s still not enough. That’s evident when owners have to clean their throttle bodies and ICV valve. We made an article on how to clean that for this reason and you can check it out here: E46 M3 Throttle Body and ICV Cleaning DIY.


So how does the oil catch can make a difference?
The oil catch can simply routes the residual oil and vapor from the crankcase into an isolated container opposed to routing it back to the intake plenum.
If you ever remove your intake plenum, you’ll notice the small oil vent line connected underneath. This routes back to the oil pan. But think about it, you’re really trying to force the vapor and oil from the crankcase, through the breather tube, into the plenum, somehow bypasses the intake trumpets, and seeps downwards into the small hole? Why not just stop it from entering the plenum in the first place? That’s the idea of the oil/air separator AKA catch can.
Is the catch can worth it?
Regardless of your usage, by the book the answer is always yes. You don’t want to recirculate dirty oil and vapors back into the plenum. Check out the video of how much stuff came out. This is the results after maybe 4 track days.
4 track days. Look what comes out of the catch can. pic.twitter.com/CmaVrjdFx5
— buildjournal (@buildjournal) June 20, 2020
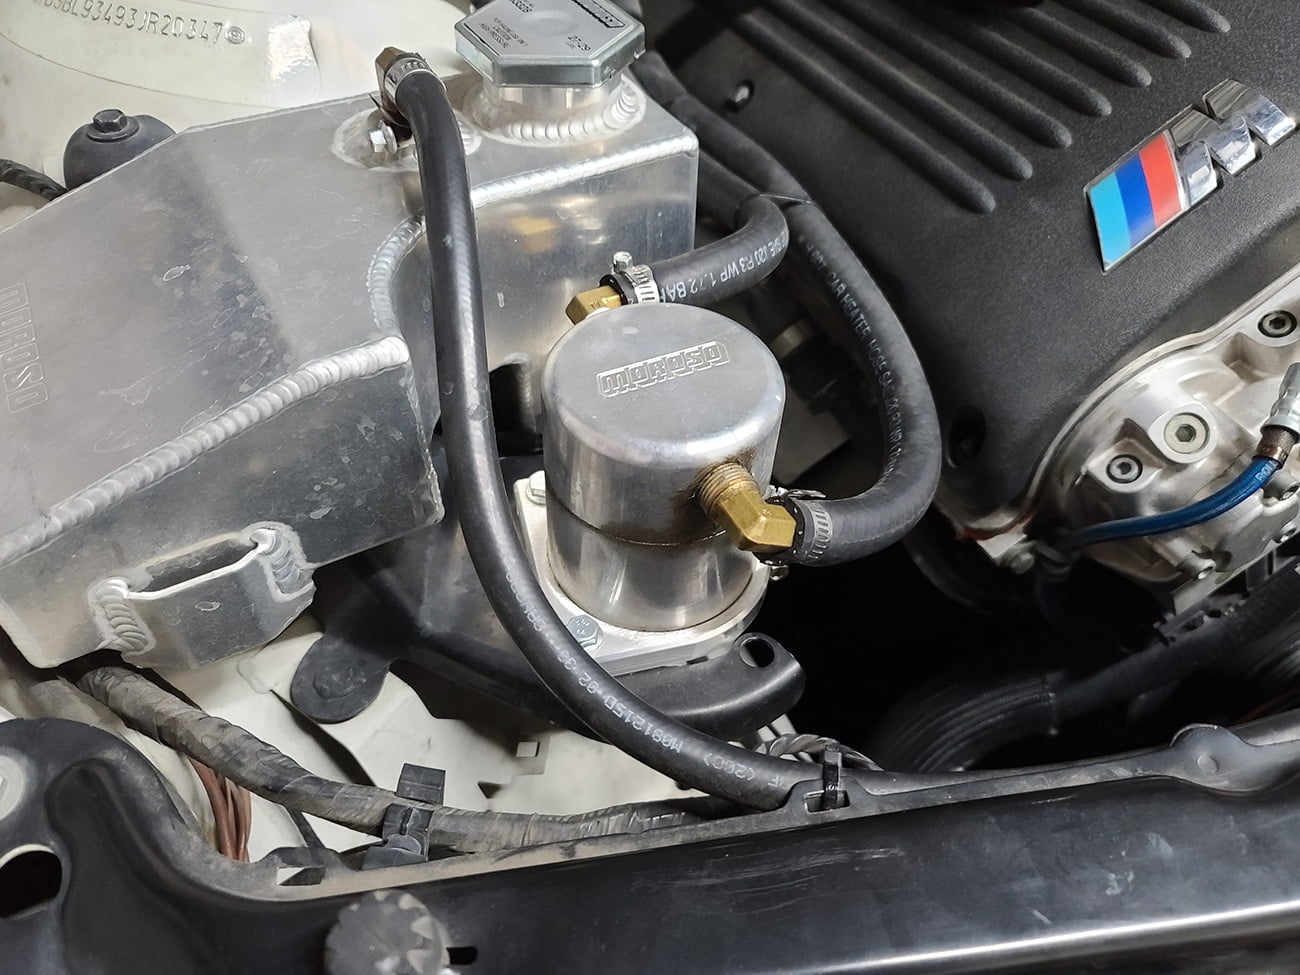
The Moroso setup
There are several catch cans out there, but I chose the Moroso simply because of engine bay aesthetics. I have a matching Moroso Expansion Tank for the coolant and the generic catch can they sell perfectly mounts into my existing air pump bracket. It’s like it was meant to be!


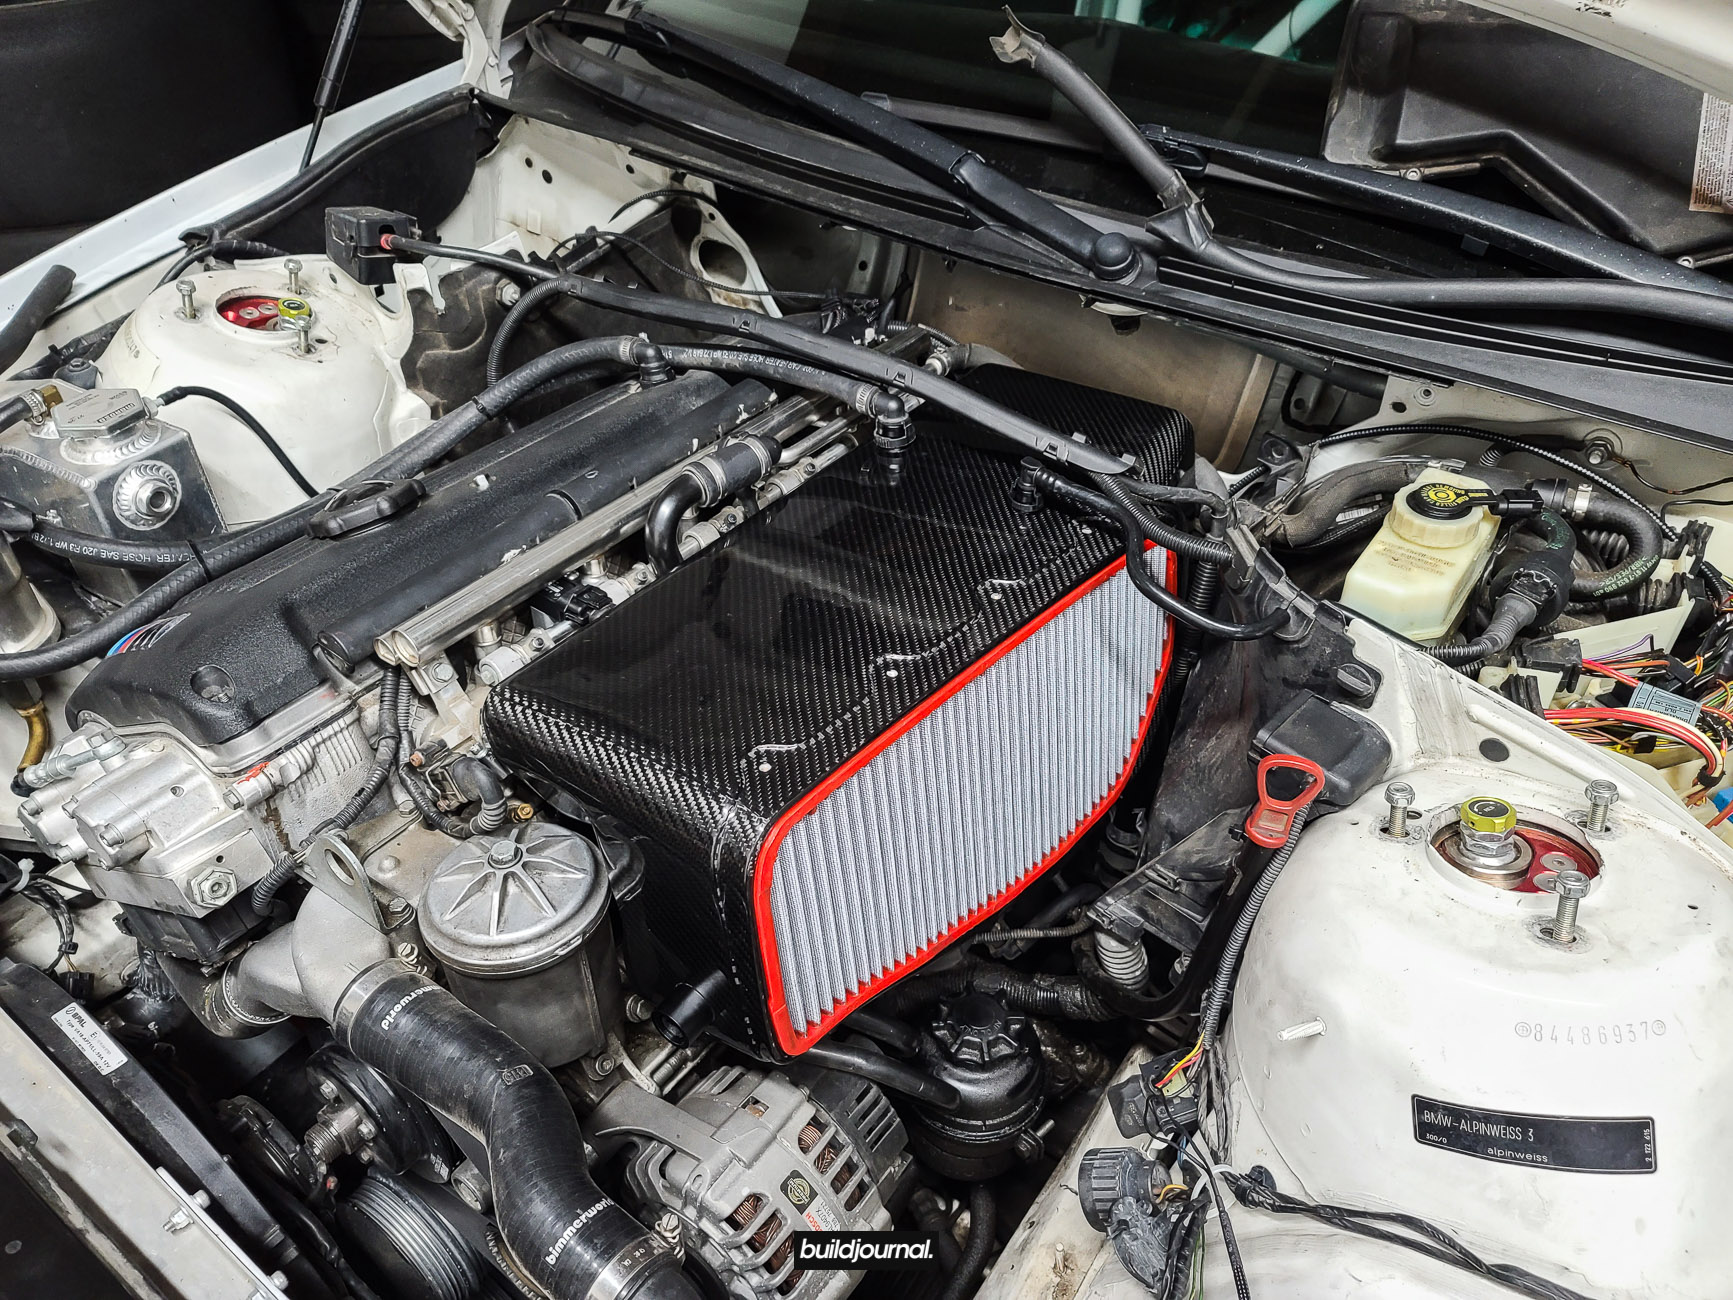
Turner Motorsport CSL Style Intake Unboxing, Review, Dyno Results
Overview of the Turner Motorsport CSL Style Intake
I decided to run a CSL style carbon fiber intake on my track E46 M3 to see if I can squeeze more horespower. Let’s be honest though, the looks and sound is probably half the reason why most of us justify the cost – including me. However, it’s easier to justify a CSL intake now because Turner Motorsport have developed their own version of the CSL intake.
The price? It’s very reasonable considering competitors. They have an intake-only option for $1,499, but they are also providing kit options starting at $1,999.95.
Summary
- The Turner Motorsport CSL Intake (w/ supporting mods) made a solid +54.23 whp and +17.84 wtq over stock engine setup.
- Bare minimum cost to fully convert into CSL intake is around $2,530 for 6MT; around $2,690 for SMG.
- Carbon fiber quality is great, however weave pattern runs opposite of authentic CSL.
- Initial production batch comes with weak epoxy points for hose connectors.

Turner Motorsport CSL Style Intake
Unboxing the Turner Motorsport CSL Style Intake
ECS has an intake line designed in house which is produced under the name Kohlefaser Luft-Technik however the Turner CSL Intake is not the same. When I received the package I was honestly surprised how small the box was. When I opened it up, I noticed there wasn’t a lot of side padding for protections so I held my breath hoping nothing got damaged.


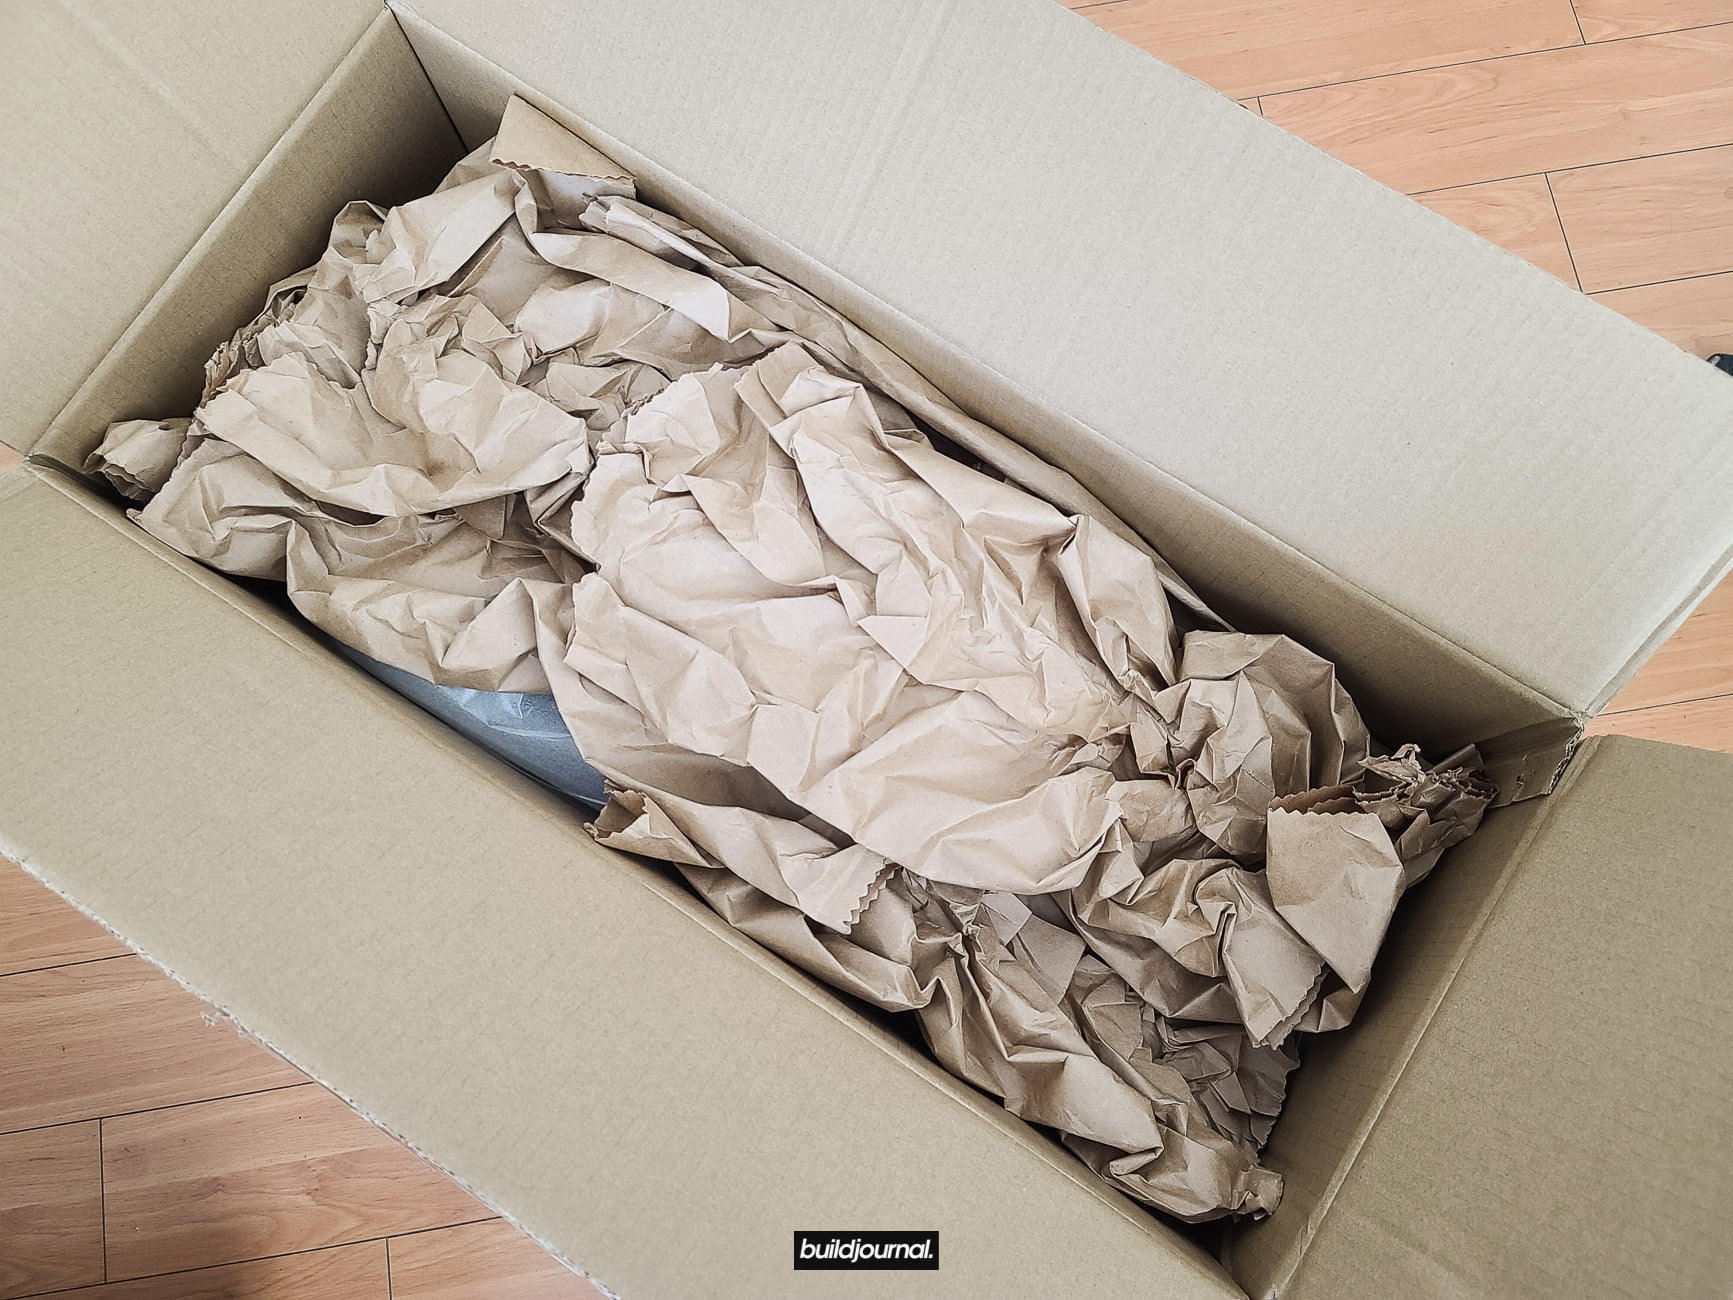

I did a full inspection and luckily nothing was damaged! All breather hose valves, IAT bungs and overall structure of the intake was nice and clean. By the time I publish this article I will probably already have notified them of the packaging recommendations. I would hate to receive this intake damaged. However I do want to point out, as I did in the DIY guide, the epoxy for the lower breather tube that connects to the ICV is weak and it actually detached while I was installing the hose. This is something I’m sure they’ll improve for later production runs.
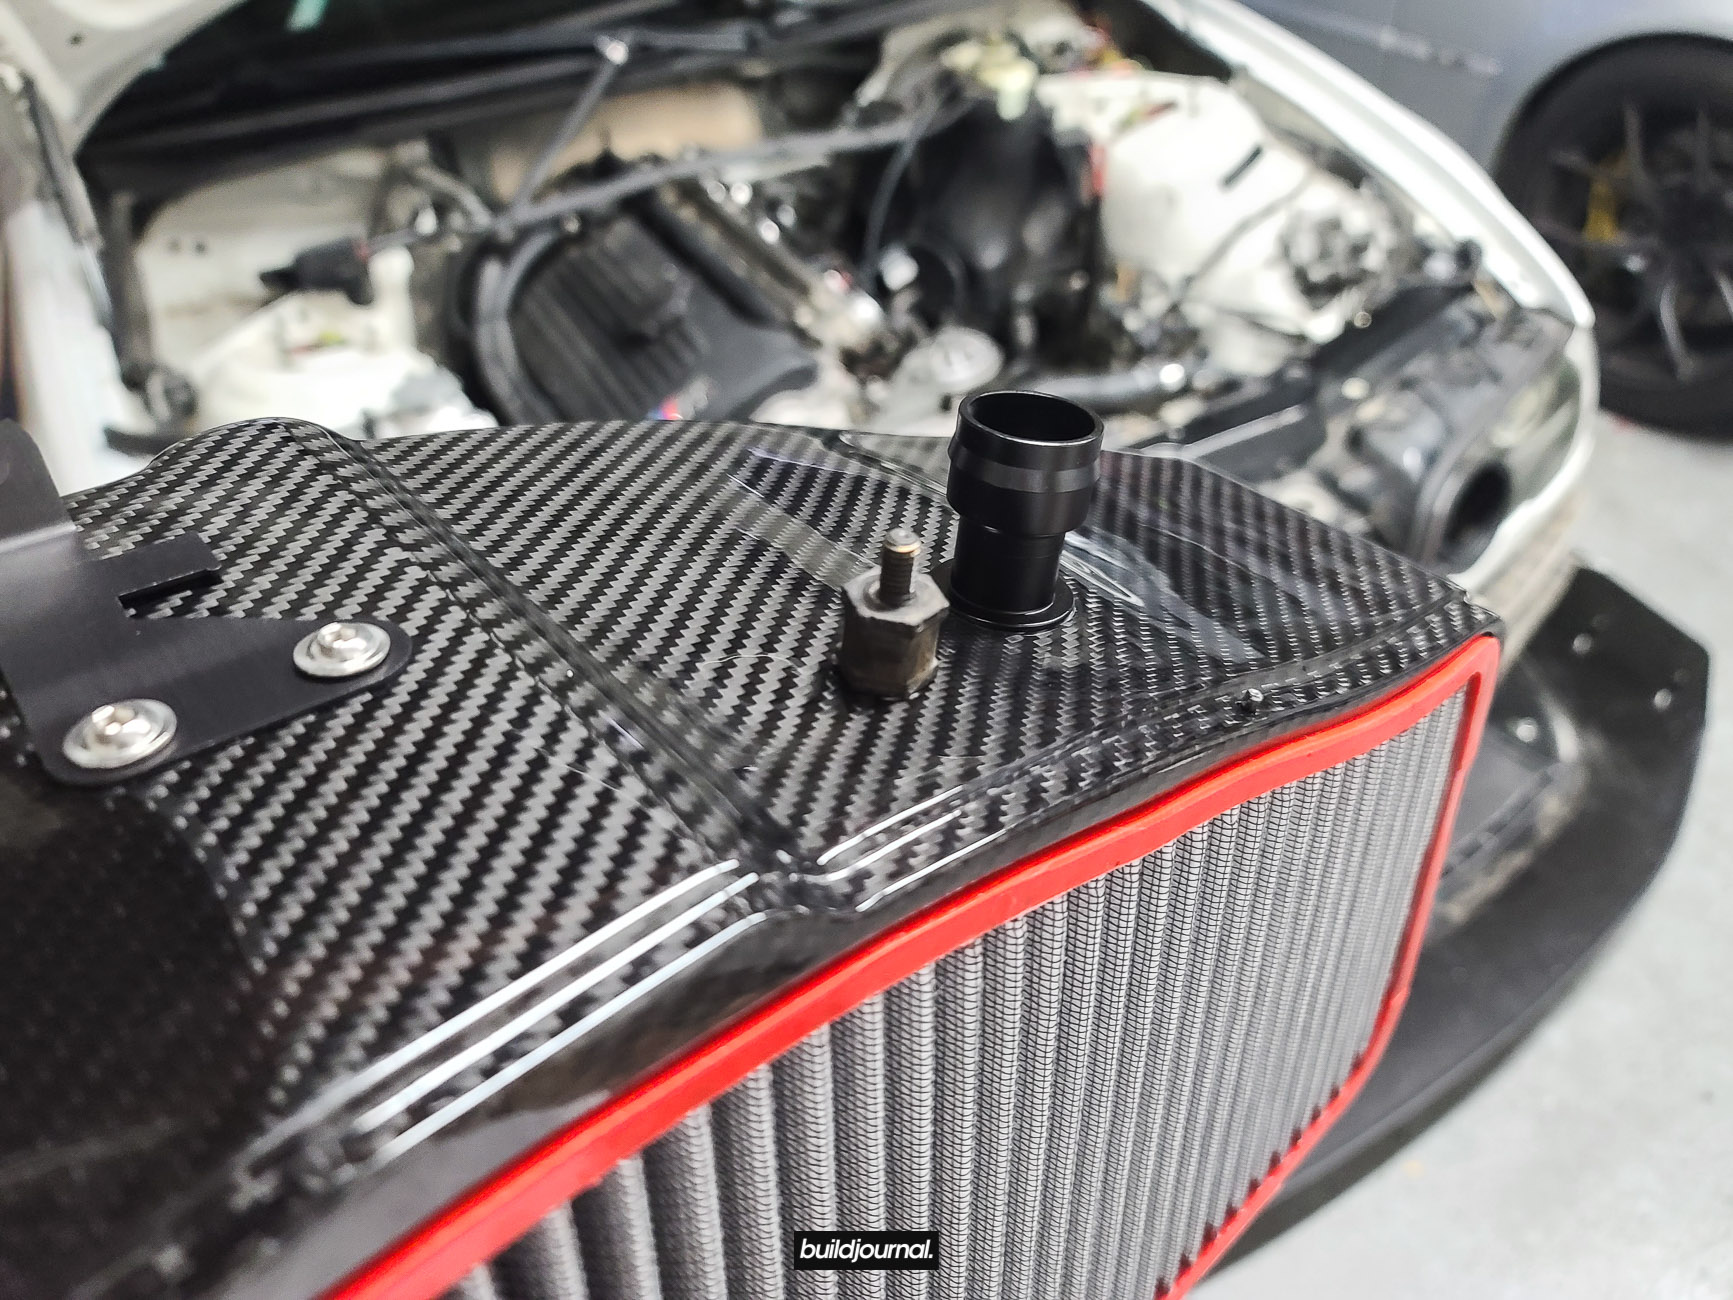
The entire carbon fiber structure of the intake is composed of two parts: intake body and inlet. The trumpets on the intake body appear very nice and is a 1-piece mold part of the entire intake body.
I also noticed the carbon fiber weave is going a different direction than the OEM CSL airbox. You probably won’t have noticed it and it’s not a big deal to me, but just something I noticed.


Dyno Testing
⚠️ Update 8/17/2020: A lot of people seem to be in shock from the dyno results and I suspect some people are selectively reading this article. So for those that want extra clear cliff notes, here they are:
- “No way it’s 52 whp gain!” – Yes way. The comparison is against a completely bone stock car – not just a stock intake. Read the dyno chart please. I have notes contained at the bottom to compare all my historical dyno results. I’ve dyno’d my car there for a very long time now so I have data on a lot of different setups. Again, please read.
- “Dyno numbers are way too high!” – Dyno numbers are subjective. There are too many variables with different types of dynos and they all read a little or a lot differently. Even the same dyno/model can read a little differently. The point here is, I eliminated the variable as much as possible by testing on the same dyno. Same car, same altitude, similar temps. If the CSL airbox dyno results seem high, then compare it against the other setup results. The other results are “high” as well. So what does that mean? As long as it’s an apples to apples comparison on the same dyno and car, the delta difference is what you need to look at. Again, I detailed this in the article and I’m not sure why there is so much confusion.
- “OMG. He must have some secret mods.” – No. I’m simply running an OEM CSL tune, Turner Motorsport airbox, headers, BW exhaust. No cams. No crazy engine internals. If you’re seriously doubting these results, go ahead and call EAS and tell them your story on dyno numbers.
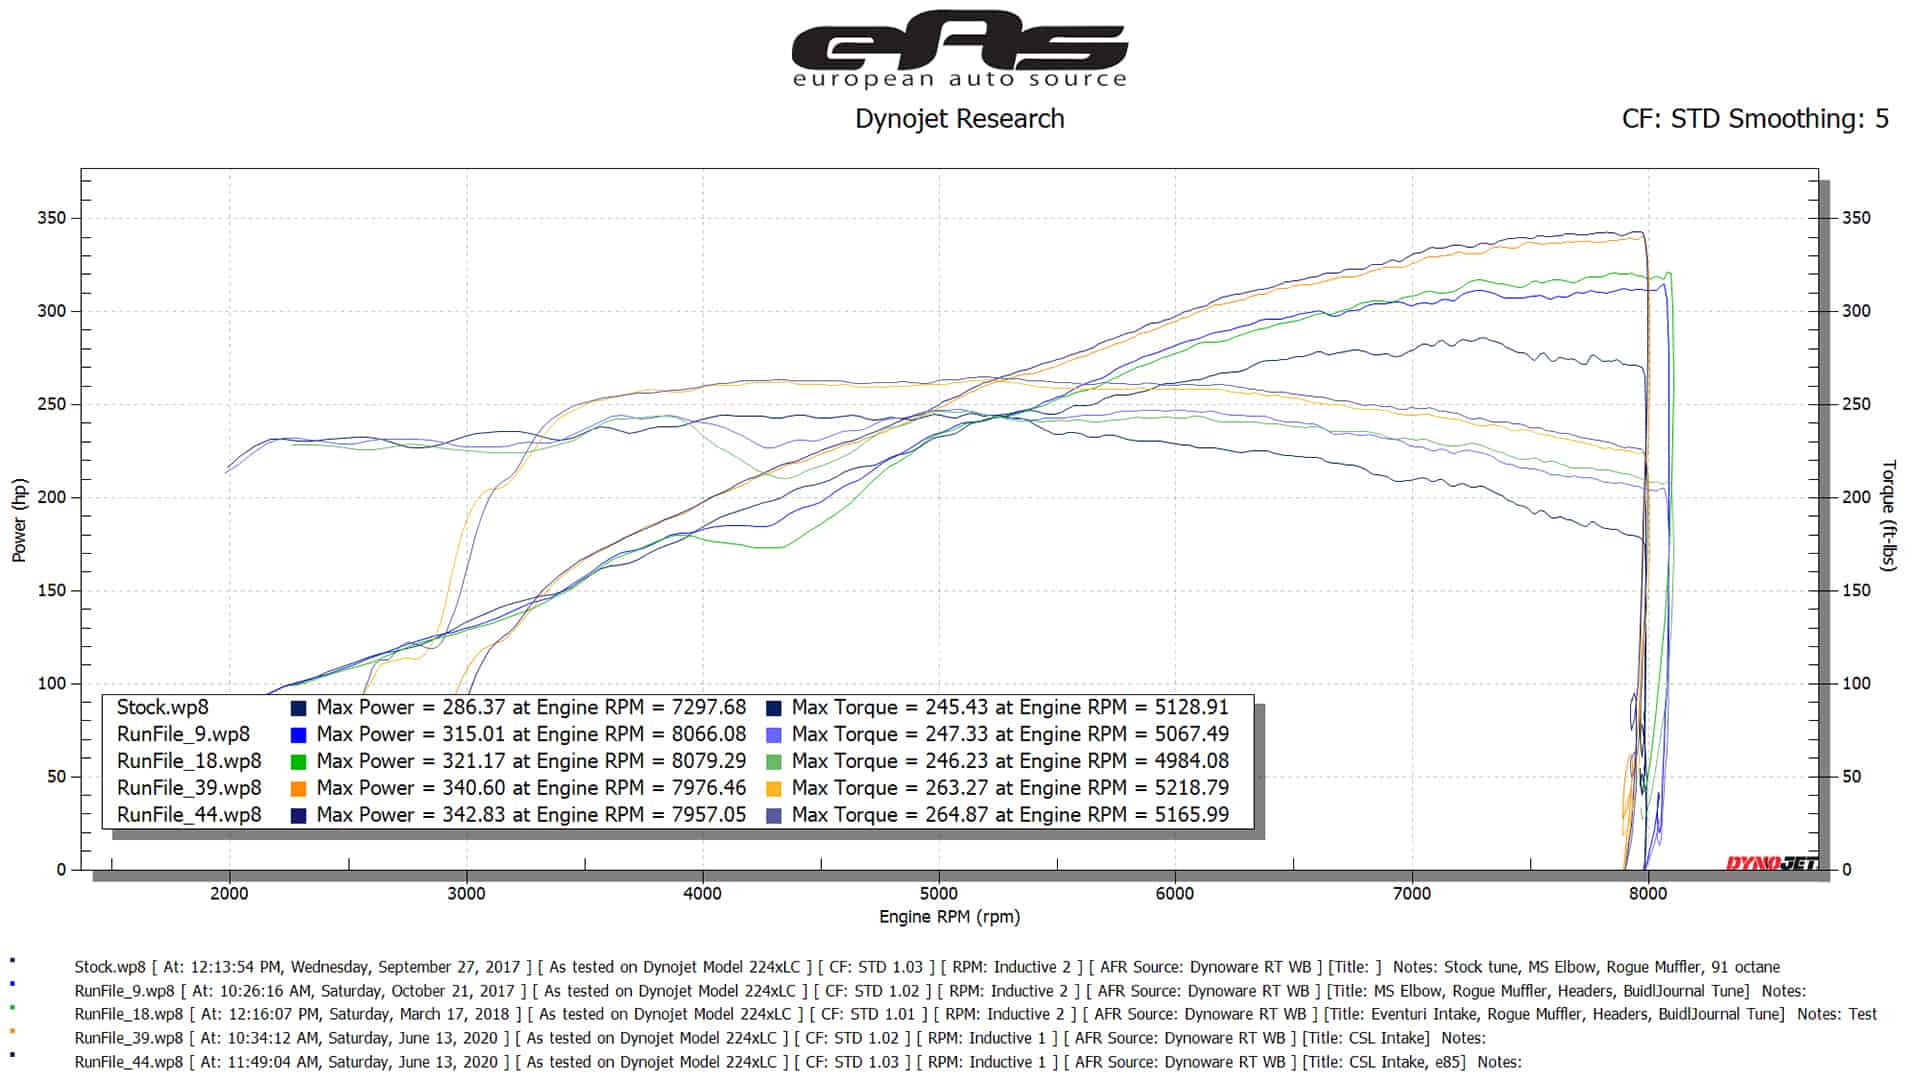
Just as we do for all of our dyno tunes and testing, we went to European Auto Source in Anaheim, CA to run the dyno. We have historical data with our previous setups, so we can benchmark the data with stock and other modified setups. In the dyno chart below, we compare 5 different runs – all from the same car. Keep in mind these tests were not done all on the same day, so there are minor factors that come into play such as varying temperature, humidity, engine health, exhaust setups, etc.
Setups Tested
Details on the supporting parts are outlined in the bottom of the dyno chart e.g. Stock (91 octane) run is on catted headers, RE exhaust, stock intake.
- Stock (91 octane)
- Catless + B-Spec Tune (91 octane)
- Catless + B-Spec Tune + Eventuri intake (91 octane)
- Catless + MSS54HP CSL + CSL intake (91 octane)
- Catless + MSS54HP CSL + CSL intake (~E35 blend)
Gains Comparison vs Catless + MSS54HP CSL + CSL Intake (91 Octane)
Comparison is against the 91 octane run since for us in CA this simulates a more realistic scenario as we don’t have 93 octane at the pump. 93 octane testing was done for additional insights.
| Setup | WHP | WHP Gain | Δ | WTQ | WTQ Gain | Δ |
| Stock (91 octane) | 286.37 | 54.23 | 19% | 245.43 | 17.84 | 7% |
| Catless + B-Spec Tune (91 octane) | 315.01 | 25.59 | 8% | 247.33 | 15.94 | 6% |
| Catless + B-Spec Tune + Eventuri intake (91 octane) | 321.17 | 19.43 | 6% | 246.23 | 17.04 | 7% |
Parts List & Cost
The table below is a full parts list to do the Turner Motorsport CSL Intake conversion. Again, this is a full parts list. If you read the DIY article we put out, you’ll find out exactly what I did and did not use. You don’t need to buy everything in the parts list.
| Quantity | Item | Price | Link |
| 1 | CSL Style Intake – Gloss | $1,499.95 | View Product |
| 1 | CSL Style Intake – Matte | $1,499.95 | View Product |
| 1 | CSL Vent Valve Bracket | $41.00 | View Product |
| 2 | Washer | N/A | View Product |
| 1 | Hex Bolt | $1.05 | View Product |
| 2 | Hex Nut | $0.99 | View Product |
| 1 | CSL Air Shut Off Valve | $111.95 | View Product |
| 1 | CSL Air Filter | $149.95 | View Product |
| 1 | S54 Silicone Throttle Body Boot Set | $109.95 | View Product |
| 1 | Turner Plug-And-Play IAT Relocation Kit | $117.90 | View Product |
| 1 | CSL IAT Sensor | $26.95 | View Product |
Additional for SMG
| 1 | CSL SMG Expansion Tank Bracket | $29.95 | View Product |
| 1 | CSL SMG Expansion Tank | $128.95 | View Product |
Optional
| 1 | CSL Dipstick Tube | $89.95 | View Product |
| 1 | CSL Oil Dipstick | $32.95 | View Product |
Along with the parts you need to buy for the CSL airbox, you also need to figure out your ECU and Alpha-N/MAP sensor setup. That is not baked into the parts list cost.
MSS54HP ECU
The earlier E46 M3 models came with an MSS54 ECU while the later models came with an updated MSS54HP ECU. In order to run the CSL tune, you need the MSS54HP ECU. There are various shops that can make the conversion to MSS54HP ECU such as Kassel Performance. If you want a custom tune, well that’s going to be more.
MAP Sensor
What is a MAP Sensor? Well we did an article for that and you can take a read on our Wire MAP and IAT Sensor for MSS54HP CSL ECU DIY guide first. TLDR: If you want to run a CSL box you have two options 1. Alpha-N or 2. MAP sensor. The following chart below is under the assumption of a MAP sensor with a MSS54 non-HP ECU conversion.
| Quantity | Item | Price |
| 1 | MSS54HP CSL ECU (Kassel) | $ 460.00 |
| 1 | BMW E46 M3 S54 CSL MAP Sensor Conversion Kit | $ 235.00 |
Alpha-N
If you don’t want to do the MAP sensor route, you can choose Alpha-N tuning. These are hard coded values your engine uses to calculate load. Since it does not have a MAP sensor to calculate air mass, it uses throttle position and RPM to calculate load. There is a lot of debate for MAP vs Alpha-N, but the best way to go is using a MAP sensor since it can calculate dynamic changes in the environment e.g. higher elevation conditions where there is less oxygen. This is especially important in areas/tracks that experience large temperature fluctuations within a span of hours. Alpha-N requires custom tuning and is usually more than the price of a MAP kit.
Turner Motorsport CSL Intake DIY
Final Thoughts
So there you have it. A look at the Turner Motorsport CSL Intake with comprehensive dyno testing. Let me know in the comments below on what you think of this kit and whether or not you would consider buying this.
Turner Motorsport CSL Style Intake Install DIY - E46 M3
Installing the Turner Motorsport CSL Style Intake Airbox
Ever since Turner Motorsport released the CSL Style Intake for the S54, a lot of people have been interested because of the price point. For those that have bought or plan to purchase this intake, I’ll cover the overall installation in this article, but also detail in some of the small things because during my research there were a lot of small details that were critical, yet not being really talked about.
This article is strictly about the Turner Motorsport intake install. If you’re looking for more information on what it takes to convert your S54 to run a CSL intake, we’ll be writing another article that covers all of that.
Turner Motorsport CSL Style Intake
Parts List
For those that don’t need to buy everything in the kit, use this parts list below to piece together what you need. I realized after I installed everything, I didn’t need everything.
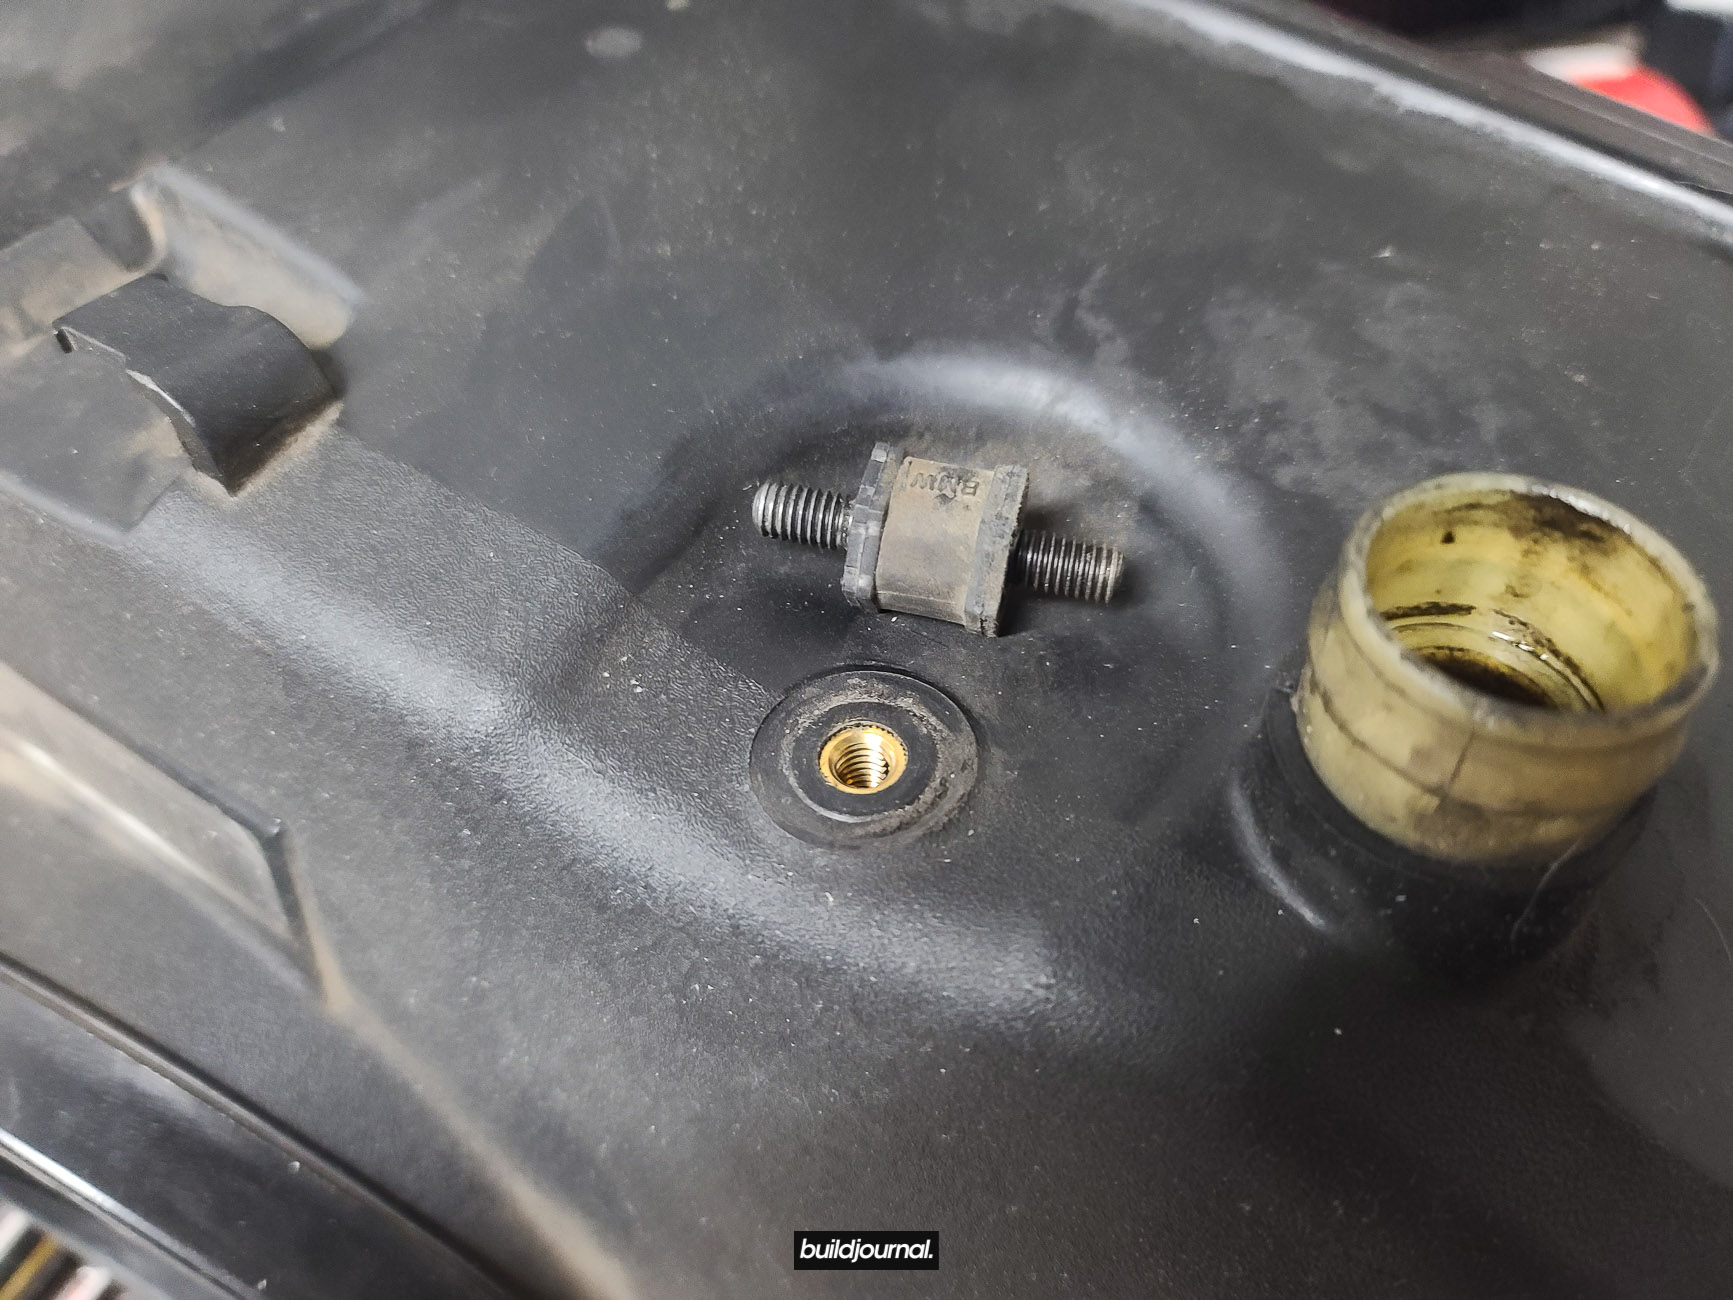
CSL Vent Valve Bracket – I’m honestly not sure what this part is used for. I used it as a zip tie location for some of the hoses that run underneath the plenum. You don’t need this part, however you do need screws, or something else, to plug the thread.
Washer, Hex Bolt, Hex Nut – I did not use any of these parts. The two Hex Nuts are for the 10mm nuts that secure the intake to the bracket, but I ended up re-using mine. The other hardware, I’m not sure what it’s used for.
CSL Air Shut Off Valve – You can modify your existing shut off valve by re-using the two male connectors on each ends and replacing the hard line with a soft vacuum line.
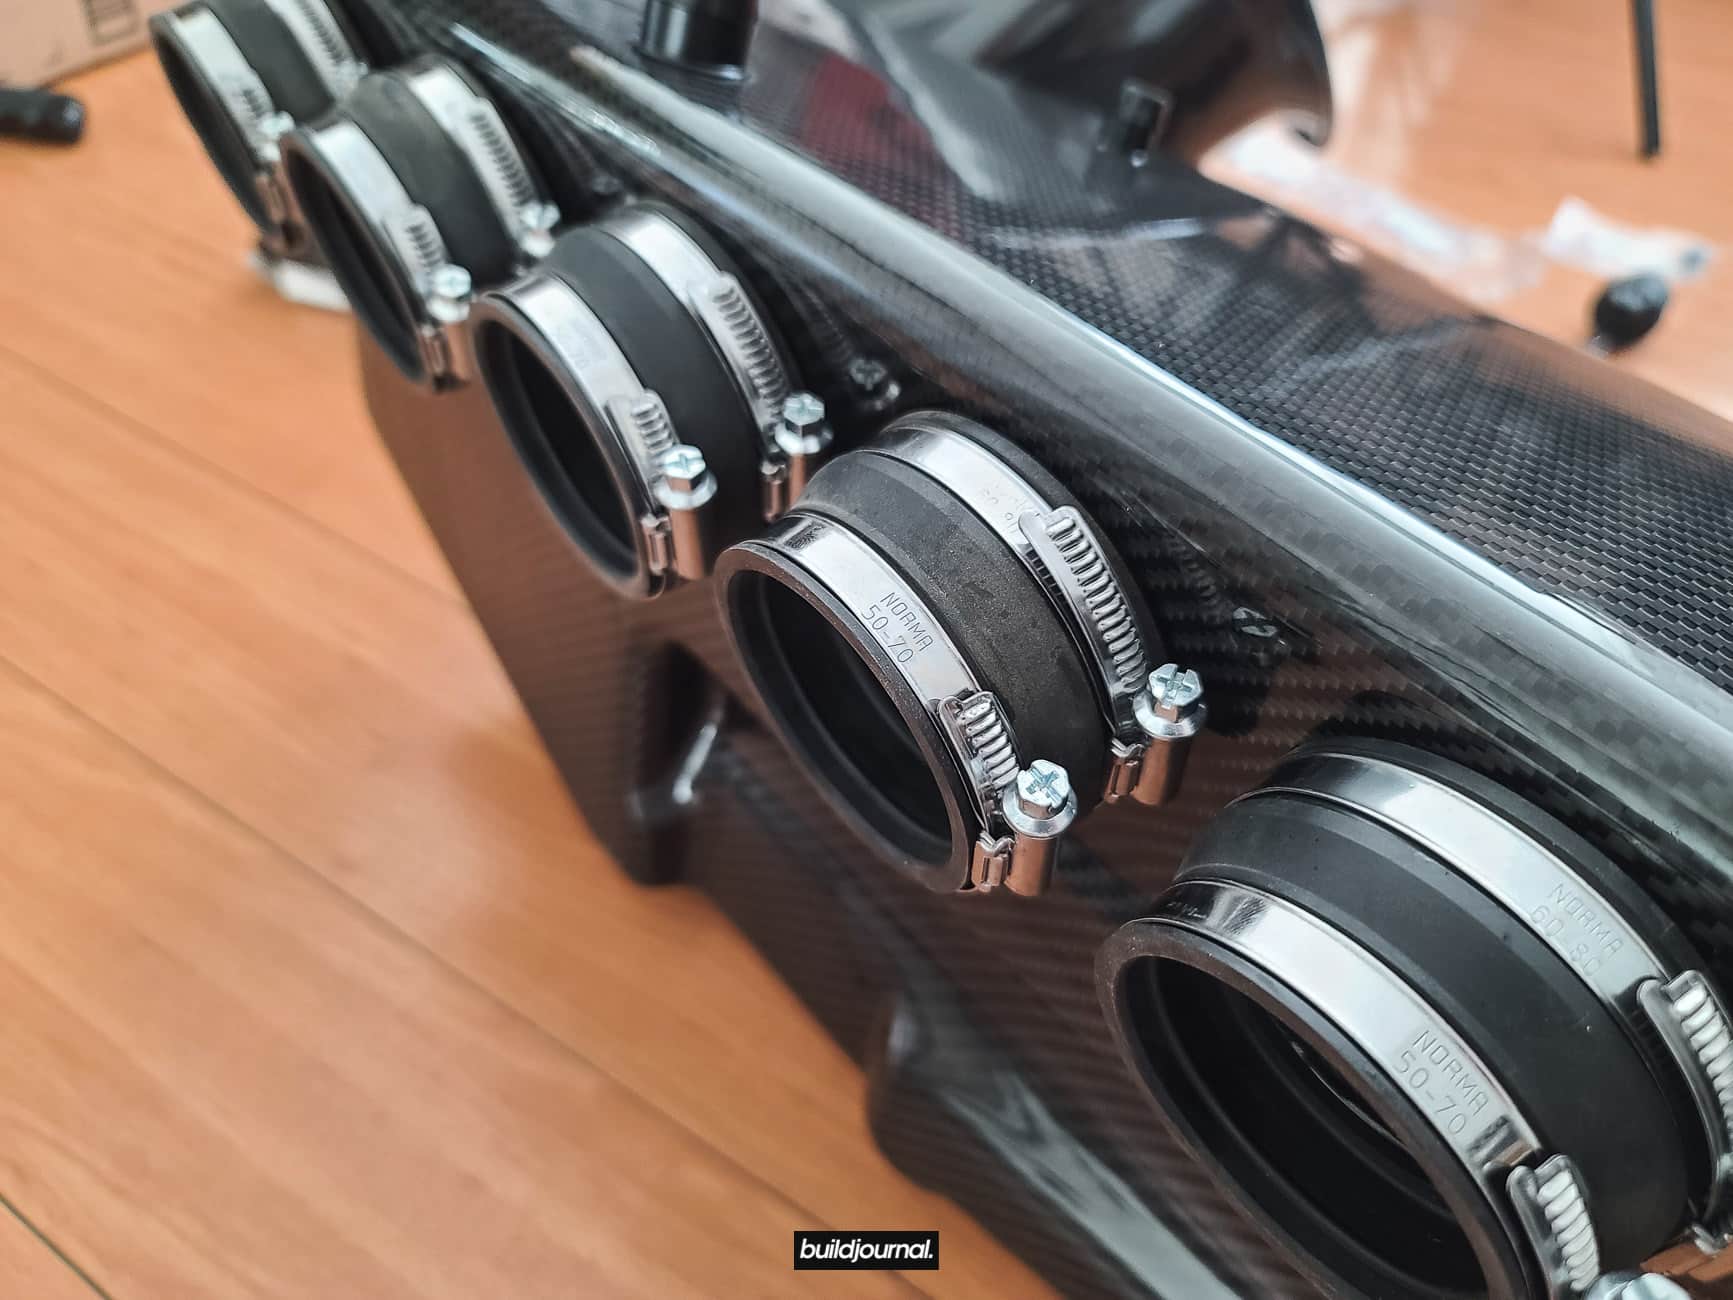
S54 Silicone Throttle Body Boot Set – I ended up re-using my boots from my OEM intake. Some people say only 01-03 model boots can be re-used, but according to ECS/Turner their boot set fits all plenums including OEM and CSL. I also sourced my own worm-style hose clamps. You just need 6x of the 50-70mm and 6x of the 60-80mm clamps.
CSL Oil Tube and Dipstick – You can bend your OEM tube and retain ability to check without removing anything. If you opt for the CSL Oil Tube and Dipstick, you’ll need to remove your swaybar and intake inlet to check oil. I highly recommend you stick to modifying the OEM for convenience.
| Quantity | Item | Price | Link |
| 1 | CSL Style Intake – Gloss | $1,499.95 | View Product |
| 1 | CSL Style Intake – Matte | $1,499.95 | View Product |
| 1 | CSL Vent Valve Bracket | $41.00 | View Product |
| 2 | Washer | N/A | View Product |
| 1 | Hex Bolt | $1.05 | View Product |
| 2 | Hex Nut | $0.99 | View Product |
| 1 | CSL Air Shut Off Valve | $111.95 | View Product |
| 1 | CSL Air Filter | $149.95 | View Product |
| 1 | S54 Silicone Throttle Body Boot Set | $109.95 | View Product |
| 1 | Turner Plug-And-Play IAT Relocation Kit | $117.90 | View Product |
| 1 | CSL IAT Sensor | $26.95 | View Product |
Additional for SMG
| 1 | CSL SMG Expansion Tank Bracket | $29.95 | View Product |
| 1 | CSL SMG Expansion Tank | $128.95 | View Product |
Optional
| 1 | CSL Dipstick Tube | $89.95 | View Product |
| 1 | CSL Oil Dipstick | $32.95 | View Product |
Tools Required
- 7mm socket
- 10mm socket
- 13mm deep socket
- 15mm or 16mm deep socket
- 4mm hex
- Torx screw set
- Ratchet
- Hose clamp removal tool or pliers
3
Hours
2/5
Difficulty
CSL Intake Install DIY
1. Access intake box
1.1, remove 4 nuts holding front strut bar.
1.2, remove 4 torx screws holding cabin filter housing, remove filter.
1.3, remove intake including the nut for the oil dipstick.
1.4, remove crankcase vent hose.
1.5, remove vent hose grommet to give some more slack in the line when you take out the airbox.
2. Remove intake box
2.1, remove the throttle body hose clamps. There’s not much grip and clearance so I had to use angled needle-nose pliers and locking pliers to squeeze the rivets together and with a flat head pry out the clamp simultaneously. Basically in the bottom picture below, I pry the two rivets together to alleviate clamping force and then used a small flat head to pry out the end of the clamp pictured on top.
Clamp the rivets together. Remove all 6 clamps.
2.2, remove the (2) two nuts holding the bottom of the intake box. Detach plug grommet between the two nuts.
2.3, unclip the (large) vent hose on the bottom of the intake box.
Below is a better view of the (large) lower vent hose and the 2 nuts holding the airbox.
2.4, unclip the holder for the smaller vent hose on the side of the intake box – the small highlighted tab has to be pressed down and the plastic holder will slide up. (not away from box)
2.5, this part is a little tricky (any is the part everyone talks about breaking) so pay attention! Before the airbox comes out, you have to unclick the (small) vent hose below the intake box, but because the clearance is so small you have to wiggle the box out a little to slide your hand in. Be gentle because this part is fragile and if you break this hose, it’s going to be an annoying trip to the dealership.
The best thing to do is slightly pull the airbox halfway out and then unclip the (small) vent hose.
Here is a picture showing the underside of the airbox.
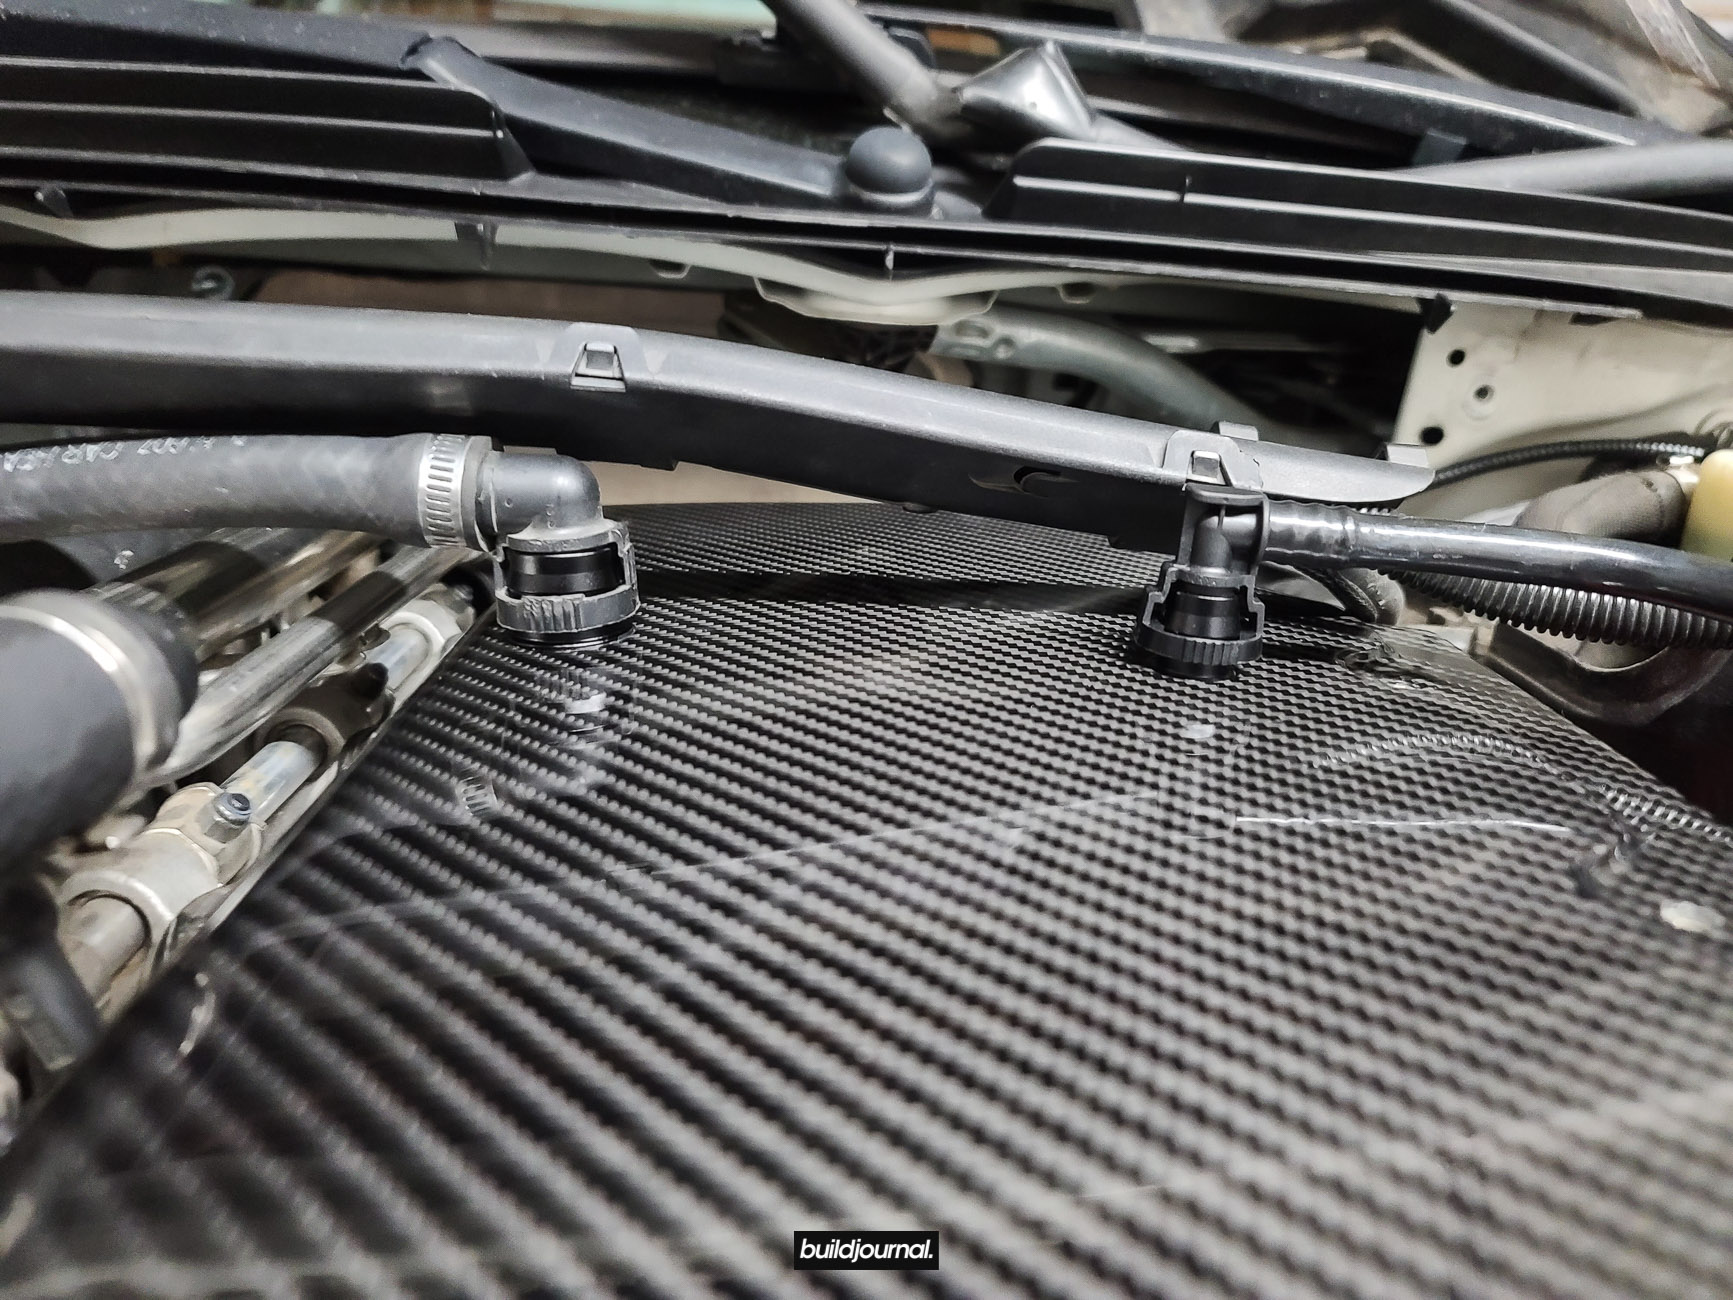
3. Setup engine bay for install
3.1 If you’re re-using the OEM dipstick, slightly bend or pivot your dipstick to the left shock tower right next to the plastic wire box. I just used a zip tie to hold the tube.
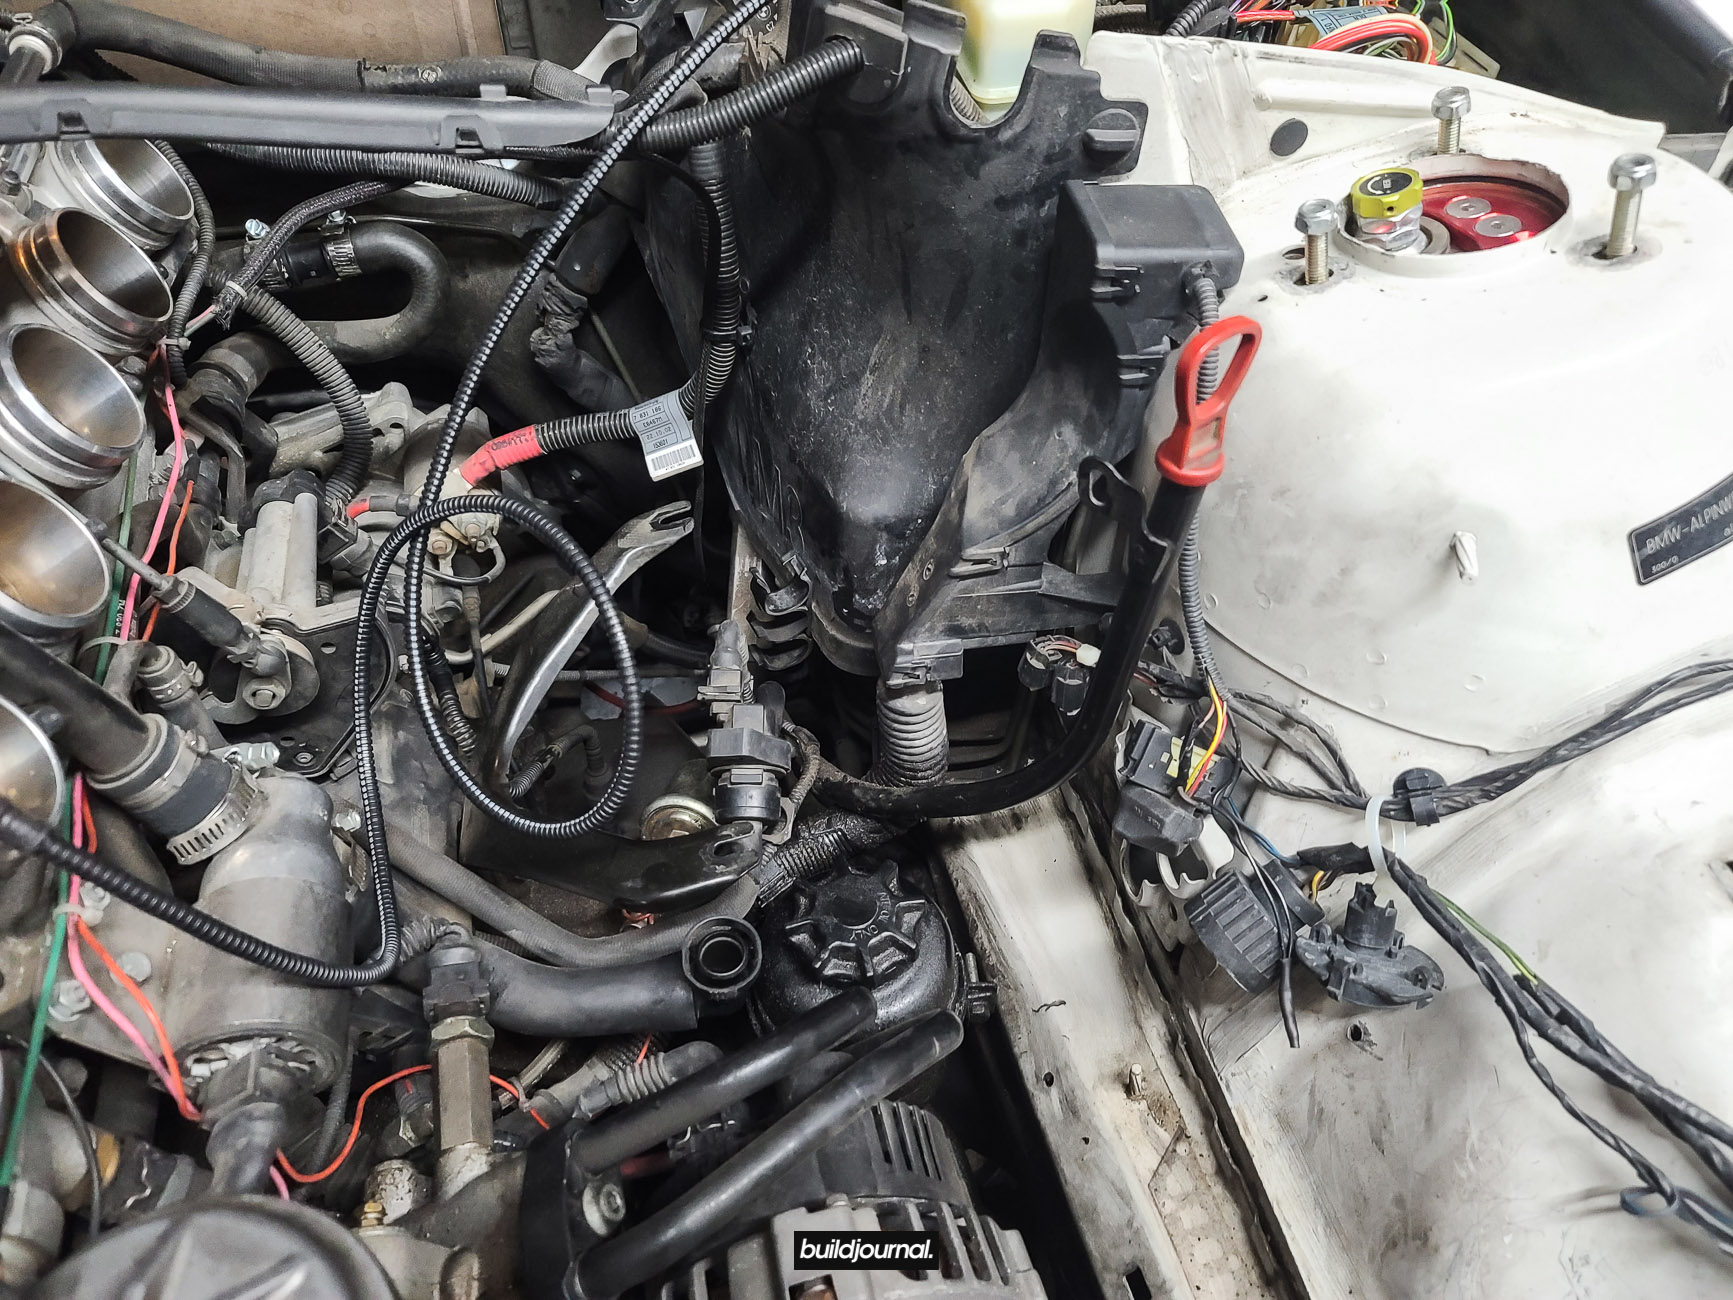
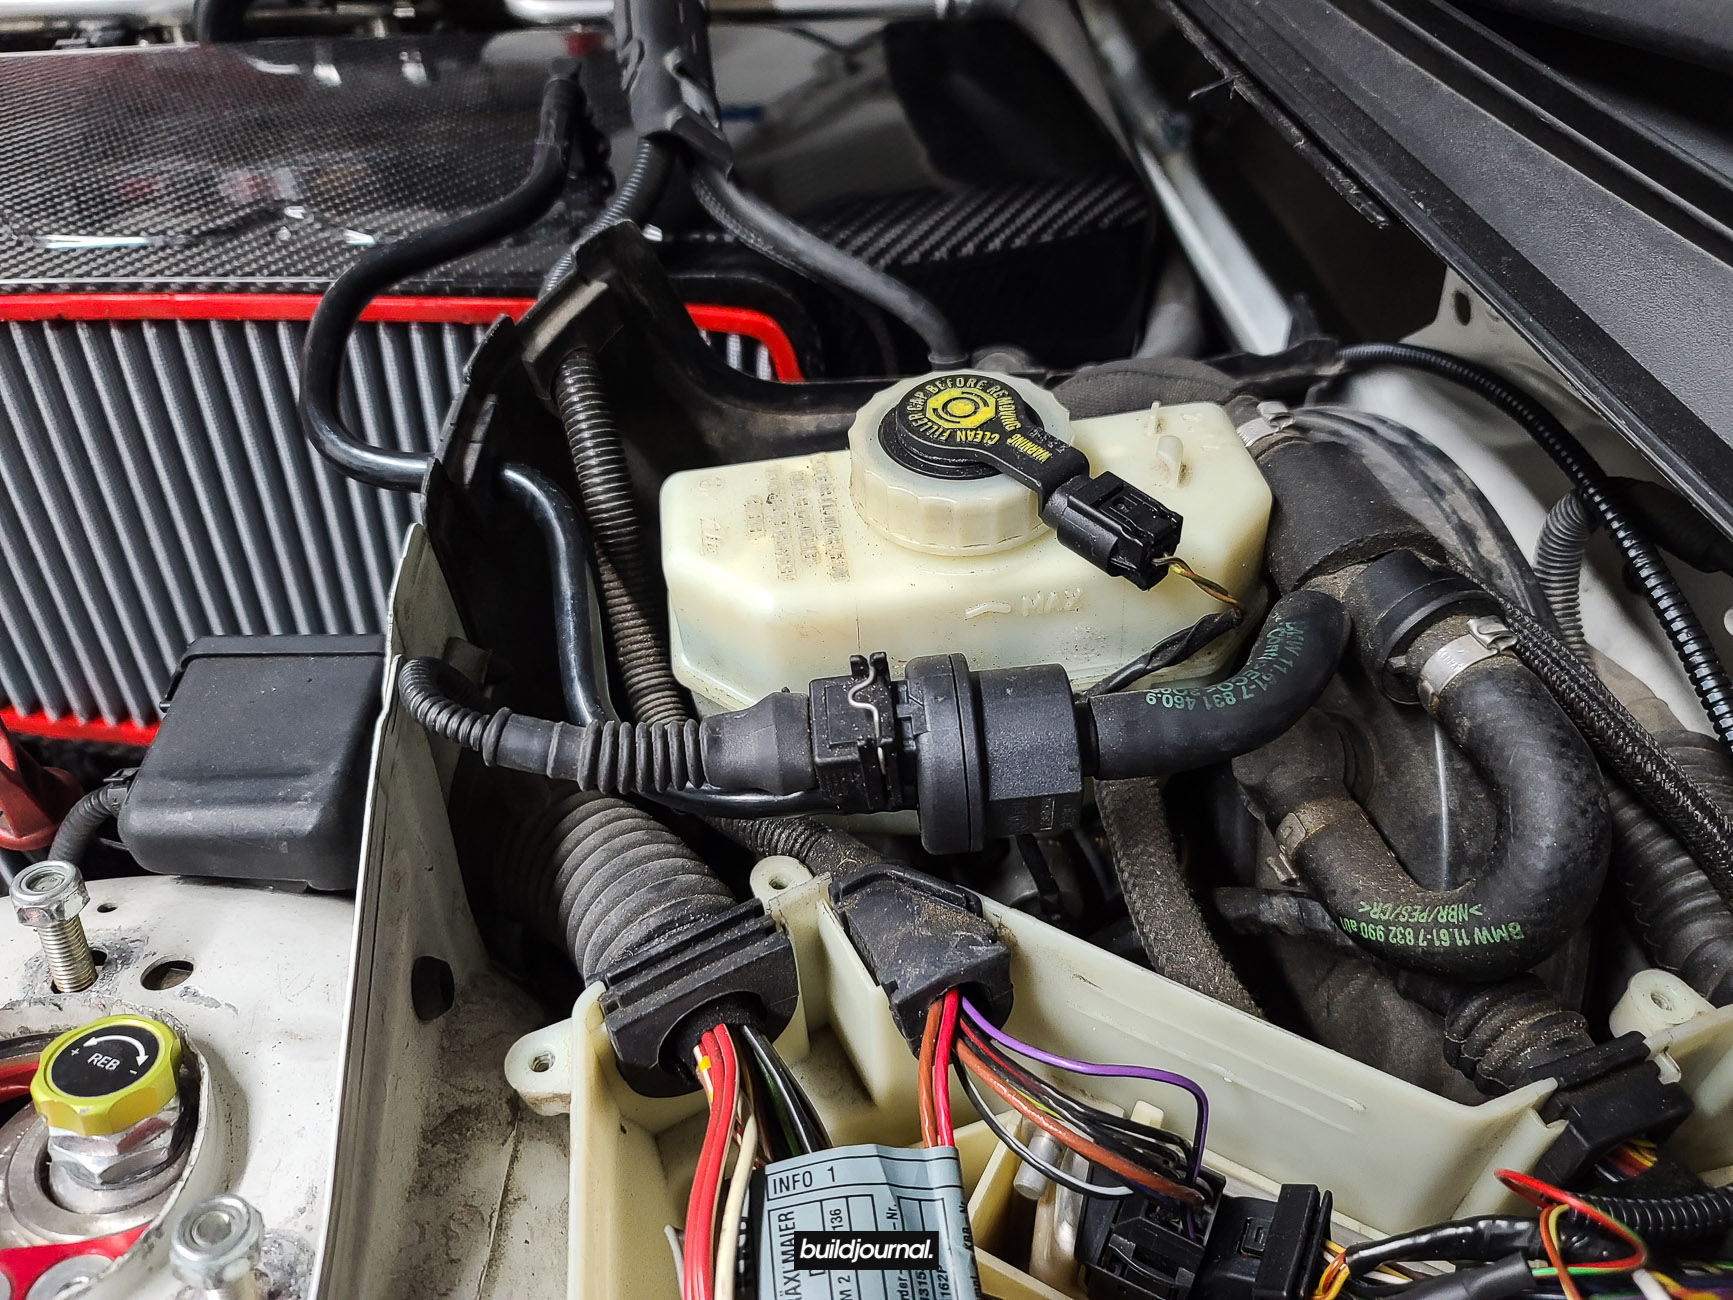
3.2 Now is the time to take care of all the hoses and wiring underneath the plenum between the two intake brackets. You’ll also notice the wiring loom for the MAP sensor. We’ll go over the MAP/IAT wiring in the next step, but you’ll want to secure this loom with zip ties as well.
4. Wire MAP and IAT sensor
4.1 I did a separate DIY article to configure the wiring. Please see our article for this step: Wire MAP and IAT Sensor for MSS54HP CSL ECU DIY

5. Install CSL intake
5.1 Remove the OEM intake boots and move it to the new CSL box. Use the bigger hose clamps for the box side and the smaller hoses for the throttle body side.
5.2 Remove the two rubber OEM intake mounts and install on the new CSL box. This is either a 15mm or 16mm deep socket. Please let me know in the comments which one it is.
5.3 Install the CSL Vent Valve Bracket, should you choose, onto the airbox. The orientation in the picture is incorrect. The tab that sticks downwards should be facing towards the air filter.
5.4 Install the air filter and install the main plenum. Make sure to install the hose clamps now while the boots secure to the throttle bodies. Line up the two intake mounts underneath onto the intake bracket.
5.5 Attach the two hoses underneath. There is a bigger hose coming from the ICV and a smaller vent hose. If your ICV hose does not line up with the airbox connector, your airbox is probably not seating right and is too high. If this is the case, I would recheck the intake brackets to make sure they weren’t bent upwards. Also be very careful with the ICV hose connector as it has a weak epoxy. Some users, including me, had to re-epoxy this connector because it came unglued.
5.6 Install the new CSL Air Shut Off Valve.
5.7 Attach the new crankcase vent hose and shut off valve on top of the box. It’s worth to mention, ECS/Turner does not include a CSL crankcase hose as the OEM can be re-used. I’m using an aftermarket oil catch can so I can not confirm this. Please let me know in the comments if this can be successfully re-used.
5.8 Install the intake inlet using the supplied 4mm hex screws. Make sure the bottom two tabs beneath the airbox are clamped on first.

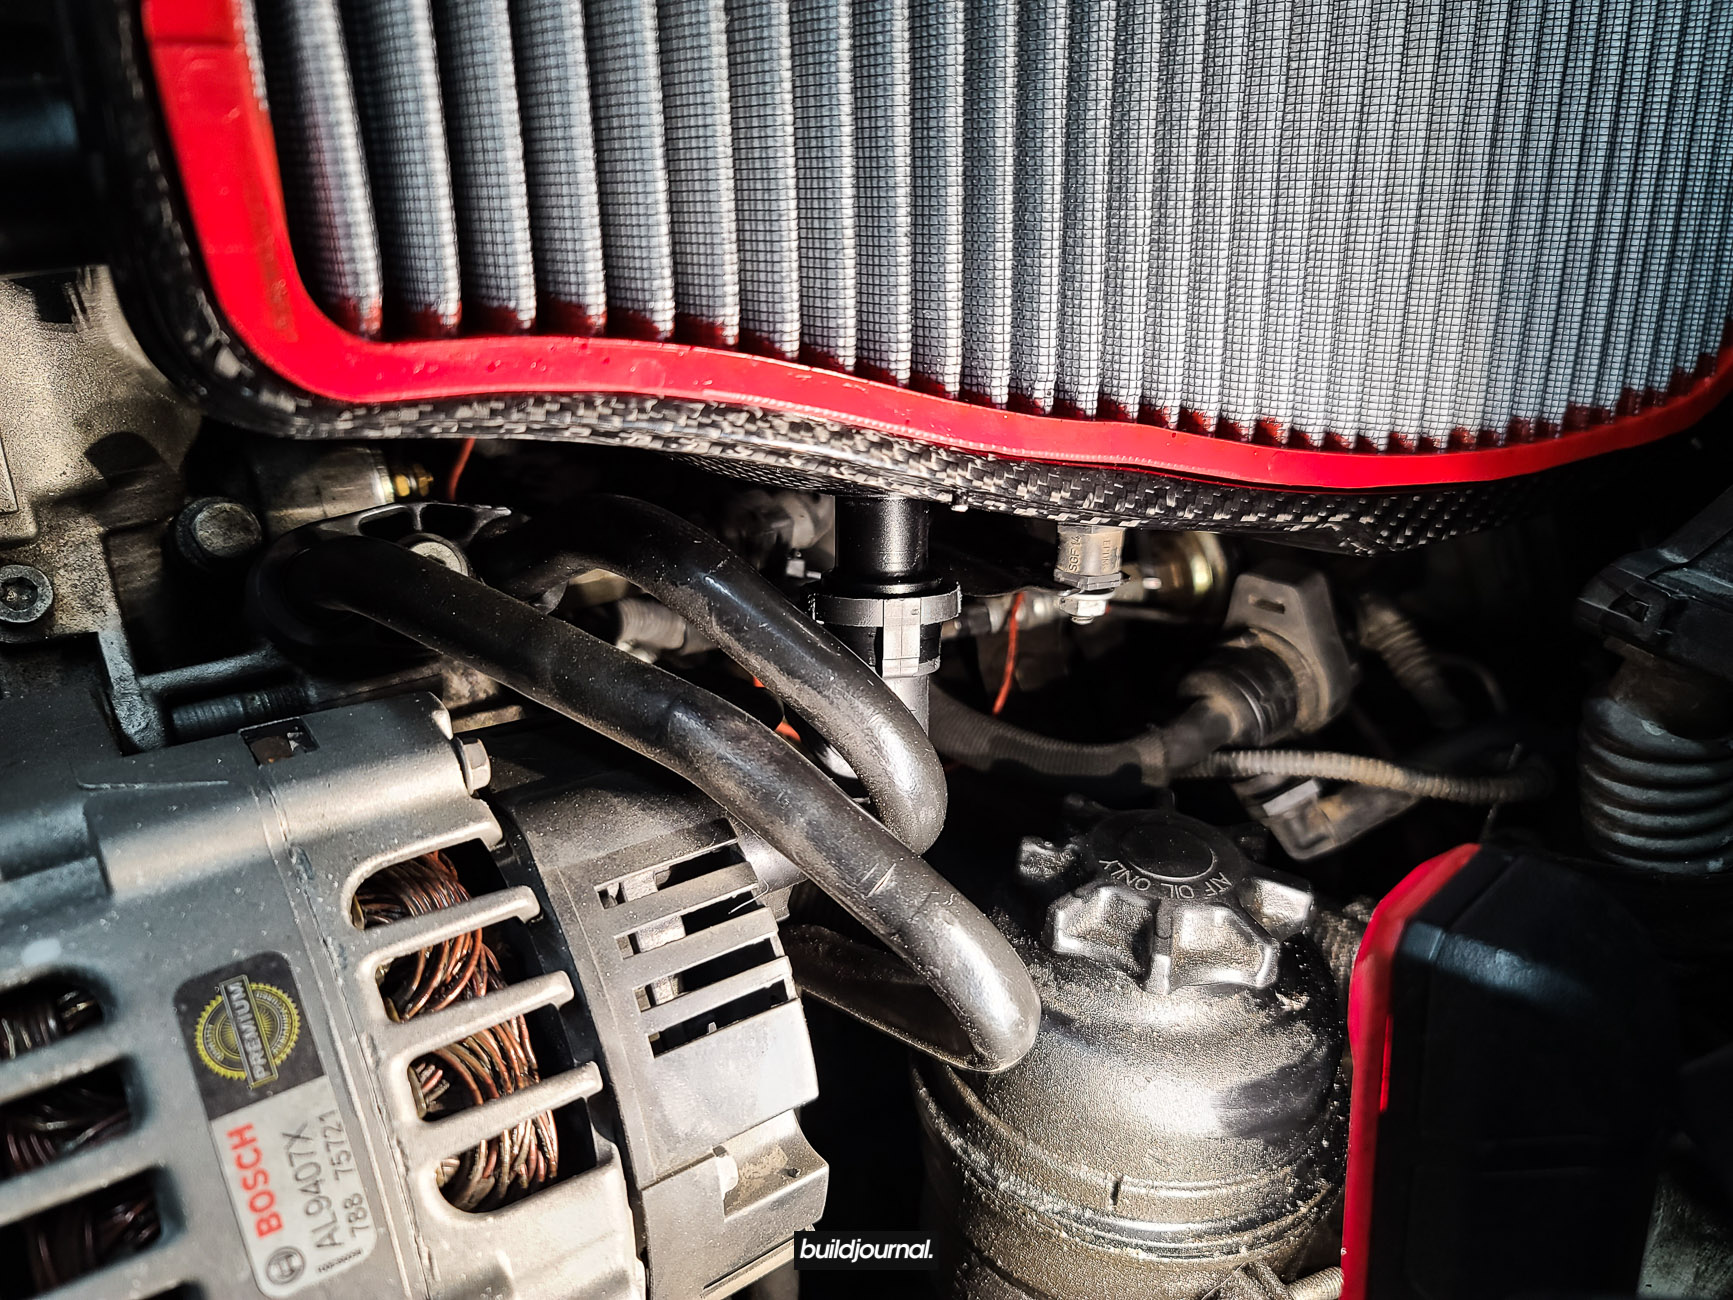
5.9 Install the CSL IAT sensor into the bung located next to the oil filter housing. Plug in your IAT harness.
5.10 Re-install everything in reverse order for the strut bar, cabin filter, etc. Your install is now complete!
Turner Motorsport CSL Intake Dyno and Review

FLASH SALE: 20% off RECARO RS-G Alcantara Bucket Seats
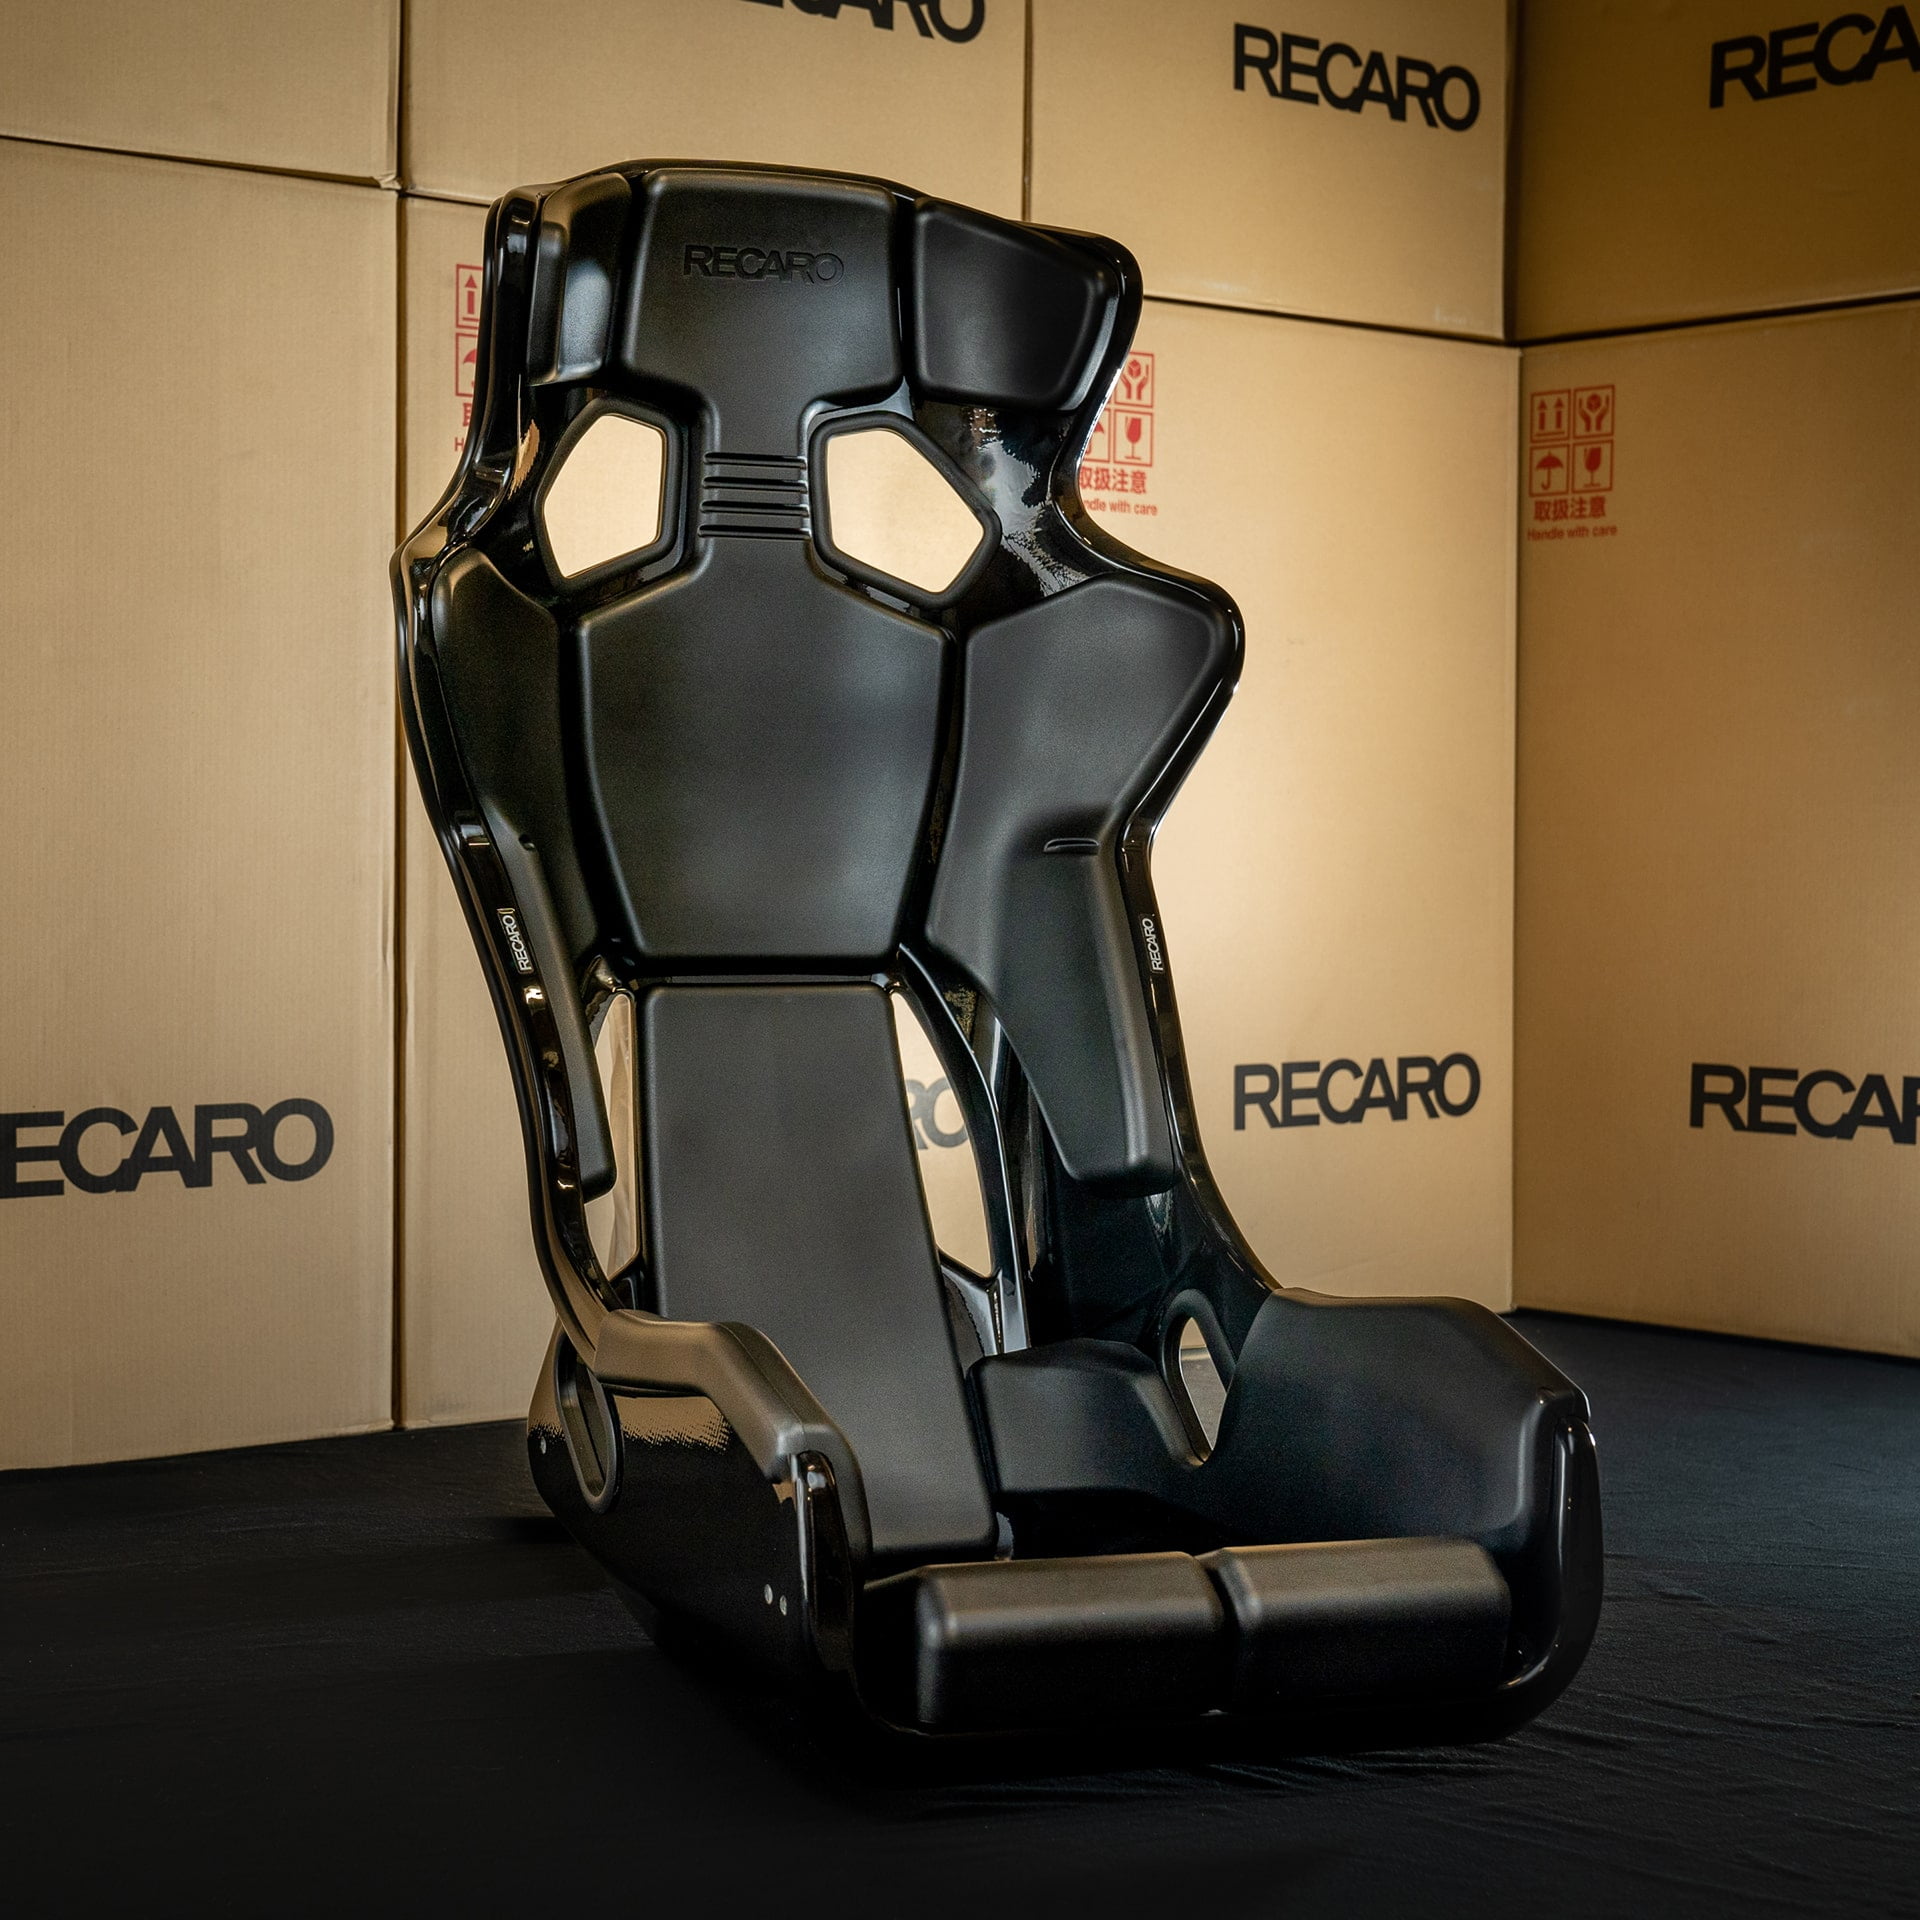
For a limited time only! Get 20% off the RECARO RS-G Alcantara Bucket Seats. The RS-G is a full bucket seat which has been developed and designed for the world of motor sports and the Asian body size. The form of the full bucket seat leads to an ideal and natural driving position in which the driver can slightly straighten up and have a wide view but still can keep a low hip point. Furthermore, the RS-G makes active steering possible required in a rally, gymkhana or drifting whereas it is even suitable for every-day use.
-
Recaro RS-G Alcantara Bucket Seat
$2,399.00- Compact seat form. The shoulder part is 50mm narrower compared to the SP-A, a model for exclusive racing use. Furthermore, the seat cushion width is reduced by 10mm.
- Improved seat cushion for getting in and out easier by designing the side support part of the seat cushion in a slow curve.
- Abundant seat cover versions and different materials matching with the interior. The RS-G is available with Kamui in combination with superior mesh material, as well as in pure Kamui which is most suitable for motor sport driving concerning breath-ability. Moreover there is a high quality leather & Alcantara version.
RECARO Bucket Seats


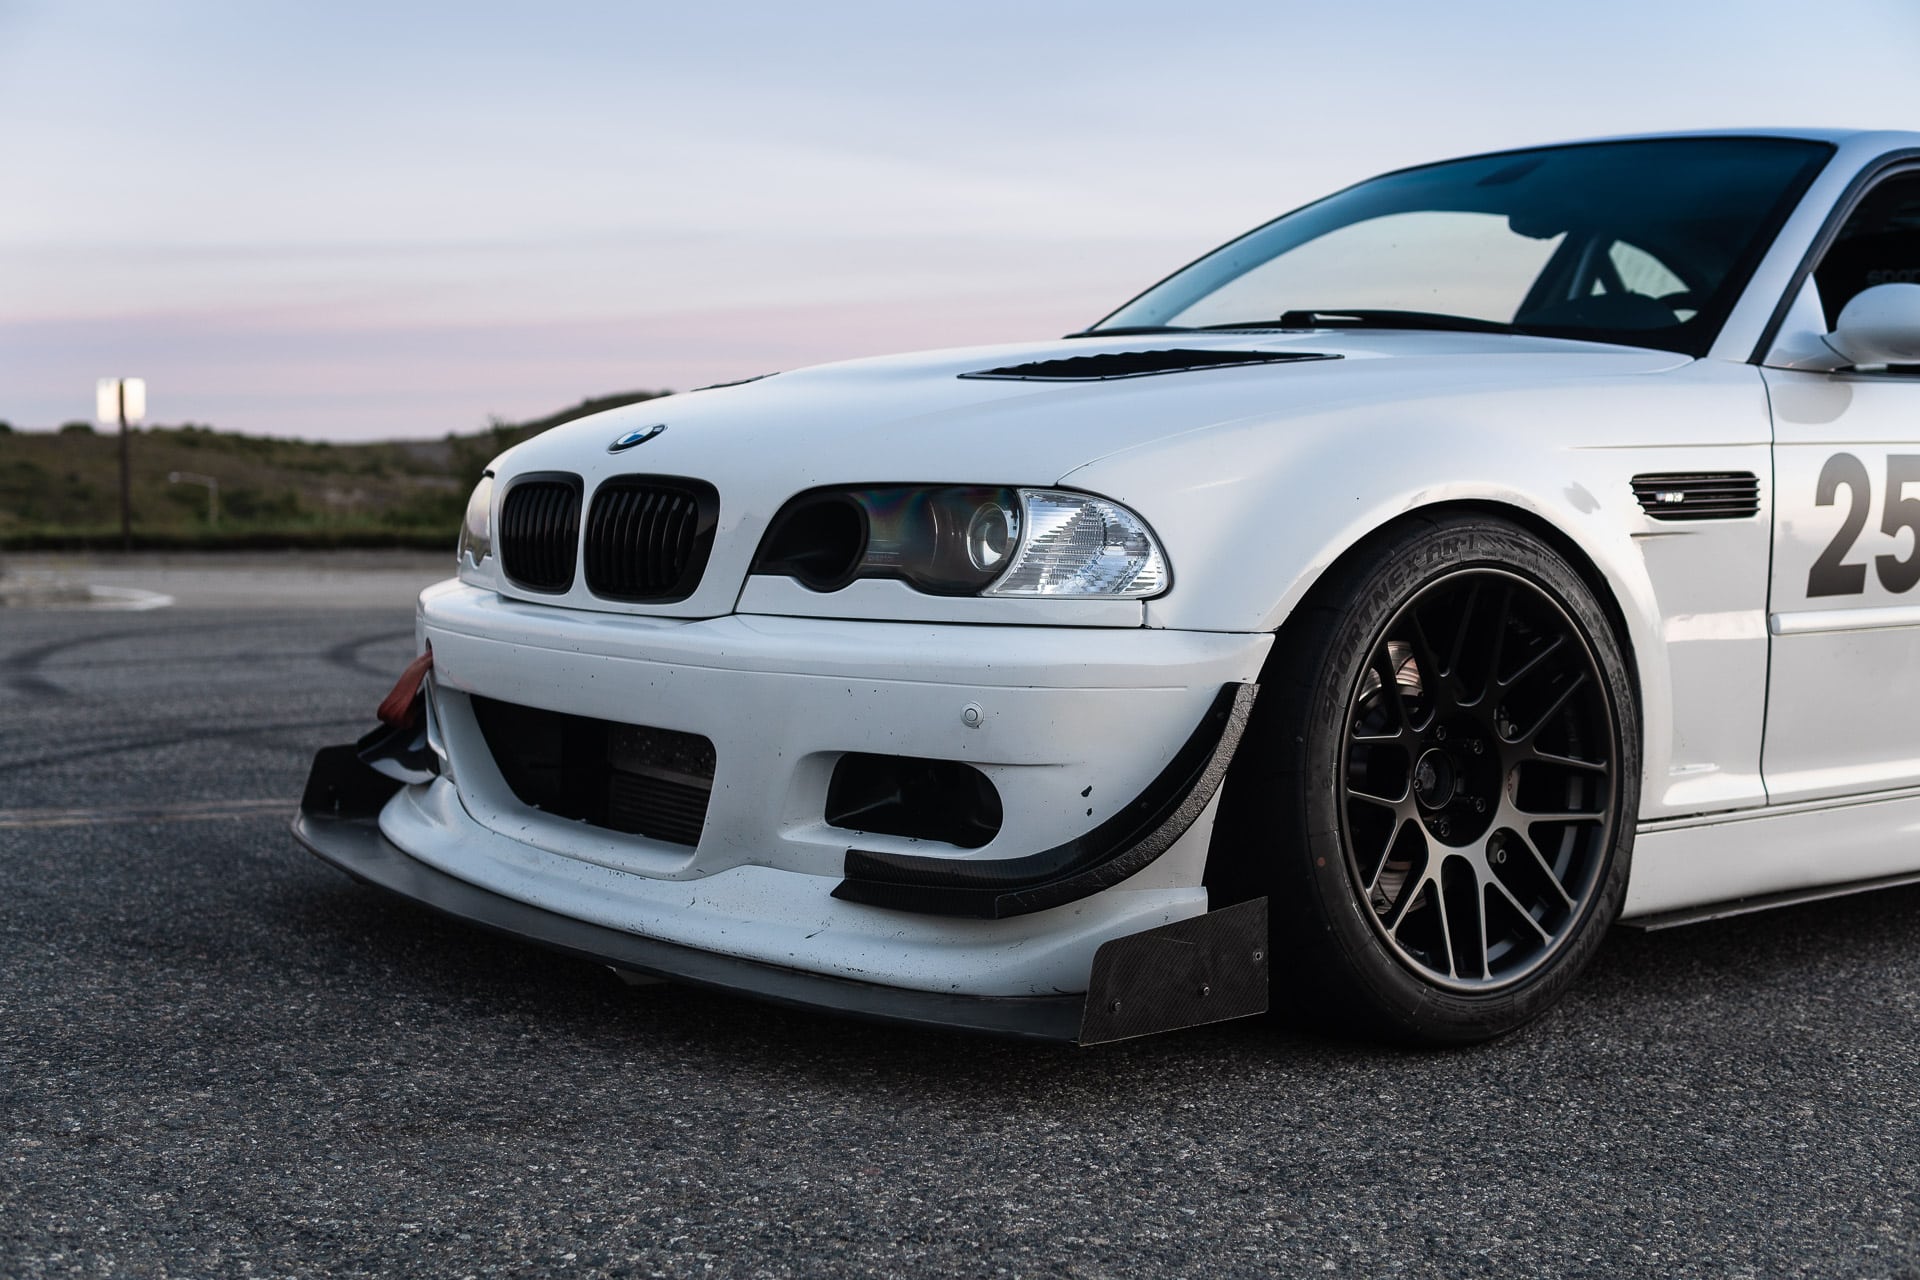
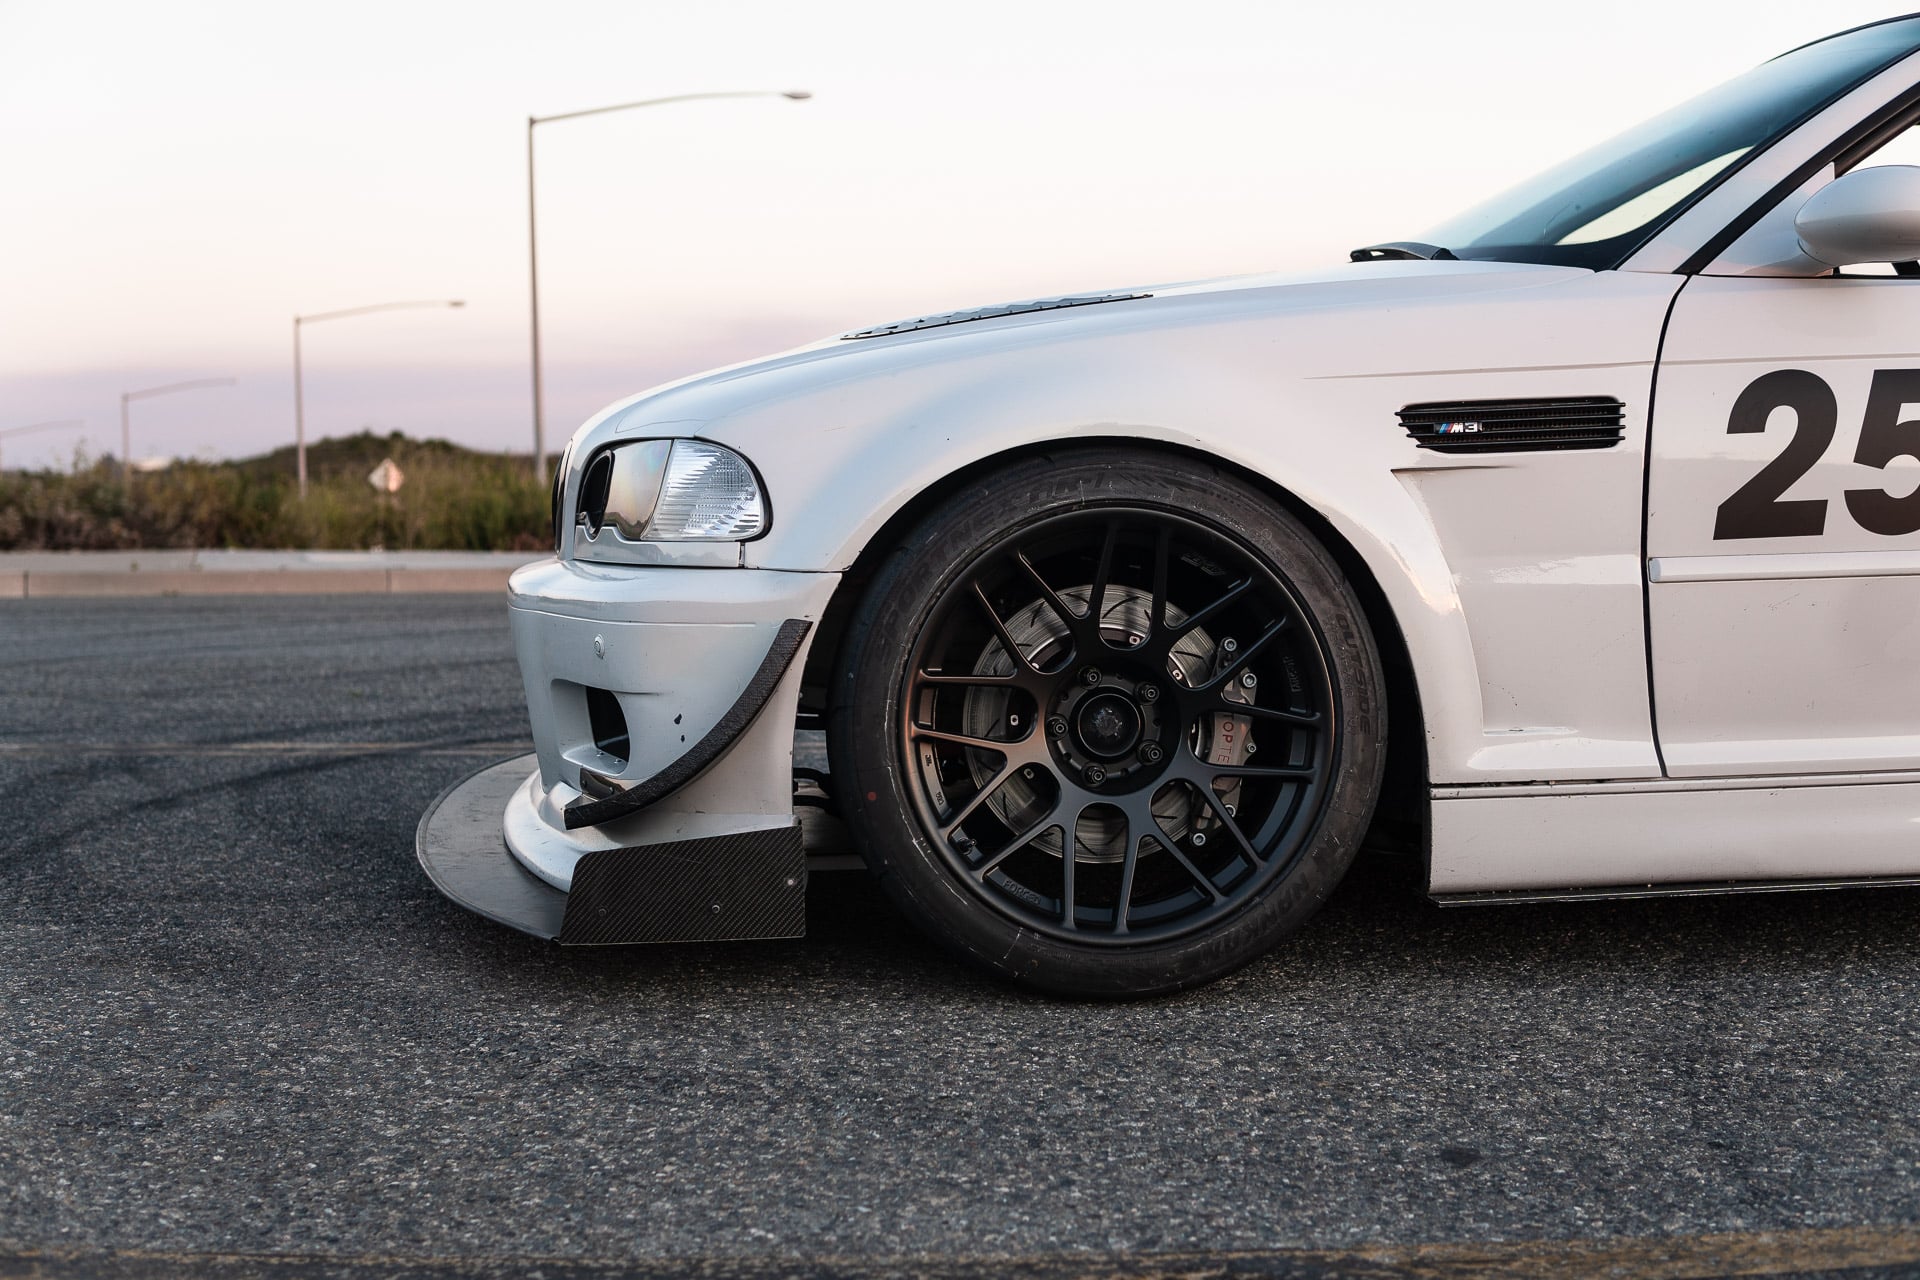
E46 M3 on APEX ARC-8R Forged
Track Fitment for the E46 M3
I planned on doing this photoshoot with the new APEX ARC-8R forged wheels, but things took a turn really quick when COVID-19 logistical issues started happening with vendors as I was awaiting a CSL box. I had already started taking apart the car and making semi-permanent ECU changes when I found out the airbox was going to be delayed. Finally, the car is back up and running and I got a chance to shoot. So here it is.
Wheel Specs
- APEX ARC-8R Forged
- Satin Black
- 275/35/18 Nankang AR-1 tires
- 5mm rear spacer
- 20.3 lbs
- Face Profile 2; medium concavity
- 1,800 lbs load rating
- VA # VIA-25-0277
Suspension Specs
- MCS 1WNR coilovers
- Eibach ERS race springs 900# f / 500# r (non-divorced)
- Vorshlag race camber plates
- -4 camber f / -2.5 camber r
- 13.25" height f / 12.75" height r
- Stoptech C43 CBK f
- Porsche 996 calipers r
- Motorsport Hardware studs and MH Titan lug nuts
Join the ARC-8R Group Buy
$500 OFF + Free Shipping


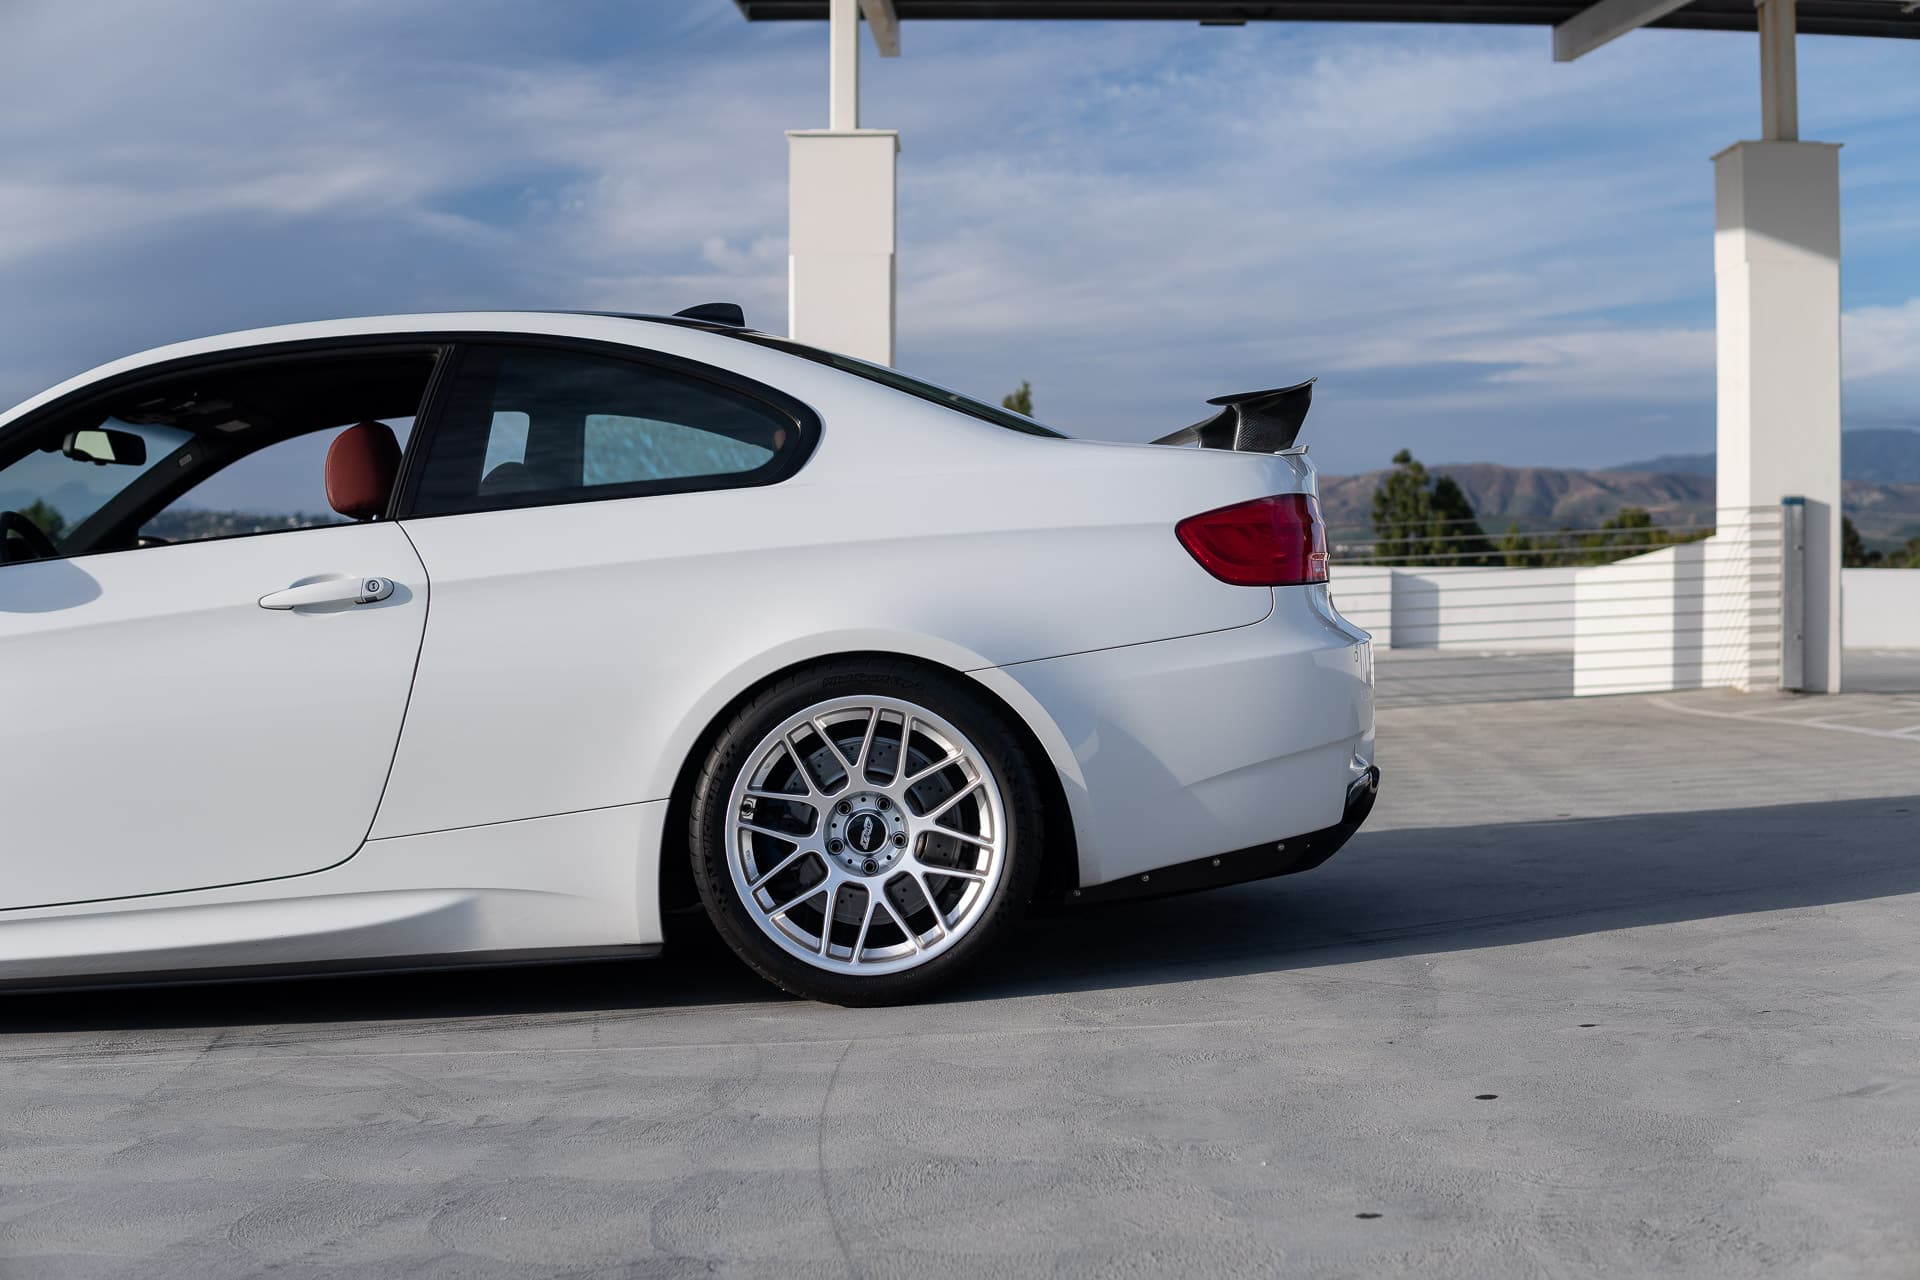
E92 M3 on Apex ARC-8 Hyper Silver
E92 M3 Street Fitment
It was inevitable. I like Hyper Silver and Apex ARC8-8 so much, I had to get another set for the E92 M3. I’m slowly beginning to find that balance of what can be a fun canyon or occasional track car while mostly serving its purpose of driving on the streets. I was on the fence for a staggered setup and throwing on some meaty rear tires, but I couldn’t get around not being able to rotate my tires if I need to. So I went with the 18×10 ET25 spec.
Also I tried something new this time. I wanted to get the beefiest tire/sidewall setup without sacrificing too much in the camber department. Originally I wanted to try 295/30/18 square, but that’s not possible without linear spring coilover setups like MCS. In addition, it required at least -3 camber which I wasn’t going to do on this street setup. I’ve always liked the sidewall profiles of the Michelin Cup 2 so I opted for the 285/30/18 square setup. Thanks to Mike at TPM Parts in Irvine, CA for providing the tire service! Yes, the 285/30 is not the ideal spec and lowers the radius from factory setup, but this is a street setup and I wasn’t too bothered considering if it meant I’ll get the look I’m going for.
So what is the “look” I’m going for? A nice and low meat flush look. The lower profile tires really makes the car sit nice and low while filling in the arches with just the right amount of camber to achieve that meat flush look. With a 275/35/18 setup, which I’ve done many times, it has that beefy sidewall look, but you have to run a tuck to get to the height I’m at now. I risk rubbing while doing so also.
I’m pretty happy with my setup and I think it looks even better in person. Hyper Silver just pops.
Group Buy
Apex 18" Forged


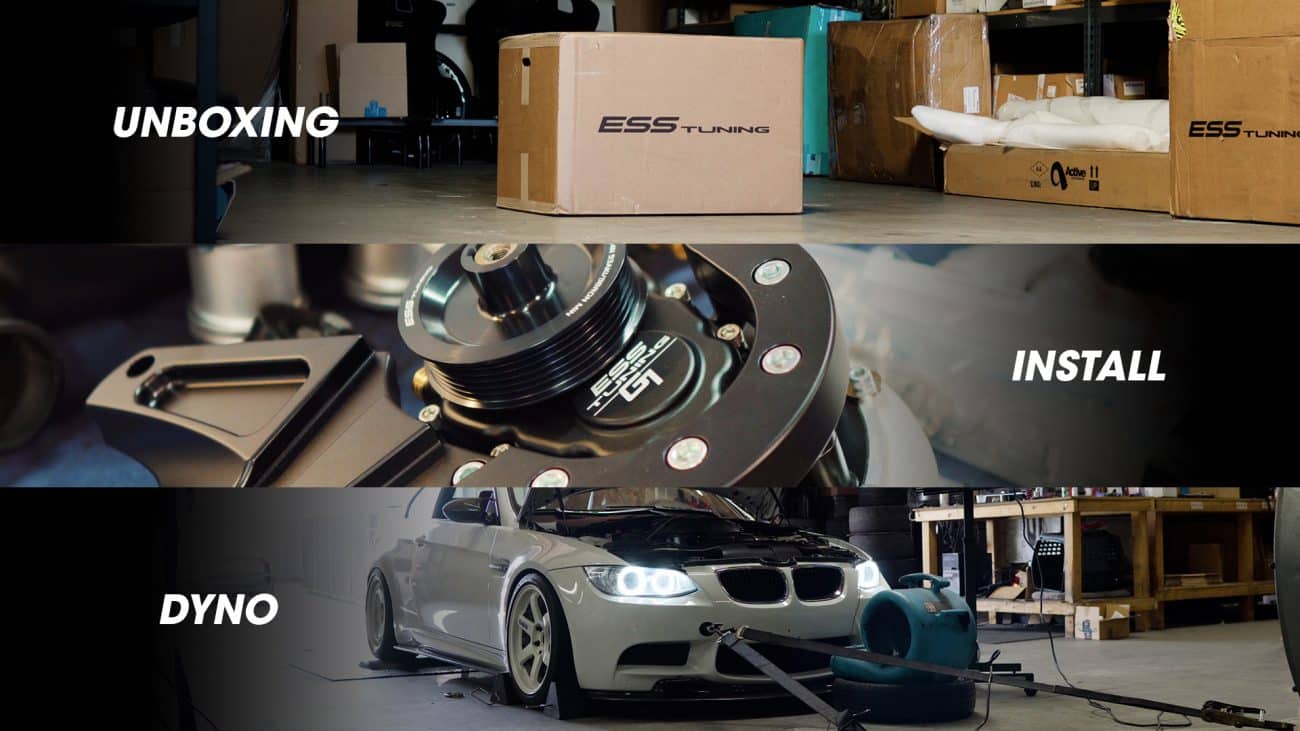
ESS G1 Supercharger for E92 M3 - Unboxing, Install, Dyno @ European Auto Source
ESS G1 E92 M3 Supercharger Summary
The new ESS G1 and G1+ supercharger kits have replaced the VT2-595 and VT2-625 with a new blower providing more power.
- 579 WHP @ 8,338 RPM
- 383 WTQ @ 7,442 RPM
- 93 octane (E17 ethanol mixture)
- No more S/C fluid seepage under high Gs
- ~10-20 ft/lb gain in torque from VT2/Vortech based systems
- Complimentary dyno with purchase+install at European Auto Source
- Very usable power on street without torque punch
S65 G1 Supercharger
BMW E9X M3
